|
Posted: 9/30/2013 7:59:20 PM EDT
This was done on a Steyr AUG A3 hammerpack.
The Steyr A1 and MSAR hammerpacks should install the same. The TSM (trigger sear mod) is brand specific. If you have a Steyr AUG, you need the TSM-S. If you have an MSAR, you need the TSM-M. 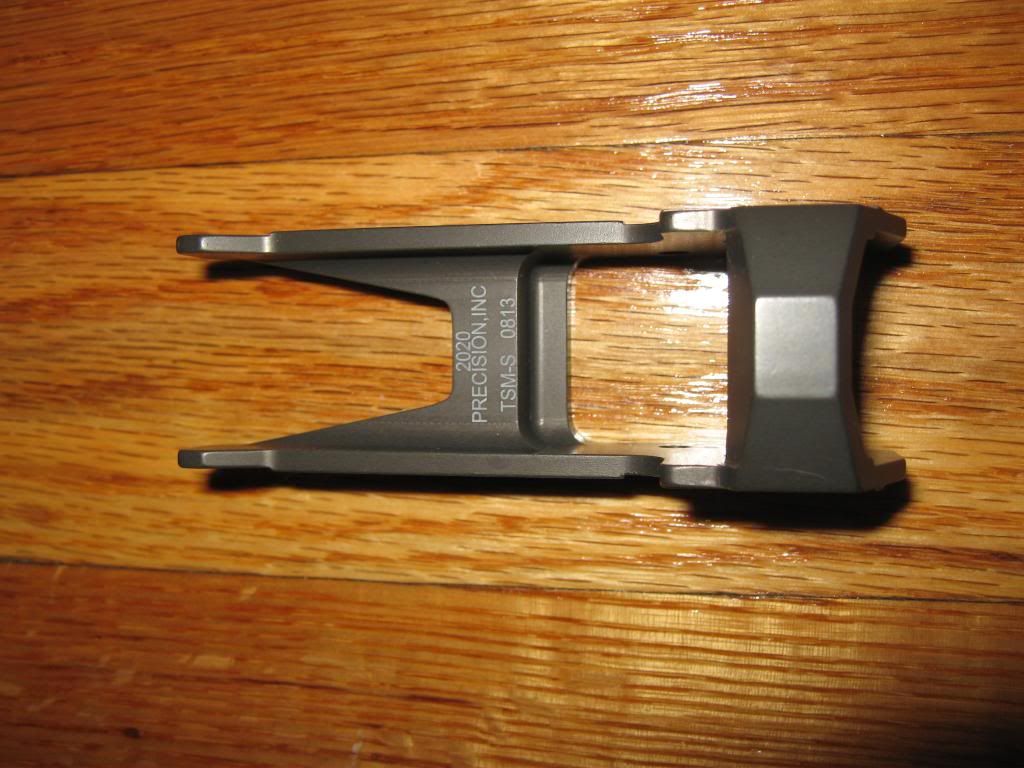

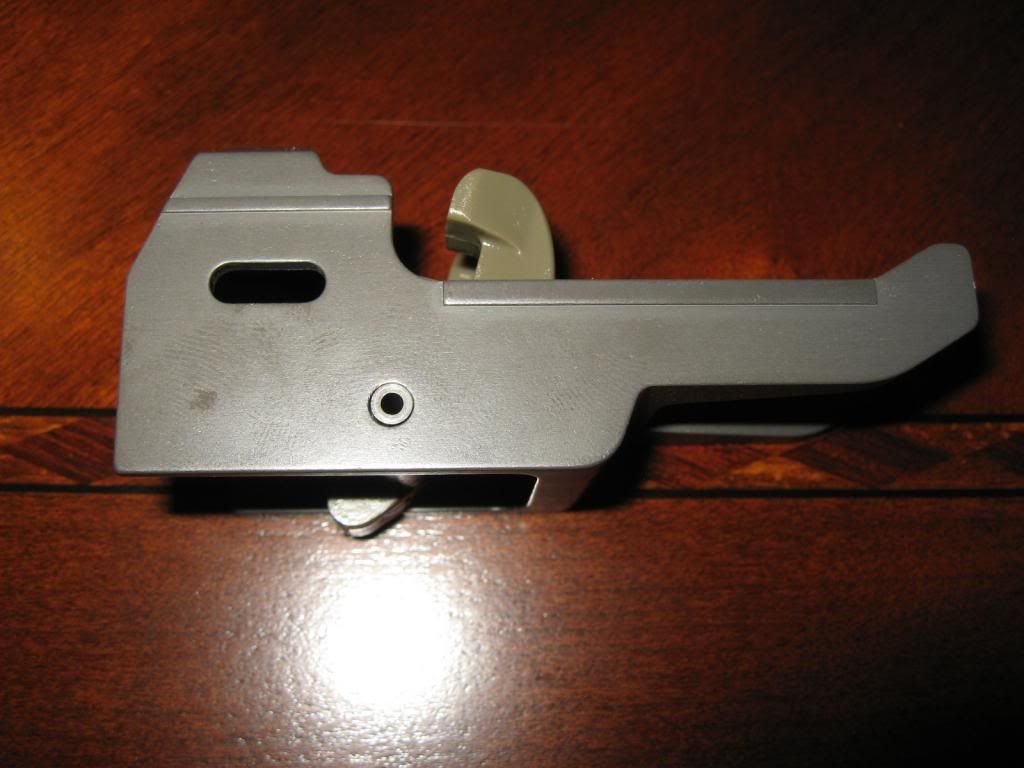
The trigger sear, known as the "SLIDE" is replaced in the hammerpack with the TSM which gives the gun a VERY NICE short travel trigger and short reset. As an added bonus, the actual trigger pull weight is lowered. The long trigger travel and long reset of the AUG guns is now a thing of the past. This is accomplished by reducing the distance that the slide (TSM) has to travel rearward. The leading edge of the sear/slide/TSM here... 
...has literally almost no gap (when the hammer is released) with the rear edge of the hammer here... 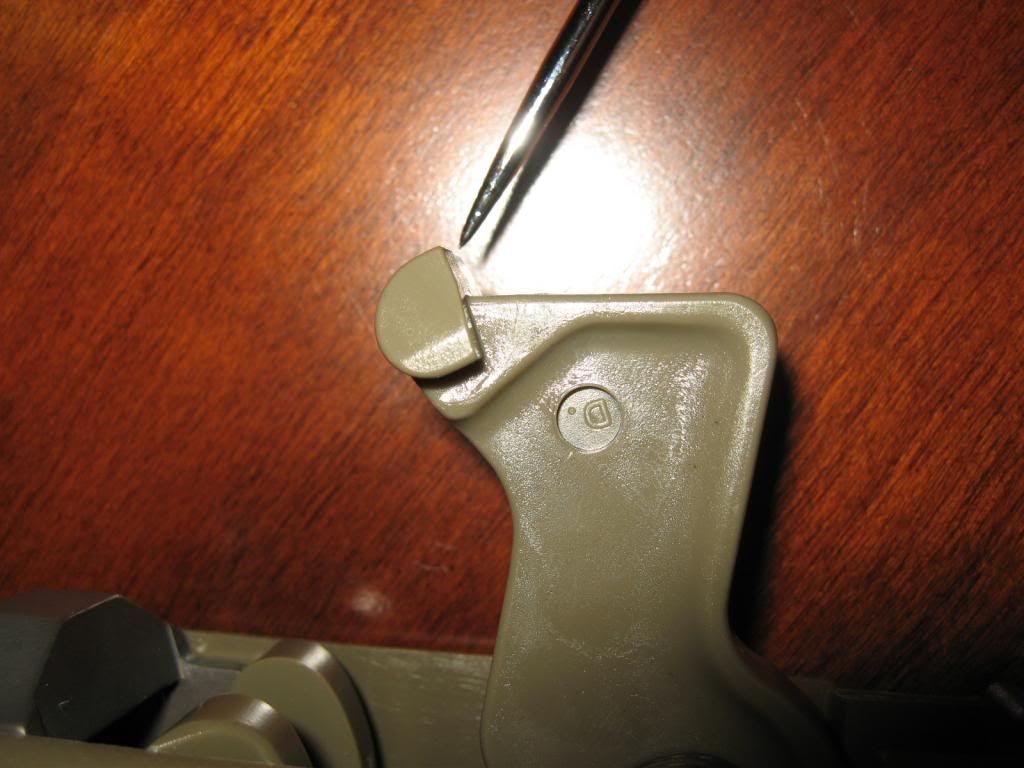
making for an EXTREMELY IMPRESSIVE trigger feel. I'll note that certain hammerpack modification parts will not work with the TSM. You see why. The TSM modifies the slide so that when the slide disengages, the total distance travelled is as minimal as possible. This in turn correlates to a shorter trigger travel and a shorter reset. The gap between TSM and a standard AUG hammerpack is shown below. I do not have a micrometer with me, but the gap (distance sear travels to disengage hammer) differences between the two is substantial. The pictures below were hard to take alone, you have to hold the slide to its most rearward position and keep the hammer down with your thumb. I don't recommend doing this, you may smack your thumb if the hammer slips while holding it... AUG A3 factory hammerpack: 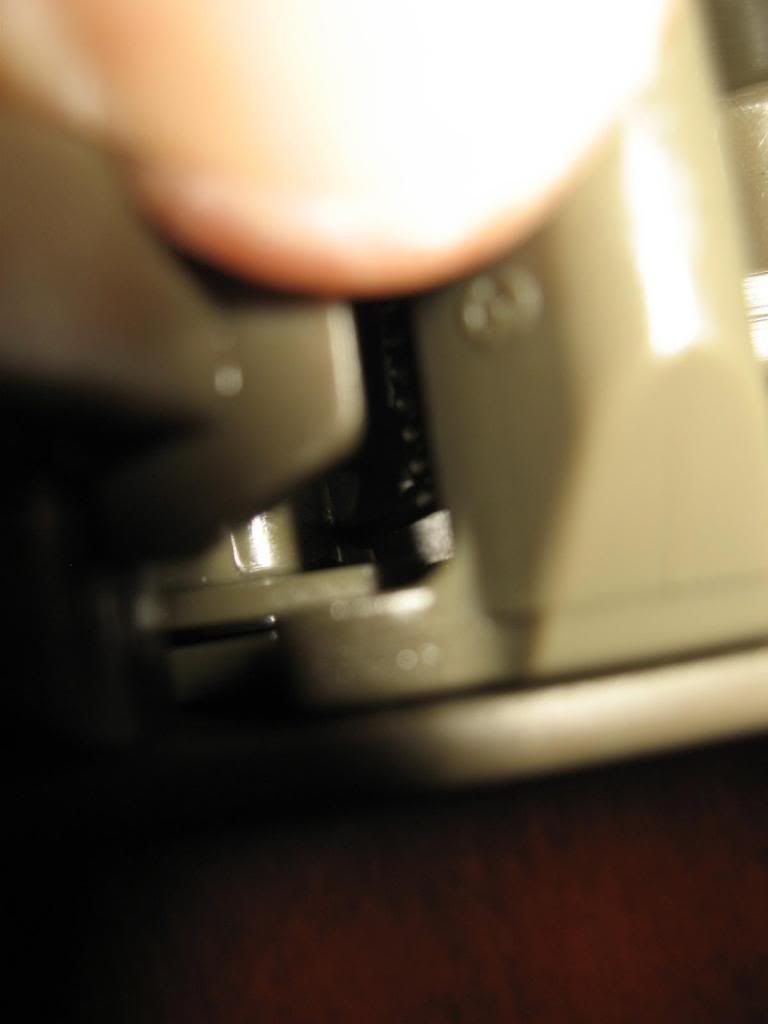
AUG A3 hammerpack with TSM-S installed: 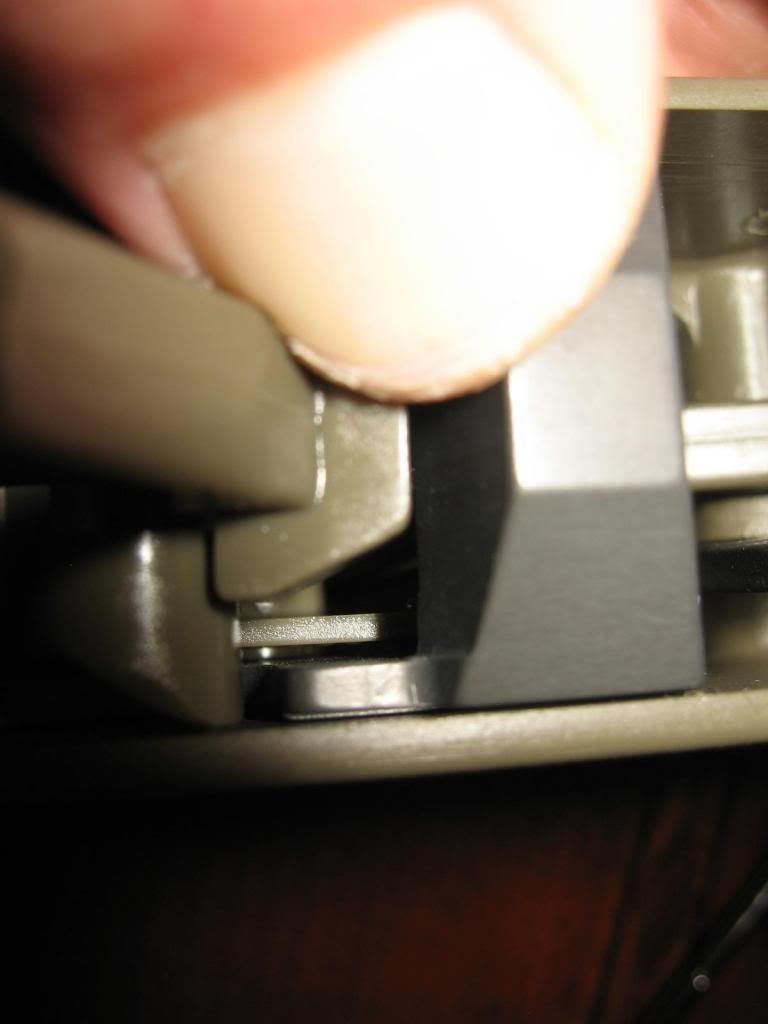
|
|
|
|
[#1]
Before you go all crazy getting punches, a hammer, etc. STOP. All you need is a pick or a small diameter long rollpin punch or nail set. You could even use a very small phillips head screwdriver (as long as the shank can pass through both sides of the hammerpack).
You do not need a hammer. The pins are fairly easy to slide out and are held in with minimal but adequate force. I used two tools, a 90' hook and a straight pick. You really could do this just with a straight pick. 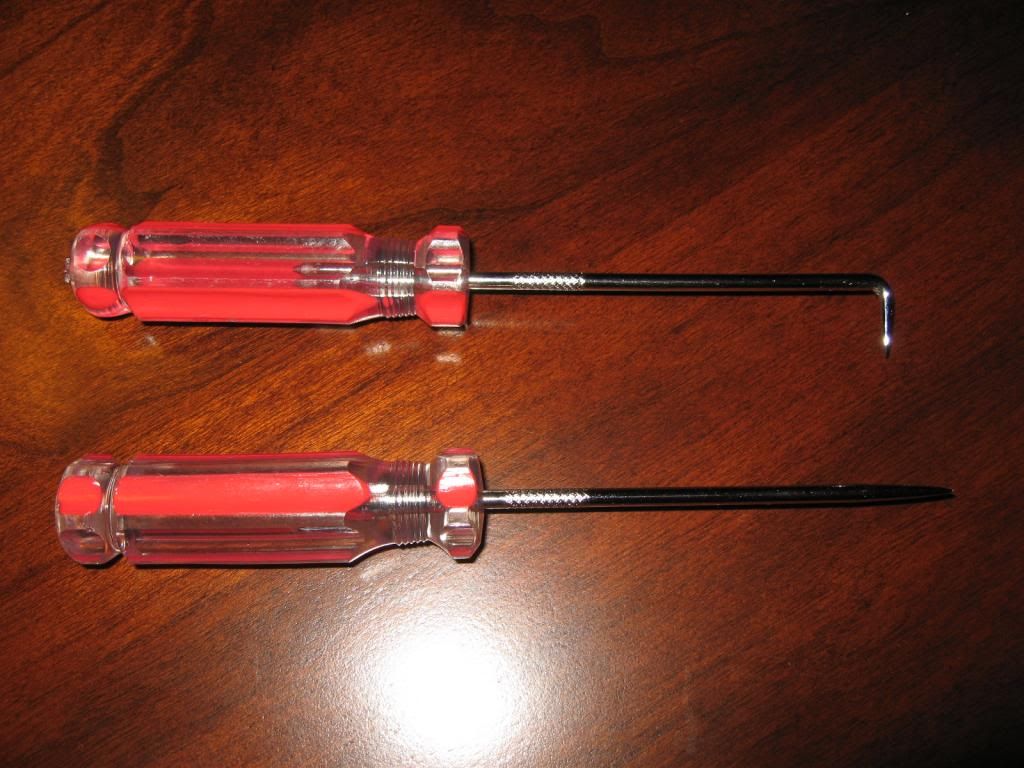
Useful Info: 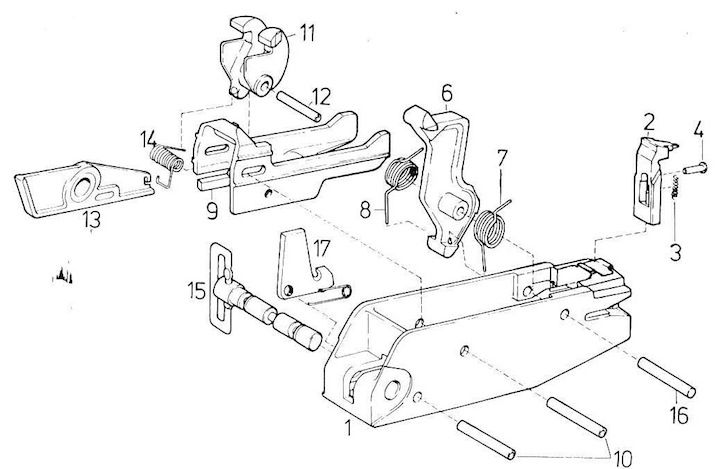
|
|
|
|
[#2]
Removing Factory Slide (sear) From Hammerpack:
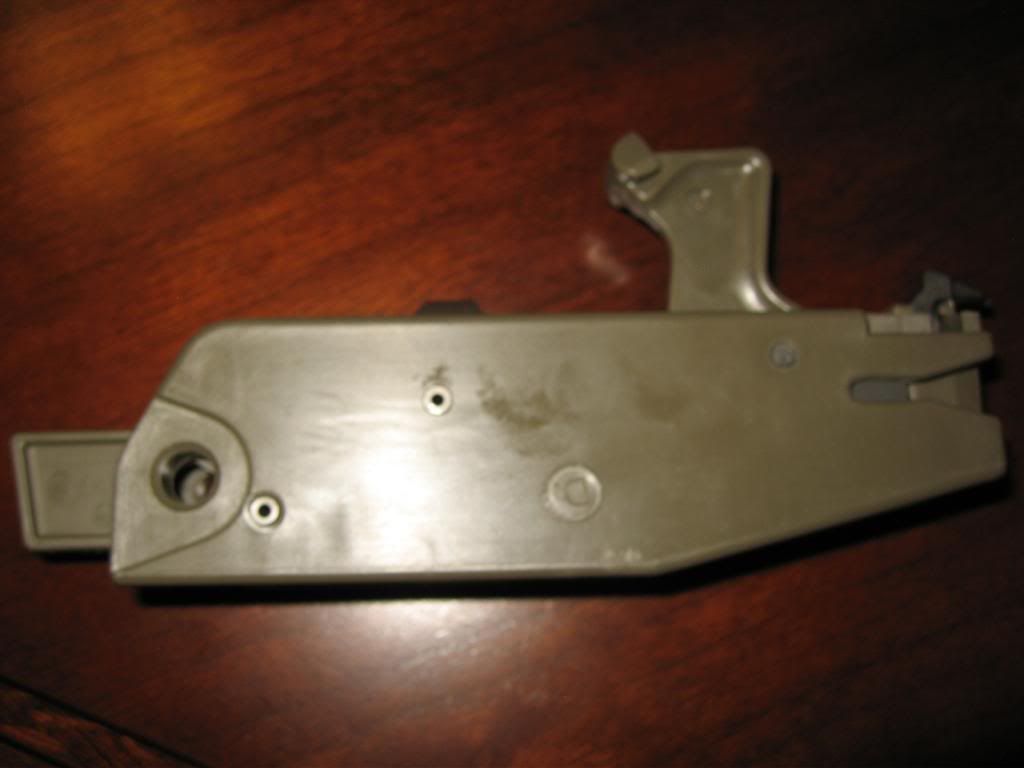
After safely removing your hammerpack from the stock, drop the hammer. Do this carefully. If you are not careful you will bleed. 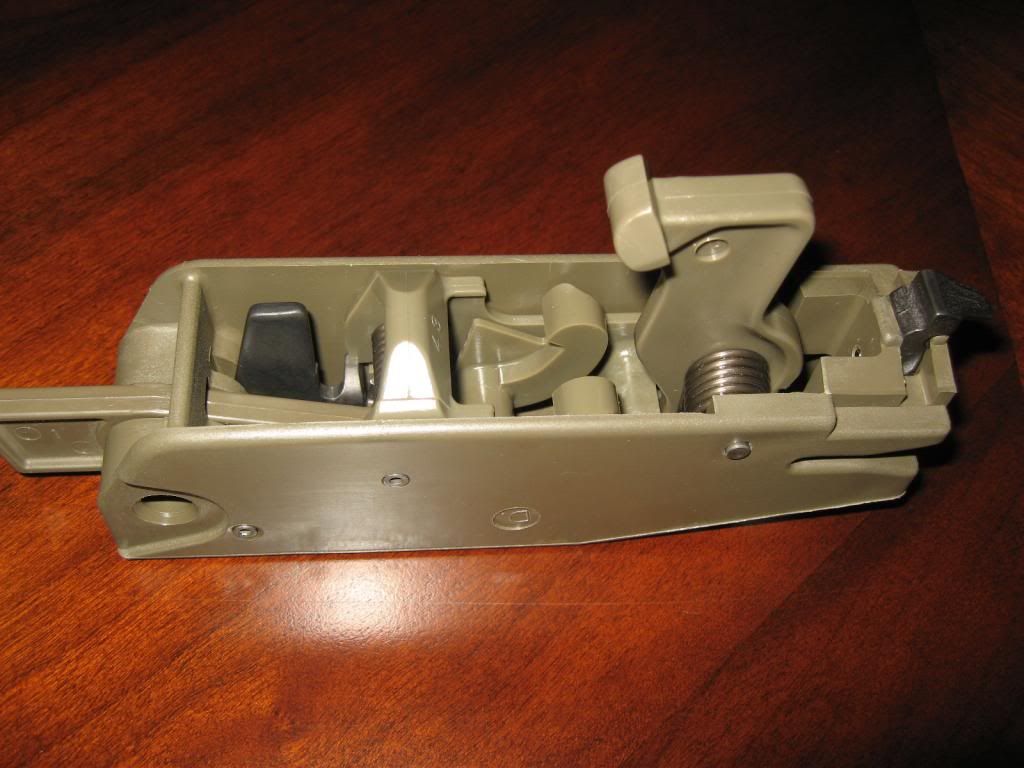
At the rear of the pack is a pin. This pin captures the drop safety (17) and the retaining bolt lock (13). 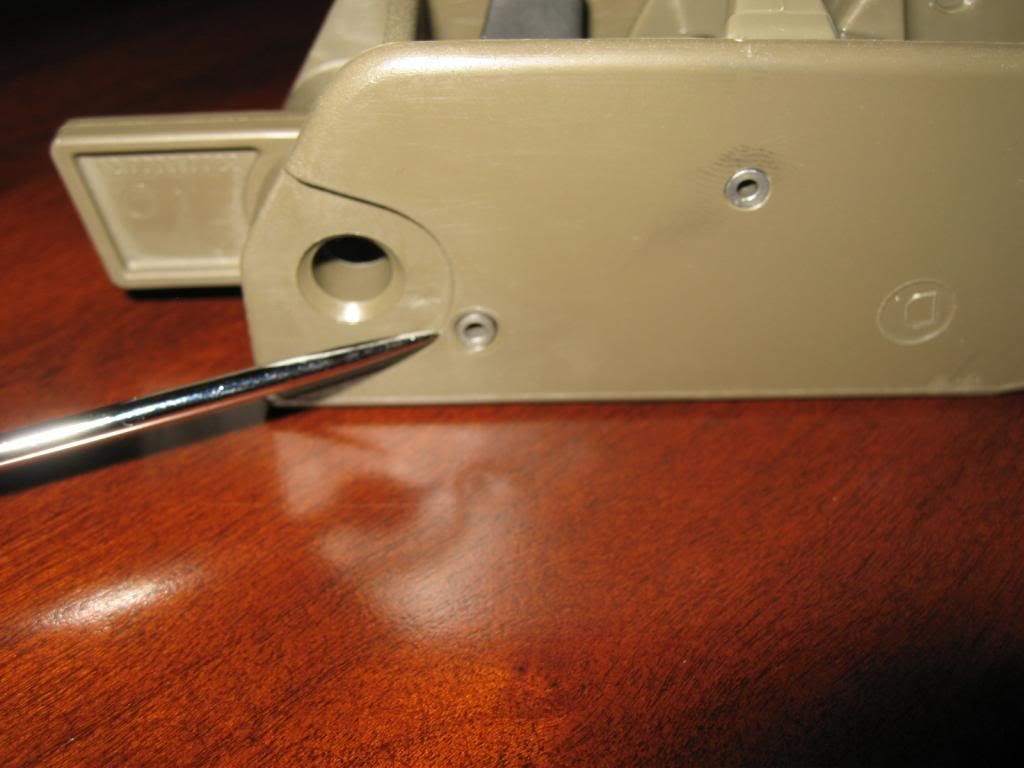
Slide the pin from right to left of the hammerpack (bottom of photo to top of photo) until you hear the retaining bolt lock (13) "pop" and release. Point marked in photo. Do not slide the pin further. This will save you from having to remove and reinstall the drop safety (17) which is a small pita to do. 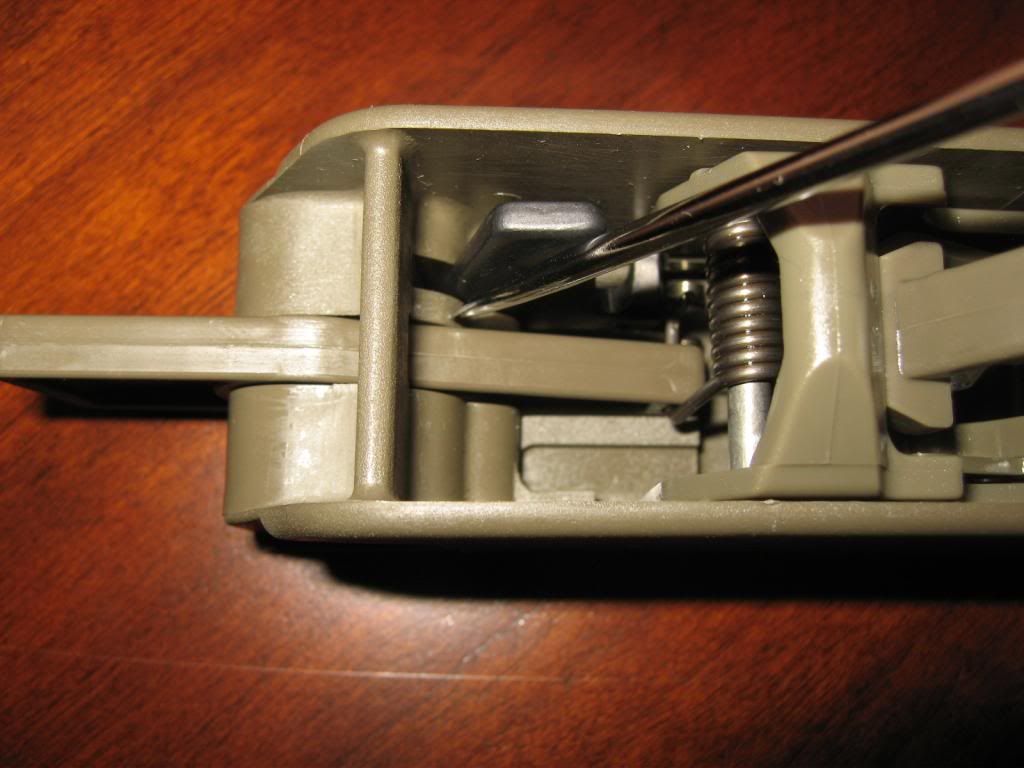
The retaining bolt lock (13) is now free from the pin. 
Use something to press down on the hook of the trigger spring (14). I used a 90' hook, you could use your finger or something else... 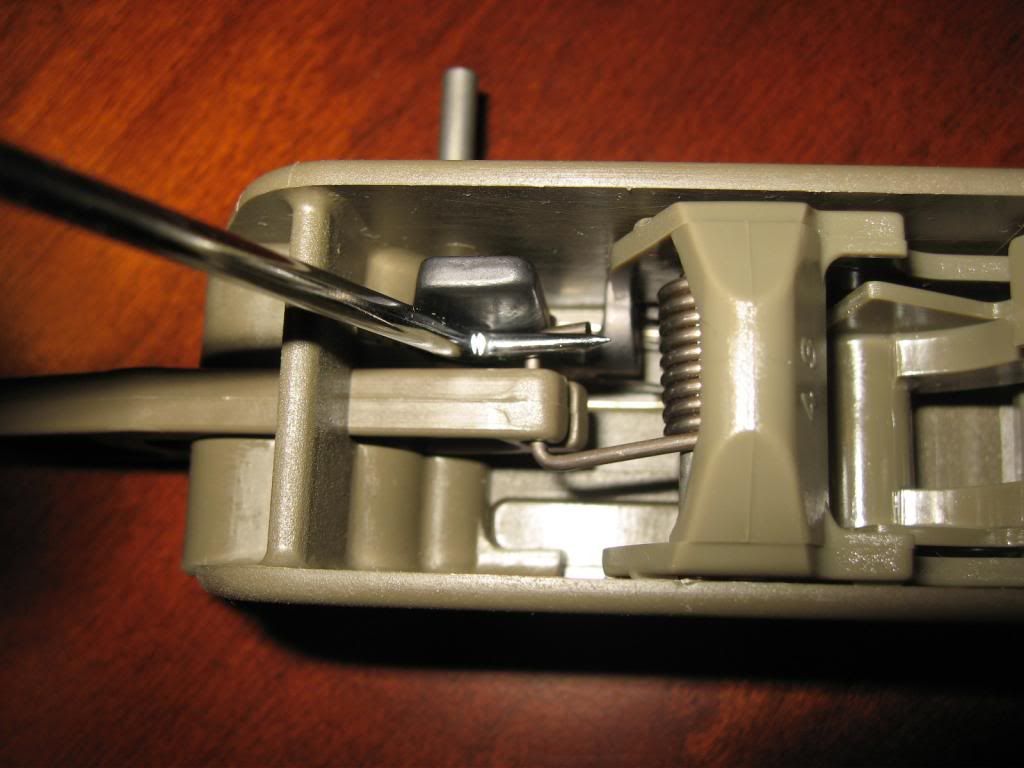
Remove retaining bolt lock (13) and slide pin back, so as to not have it fall out. 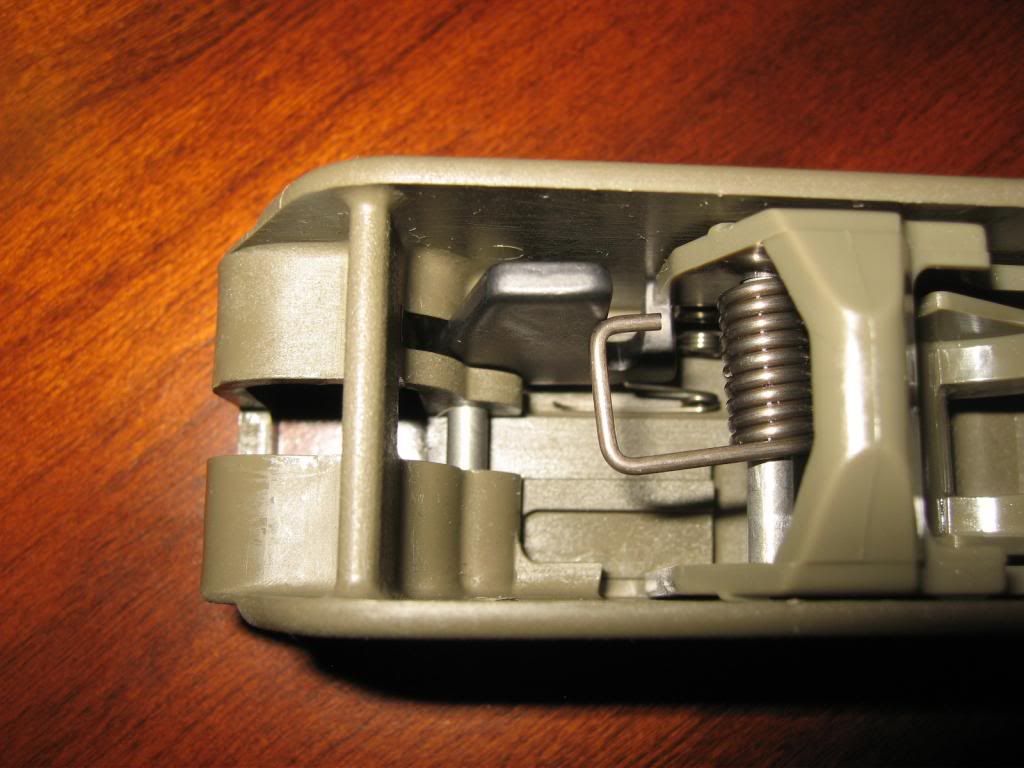
With the retaining bolt lock (13) removed you can see one of the most important parts of installation/reinstallation. Ensuring that the drop safety leg (17) engages properly into the slide (9). You can see the proper orientation of the drop safety spring (if you happen to have it fall out). You can also see the proper orientation of the trigger spring (14). 

Remove the pin that captures the slide (9) and trigger spring (14). 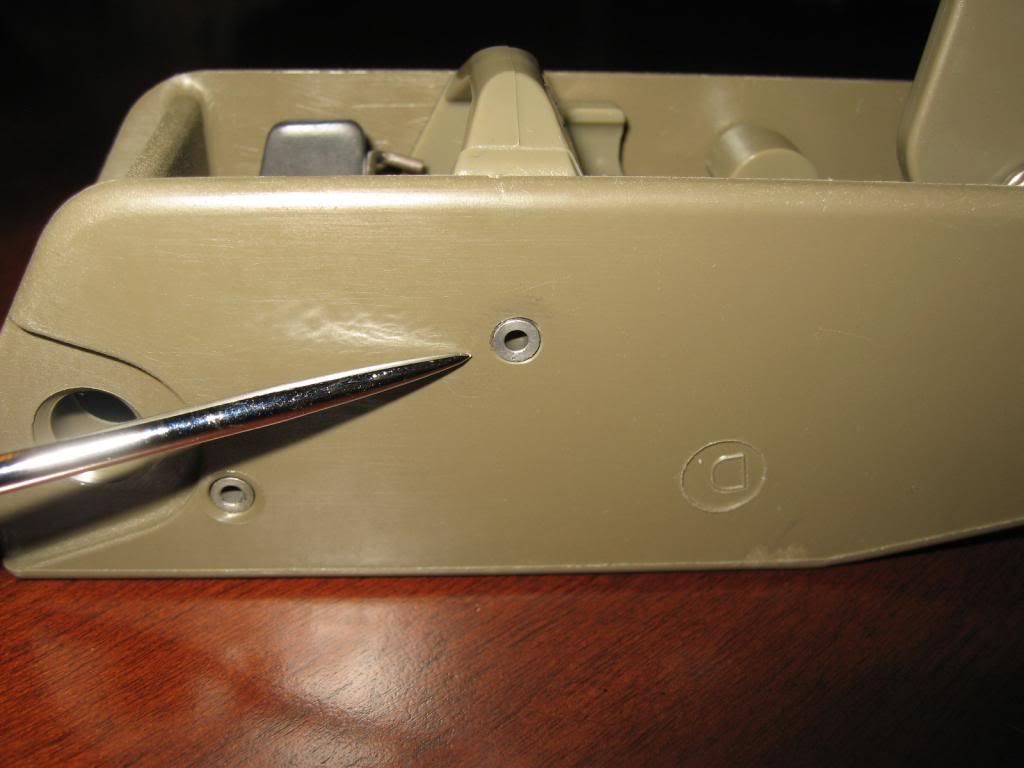
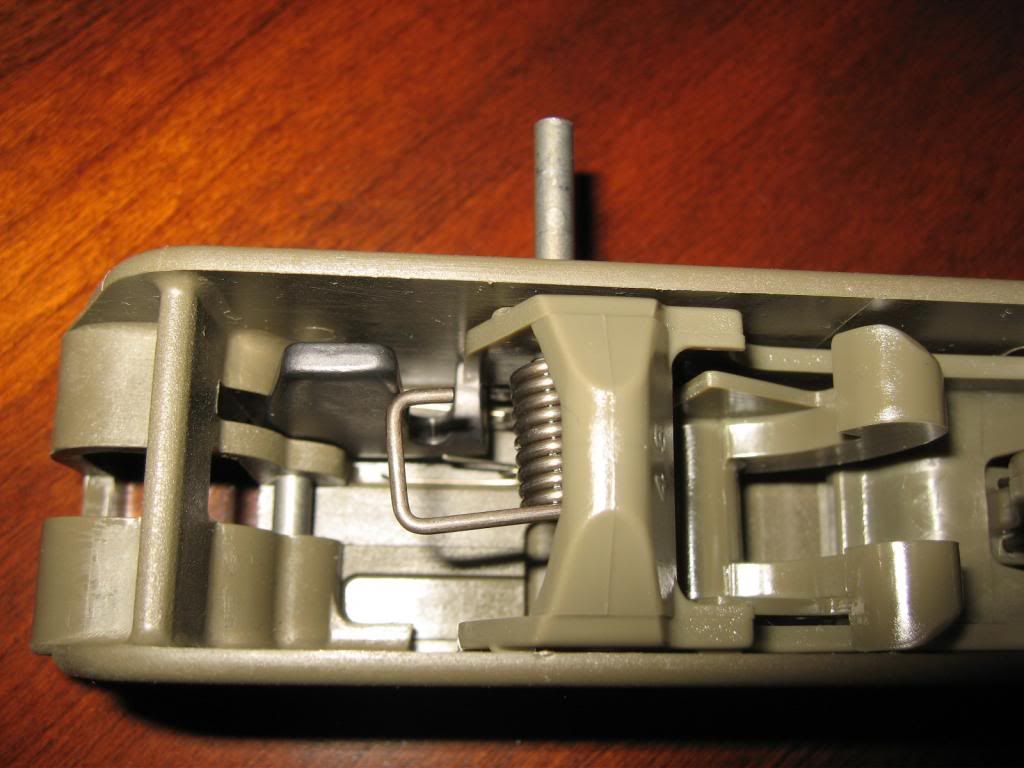
Gently manipulate the drop safety leg (17) and the slot in the slide (9) so that you can remove the slide (9) from the hammerpack body. 
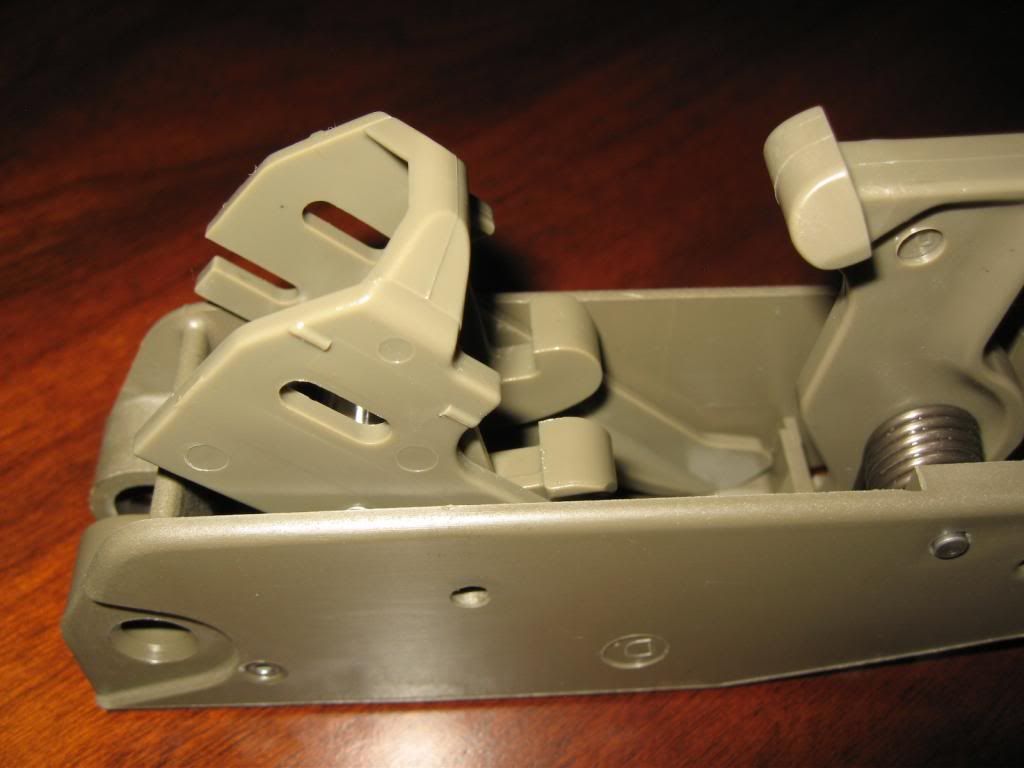
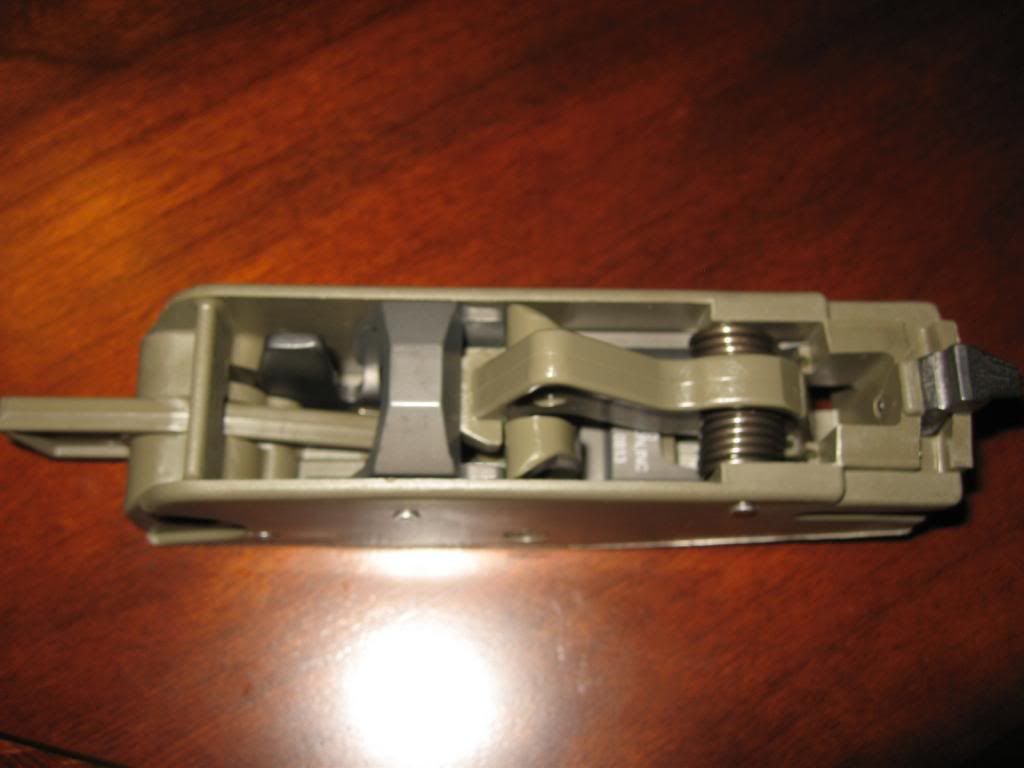
Your hammerpack body should now look like this. 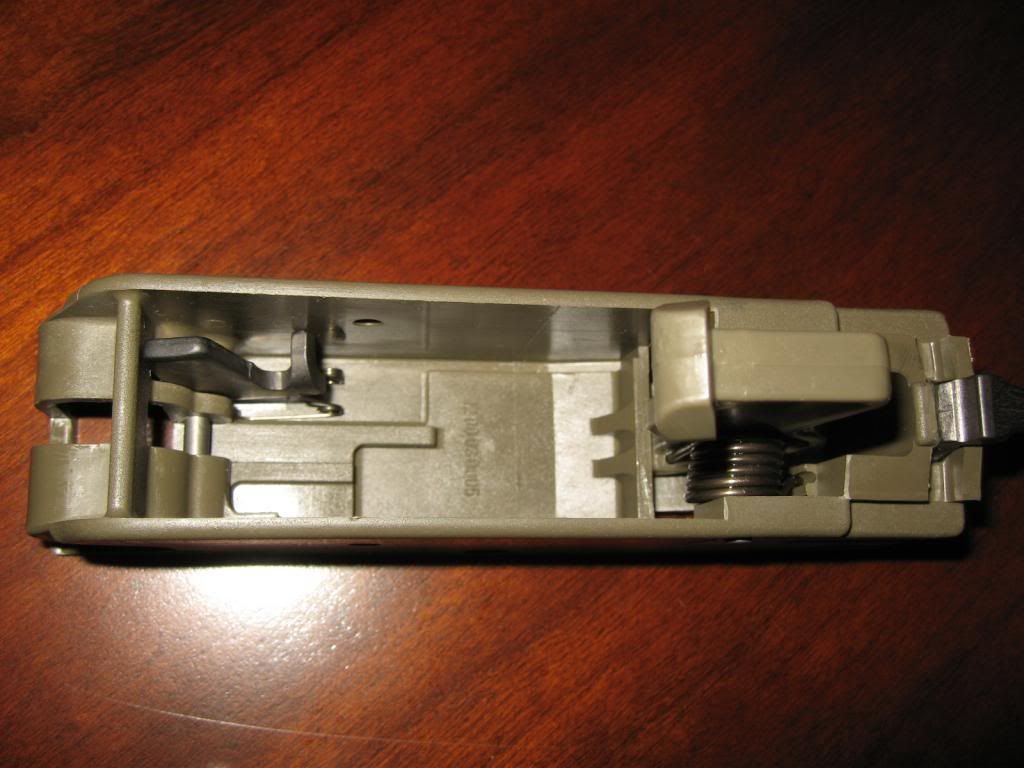
Your factory slide (9) has one smaller length disconnector pin (12), remove the pin (12) and the disconnector (11) will drop out. 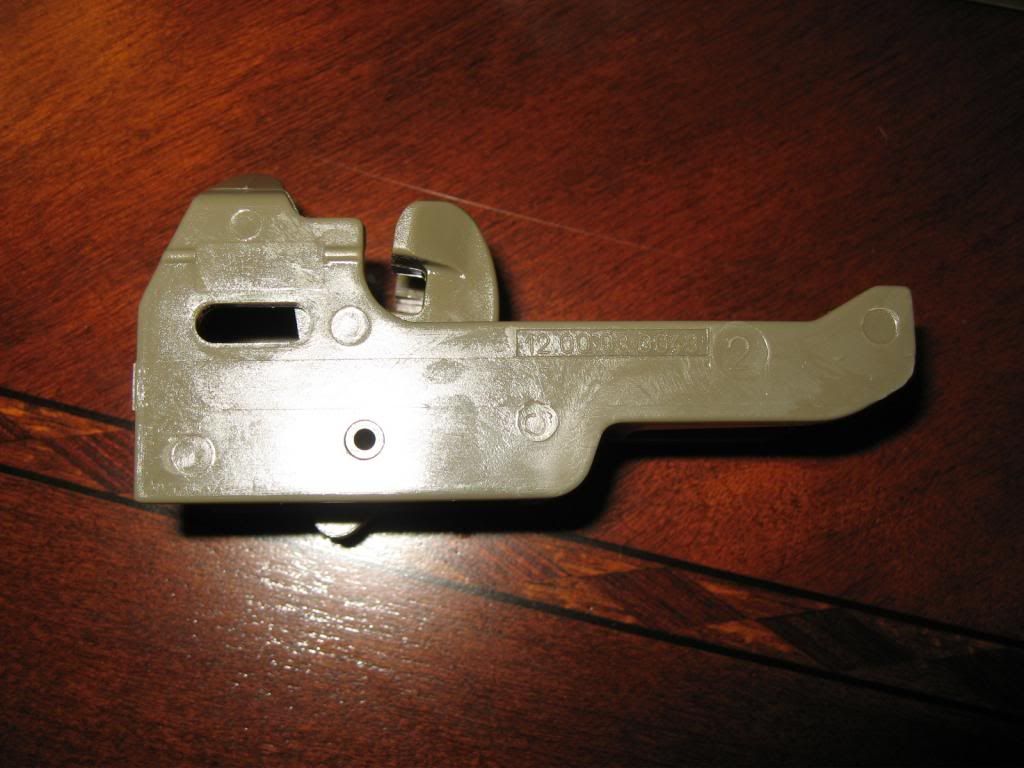
|
|
|
|
[#3]
Installing 2020 Precision TSM (trigger sear mod) Slide (sear) Into Hammerpack:
Take your new TSM and align the disconnector (11) with the TSM. Insert disconnector pin (12) to secure parts in the TSM. 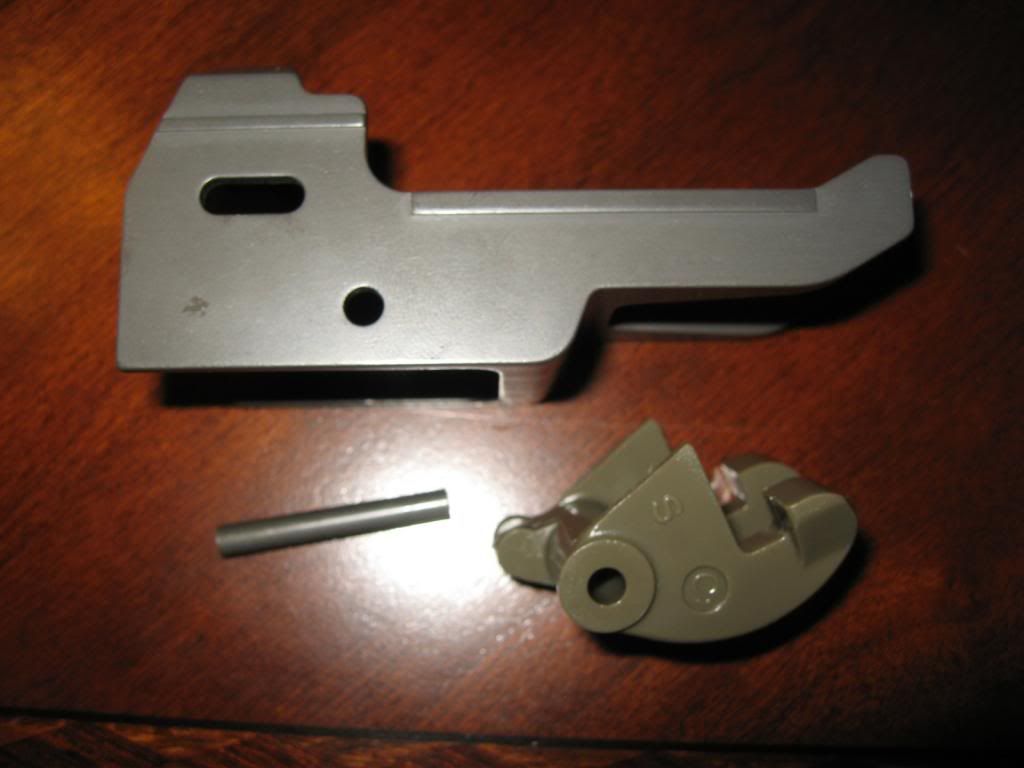
Disconnector pin (12) is the shorter pin. 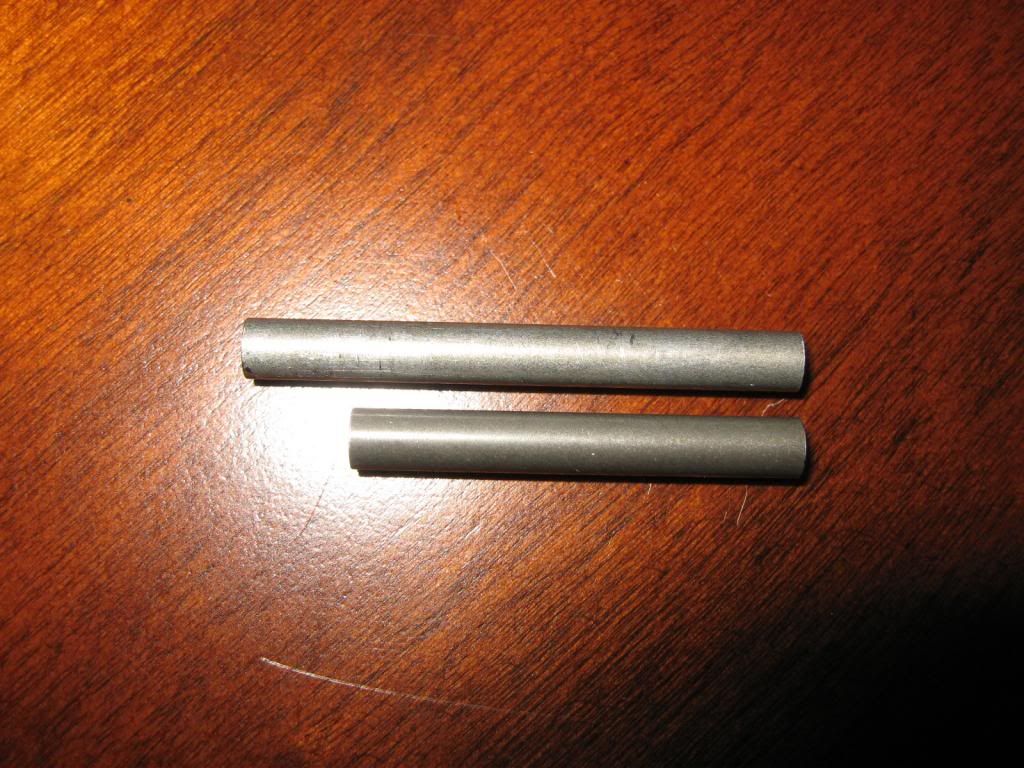
Ensure that drop safety (17) spring orientation is correct. 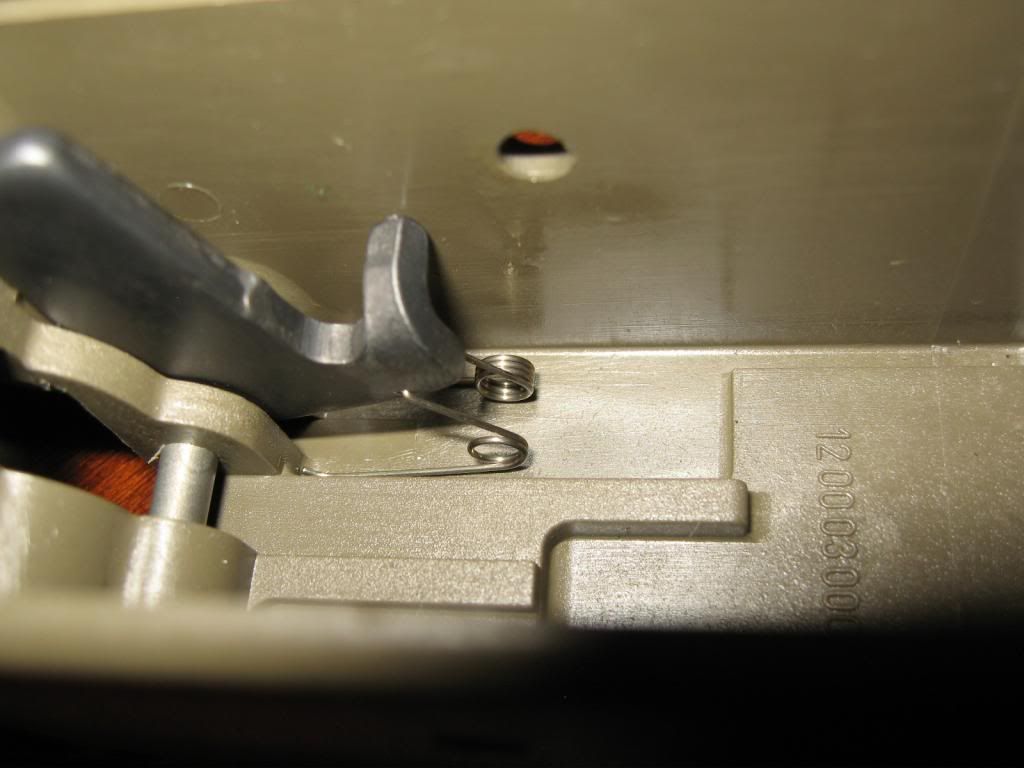
Insert assembled TSM into hammerpack ensuring that the drop safety leg (17) is engaged properly into the slot of the new TSM. 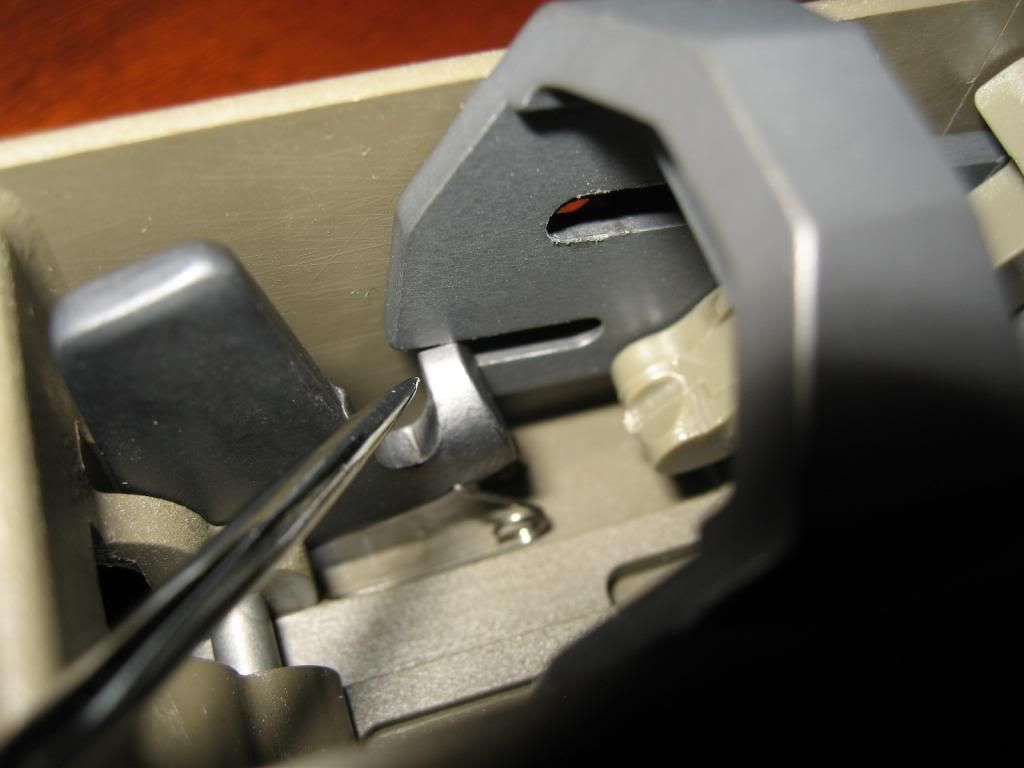
Insert remaining pin into hammerpack body, passing through one side of TSM, and slide the pin through the trigger spring (14) and continue through to the other side of the hammerpack. This will take a tiny bit of effort making sure that holes are aligned so the pin can pass through correctly. Make sure that the trigger spring (14) is in the correct orientation. 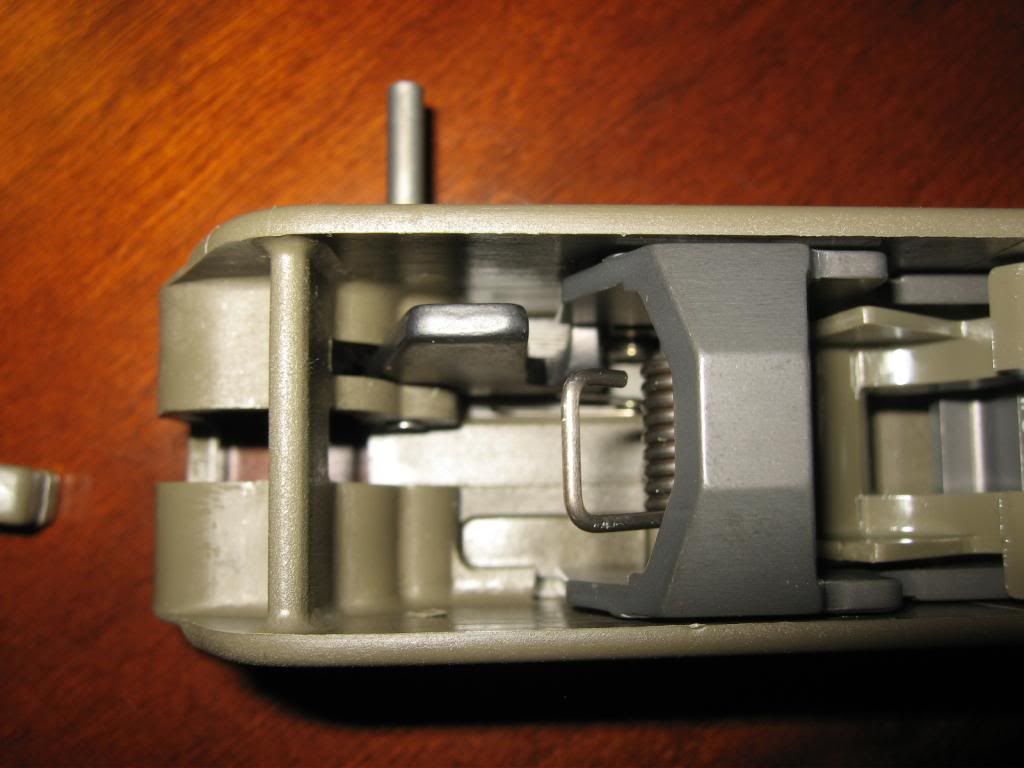
The trigger spring (14) must be centered on the pin inside the hammerpack so that the long leg of the trigger spring (14) engages with the corresponding notch on the bottom of the disconnector (11). 
*****This picture is incorrect.***** As you can see, the trigger spring leg (14) is nowhere near the notch of the disconnector (11). Depending on how you put the trigger spring (14) onto the disconnector pin (12), you may end up with the leg of the spring bound up or caught on the drop safety (17). 
With spring correctly installed and centered (with leg resting in notch of disconnector), move the lower pin out half way to insert the retaining bolt lock (13) into the rear slot of the hammerpack.
Attach the hook of the trigger spring (14) into the corresponding notch of the retaining bolt lock (13). 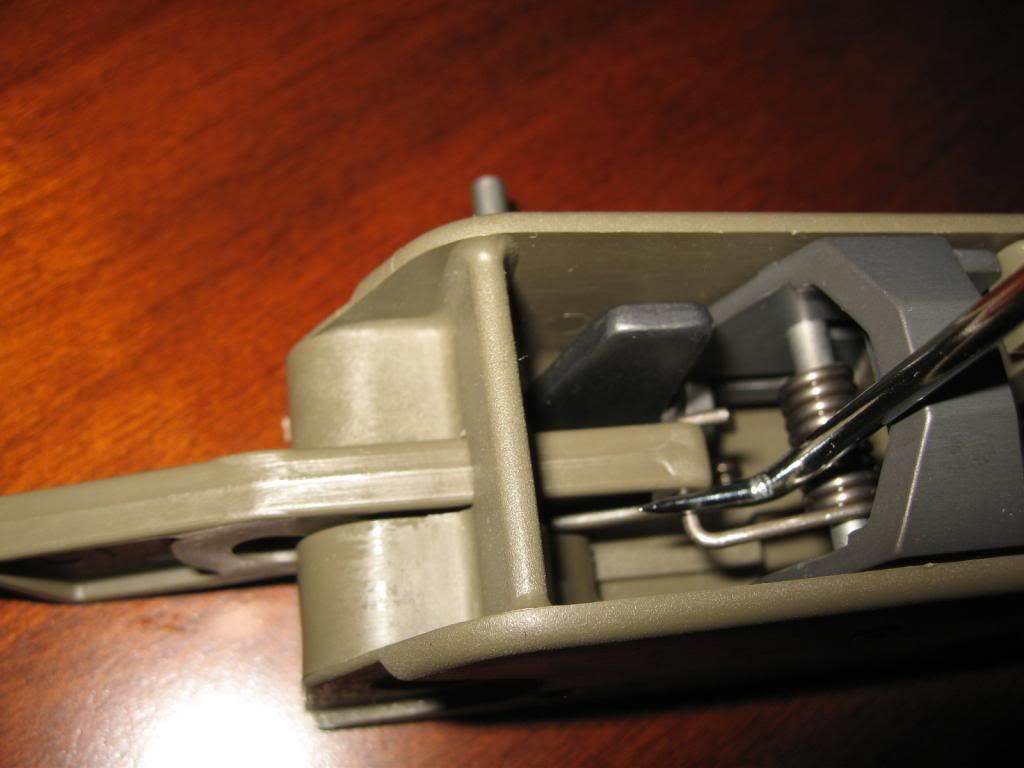
At the rear of the hammerpack is the large hole for the sling swivel. Align that hole with the corresponding hole of the retaining bolt lock (13) and slide the pin through the hammerpack capturing the retaining bolt lock (13) into the hammerpack. Your hammerpack should now look like this: 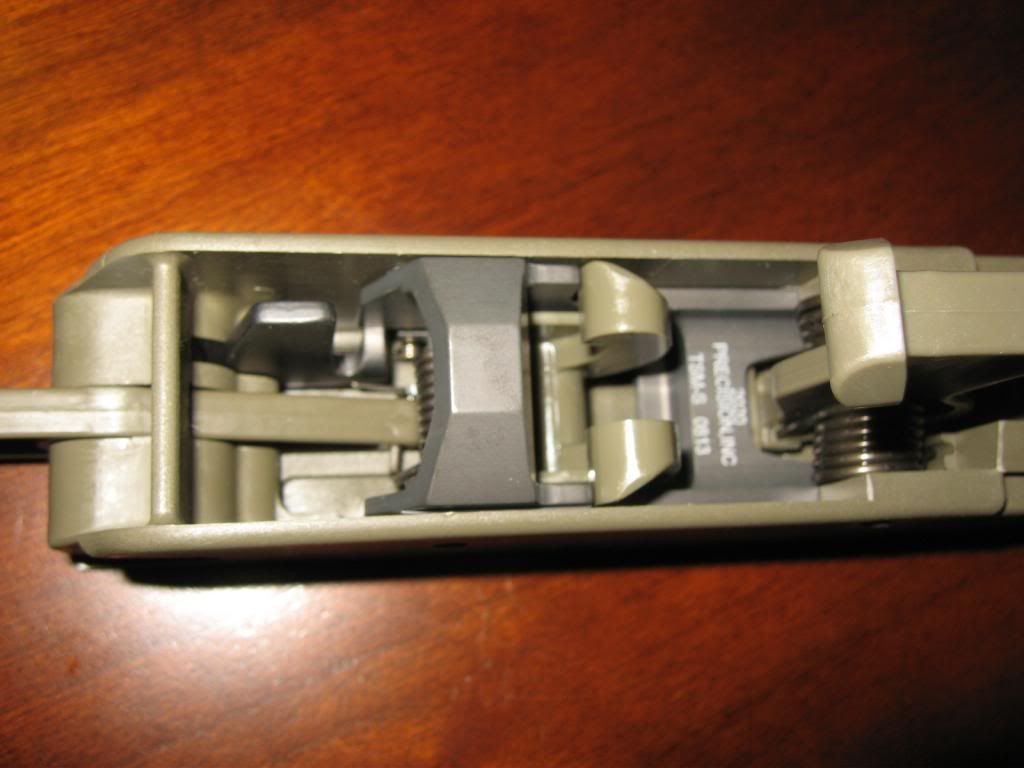
*****Function test the drop safety***** To do this, press forward and down on the drop safety and carefully try to release the hammer from the slide/sear/TSM. If the drop safety does not allow the hammer to release, all is well. If you hammer releases with this test, you need to evaluate what you did wrong and fix it. Insert hammerpack into empty and unloaded gun and function test the hammer. Enjoy your improved trigger pull length and reset. You also get the added bonus of a slightly lighter trigger pull. |
|
|
|
[#4]
Great writeup and pics so far!
In for the popcorn and the conclusion. :) |
|
|
|
[#5]
Awesome! Requested a sticky already
|
|
|
|
[#6]
Nicely done Sir!
|
|
|
|
[#7]
Quoted:
Awesome! Requested a sticky already Agreed. Stickies list is getting a bit tall/long here, to the point it's crowding out regular posts in the default normal view, so we'll probably roll this into something else, or make a bit more of an "index" eventually here. But it's stickied for now. |
|
|
|
[#8]
|
|
|
|
[#9]
...
|
|
|
|
[#10]
Got a box of parts from Ratworx this weekend, the 2020 TSM was one of them.....
Haven't shot it yet, but damn(!) it's a lot better than the stock trigger. It's almost good enough to leave alone now-I might after I shoot it, I had been waiting for a left hand bolt too. I'll probably throw in a KM Lightening, no word on if a neu trigger will cause problems or not. Definitely worth the money IYAM. |
|
|
|
[#11]
Thanks for the great install pics, turned it into a pretty easy job.
Will see how it feels tomorrow at a match. It certainly shortens the pull and reset significantly, but it feels like 'short pull, HARD wall, then very quick break' at the moment. Pulled the pack back out and can't see any issues, especially as the pack isn't that complicated...will see what I think tomorrow.. |
|
|
|
[#12]
I had this in a 5.56 gun and switched it over to a 9mm AUG. About 4k rds combined.
No problems yet. Functions the same as day one. Nice crisp extremely short break and a great short reset. No wear I can see either. I'll update again after Christmas, should have much more 9mm through it by then. |
|
|
|
[#13]
TERRIFIC write up!
I want one BAD. On the back order list... but should anyone have one knocking around that they're not going to use, shoot me a PM. I'll take it off your hands now! |
|
|
|
[#14]
Just ordered mine.
|
|
|
|
[#15]
Got mine 2 weeks ago. Absolutely a must.
|
|
|
|
[#16]
Just got mine. I can't wait to get it out to the range.
By the way, does anyone else get a 'click' noise if they push the hammer into the pack after it's installed? |
|
|
|
[#17]
Just put mine in, simple to install and big improvement.
|
|
|
|
[#18]
Ratworx has these again?
|
|
|
|
[#19]
Yes, ordered mine from them on Friday, got it the following Wednesday.
|
|
|
|
[#20]
I have it teamed up with a Trigger Tamer. It is on the dot, consistent 6lb trigger pull and the reset/break is sharp and consistent. I know I will be able to more accurately zero now. I also tweaked the placement of the trigger bar over the trigger to take out as much play as possible. I'm impressed.
|
|
|
|
[#21]
has anyone posted any videos on this to compare the TSM to stock trigger with a pull gauge? Also will the neutrigger be compatible with the TSM and will it improve upon the TSM, if any? Thanks!
|
|
|
|
[#22]
Installed mine as per your excellent instructions, Maleante. Thank you very much for the guide. You did a great job explaining the ins and outs.
Everything went smoothly with my install, as per your guide. ***However*** Once I got it together, the 2020 sear would not allow the hammer to release. At all. Checked the fit of everything. Seemed to be fine. Then I realized... I had installed the part into a NATO hammer pack. I removed the part from the NATO pack and put the stock part back in. Worked great again with the stock part. So I didn't bugger anything up, it seems. O.K., so next I installed the part into my standard AUG hammer pack. THAT works great! Shortened, lighter trigger action. Better let-off. Short reset. Nice. Moral of the story: the 2020 sear may not work OOTB in your NATO hammer pack. Beware. R. |
|
|
|
[#23]
Interesting, I wonder if others have come across the same issue with their NATO type hammer packs. The NATO pack is essentially an A1 hammer pack.
|
|
|
|
[#24]
Good question.
I compared the stock NATO AUG sear with the standard AUG sear, and it seemed to me that there were some minor visual differences. I have 2 NATO packs. I need to dig out the 2nd one and compare it to the pack that didn't work with my 2020 sear, and compare those NATO sears to the standard AUG sear (which is sitting, forlorn, in a little baggie now). See if I can detect differences somewhere. |
|
|
|
[#25]
I have a NATO pack now but will have to order another TSM, but will update this with what I find when it gets in.
|
|
|
|
[#26]
I got another 2020 TSM. This seems much better than the original 2020 sear. Sharp edges appear cleaner and the coating is different, I would say it is "slicker".
My original was an 0813, made August 2013. This new sear is 0515, May 2015. It went in exactly the same and functions without problems. The hammerpack was a new NATO pack. I was able to talk to the person who makes the TSM, he said that there was a difference in the dimensions between the 0515 batch and the prior batch made (don't know the date of that, would have to ask again). Rnprice, do you know what the date code is on your TSM? As of now there is one known AUG NATO hammerpack that doesn't function with the TSM. But there is also one known AUG NATO hammerpack that does function correctly with the TSM. Sample size: two. 
|
|
|
|
[#27]
Sure. Mine reads "0914".
That is great news that your new one works on the NATO pack as well, Maleante! |
|
|
|
[#28]
Send me your 0914 and I'll send you my 0515.
|
|
|
|
[#29]
Thank you Maleante, but no need. Now that it's in and working with my standard AUG pack, I'm happy.
Unless, that is, you are burning with curiosity to research this phenomenon further. In which case I'd be happy to send you mine. PM me your address and I'll ship it off to you. |
|
|
|
[#30]
Maleante muito obrigado!!!
Your reviews and tutorial on the TSM were very persuasive and instructional, and I installed the unit in less than three minutes. The awful and unpredictable AUG trigger is now subjectively lighter, less pre-travel, less over travel , and a very defined reset. I did not think 100 bucks would make as much difference. It is just right!!! |
|
|
 Win a FREE Membership!
Sign up for the ARFCOM weekly newsletter and be entered to win a free ARFCOM membership. One new winner* is announced every week!
You will receive an email every Friday morning featuring the latest chatter from the hottest topics, breaking news surrounding legislation, as well as exclusive deals only available to ARFCOM email subscribers.

AR15.COM is the world's largest firearm community and is a gathering place for firearm enthusiasts of all types.
From hunters and military members, to competition shooters and general firearm enthusiasts, we welcome anyone who values and respects the way of the firearm.

Subscribe to our monthly Newsletter to receive firearm news, product discounts from your favorite Industry Partners, and more.
Copyright © 1996-2024 AR15.COM LLC. All Rights Reserved.
Any use of this content without express written consent is prohibited.
AR15.Com reserves the right to overwrite or replace any affiliate, commercial, or monetizable links, posted by users, with our own.


