AR, USA
|
[#1]
Anyone know if the 10 rd mag can be converted to a 22 rounder by removing the plastic spacers and using the same spring?
|
|
|
AL, USA
|
[#2]
damn straight buddy, pop the 2 crap sections off and slide out the 2 spacers, however u have to tweak spring like its ur favorite girlfriend. I stretched mine out a couple good times and now its all good and runs 24 just like the others
|
|
|
|
[#3]
Yup did this myself. Little force needed to get the limiters unglued.
|
|
|
|
PA, USA
|
[#4]
Excellent information in here. Just wanted to say thanks.
|
|
|
PA, USA
|
[Last Edit: Ick]
[#5]
Originally Posted By V1Vr:
Next I decided to make a buffer, as others have done, for the charging handle, so it would not slam into it's slot in the frame when released. In the plumbing Dept. at Home Depot, I found a couple items that were the proper 11/16" outer diameter size, that worked perfect. The (Danco brand 3/8L faucet stem repair) beveled washer and o-ring, stacked together make a buffer with a little "cush" for the cocking tube to travel forward into, without damaging the handle or frame, and it eliminates any cheap metalic noise when the handle moves forward after cocking the gun. I was able to install these items, without seperating the frame halves, by inserting them horizontaly, into the cocking-handle slot, and then turn them into position, and used the charging tube to "ram-rod" them into position, with a couple pulls and releases. http://i153.photobucket.com/albums/s223/watsongrg/GSG-5020.jpg The pieces are oriented like on the pencil tip below, the cocking tube hits the o-ring. http://i153.photobucket.com/albums/s223/watsongrg/CopyofIMG_0680.jpg http://i153.photobucket.com/albums/s223/watsongrg/GSG-5019.jpg http://i153.photobucket.com/albums/s223/watsongrg/GSG-5013.jpg I think I may have found a simpler fix for this charging handle hitting the frame.. I took a piece of thin linolium and cut a piece in a circle just slightly larger than the tube. I put the bolt in the open position and fished it into position with a toothpick. A few hits closing the charging handle and it is perfect. The charging handle no longer hits the frame. Fish the piece of linolium down here: http://i153.photobucket.com/albums/s223/watsongrg/GSG-5019.jpg |
|
|
|
[Last Edit: jackal2001]
[#6]
See Page 1 of this thread for details on the Navy Lower Mod.

Steve |
|
|
|
PA, USA
|
[Last Edit: Ick]
[#7]
Grip Tape and Filling Letters with Paint
Finished my first round of customizing my PK. I have some additional items coming in the mail....so more later. For now, the two major changes are grip-tape and a paint job. 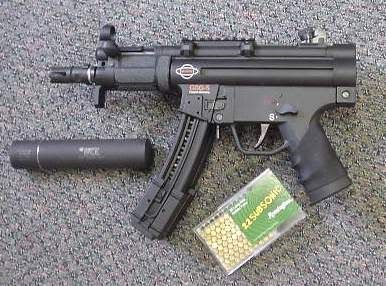
Here is an up-close of the grip tape and paint job. I wanted to get a better grip on the front of the weapon, but of course you can't modify it without all the proper checks and $200 tax....so grip tape will have to do. It works pretty darn well for movement whilst shooting. With grip the tape your front grip is rock solid. 
Filling Lettering with Paint Go to your local Wal-Mart in the craft section and get acrylic paint and one of those small tip brushes. Try your best to fill the lettering with paint but be carefull to not load up too much with paint.. Quickly use a cloth to "wipe" across the letttering. You are trying to let some paint behind, it will take several applications over time to get a nice even and thorough fill. A bit of moisture while the paint is wet will remove most of the excess paint. Once you are done it should leave a nice fill of, say, white paint... but invariably you will have a light coat of splotchy white everywhere else around the area. I wouldn't reccomend you do this too many times, but the best way to clear the white residue is to wait for the paint to dry then take nail polish remover and a q-tip. My concern is that if you could damage the finish of your rifle with over-use of nail polish remover. Use the Q-tip to remove the excess white you have between the letters and everywhere else. You can even use a gengle rubbing motion. Personally I think the red and orange are more vibrant if you fill those areas with one fill of white.... let it dry, then do the red or orange in several additional applications. Grip Tape Go to your local skateboard shop and ask for a sheet of deck grip for a skateboard. I would choose black or gray but they have all kinds. Get pink if you want, whatever. They come in a big sheet and have really strong adhesive... yet you can still remove it from the plastic without damaging anything. Here is the stencil. You can print this out on standard label paper and then stick it to the back of the sheet of skateboard grip. PDF file showing the pattern to cut for the GSG5 PK grip tape Don't use scissors to cut out the pattern, it doesn't work well and you will probably ruin the scizzors before the job is done. A razor knife (Box cutter) works great. |
|
|
FL, USA
|
[#8]
Originally Posted By jackal2001: ICS Navy Lower by Regular122 I received an ICS Navy lower today. What follows is how to fit, modify and install it on the GSG5. Here is a comparison of the Factory GSG5 Trigger Grip housing and the ICS. The ICS has lots of potential because the slots for the rear mounting are there. With the front screw or pin hole and the slotted back end, it makes for a tight fit. In all these comparison pics, the German Sports factory trigger housing is on the left and the ICS on the right. http://www.vets4victory.com/images2/GSG5nICS.JPG The housing looks very nice. The plastic is a little less quality though. And there are some differences that must be modified. But once modified and together with the trigger group, it weighs and feels just fine. http://www.vets4victory.com/images2/GSG5nICS2.JPG To modify the ICS to fit the GSG5, here are the main points that need to be cut or reworked: http://www.vets4victory.com/images2/ICSMods.JPG What you will need to make these modifications is a Dremel Tool, an X-Acto Knife, a millimeter ruler to measure, and a pencil. Use the pencil to make the marks for the cut. Use the factory housing as a guide. http://www.vets4victory.com/images2/BlockMarks.JPG It is VERY IMPORTANT to get the placement correct, otherwise, you will have drilled away and the trigger group may not fit becasue it is too far forward or too far back. http://www.vets4victory.com/images2/SerialBlockCut.JPG This will take some time. DO NOT GET IN A HURRY. Unless you want a big hole in the side of your nicely marked trigger guard, you need to slowly work the space on the plastic. It is only about 4mm thick. But it is very solid and can be shaped nicely. You will also need to widen the selector switch holes. These are much smaller than on the factory grip and to fit the safety lever, you will need to widen them until it rotates with ease. Do not forget to carve off the little 'stop' bump as this will interfere with the factory selector switch. http://www.vets4victory.com/images2/NotchViews.JPG You are now ready to install the trigger group and selector switches. For installing the trigger group, make sure the brass spacer washers are in place and the spring is engaged on the flat retainer that the spacers sit on. Next, slide the group down until the serial block is flush with the top of the housing. Using a small screw driver, gently pry the side open so the serial block can fall into the notch. Then make sure the whole group is flush with the top and that the holes line up for the selector. Install the selector. http://www.vets4victory.com/images2/TriggerInstall.JPG The next step is to install the retaining screw in the hollow of the pistol grip. The ICS has more holes in the bottom, so you will need to widen the main hole into an oval, and then secure the screw base with a locking or flat washer. My ICS did not come with a butt cap. The factory butt cap does not fit. http://www.vets4victory.com/images2/SetScrew.JPG Now you can mount the trigger group on the GSG5 like normal. Here it is installed on my 5P. Compare this new look with the inset pic of an actual MP5A3 Navy. http://www.vets4victory.com/images2/GSG5PnMP5N.JPG This project took about 3 hours. The cost of the ICS housing was $29.99 from Evike.com. It shipped to me in about 5 days from order. All in all, I am satisfied with it and am ready to test it at the range. Hope this was helpful to those out there thinking about getting this setup. Steve |
|
|
|
[Last Edit: Regular122]
[#9]
I am not aware of any laws prohibiting this. Full-sized semi-auto machineguns would have the same issue I suppose. And the fact that all these GSGs have fake cans would run into the same problem. I had a policeman look it over a week ago and he asked if it was semi. I told him yes and explained it was a .22 GSG. Steve
|
|
|
|
FL, USA
|
[Last Edit: NARC_K9]
[#10]
Which is understandable since he can physically remove the fake can and see a long 16 inch barrel but how would a street cop know if its select fire or semi if the lower looks like a real full auto. I am sure you can follow me on this one it becomes a little more complicated to verify I think; yes it only has 2 position stops but again looking at the lower it becomes a gray area I feel.
Originally Posted By Regular122: I am not aware of any laws prohibiting this. Full-sized semi-auto machineguns would have the same issue I suppose. And the fact that all these GSGs have fake cans would run into the same problem. I had a policeman look it over a week ago and he asked if it was semi. I told him yes and explained it was a .22 GSG. Steve |
|
|
|
[#11]
I understand your point but it is no different than an AK that has an extra notch etched on the receiver with all the etched letters to make it look like the original or no different than a 37mm M203 Grenade Launcher that can't shoot 40mm. An 'appearance' argument could even be extended to airsoft guns. My concern is the slippery slope that has one group determining that our weapons look more 'scary' than our neighbor's and therefore should be banned for whatever reason, even though they comply with the law. I know that is not your intent, but I can find no laws prohibiting the 'appearance' of a semi-auto that looks like its full-auto cousin. Thanks, Steve
|
|
|
|
|
[#12]
There is nothing illegal about it. It adds no illegal functionality over the factory housing.
|
|
|
|
OR, USA
|
[#13]
Originally Posted By jackal2001:
[div style='text-align: center;']Laser Mod by franky4fun</center id=center> This mod can only be done on Gen1 Guns with the ability for the end cap to be unscrewed. You should not use the nut that came with the laser, if you do you will not have enough thread on the laser to get it in. Here a quick guide how I did it: The manual that came with the laser: http://i328.photobucket.com/albums/l340/GSG5Host2/lasermod/gebruiksaanwijzing-laser.jpg Take the retaining screw out (botom of the fake can): http://i328.photobucket.com/albums/l340/GSG5Host2/lasermod/inbouwen_laser_GSG5_01.jpg Take the fake can off: http://i328.photobucket.com/albums/l340/GSG5Host2/lasermod/inbouwen_laser_GSG5_02.jpg Take the cap out of the cocking tube: http://i328.photobucket.com/albums/l340/GSG5Host2/lasermod/inbouwen_laser_GSG5_03.jpg Take the body of from the laser (don't need it): http://i328.photobucket.com/albums/l340/GSG5Host2/lasermod/inbouwen_laser_GSG5_04.jpg Dremel some material from the bottom of the laser to make the fake can fit again: http://i328.photobucket.com/albums/l340/GSG5Host2/lasermod/inbouwen_laser_GSG5_05.jpg Turn the laser in without the nut (I did use a O-ring but a smaller one): http://i328.photobucket.com/albums/l340/GSG5Host2/lasermod/inbouwen_laser_GSG5_06.jpg Put the fake can back on: http://i328.photobucket.com/albums/l340/GSG5Host2/lasermod/inbouwen_laser_GSG5_07.jpg And ready it is: http://i328.photobucket.com/albums/l340/GSG5Host2/lasermod/inbouwen_laser_GSG5_08.jpg The laser did srew on tightly, because of the O-ring it is secure from movement. I did tight it pretty much using the hexkey that is used for windage and alivation (used it as a lever, but be carefull with that, don't break the hex screws). The upper adjustment scew is now at exactly 12 o'clock. Using the hexkey as a lever secures the laser so much that I can not turn it with my bare hands any more. Tomorow I will go out to the range to test it's "holding zero" capacity. I think it will hold zero just fine because of the 3 srew design, they hold each other in place. EDIT: because of the flat base I dremeld on the botom of the laser it can't be turned any how because the fake can is in the way. If you take care when dremeling and make it a precise fit (best would be to dremel the same radius as the fake can) it will be imposible to move the laser head. The cable switch is attached to the forgrip using some inner tube of a bicycle, the cable is wraped around the front of the handguard, ones around the barrel and out of one of the holes in the front handguard. I did indeed nitch out a little section on the foregrip to put the cable trough. What foregrip is that? Is this mod possible on the 2nd gen guns? |
|
|
IN, USA
|
[#14]
Originally Posted By joey93turbo:
What foregrip is that? Is this mod possible on the 2nd gen guns? Not unless you do some serious re-mods... I have a gen2 and greatly considered looking into what all would need to be done, but haven't gotten there yet. I was hoping someone else would wonder down that road first... –– Jatses |
|
|
IN, USA
|
[Last Edit: jatses]
[#15]
[edit] I do figured out my problem and should have hopefully resolved the issue... [/edit]
|
|
|
|
[#16]
tag
|
|
|
|
USA
|
[#17]
Will the Classic Army S/E/F lower work with the GSG-5?
|
|
|
GBR
|
[#18]
I apologise for posting this again as its on the main forum, but i was trying to post on this one. forgot how to do it!
After receiving my GSG5 and firing 5 rounds through it, i thought that is a crap trigger and is not good enough to achieve the best accuracy. Especially for bunny bashing. So After studying simplegreen and Jackal2001s detailed break down descriptions(thanks for that Lads) and then stripping down the trigger mech, found away of tweaking the trigger to a crisp break, instead of an endless pull. so this is it, its easier than it looks. First i laid on this part of the trigger housing a 3M bolt from the bolt replacment mod. This is the angle to drill a 2.4mm hole needed to run a Tap for the 3M thread. http://<ahttp://inlinethumb08.webshots.com/41735/2833199210044063482S425x425Q85.jpg</a>" /> This is the hole drilled and Taped. http://<ahttp://inlinethumb43.webshots.com/23210/2711613200044063482S425x425Q85.jpg</a>" /> This is the original gsg bolt screwed in. http://<ahttp://inlinethumb56.webshots.com/44791/2918964540044063482S425x425Q85.jpg</a>" /> I now cut off the head and cut a slot in it with a dremal. this will allow you to tune the break and creep to you own comfort. http://<ahttp://inlinethumb28.webshots.com/31195/2377835230044063482S425x425Q85.jpg</a>" /> Now, first screw in the screw and adjust to your comfortable trigger break. Make sure the screw does not stick out the top of the block, otherwise the housing wont fit. I found that 3mm measured between the sear housing and the drilled block, was just about right. Remove applie plenty of thread lock then reposition. http://<ahttp://inlinethumb24.webshots.com/23895/2921060260044063482S425x425Q85.jpg</a>" /> I needed to grind a small amount off of the placement stud on the left hand part of the trigger plate, this locates into the hole of which the screw passes. I also removed two coils off of the sear and magazine safety spring. The one on the sear housing, to lighten it up a bit. im working on removing or at least lightening the first stage of the pull and will pass it on if i succeed. It has been working great since the mod and a pleasure to shoot. all the best. BEWARE, THIS COULD TURN YOUR GUN INTO FULL AUTO IF YOU ADJUST THE SEAR TO FINE, COULD EMPTY THE COMPLETE MAG. hmmm interesting thought. BUT TOTALY ILLEGAL |
|
|
KY, USA
|
[#19]
I really wasn't interested in paying $15 for the Derlin buffer so I headed to Lowes. I had read on another forum where someone had used an 11/16 rubber faucet washer and just rammed it into the end of the cocking tube. I looked around for the same thing but was unsuccessful. I did however come across a rubber "WELL NUT". Here is my mod.
Well Nut at Lowes: $1.39 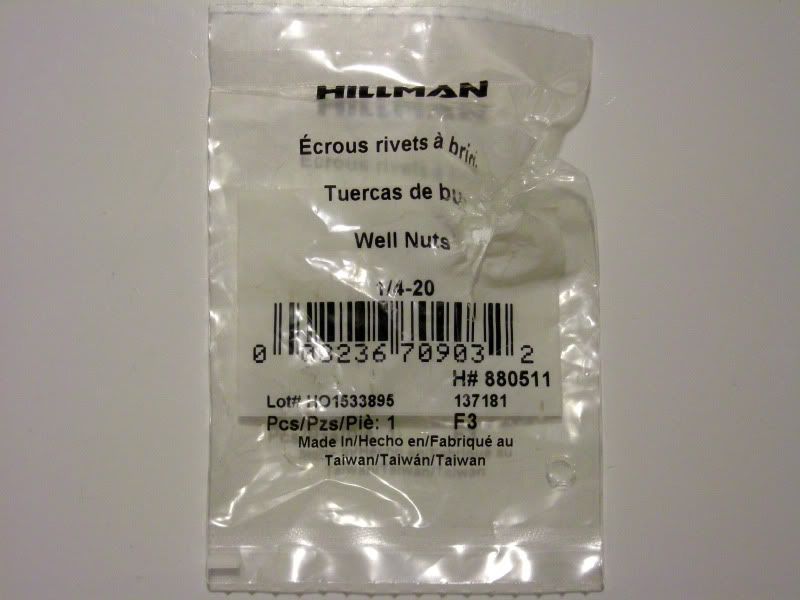
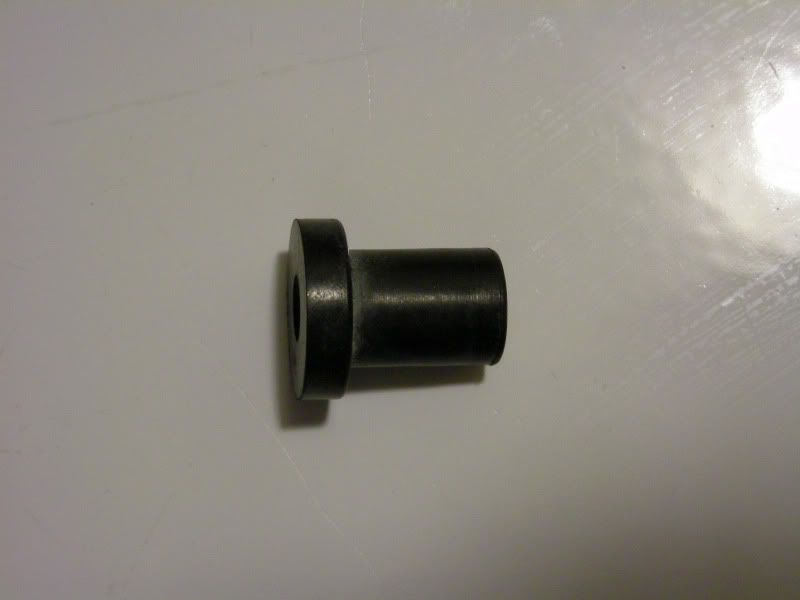
You see the brass threads. They need to be removed. I just used my utility knife and cut where the piece stopped in the rubber piece. 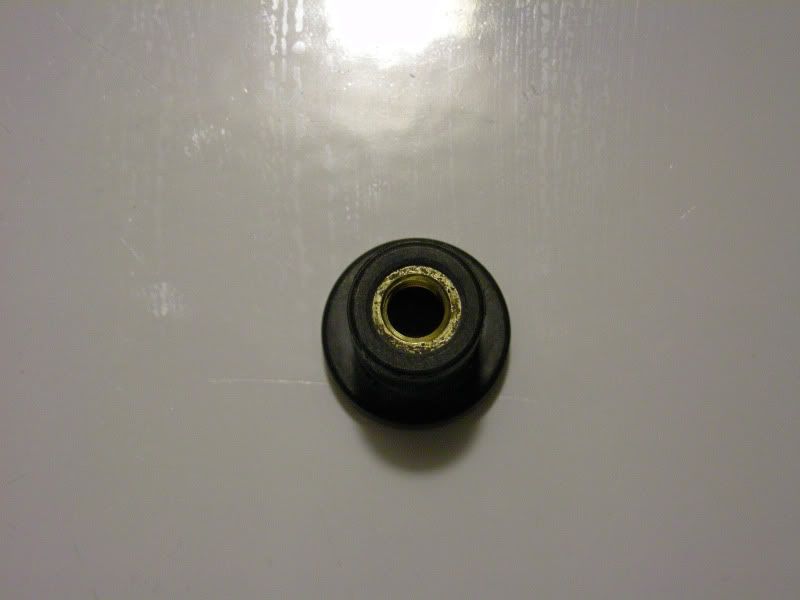
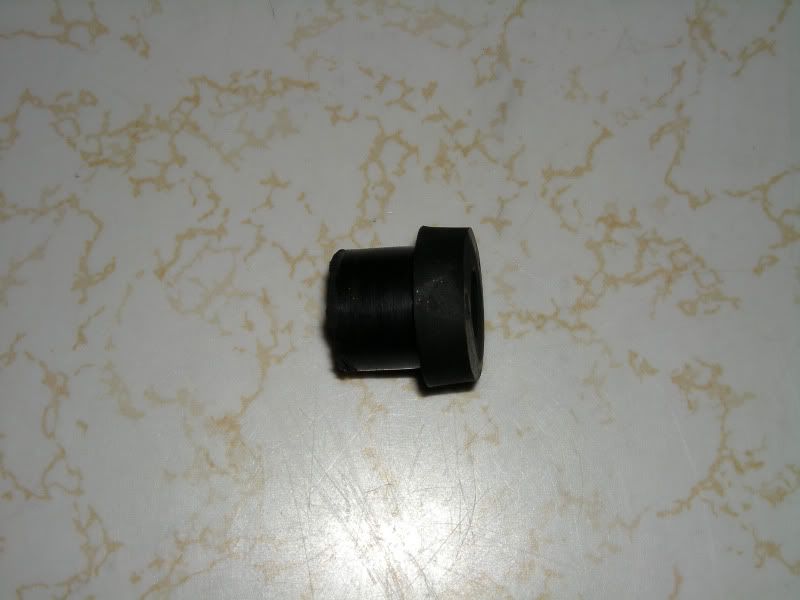
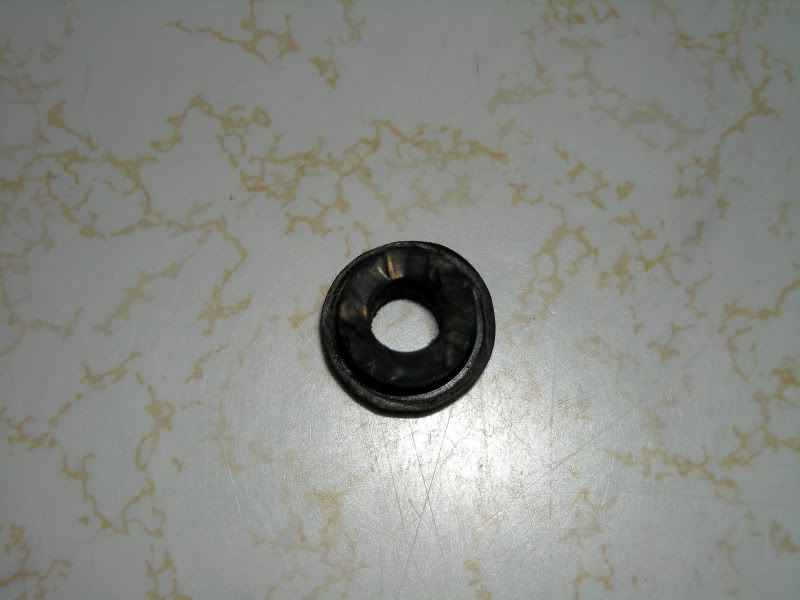
Once you get the threaded brass piece removed, you can insert the well nut into the charging tube. The diameter of the well nut is larger than the cocking tube so you will have to use a dremel, or in my case, I put the piece in the tube and turned my dewalt grinder upside down and ran it over the grinder until it was the same diameter as the tube. Be careful if you use the grinder method so that you dont grind on the cocking tube. 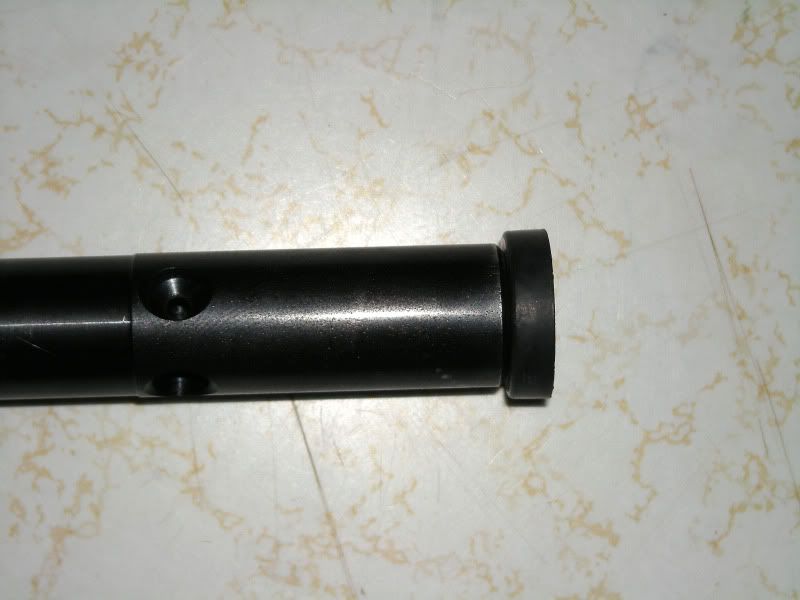
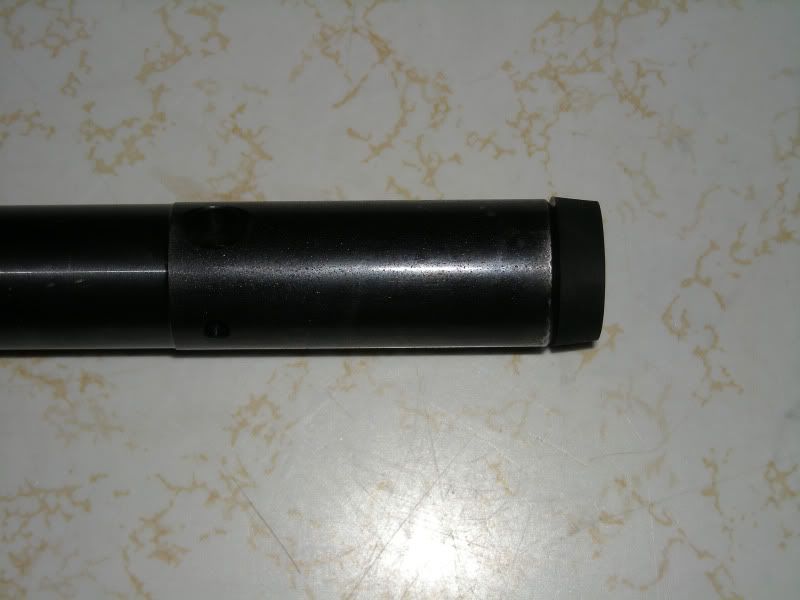
I am not the best at writing directions so if these seem a bit vague just post your questions and I'll answer the best I can. |
|
|
|
[#20]
OK I have been searching the EE for the replacement screw packages with no luck, could someone please help me out? What's the screen name of the fellow selling them?
|
|
|
|
KY, USA
|
[#21]
I just got mine from RRAGES.COM
Got here fast. |
|
|
MI, USA
|
[#22]
after doing the mag conversion from a 10 round to a 24 round. the spring is too week to hold the bolt open after the last round. even after streching it out several times. and i did experierence a few double fires. this diddnt happen before the mag mod.
|
|
|
TX, USA
|
[#23]
I'm going to be picking up an gsg5 sd when they are released. What are the recommended must do mods to make the gsg function good.
|
|
|
WI, USA
|
[#24]
I just did the mod to the SEF lower for my GSG5 carbine. If anybody is interested I will do your lower for $30.
 
|
|
|
KY, USA
|
[#25]
I have a 1st Anniversary Edition with the larger suppressor on it; this thing is a blast! The only mod so far is putting in a bolt buffer. Looks like I'll be Duracoating the frame/reciever now though. In a moment of forgetfulness, knowing not to use solvent type cleaners on it, I sprayed it out with my old stand-by cleaner, brakes parts cleaner!
 Wherever the cleaner got onto the finish, it gummed up and could just be wiped off. This is the 'Titanium' finish, which actually seems like Rustoleum spray paint with a clear coat on it. Wherever the cleaner got onto the finish, it gummed up and could just be wiped off. This is the 'Titanium' finish, which actually seems like Rustoleum spray paint with a clear coat on it.
Sooooo.....I'll be taking it apart to Duracoat it and will likely do a few other mods I've learned from here when I put it back together. What do you think for color? HK Black or WWII OD Green? |
|
|
|
[Last Edit: REDMASTA]
[#26]
Originally Posted By kokopelli:
I have a 1st Anniversary Edition with the larger suppressor on it; this thing is a blast! The only mod so far is putting in a bolt buffer. Looks like I'll be Duracoating the frame/reciever now though. In a moment of forgetfulness, knowing not to use solvent type cleaners on it, I sprayed it out with my old stand-by cleaner, brakes parts cleaner! Wherever the cleaner got onto the finish, it gummed up and could just be wiped off. This is the 'Titanium' finish, which actually seems like Rustoleum spray paint with a clear coat on it.
Sooooo.....I'll be taking it apart to Duracoat it and will likely do a few other mods I've learned from here when I put it back together. What do you think for color? HK Black or WWII OD Green? Lol yeah that anniversary finish is a joke.I say HK black it just looks so sexy! |
|
|
|
KY, USA
|
[#27]
HK Blach Dura coat was the winner- looks MUCH better!
Now...how did this thing come apart...? Anyone have step by step instructions for total disassembly and rebuild, with pics? I labeled every part as I took it out in a ziplock baggie, but I don't remember the sequence!!!! 
|
|
|
OK, USA
|
[#28]
I picked up a slightly used GSG earlier this month and after reading through this thread, I realized that the spring that is used to hold the bolt open after the last round is gone....I'm assuming it was lost by the previous owner.....can a replacement spring be ordered or is there an aftermarket spring that will fit in it?
|
|
|
CO, USA
|
[#29]
I didn't like the sound or feel of the plastic stock (the stock stock
|
|
|
|
[#30]
curious to know the before and after weight.....its prob. to late obv. to get your beg. weight but if you have some larry the largemouth bass scales i would be interested to know the weight and then someone that hasnt down the mod can just add the beg. weight.
|
|
|
|
CO, USA
|
[#31]
I can get it to a scale tomorrow
I'll get it for you, its not a big difference in weight |
|
|
USA
|
[#32]
Originally Posted By johnglock:
I didn't like the sound or feel of the plastic stock (the stock stock i thought about doing somthing like that one day but useing fiberglass resin. |
|
|
CO, USA
|
[#33]
Weight of the foam only filled stock is 10.0 oz. I doubt that I used more than 4oz of foam. Weight is likely less than that after it has set up. See the Beers78n9's post on the first page about adding weight and balance.
|
|
|
IL, USA
|
[Last Edit: USMC2147]
[#34]
I found a series of You Tube videos that walk you through the complete tear down and screw replacement for those of us with A.D.D. .....
http://www.youtube.com/user/okfirearms |
|
|
WI, USA
|
[Last Edit: mike12345]
[#35]
that mag mod for ban states, im going to say that aint legal.
You have to remove the extra lenght on the mag. You could just drill/punch out the roll pin and it holds more than 10rds again. It has to be permanent. Thats like saying someone in CA can have a new beta-c-mag if i drill a hole and put a pin in the feed tower. It dosent work that way. |
|
|
PA, USA
|
[#36]
well, i JUST finished up the screw replacement on the pistol! I started it, then decided to hit up youtube. lol.
everything is swapped, red locktite on the bolt sleeve screws like its recommended. Never taken it down that far before, it was a learning experiance. Now i gotta order another set for my SD. |
|
|
TX, USA
|
[Last Edit: DannyinTexas]
[#37]
I wanted to say that I followed the posted mods step by step and it all worked.
My trigger pull went from "crushing light bulbs with pliers" to a smooth, single pop. Night and day difference. thanks all. |
|
|
AL, USA
|
[#38]
Originally Posted By jackal2001:
[div style='text-align: center;']Laser Mod by franky4fun</center id=center> This mod can only be done on Gen1 Guns with the ability for the end cap to be unscrewed. You should not use the nut that came with the laser, if you do you will not have enough thread on the laser to get it in. Here a quick guide how I did it: The manual that came with the laser: http://i328.photobucket.com/albums/l340/GSG5Host2/lasermod/gebruiksaanwijzing-laser.jpg Take the retaining screw out (botom of the fake can): http://i328.photobucket.com/albums/l340/GSG5Host2/lasermod/inbouwen_laser_GSG5_01.jpg Take the fake can off: http://i328.photobucket.com/albums/l340/GSG5Host2/lasermod/inbouwen_laser_GSG5_02.jpg Take the cap out of the cocking tube: http://i328.photobucket.com/albums/l340/GSG5Host2/lasermod/inbouwen_laser_GSG5_03.jpg Take the body of from the laser (don't need it): http://i328.photobucket.com/albums/l340/GSG5Host2/lasermod/inbouwen_laser_GSG5_04.jpg Dremel some material from the bottom of the laser to make the fake can fit again: http://i328.photobucket.com/albums/l340/GSG5Host2/lasermod/inbouwen_laser_GSG5_05.jpg Turn the laser in without the nut (I did use a O-ring but a smaller one): http://i328.photobucket.com/albums/l340/GSG5Host2/lasermod/inbouwen_laser_GSG5_06.jpg Put the fake can back on: http://i328.photobucket.com/albums/l340/GSG5Host2/lasermod/inbouwen_laser_GSG5_07.jpg And ready it is: http://i328.photobucket.com/albums/l340/GSG5Host2/lasermod/inbouwen_laser_GSG5_08.jpg The laser did srew on tightly, because of the O-ring it is secure from movement. I did tight it pretty much using the hexkey that is used for windage and alivation (used it as a lever, but be carefull with that, don't break the hex screws). The upper adjustment scew is now at exactly 12 o'clock. Using the hexkey as a lever secures the laser so much that I can not turn it with my bare hands any more. Tomorow I will go out to the range to test it's "holding zero" capacity. I think it will hold zero just fine because of the 3 srew design, they hold each other in place. EDIT: because of the flat base I dremeld on the botom of the laser it can't be turned any how because the fake can is in the way. If you take care when dremeling and make it a precise fit (best would be to dremel the same radius as the fake can) it will be imposible to move the laser head. The cable switch is attached to the forgrip using some inner tube of a bicycle, the cable is wraped around the front of the handguard, ones around the barrel and out of one of the holes in the front handguard. I did indeed nitch out a little section on the foregrip to put the cable trough. I did this mod today on a gen 2 gun. Don't be afraid to drill, it's no big deal. And, I didn't buy a 45 dollar metric tap either, I just dremeled off the end of the laser tube, and sealed it in the end. Works great. I used a 3/4 drill bit, and a 1/2 drill bit, and the laser housing. I got the laser from that uncompany listed somewhere here, thanks for that whoever posted that link. I drilled about .50 inches into the fake button with the 3/4 drill bit, and then reamed out the tube about one inch and a ahlf down from the front with the 1/2 bit. Then epoxied the threaded part of the laser housing I cut off into the hole. Waited about an hour, and screwed in the laser. The epoxy took an incredible amount of force so I know it's not going anywhere. |
|
|
NJ, USA
|
[#39]
Originally Posted By mike12345:
that mag mod for ban states, im going to say that aint legal. You have to remove the extra lenght on the mag. You could just drill/punch out the roll pin and it holds more than 10rds again. It has to be permanent. Thats like saying someone in CA can have a new beta-c-mag if i drill a hole and put a pin in the feed tower. It dosent work that way. that all depends on what your state views as perminent. If it specifically says that the length is an issue, well then there you go. here NJ we are limited to 15 rds. in any semiauto. Everyone has 20 and 30 rd. AR mags that are blocked to 15 rds. they arent cut down. Dont get me wrong we cant pull the floor plate and put a dowel in because the law says that specific practice is not perminent. but it say nothing about having to cut the mags down either. and that s the only clarification we receive. |
|
|
|
[#40]
ok how important is it to change out the screws? just got a SD model (pre cosmetic changes with no can).
also same with getting a buffer. Is the buffer a must have item? thanks |
|
|
|
MI, USA
|
[Last Edit: Bubba1985]
[#41]
|
|
|
WI, USA
|
[#42]
Originally Posted By dayphotog:
ok how important is it to change out the screws? just got a SD model (pre cosmetic changes with no can). also same with getting a buffer. Is the buffer a must have item? thanks I would rate both as must-haves. They are cheap and will ensure your gun runs reliably.... they both prevent some known wear & tear issues. |
|
|
FL, USA
|
[Last Edit: Popcop]
[#43]
Bluing made easyhttp://i1222.photobucket.com/albums/dd490/Doug_Cruz/PC300137.jpg
|
|
|
NJ, USA
|
[#44]
I just picked one up yesterday, a GSG-522 SD which came from the factory with the new "legal" fake can and has a weaver rail on top.
Has anything been changed in the newer guns to alleviate some of the inherent issues they had in the earlier models? I'm just trying to figure out what preventative measures I should take before I start throwing lead down range. |
|
|
FL, USA
|
[#45]
After 3 1/2 hours of dremeling and test fitting, I was soooo disappointed on the toy feel of the ICS SEF lower housing. I felt I had just thrown away 40 bucks (30+shipping). The difference between the OEM housing and the ICS is SUBSTANTIAL! Sure it LOOKS great, but it feels like a heavy toy. I felt even worse when I found a genuine unused SEF housing for 60 bucks!!! Pictured is the feather light ICS.
http://i1222.photobucket.com/albums/dd490/Doug_Cruz/100_1191.jpg |
|
|
FL, USA
|
[Last Edit: 2StateTrigger]
[#46]
Anyone ever feel like they've experienced a double tap with the pull of trigger once? I could have sworn that I had that experience the last time I went out with the trusty GSG5......
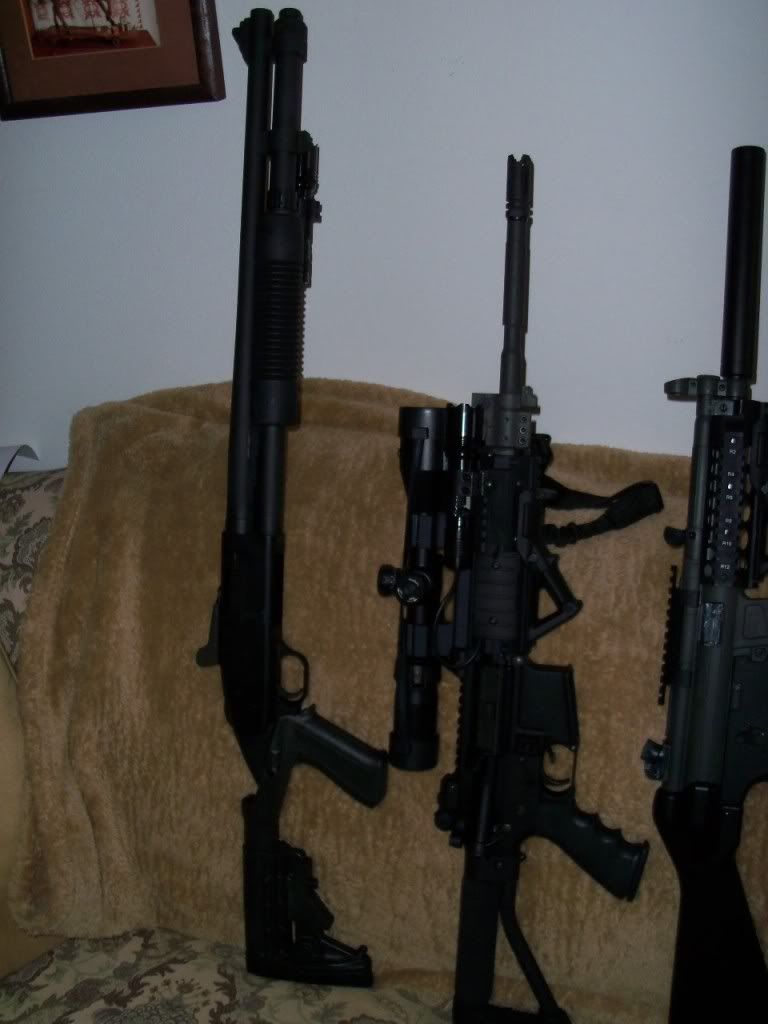
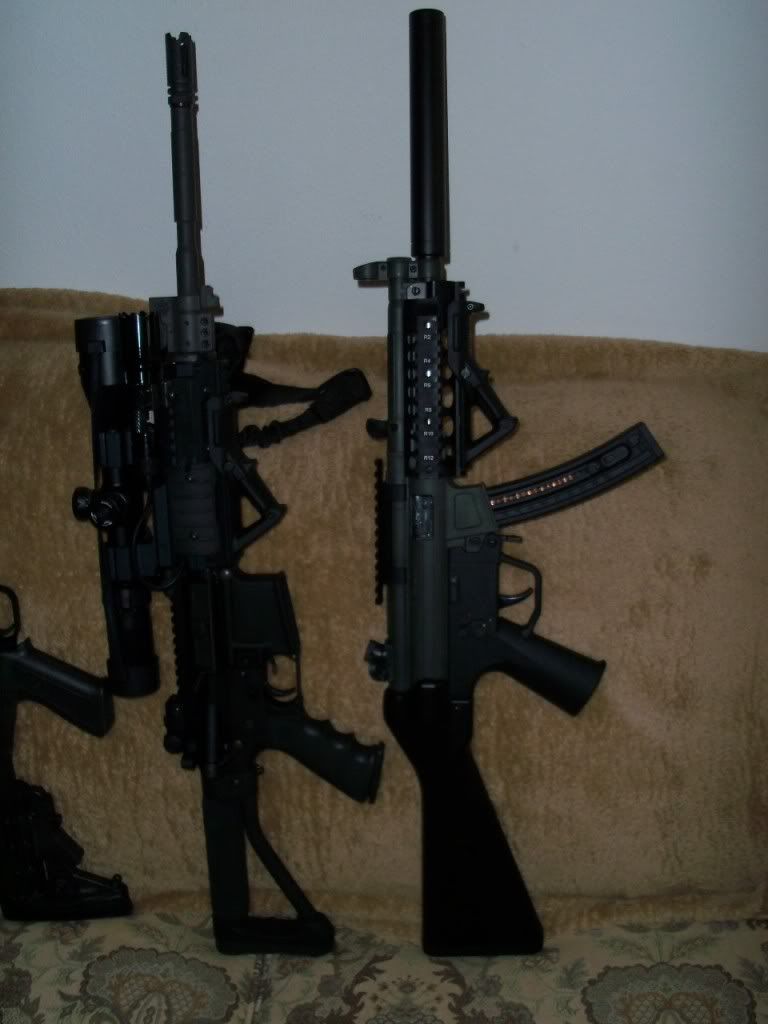
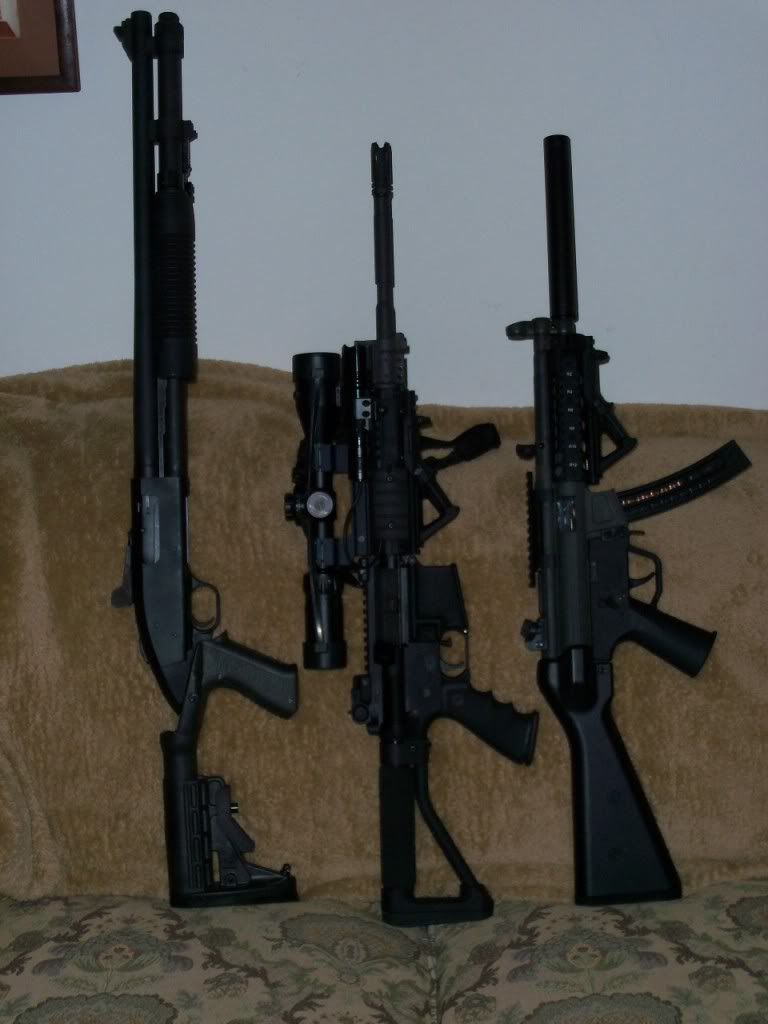
My humble home defense tools......Hope to never use them in a home defense situation but you NEVER know these days.... |
|
|
PA, USA
|
[#47]
Heyooo.....
Im a new member here, and recently purchased a Gen2 GSG522SD. So far, I love it, and have quite a few mods being shipped to me as we speak. I will update the site with my mods as I install them, but right now, I want to share this simple mod with you guys. I saw a mod where a gentleman painted the letters and logos on his gsg with a fine tipped brush and some acrylic. While his finished product looked excellent, the task itself is meticulous and painstaking, and not for everyone. The crayon mod, as you will see is much easier, takes less time, requires less artistic skill and dosent even require a steady hand. First, let me say that I got this idea from my brother, who did this to his SW MP22, which is a polymer reciever. As it turns out, the results are not much different on the alum reciever of the GSG. What you need: Box of Crayola crayons Clean cloth (I used an old white tank top) Warm water Toothpick Silicone Gun Cloth Take your choice of color crayon and press firmly down into the lettering. You will want to work from the edge of the letter IN, towards the center of the letter. If you try to trace along the letter, the wax will stick to the crayon and come out. Continue until the lettering is full of wax. Easy. http://www.thejessemontana.com/1.jpg You will have some excess wax along the sides. It will look like this. http://www.thejessemontana.com/2.jpg Dont worry about that. Take your toothpick and gently scrape away the bulk of the excess around the lettering. Take a slightly damp, warm cloth, and wipe away the excess, constantly folding the cloth to keep it clean. Eventually you will wipe the surrounding areas clean. This wont take long. You may need to repeat these steps to fill your lettering. http://www.thejessemontana.com/3.jpg I suggest doing the small stuff last, and also if using white, doing that last. http://www.thejessemontana.com/4.jpg You may end up having to scrape out the lettering with the toothpick if you get a darker color in the white. http://www.thejessemontana.com/5.jpg Continue until youre finished. Youll see that not ALL of the crayon came off around the lettering, in the pics above. The final step will fix that. Take your silicone gun cloth, and give it a firm wipe. Now you have this. http://www.thejessemontana.com/6.jpg As you can see from the zoomed out pic below, you get a professional finished product, and its MUCH easier than paint. http://www.thejessemontana.com/7.jpg As for longevity, my brother did this about 2 yrs ago, and after 5000+ rounds and many hot summer days, the wax has not deformed or faded. Give it a shot! |
|
|
NC, USA
|
[#48]
i have a gsg 522 rifle build in july of 2011 (post lawsuit version)
do i still need to do the screw upgrade on mine? |
|
|
USA
|
[#49]
im in line to purchase the GSG and already have it built on paper (20 some-odd mods w/ build thread coming soon). My question is if the screw upgrade, firing pin job, and other associated improvement mods (aside from cosmetic) have been resolved and or necessary to be done on the later model GSG-522's (3rd gen). ive noticed this question has come up many times before in so many words but its unclear what the definitive answer may be.
|
|
|
FL, USA
|
[Last Edit: Afterburn]
[#50]
Originally Posted By 2StateTrigger:
Anyone ever feel like they've experienced a double tap with the pull of trigger once? I could have sworn that I had that experience the last time I went out with the trusty GSG5...... Just saw your post, and figured better late response than never... TL;DR: Yes. Full Story: At the end of 2008 I had noticed my GSG-5 "double tapping" with a single trigger pull. I contacted ATI and they told me to ship it to them for repair. I later received this in email from ATI: "There are only two reasons a GSG-5 would double tap, first would be if the barrel stuck out beyond the breech block, the second would be if someone cut the firing pin spring. I looked at your barrel it was flush, then I pulled your bolt apart and low and behold about 1/3 of the spring had been cut off, which would violate the warranty." They asked me to call them to clear it all up, which I did. At first it sounded like they were implicating me in altering the firearm (I had not). I explained that would be crazy; why would I modify the gun to create an illegal situation, then send it back to the company, all the while wondering why my gun isn't working properly? It doesn't add up. In the end they agreed to repair the gun under warranty. Still not sure if it's completely fixed - I haven't had much chance to take it to the range over the years... (has it been that long? )
Hope this helps - Joe P.S. Even though I thought they were trying to void my warranty, they were in the end extremely helpful. It did take more than a month to get the gun back but it was around the holiday season so it's understandable. |
|
|
 Win a FREE Membership!
Sign up for the ARFCOM weekly newsletter and be entered to win a free ARFCOM membership. One new winner* is announced every week!
You will receive an email every Friday morning featuring the latest chatter from the hottest topics, breaking news surrounding legislation, as well as exclusive deals only available to ARFCOM email subscribers.

AR15.COM is the world's largest firearm community and is a gathering place for firearm enthusiasts of all types.
From hunters and military members, to competition shooters and general firearm enthusiasts, we welcome anyone who values and respects the way of the firearm.

Subscribe to our monthly Newsletter to receive firearm news, product discounts from your favorite Industry Partners, and more.
Copyright © 1996-2024 AR15.COM LLC. All Rights Reserved.
Any use of this content without express written consent is prohibited.
AR15.Com reserves the right to overwrite or replace any affiliate, commercial, or monetizable links, posted by users, with our own.


