|
Posted: 6/10/2016 9:08:11 AM EDT
Greetings group,
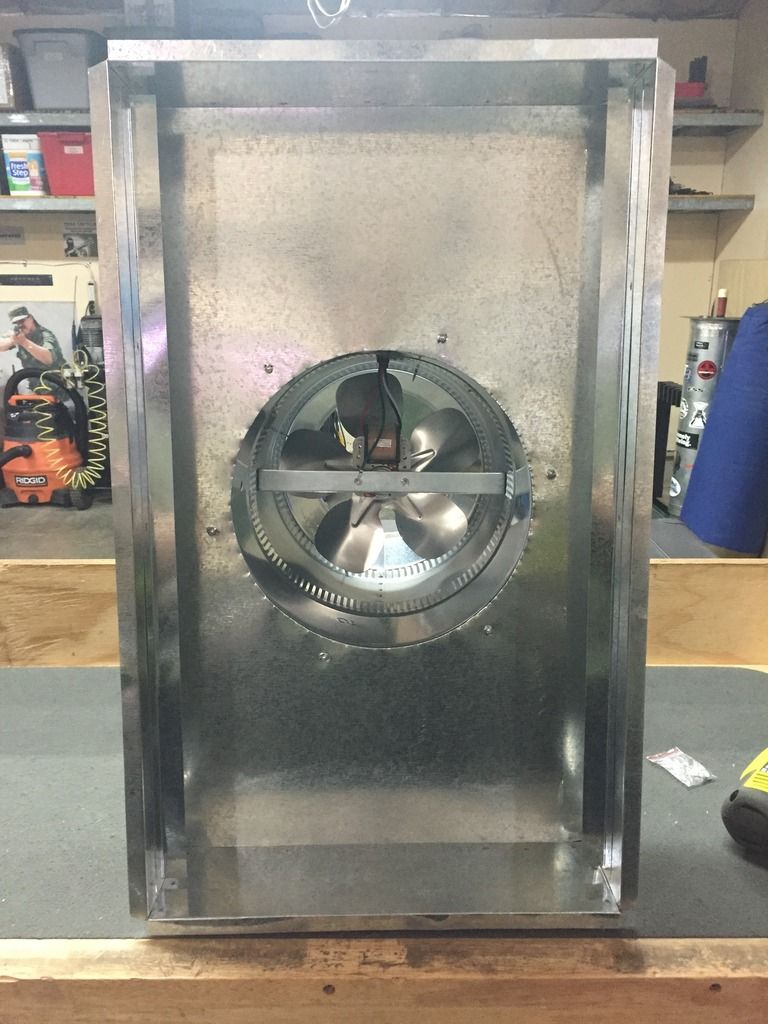
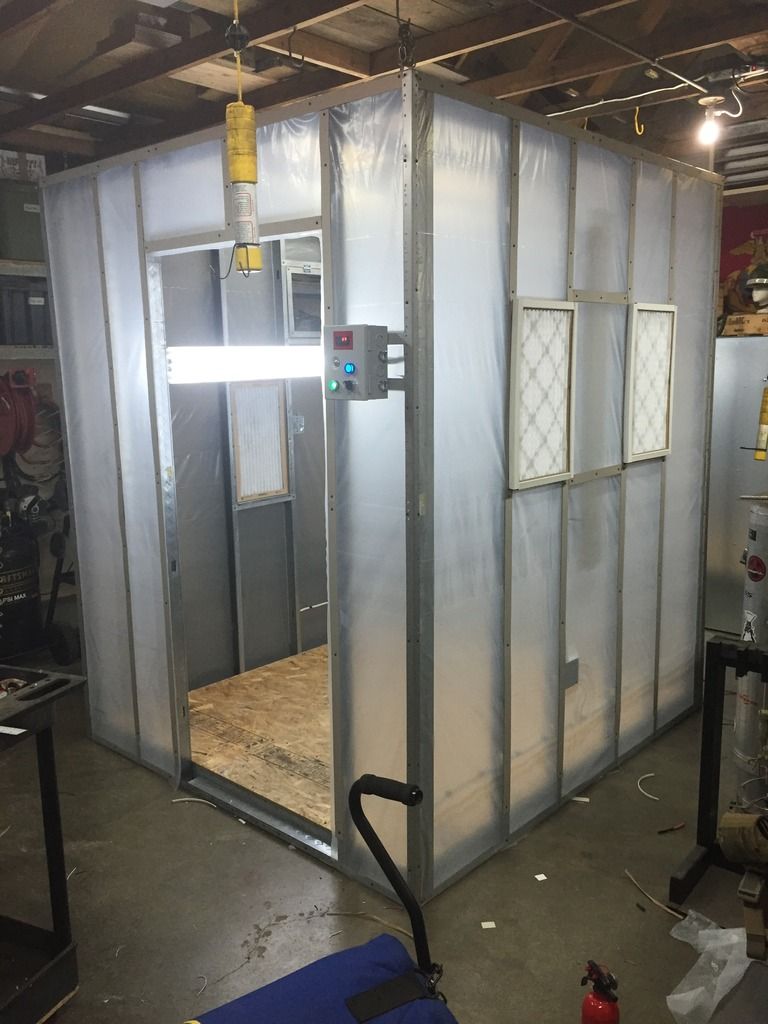
Today I am here to discuss the construction of a cross draft spray booth I designed and built (Jan, 2015), to provide insight for anyone looking to build their own custom spray booth. As always safety is the highest priority. In this case for the required air flow needed to safely inhabit the work space, as well as the air flow required to safely achieve a diluted flammable solvent mixture. This was a very fun project, and only took about 3 days to assemble. However, a solid 2 weeks of research was conducted to ensure all of the components were compatible and would achieve the desired performance. Details: Size: 6.5’Wx7’Dx8’H Volume: 364cu.ft. Exhaust Fan: 10” Phresh Hyper Fan Shielded Digital Control Fan Max CFM: 1,065 CFM Air Exchange Rate @ Max CFM: .34 seconds Air Exchanges Per. Hour @ Max CFM: 175.5 Air Exchanges Per. Minute @ Max CFM: 2.9 Air Exchanges Rate @ 33%: 57.9 seconds (<1 min.) Required CFM for Diluted Solvent Concentration (<25% of LFL, using 100fps Calculation): 233CFM Required CFM%: .219% of Max Available CFM Illumination: (2) Dual 36’ Fluorescent Lights Frame Construction: 2x4 Steel Stud Flooring: .750” Plywood Wrap: 5mil Poly Intake Bank Filters: (2) 14”x24” 3M (4.67 cu.ft.) Exhaust Bank Filters: (1) 14”x24” 3M (2.33 cu.ft.) Access Door: 36” Standard Storm Door Electrical Requirement: 110v-120v A/C Total Cost: ~$750 After I had settled on the components needed I acquired the framing materials from my local hardware store (Home Depot). The remaining components (fan, control box, PID, lights, and switches) were all ordered. With parts on order, It was time to begin the erecting the frame work. The frame was constructed using standard 2x4 steel framing studs. I framed the unit with (3) filter banks, (1) Door, (1) Window, and a reinforced cross member along the roof for hanging parts. The flooring is traditional ¾” plywood. 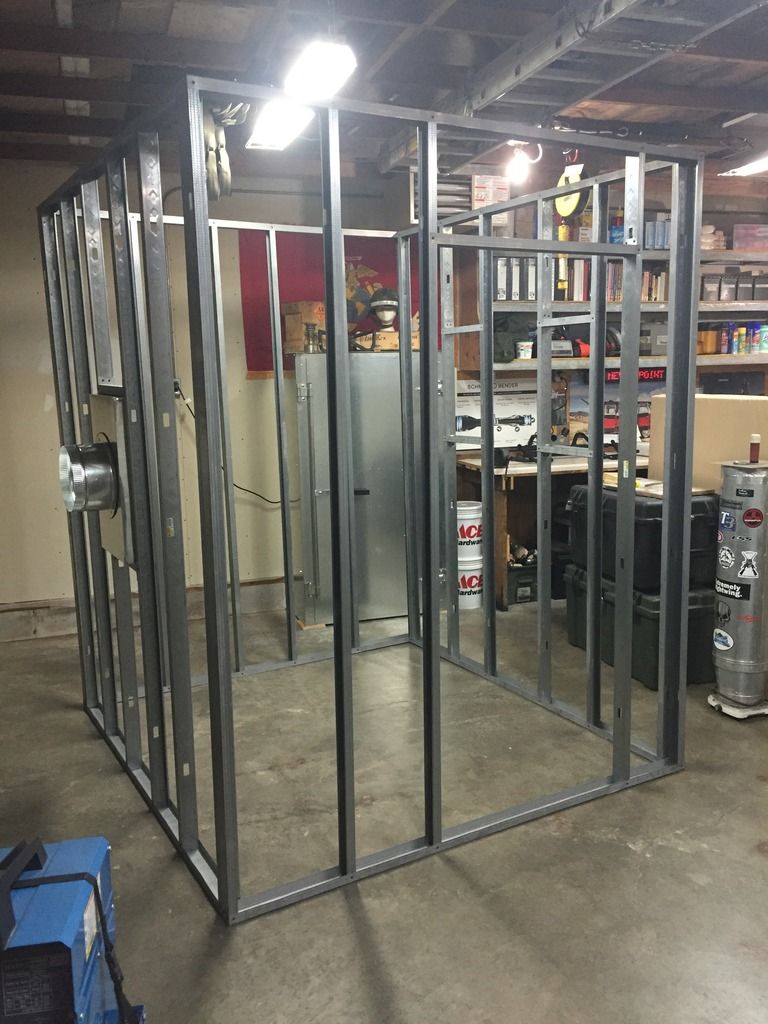
Once the initial frame work had begun I installed a filter bank that housed the fan and filter assembly. Here you can see I mocked it up with an older fan while the Hyper Fan was on order. 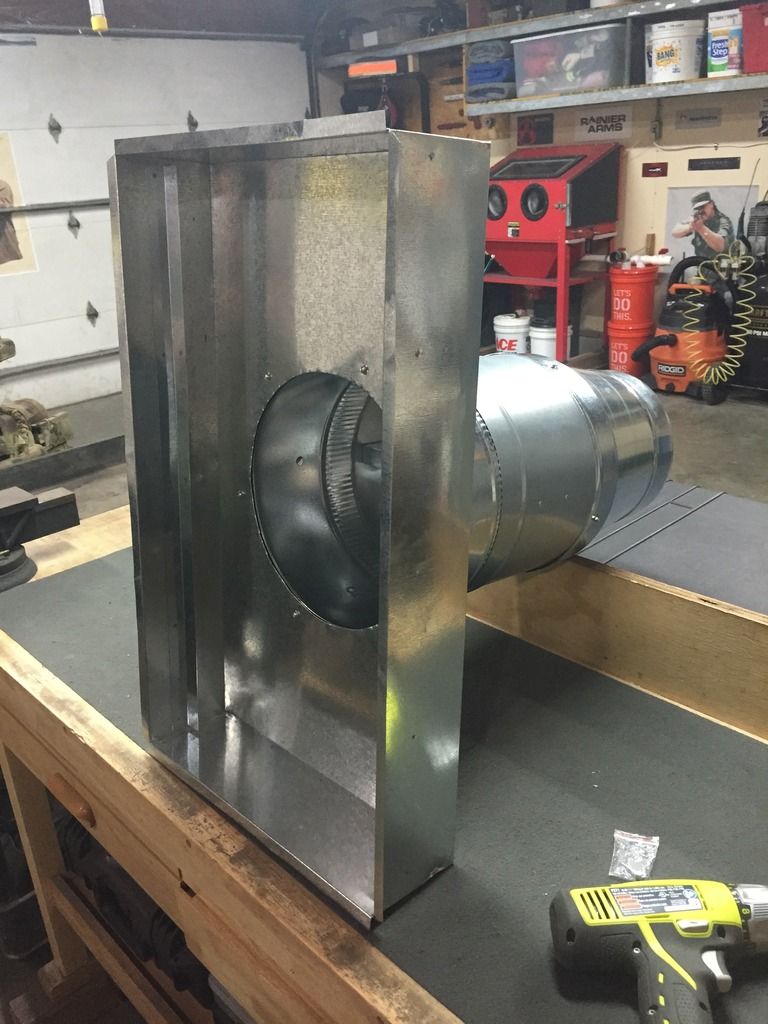
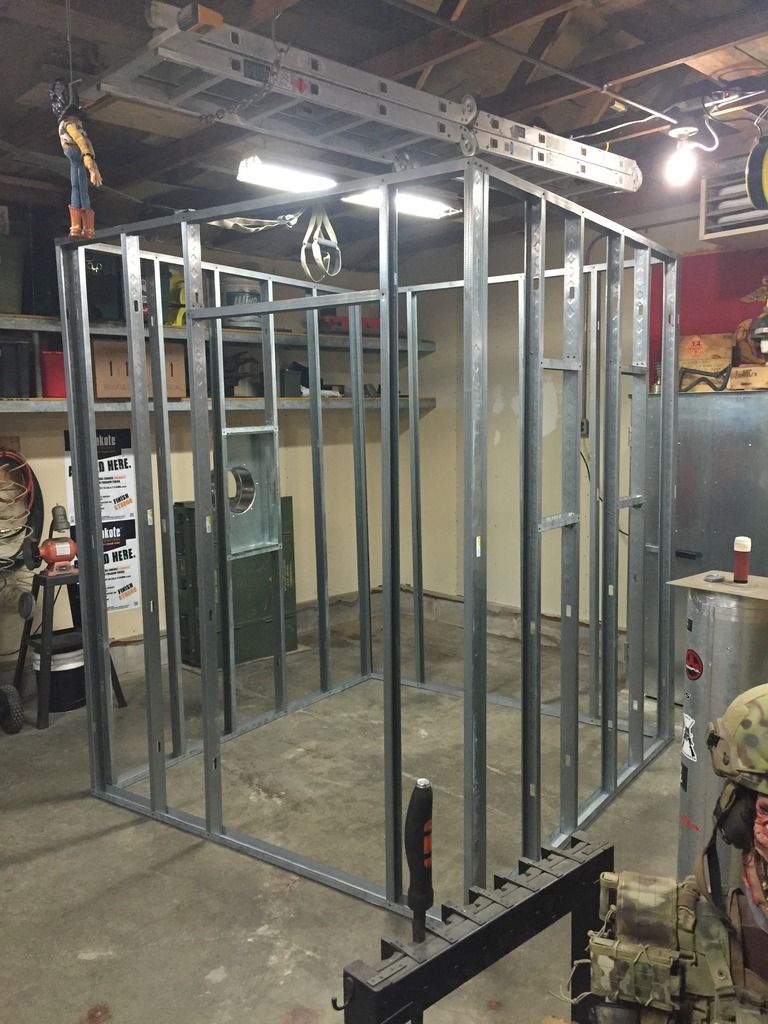
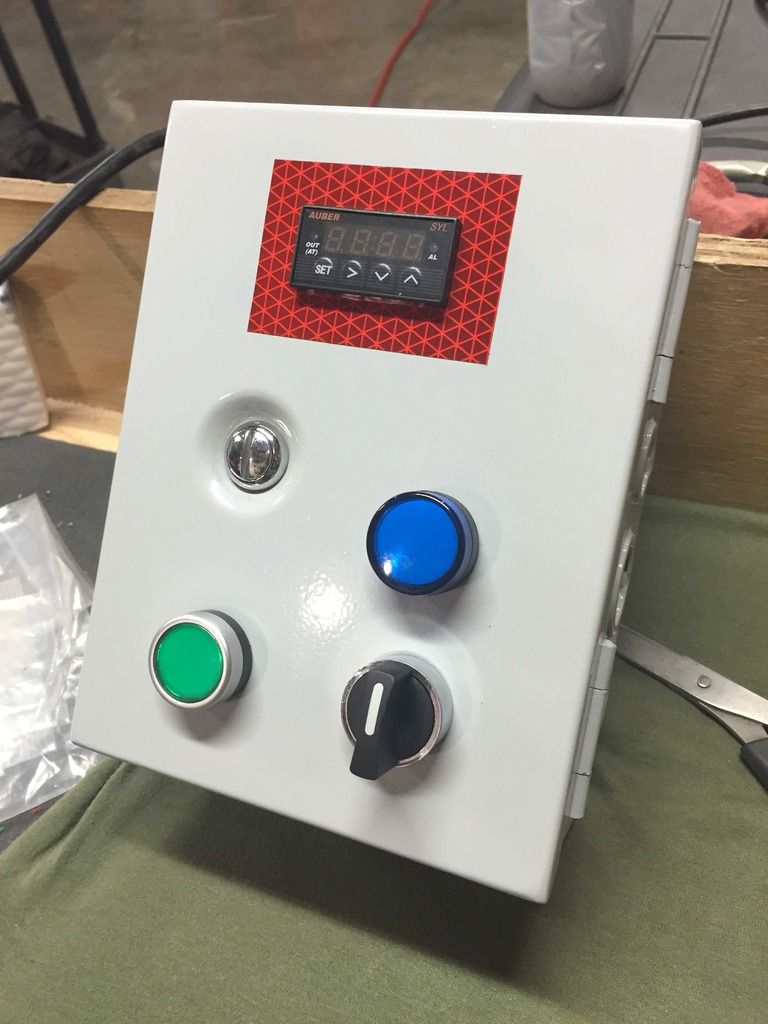
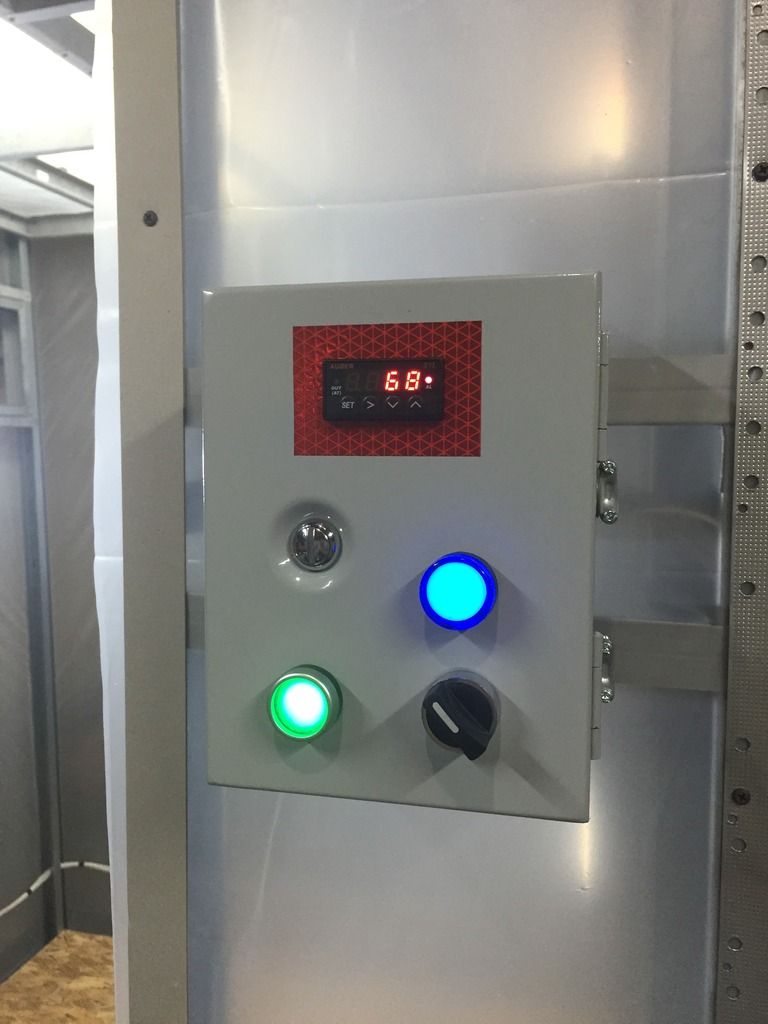
Next on the list was to build and install the control box, and illumination. The main box individually controls the lighting, main power, fan, and also has a temperature readout. Once installed, the entire unit was wired up with Romex 14/3 cable, thermometer, and power cord. 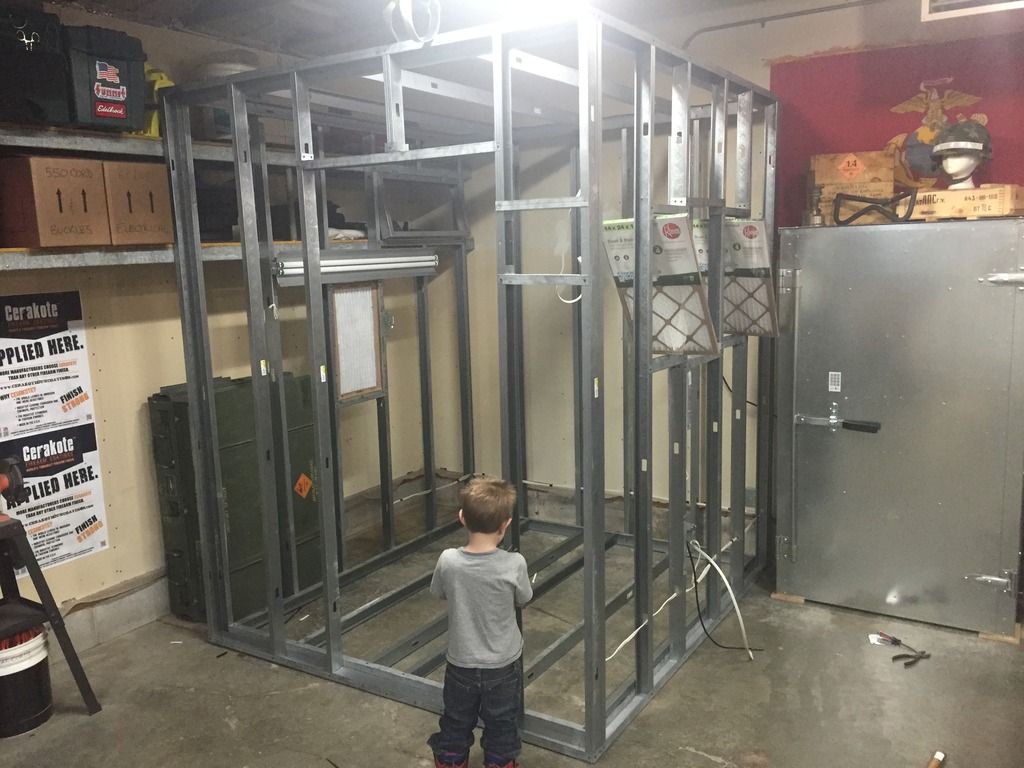
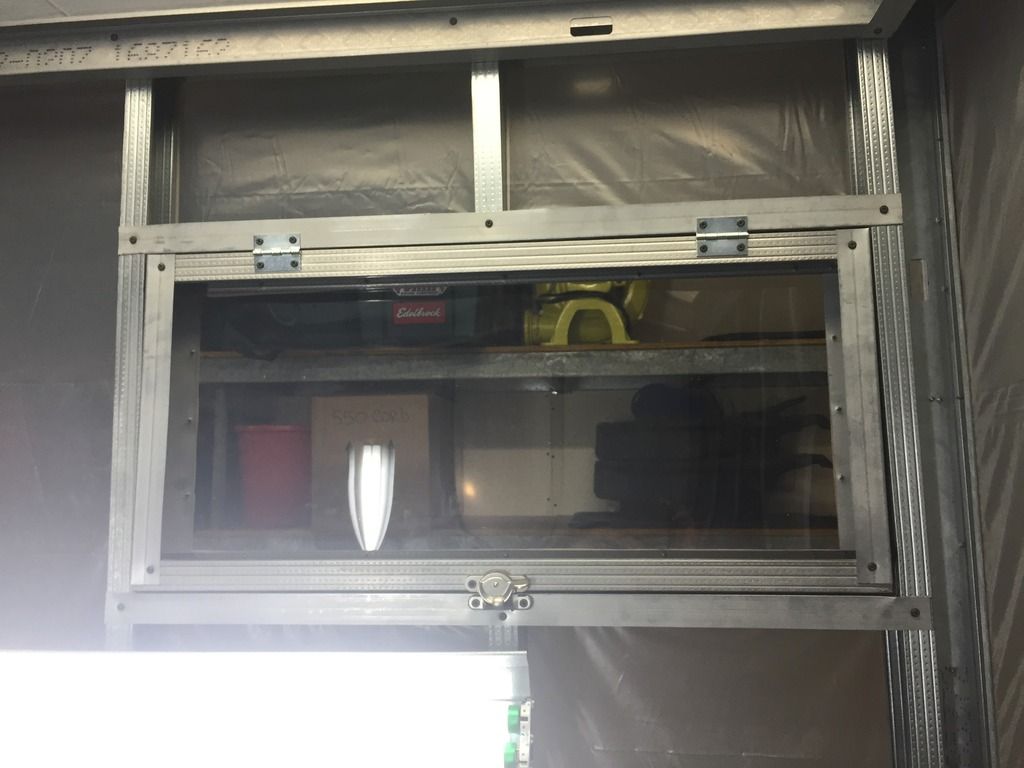
Next on the list was wrapping the exterior of the unit, and to finish fabrication of the window. The wrap is 5mil poly held in place with thin fiber strips, and self-tapping screws. Final mounting of the intake filter banks and control box was conducted as well. A full system test was conducted. 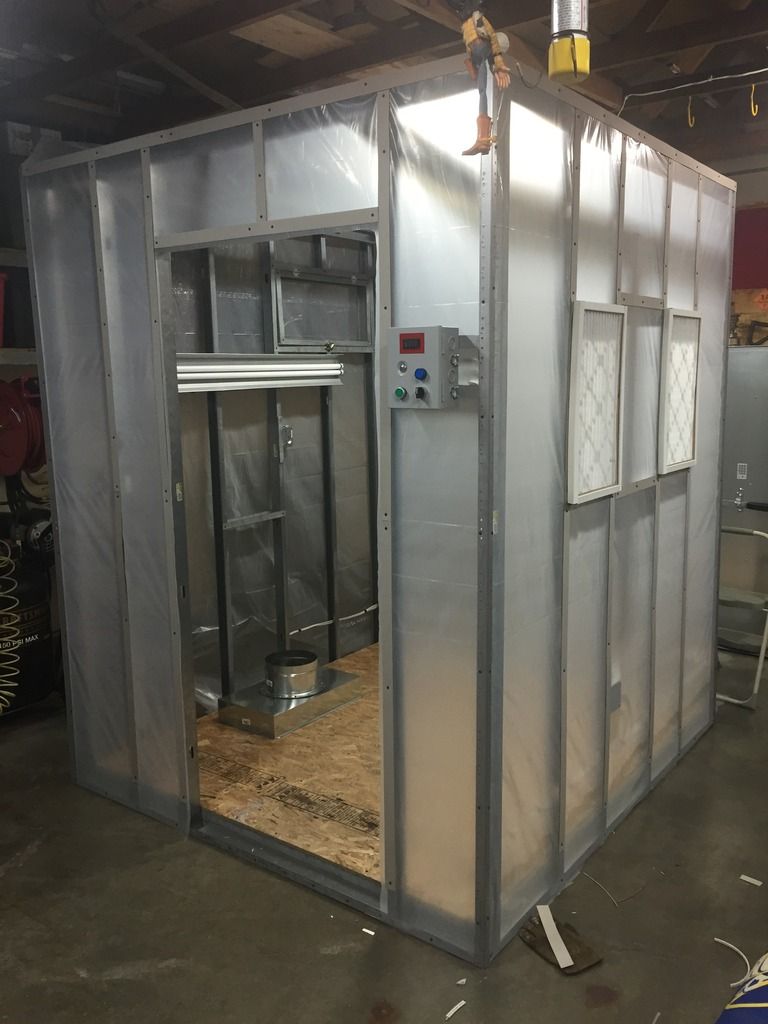
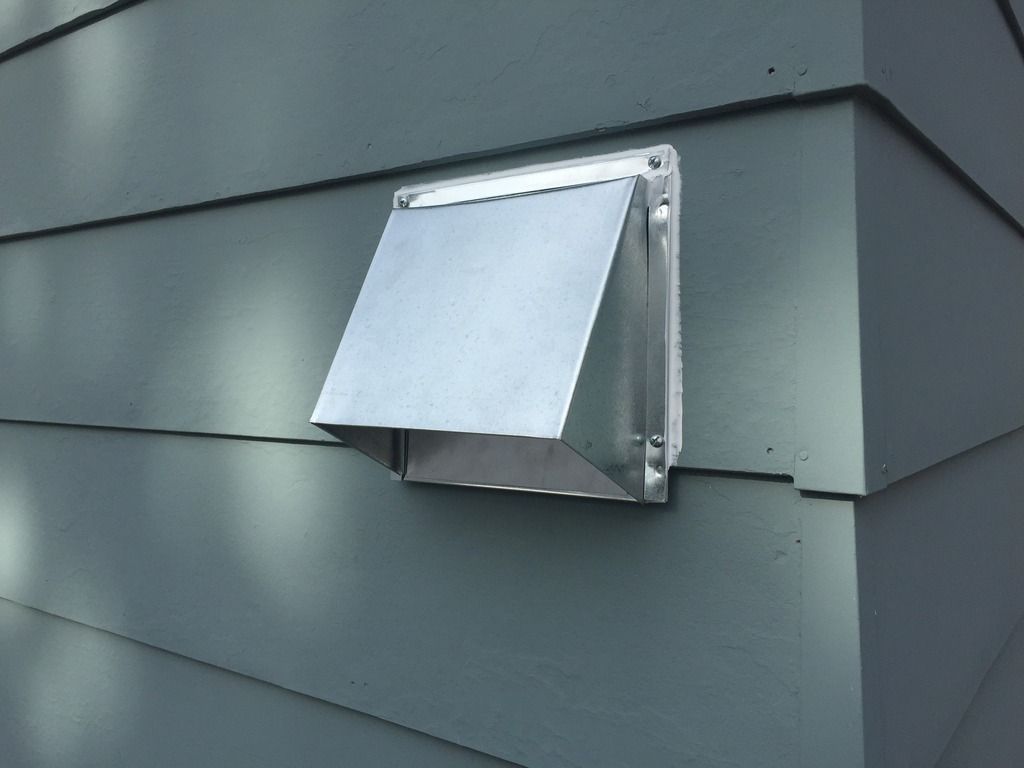
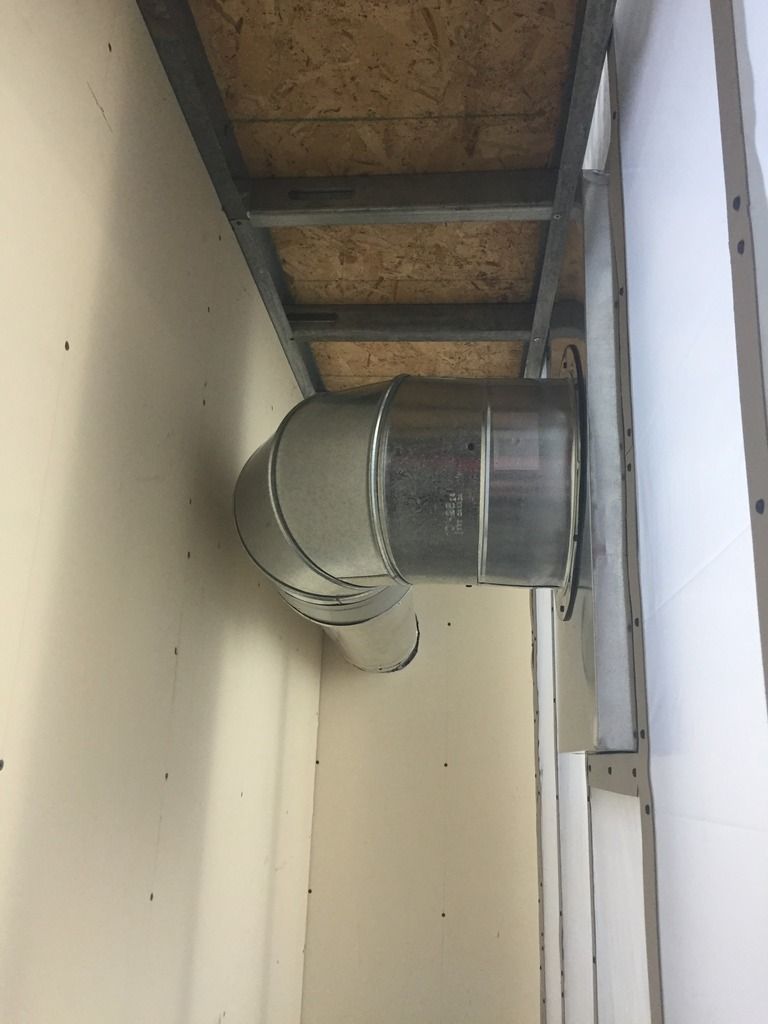
Final assembly included hanging of the door, mounting the exterior vent, and connecting the ventilation ducting. Once full assembled, a final check was conducted. 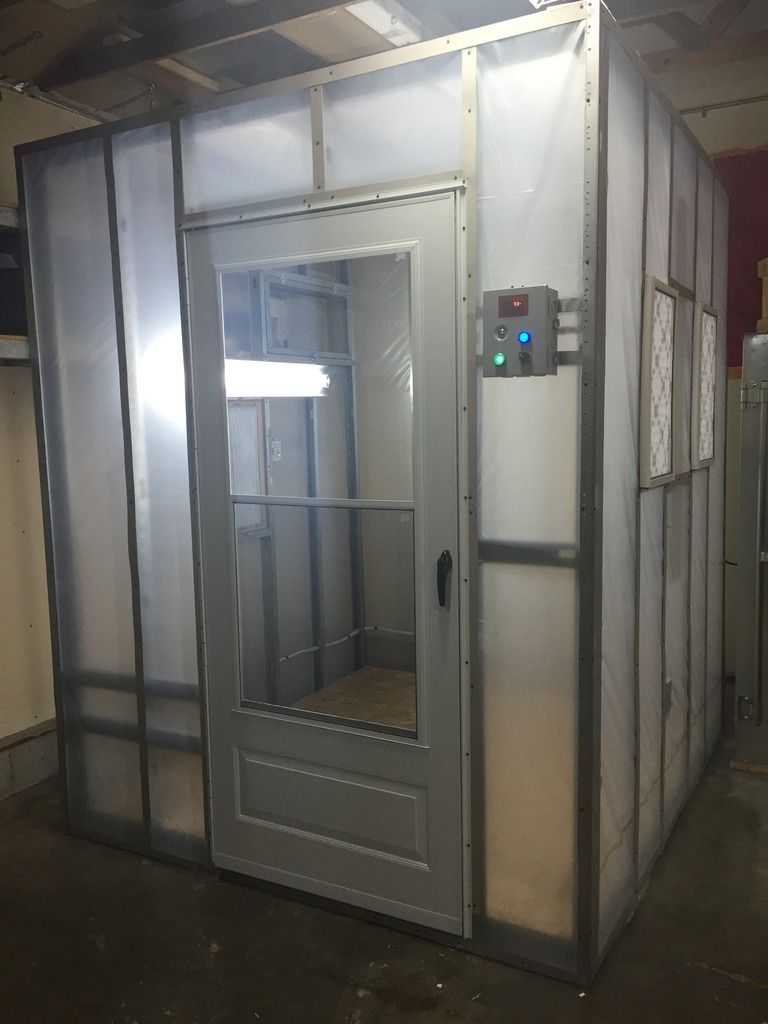
To date I have over 75 hours of run time on this spray booth. It has been a phenomenal unit, and helped me produce some beautiful finishes. I have changed the exhaust bank filter two times, and there is no sign of residual coating found inside the ventilation ducting. Moreover, my first run I covered the vent with a white pillow case, and there was no evidence that nay coating had escaped past the filter bank. I have used Cerakote and various aerosol spray paints in this booth. Thanks for looking, and I hope this helps others in their quest for a DIY spray booth. |
|
|
|
[#1]
Do you think your set up would hold up to lacquer? We build a few sets of cabinets a year, enough that we need a booth.
|
|
|
|
[#2]
Quoted:
Do you think your set up would hold up to lacquer? We build a few sets of cabinets a year, enough that we need a booth. You need a bigger booth. Are these............................EPA approved? This would be a concern if you have a business license. (I spray cars in my garage.) 
|
|
|
|
[#3]
Haha...EPA? Seriously?
It would absolutely hold up to the lacquer finishes...but, you would definitely want to reevaluate the size, and therefore the air flow requirements. Definitely a bit on the small side for large items...but, you could do it. |
|
|
|
[#4]
what's with the doll???
 
|
|
|
|
[#5]
Quoted: what's with the doll??? CHRIS |
|
|
|
[#6]
Woody? WOODY!!!!!
|
|
|
|
[#7]
I like your skills. Free Woody!
|
|
|
 Win a FREE Membership!
Sign up for the ARFCOM weekly newsletter and be entered to win a free ARFCOM membership. One new winner* is announced every week!
You will receive an email every Friday morning featuring the latest chatter from the hottest topics, breaking news surrounding legislation, as well as exclusive deals only available to ARFCOM email subscribers.

AR15.COM is the world's largest firearm community and is a gathering place for firearm enthusiasts of all types.
From hunters and military members, to competition shooters and general firearm enthusiasts, we welcome anyone who values and respects the way of the firearm.

Subscribe to our monthly Newsletter to receive firearm news, product discounts from your favorite Industry Partners, and more.
Copyright © 1996-2024 AR15.COM LLC. All Rights Reserved.
Any use of this content without express written consent is prohibited.
AR15.Com reserves the right to overwrite or replace any affiliate, commercial, or monetizable links, posted by users, with our own.


