FL, USA
|
Posted: 8/15/2010 7:54:56 PM EDT
I wanted to share my experience trying out Sponge Camo and found only a few references on some other forums so I thought I would post a how to.
Materials- Khaki, OD, and Oregano Rustoleum or Krylon Sponge-Walmart craft section buy the one that look like natural sponges. Gloves A likely victim I started by painting an old stock with a base coat of khaki. 
I then painted random but fairly evenly spaced stripes of OD over the khaki base coat. 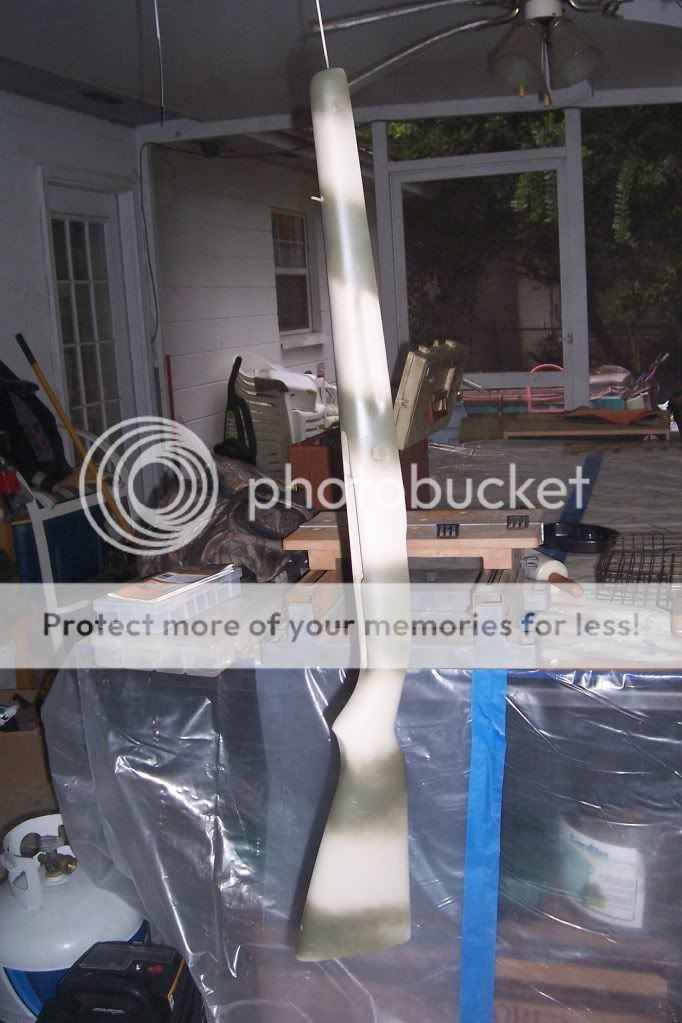
The next step was to spray some of the khaki onto a paper plate, then dip the sponge into the paint and dab the khaki paint onto the OD stripes. Dont go to heavy. 
The next step is to take the sponge then dip it in OD paint then dab the OD paint on the kahki. Again don't go to heavy. 
This is what you should have so far- not half bad but we're not done. The next step is to put some Oregano color over the whole thing again using the paper plate and the sponge. 
After the Oregano. 
I should have left well enough alone at this point but thought it needed some brown or dark tan so I started with a liitle Rustoleum Nutmeg and although its kind of close to the dark tan background in woodland Marpat I thought it was to light. I then followed up with some Rustoleum Chestnut-still to light. So––- I went with Rustoleum Flat Brown. It finished up a little busy but blends in well. 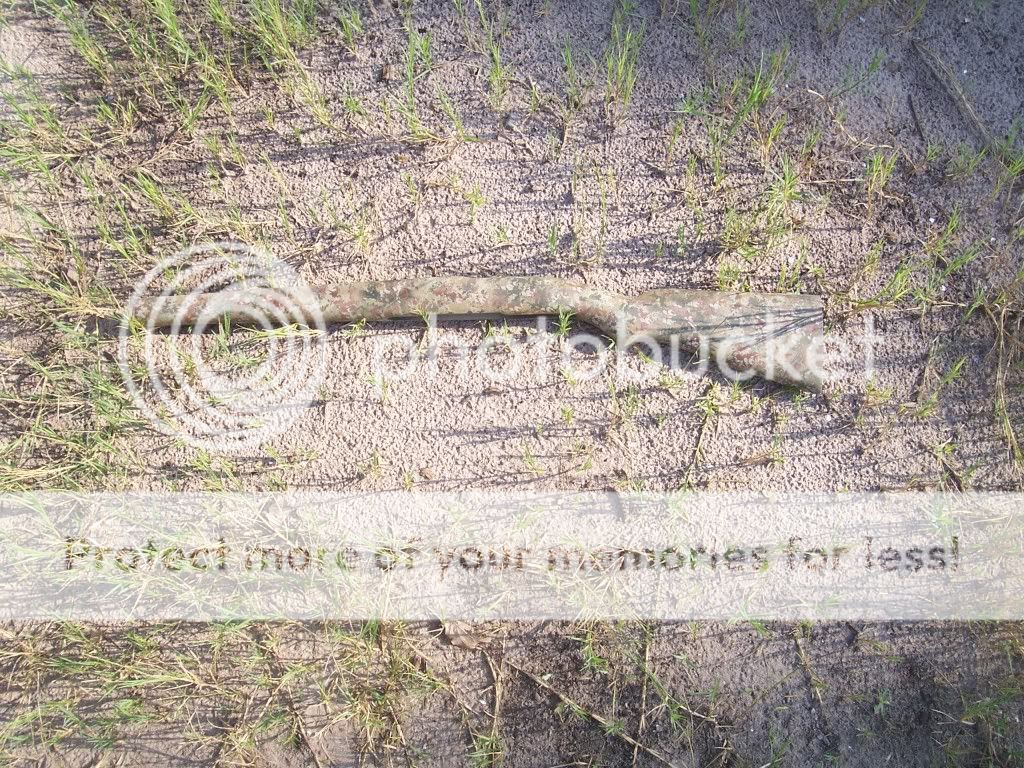

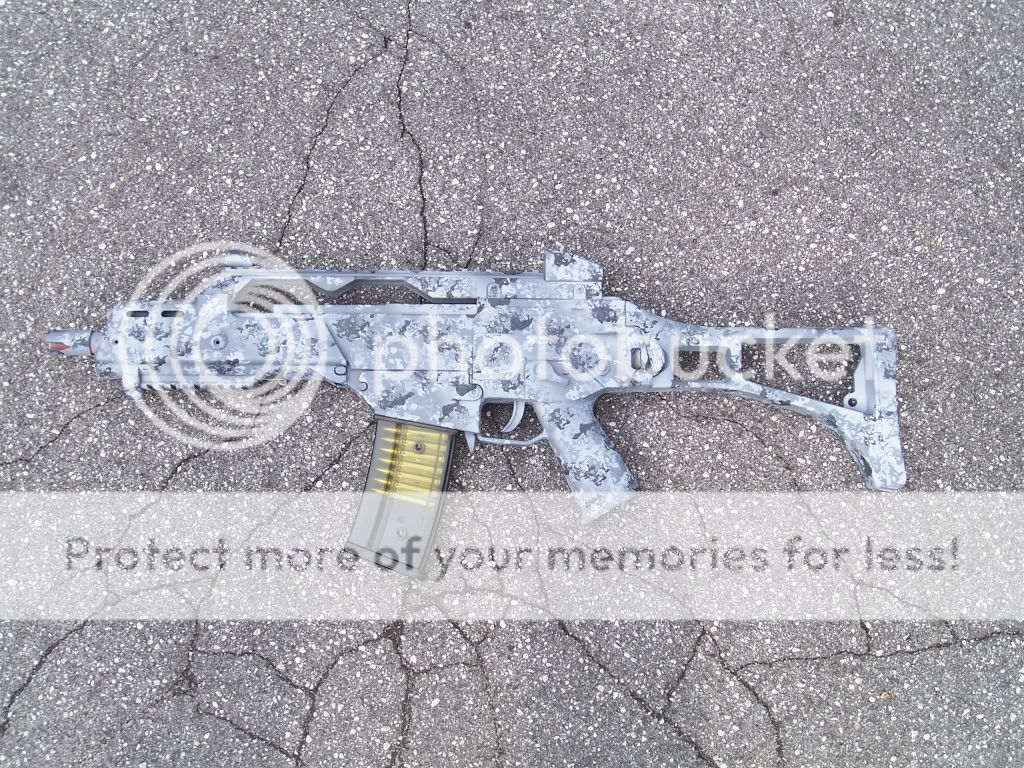
Not bad for a first attempt. I liked the overall effect and thought that for a rattle can job it looks outstanding. For my next attempt I decided to try an urban type camo consisting of Rustoleum light gray, medium and dark gray primer. The victim is my son's old airsoft gun. 
Here is the finished product. It seems that using three colors keeps the pattern a little more open and defined. 
I was wondering if it would be possible to use this technique with Duracoat. I've painted with stencils and will continue to do so but this seems like alot of fun and it's not permanent. The next victim will be one of the ARs. |
|
|
|
[#1]
tag
|
|
|
|
|
[#2]
Really nice work! Can we get some closeup pics of both?
|
|
|
|
USA
|
[#3]
Duracoat has to be sprayed.... so the sponge may not work
|
|
|
FL, USA
|
[#4]
I'll try to get some close up pics in the next day or so.
|
|
|
KY, USA
|
[#5]
I like that! Very good job.
Seems like you have captured the best part of the digital camo patterns, without capturing the worst part. They are just so ugly! I know this is a subjective observation, but I do prefer patterns that work well at a distance, and are not ugly close up. I also like patterns that are some what distinctive close up, while working well at a distance, not always easy to accomplish. |
|
|
AL, USA
|
[#6]
That looks really good. Thanks for sharing.
|
|
|
FL, USA
|
[#7]
Thanks for the compliments. I'm glad I'm not the only one who thinks that the sponge camo comes out looking a little like digital camo.
|
|
|
|
[#8]
Will try that. Thanks!
|
|
|
|
FL, USA
|
[#9]
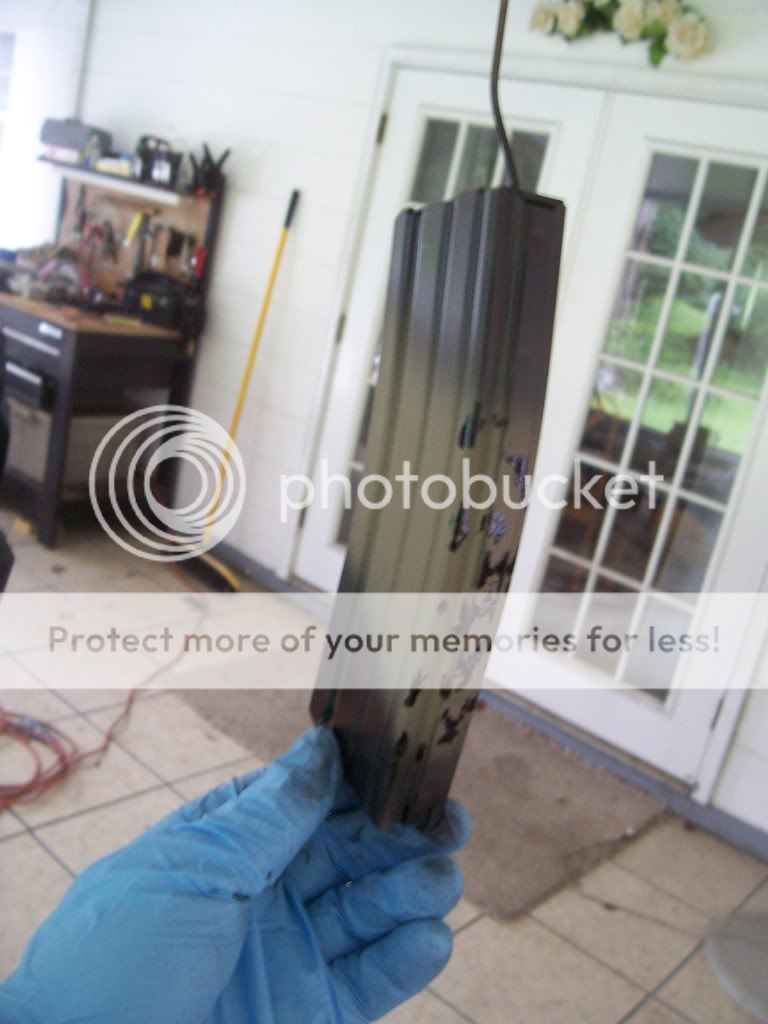
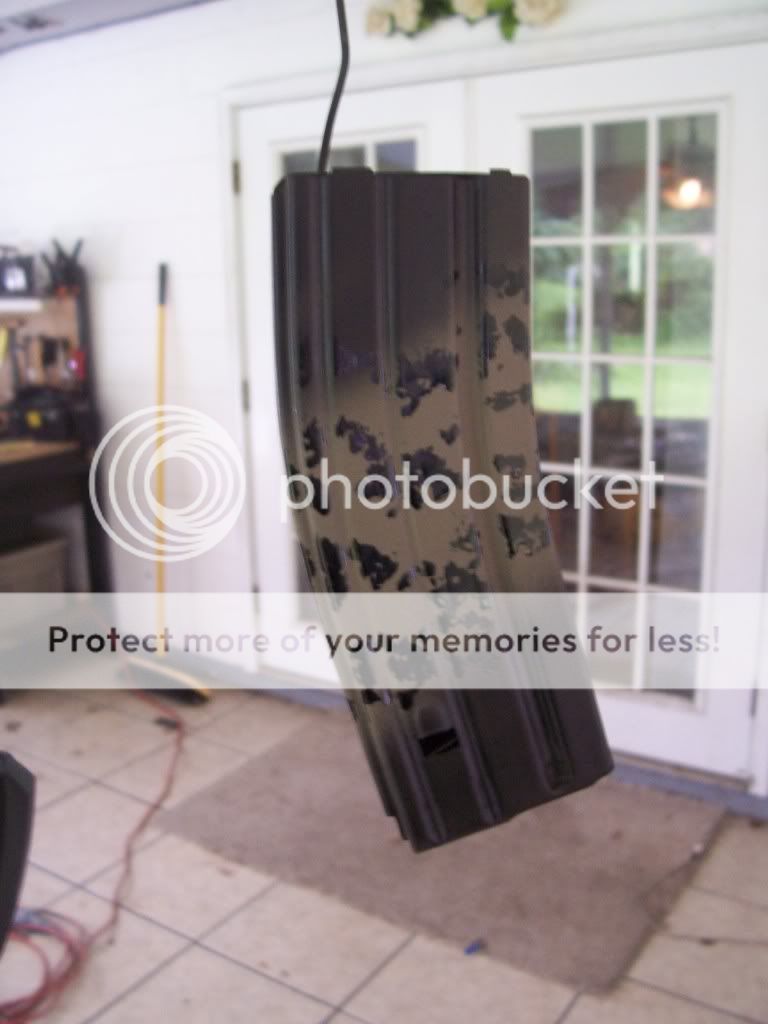
The next project is my Bushmaster A2 upper carbine. I wanted to try a pattern that would look like woodland Marpat. This pattern works really well here in North Florida plus I like the way it looks.
Rifle de-greased with brake cleaner. Parts that I wanted to stay black are masked off with blue painters tape. 
Base coat of Rustoleum Nutmeg and OD. 
Base coats done, ready for the sponge. 

Tan sponge coat done. 

OD sponge coat done. 
Black sponge coat done. 

Khaki sponge coat done. Finish with 2-3 coats of matte clear. 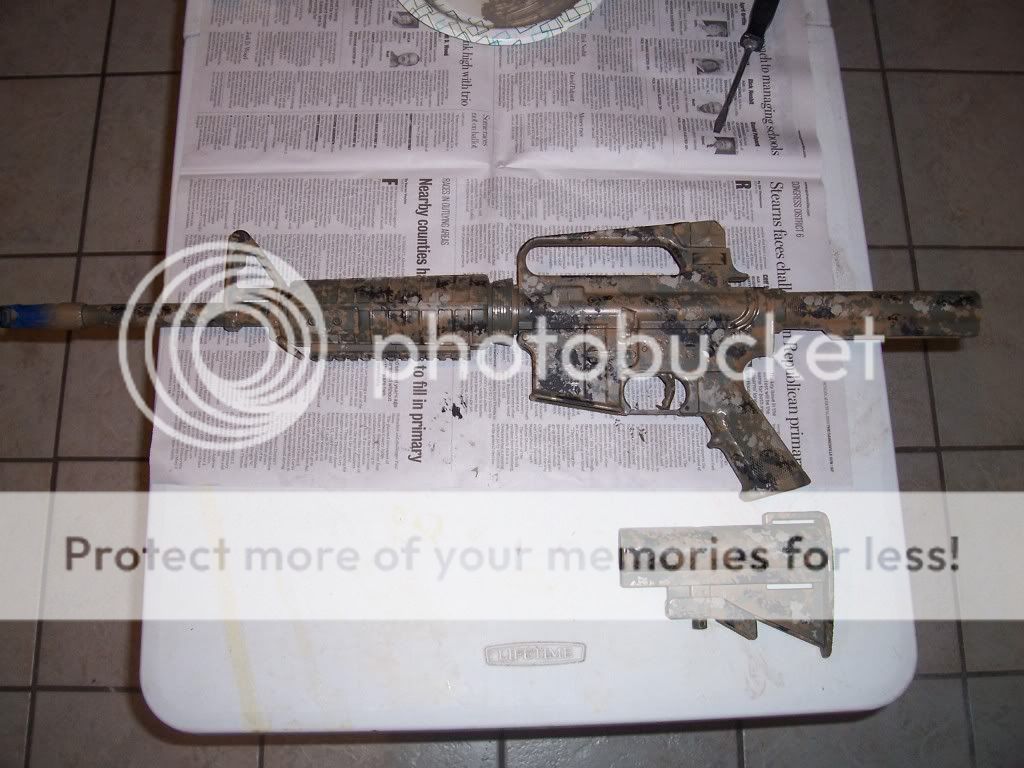
Against Marpat. 
Finished- 
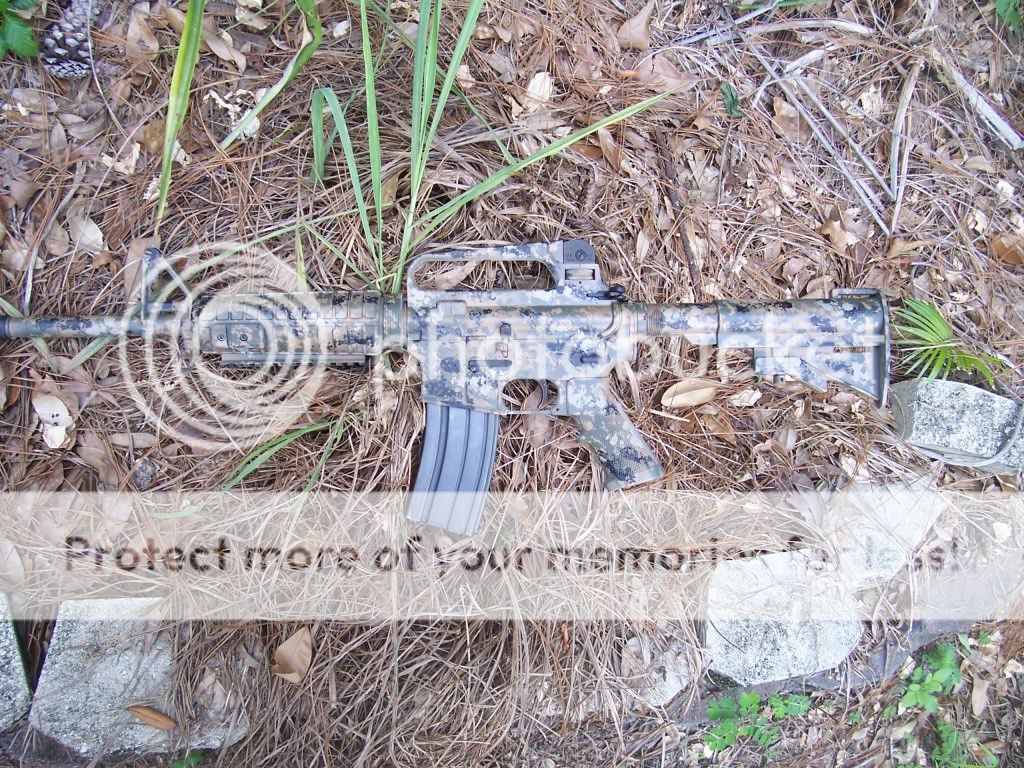


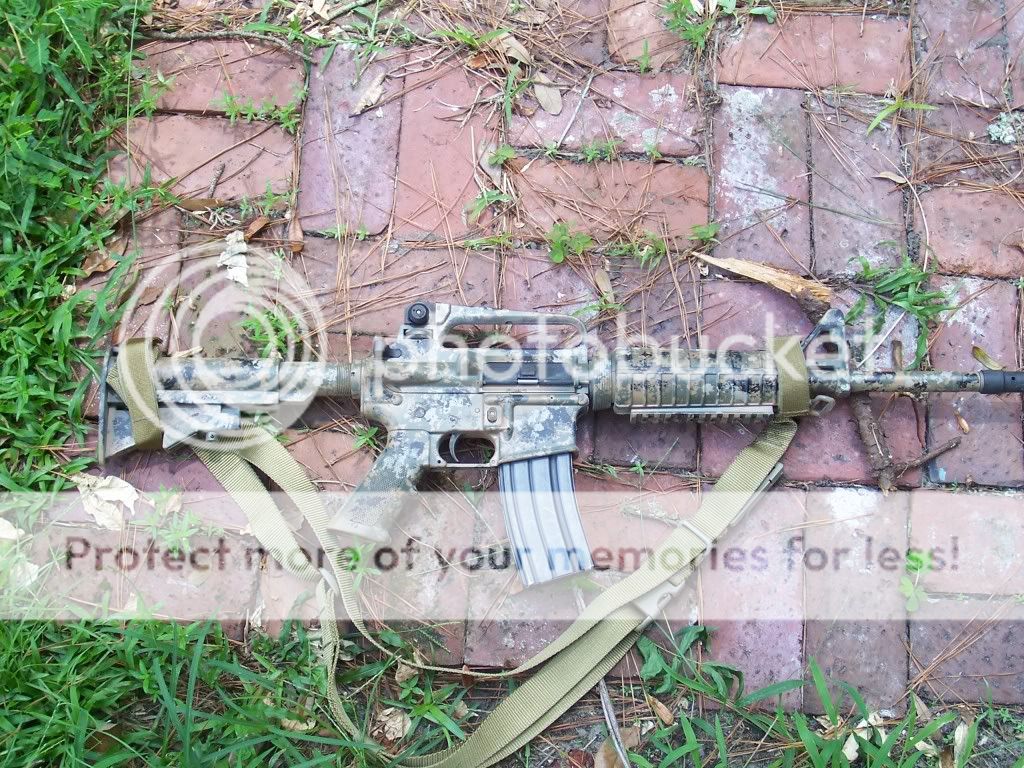
I’d like to see what everyone else is able to do with this technique. It goes very fast, looks cool and actual time from start to finish aside from waiting for the paint to dry is about an hour. |
|
|
|
[#10]
Very nice job, thanks for sharing, will have to give it a try.
|
|
|
|
AL, USA
|
[#12]
You'd better stop right now. That MARPAT look alike is awesome. I'm about to trade in my pine needles for a couple of sponges.
|
|
|
|
[#13]
I've been trying to figure out how to do it with duracoat, but things havent worked too well. I know some guys do it, but the problem I have is that duracoat dries so fast that you have to spray the sponge directly and then it builds up a texture on the gun. Maybe if you just poured out the duracoat on a plate it would work?
|
|
|
|
FL, USA
|
[#14]
What if you mixed out like a tablespoon of Duracoat and poured it on the plate then dipped the sponge the same way I did it with the rattlecan, or mix the Duracoat in an airbrush mixing jar then poured some directly on the sponge? If I get time this weekend I'll try it out on a mag or two I have already duracoated.
|
|
|
KY, USA
|
[#15]
I don't know if Duracoat will respond well to the sponge treatment or not. I do know that you could paint the first 2 colors using Duracoat, and then apply the sponge treatment with Krylon over the Duracoat. That way you could alter the appearance and some of the color to match the season.
Flexibility is nice. |
|
|
VA, USA
|
[#16]
Just tried it on my a all wood rifle for my son. With practice i may do my AR. I've been thinking about something like this. Thanks for the pics.
|
|
|
|
[#17]
I like it, have you thought of doing the same process in desert camo colors?
|
|
|
|
|
[#18]
Just tried this out on my rifle. OD, Brown, and Khaki. Not too bad. I'll post pics when it's dry. Great write up.
|
|
|
|
|
[#19]
I'm doing this to my wifes Rem870. Yea, I had to try it out on something....LOL
Right now I just have the Khaki base coat on it. I will let is set up for the night and will do another color after work tomorrow. I also have OD and black right now. I may pick another color to splice into the color but haven't decided which color yet. I will post up pics as I get it done. |
|
|
|
HI, USA
|
[#20]
should try use some mini skull stamps...
|
|
|
|
[#21]
I'm gonna try this on my 7mm Rem Mag pretty soon. Looks good. Gonna do it in Khaki and brown though for a desert scheme. Maybe throw in a Mando skull on the stock. Thanks for the pics, looks great.
|
|
|
|
|
[#22]
Amazing. Looks fantastic.
|
|
|
|
MS, USA
|
[#23]
Great job. Looks amazing.
|
|
|
FL, USA
|
[#24]
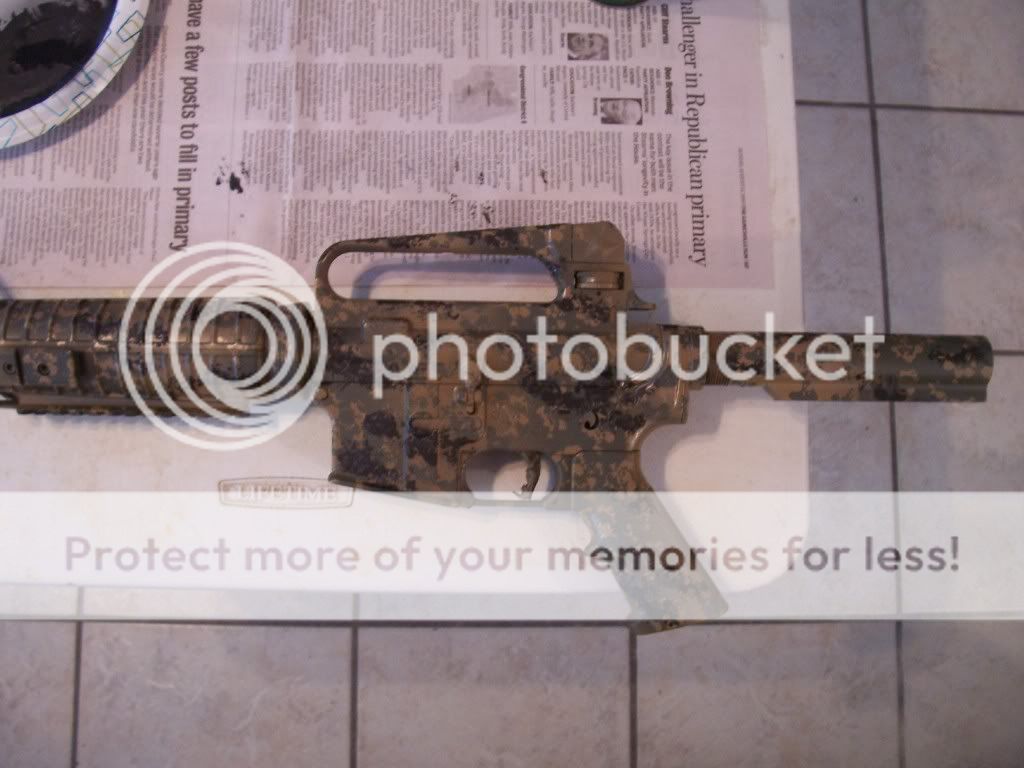
Well I tried the sponge camo technique with Duracoat and it works!
I started with a AR mag that I had previously coated Duracoat Magpul FDE, that had seen some hard use. 
The next step ws to spray the next color on the mag. In this case I used HK black because that's what I was spraying for another project and didn't want to mix up another batch of paint for just an experiment. 
The next step was to pour some of the black from the mixing jar onto a paper plate and the get a small piece of sponge dip it in the paint and wearing gloves dab the paint on your work piece the same way you would do it with Krylon. In this case putting the black on the FDE. 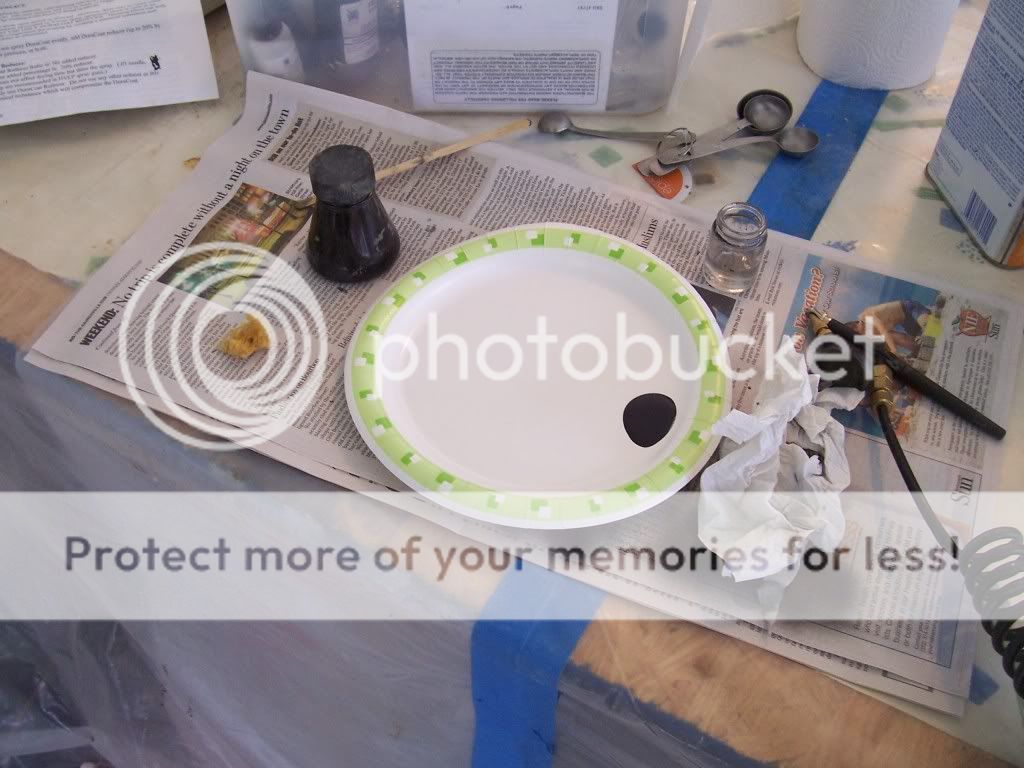
The next step is to mix a small amount of your first color, in this case Magpul FDE, in the mixing jar and pour some onto the plate. Using the sponge put the FDE on the black. 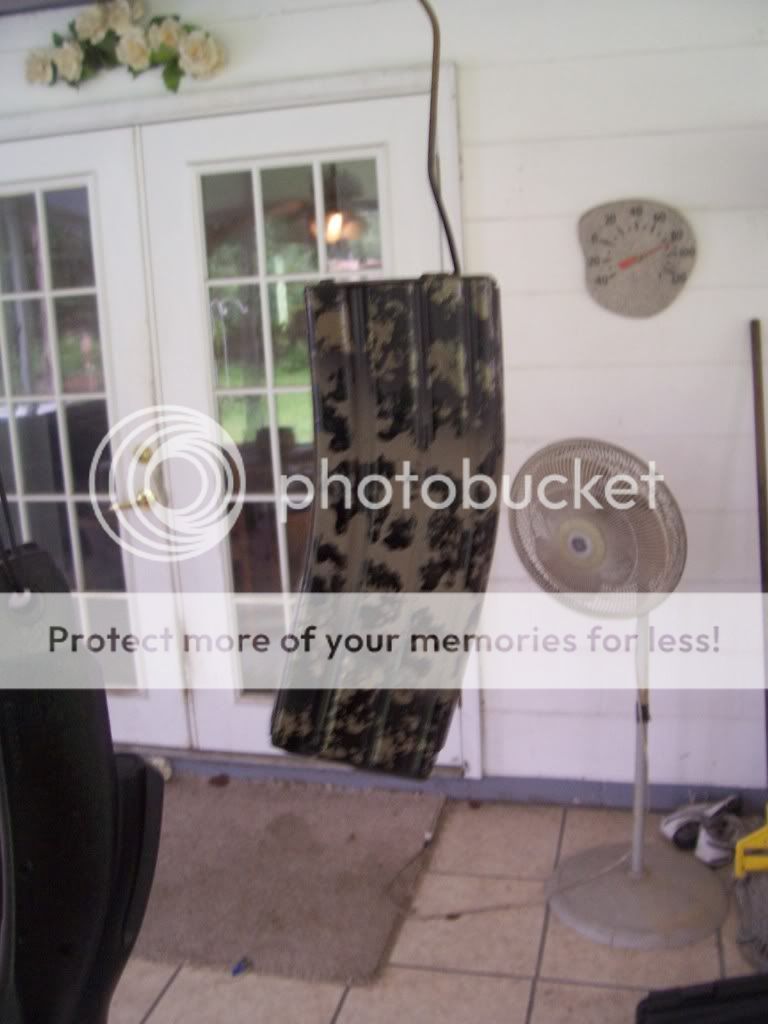

This process does work with Duracoat which is cool. My next project is going to be to use this process on my Rem 700 deer rifle or if I'm feeling brave my 20" AR HBAR. |
|
|
|
[Last Edit: David_ESM]
[#25]
Did this today. Krlyon Camo Khaki + Brown. The lighter brown/darker khaki is 1/3 Brown + 2/3 Khaki.
Marlin XS7 .308 Claw sling to match 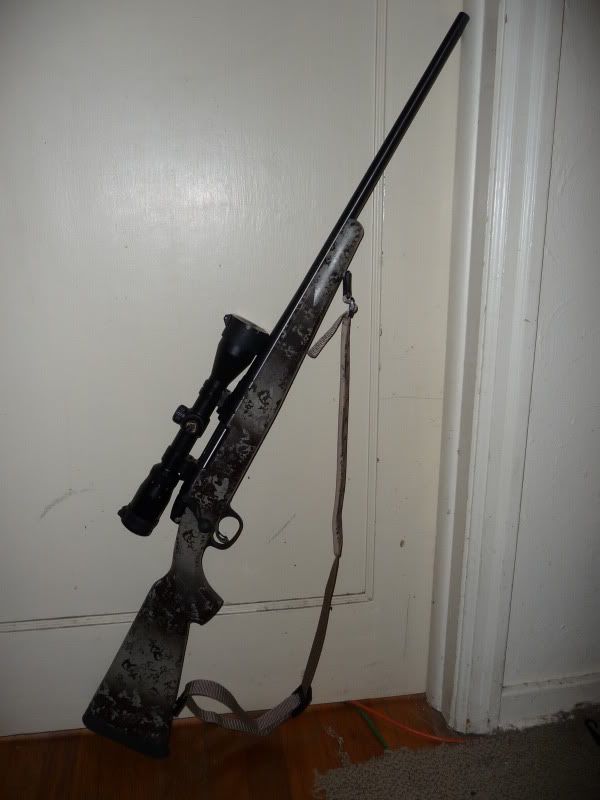 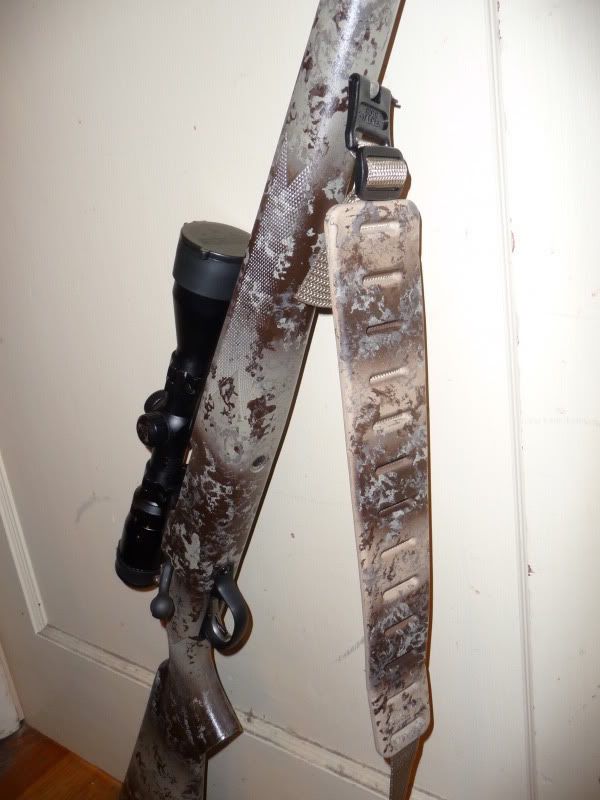
|
|
|
|
FL, USA
|
[#26]
I like it. My Rem 700 is going to get the treatment next. I want to do a fall camo with tan/brown/grey.
|
|
|
|
[#27]
Here is Jennifer's(Greg3'sGal) Rem870 that I did.
Thread here - http://www.ar15.com/forums/topic.html?b=6&f=19&t=322934 
jrn156 thanks for making it easy! |
|
|
|
AL, USA
|
[#28]
Yep, I definently like this sponge thing...
|
|
|
|
[#29]
Little sloppy but its my first shot at painting.


|
|
|
|
TX, USA
|
[#30]
This is awesome, I have heard about the sponge but I did not know how to apply it. It gonna get done soon.
|
|
|
|
[#31]
Originally Posted By beenaround:
Little sloppy but its my first shot at painting. http://i3.photobucket.com/albums/y100/beenaround/DSC_0660.jpg http://i3.photobucket.com/albums/y100/beenaround/DSC_0662.jpg http://i3.photobucket.com/albums/y100/beenaround/DSC_0661.jpg http://i3.photobucket.com/albums/y100/beenaround/DSC_0665.jpg Dude, be proud! That really looks good. Are you going to do the lower? |
|
|
|
FL, USA
|
[#32]
Very cool- a tan/brown desert type is going to be my next project.
|
|
|
|
[#33]
Thanks- im a little nervous about doing the lower since its registered I dont want to mess it up any more than it already is. But the paint is starting to go, you cant really see it but that lower has been used fairly well between suppressed and un-suppressed use. If I get a little more practice I might re-do the whole rifle.
|
|
|
|
|
[#34]
Originally Posted By beenaround:
Thanks- im a little nervous about doing the lower since its registered I dont want to mess it up any more than it already is. But the paint is starting to go, you cant really see it but that lower has been used fairly well between suppressed and un-suppressed use. If I get a little more practice I might re-do the whole rifle. Don't worry about messing up the lower. It won't happen. I have painted my Colt SP1 SBR lower so many times. Right now it's back to it's birthday suit. I had painted it with Krylon and every time I strip it clean I use Aircraft paint stripper bought at AutoZone. Just spray down and the paint bubbles right up in a matter of mins. It falls right off and for the little cracks I use a toothbrush and it comes right out/off. It has NEVER messed up the original finish. Spray away! |
|
|
|
|
[#35]
Originally Posted By Greg3:
Originally Posted By beenaround:
Thanks- im a little nervous about doing the lower since its registered I dont want to mess it up any more than it already is. But the paint is starting to go, you cant really see it but that lower has been used fairly well between suppressed and un-suppressed use. If I get a little more practice I might re-do the whole rifle. Don't worry about messing up the lower. It won't happen. I have painted my Colt SP1 SBR lower so many times. Right now it's back to it's birthday suit. I had painted it with Krylon and every time I strip it clean I use Aircraft paint stripper bought at AutoZone. Just spray down and the paint bubbles right up in a matter of mins. It falls right off and for the little cracks I use a toothbrush and it comes right out/off. It has NEVER messed up the original finish. Spray away! Carb cleaner and a pressure washer take it off pretty damn fast too. 
|
|
|
|
OR, USA
|
[#36]
Here's my shot at it


wg |
|
|
FL, USA
|
[#37]
A friend's Rem 700- need a better camera
Before 
After 

|
|
|
|
[#38]
WallyGator and Jrn156,
Both of thoes look really nice! Great work both of you. |
|
|
|
TX, USA
|
[#39]
It is definitely easy, and I think it was decent results. I did this Remington 597 as a test. Rustoleum camo Tan and Brown base and initial layers, then a Krylon Italian Olive, thinking that the camo OD would be too dark. I was looking for a largely brown and tan result, not too dark at all Then I sprayed it with a clear flat coat to give it a little protection, and in case the Italian Olive has any shine. My sponge was just a standard kitchen sponge, ripped up and tried to make it rougher by scraping it on a knife. Next time I will get a natural one that has more voids and irregularities. Nevertheless it is pretty easy to get a random result by varying pressure and amount of paint on the sponge, and you can even scrub a little, like drybrushing a model. Sorry no outdoor pics, this is my nighttime screwing around project
I had done the tan base a few months ago, thinking of doing a netting wrap job, but never for around to it. Sponge takes less equipment My only problem now is I misplaced the take-down pins and bolt handle
Tan base: 
Brown stripes: 
Brown sponge: (need to blend the edges of the brown stripes more) 
Tan sponge: 
Finished with green sponge: 

|
|
|
AR, USA
|
[Last Edit: b_rogers]
[#40]
I did this earlier in about an hour. Screw waiting for it to dry, i just kept going.. Went a little dark but i like it. I learned from my mistakes..less is more with the darker shades.
Direct sunlight will dry the krylon REAL fast. Thanks to the OP and contributors for giving me the guts to try it. Brent 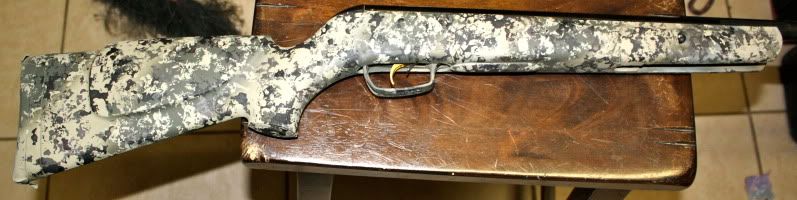

|
|
|
|
[Last Edit: Greg3]
[#41]
Originally Posted By b_rogers:
I did this earlier in about an hour. Screw waiting for it to dry, i just kept going.. Went a little dark but i like it. I learned from my mistakes..less is more with the darker shades. Direct sunlight will dry the krylon REAL fast. Thanks to the OP and contributors for giving me the guts to try it. Brent http://i42.photobucket.com/albums/e344/b_rogers/IMG_2056.jpg http://i42.photobucket.com/albums/e344/b_rogers/IMG_2057.jpg Nice job! Looks almost like the Rem870 that I did. |
|
|
|
AR, USA
|
[Last Edit: b_rogers]
[#42]
Originally Posted By Greg3:
Originally Posted By b_rogers:
I did this earlier in about an hour. Screw waiting for it to dry, i just kept going.. Went a little dark but i like it. I learned from my mistakes..less is more with the darker shades. Direct sunlight will dry the krylon REAL fast. Thanks to the OP and contributors for giving me the guts to try it. Brent http://i42.photobucket.com/albums/e344/b_rogers/IMG_2056.jpg http://i42.photobucket.com/albums/e344/b_rogers/IMG_2057.jpg Nice job! Looks almost like the Rem870 that I did. Thanks! Your photos and tutorial were my inspiration. I need to learn when to stop applying paint! Brent |
|
|
|
[#43]
Nice work guys, I've never seen this done before. Now lets see someone do the ATACS camo, I think this method may work to get the random paterns and overlapping colors.

|
|
|
|
|
[#44]
Originally Posted By b_rogers:
Originally Posted By Greg3:
Originally Posted By b_rogers:
I did this earlier in about an hour. Screw waiting for it to dry, i just kept going.. Went a little dark but i like it. I learned from my mistakes..less is more with the darker shades. Direct sunlight will dry the krylon REAL fast. Thanks to the OP and contributors for giving me the guts to try it. Brent http://i42.photobucket.com/albums/e344/b_rogers/IMG_2056.jpg http://i42.photobucket.com/albums/e344/b_rogers/IMG_2057.jpg Nice job! Looks almost like the Rem870 that I did. Thanks! Your photos and tutorial were my inspiration. I need to learn when to stop applying paint! Brent Glad to have helped out. LOL, it's hard not to apply paint. Once you start you want to keep having fun with it. |
|
|
|
|
[#45]
Originally Posted By till44:
Nice work guys, I've never seen this done before. Now lets see someone do the ATACS camo, I think this method may work to get the random paterns and overlapping colors.http://militarygear.com/wp-content/uploads/2009/11/atacs-new-camo-pattern-300x300.jpg Geesh, That looks like a nighmare to try to paint. Water transfers would be nice and easy for that pattern. |
|
|
|
AR, USA
|
[#46]
That camo looks like it could be done, maybe by "ragging"
Theres a ton of faux finish techniques out there. |
|
|
FL, USA
|
[#47]
A friends muzzleloader


|
|
|
|
[#48]
Originally Posted By Greg3:
Originally Posted By till44:
Nice work guys, I've never seen this done before. Now lets see someone do the ATACS camo, I think this method may work to get the random paterns and overlapping colors.http://militarygear.com/wp-content/uploads/2009/11/atacs-new-camo-pattern-300x300.jpg Geesh, That looks like a nighmare to try to paint. Water transfers would be nice and easy for that pattern. ATACS Water Transfer Just a cell phone pic of when I first painted the rifle back in August. 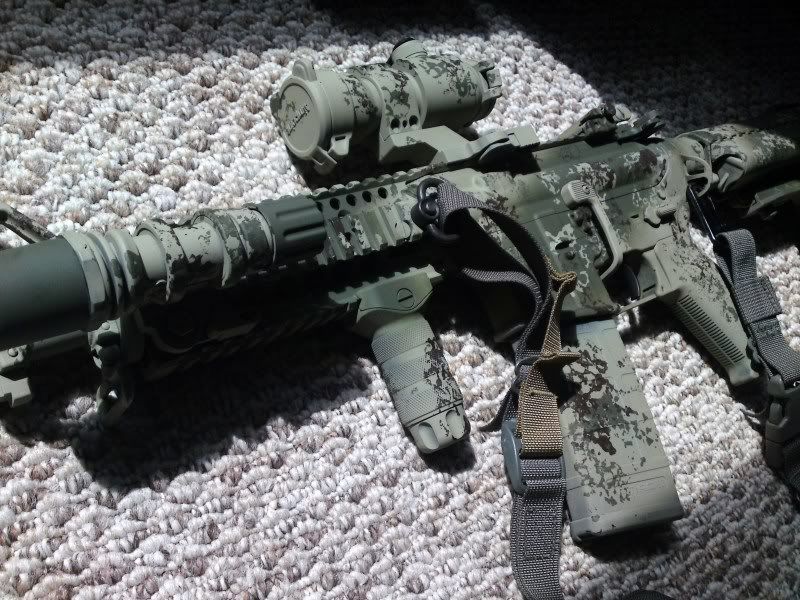
|
|
|
|
TX, USA
|
[#49]
i really like this one is it a spounge job?
|
|
|
ITA
|
[#50]
awsome! looks like a great way to make the Italian camo pattern!
|
|
|
 Win a FREE Membership!
Sign up for the ARFCOM weekly newsletter and be entered to win a free ARFCOM membership. One new winner* is announced every week!
You will receive an email every Friday morning featuring the latest chatter from the hottest topics, breaking news surrounding legislation, as well as exclusive deals only available to ARFCOM email subscribers.

AR15.COM is the world's largest firearm community and is a gathering place for firearm enthusiasts of all types.
From hunters and military members, to competition shooters and general firearm enthusiasts, we welcome anyone who values and respects the way of the firearm.

Subscribe to our monthly Newsletter to receive firearm news, product discounts from your favorite Industry Partners, and more.
Copyright © 1996-2024 AR15.COM LLC. All Rights Reserved.
Any use of this content without express written consent is prohibited.
AR15.Com reserves the right to overwrite or replace any affiliate, commercial, or monetizable links, posted by users, with our own.


