AL, USA
|
Posted: 2/7/2007 1:23:58 PM EDT
[Last Edit: bjwar10]
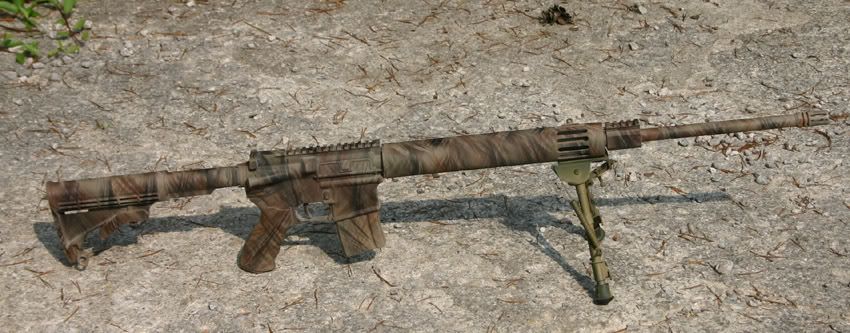
Didn't have much to do and got the urge to do some painting. Base coat is Krylon khaki, pine needles applied and then striped with OD and brown krylon.
AR10 detachable carry handle...actually the CH base coat is norrell's tan FWIW...   Surefire G2...  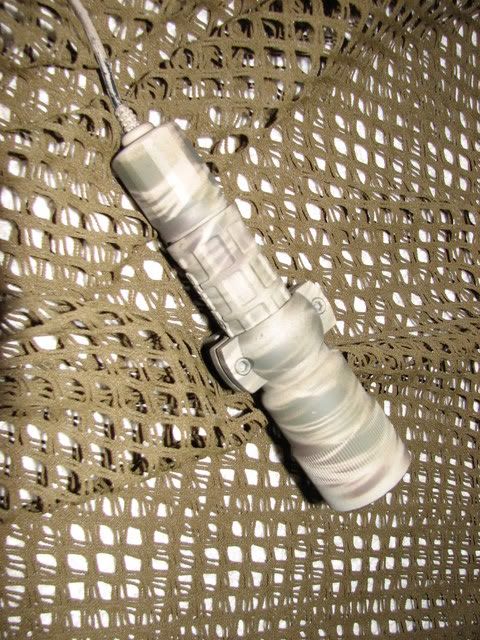 Harris bipod... 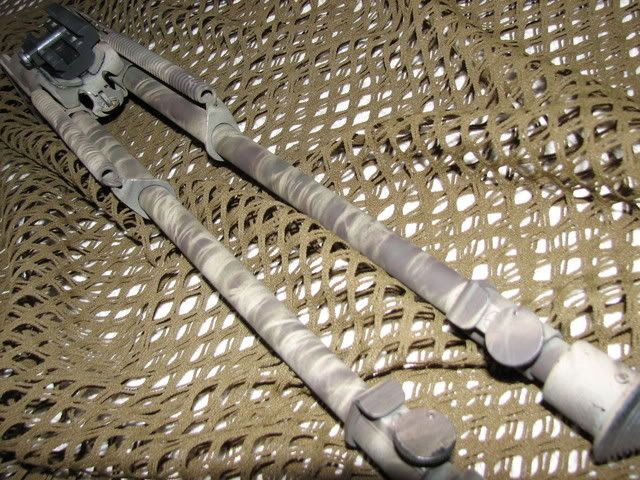 
|
|
|
|
[#1]
very nice. Is it going on that same rifle right? I am going to take the plunge one of these days here and do the needlework over my duracoat FDE
How big of needles are these? I was thinking we had them around here but they are all evergreens |
|
|
|
AL, USA
|
[#2]
Correct, all going on my AR10. The needles I'm using are 4"-6" long. |
|
|
|
CO, USA
|
[#3]
That looks good. You should do a pictorial of the process!
|
|
|
|
[#4]
BIG +1 |
||
|
|
AL, USA
|
[#5]
As soon as I can catch on off day and find something else to paint, I'll do that. |
|
|
|
|
[#6]
I wouldnt mind seeing your process either. How about a pic of the complete rifle with all your new stuff? |
|||
|
|
AL, USA
|
[#7]
Honestly, the light rarely gets used. Occasionally, I'll have to go check the fence line at night and I'll put it on but otherwise it's one of those things that I have "just in case". The bipod is another item that I only use when the grass/cover is too high to allow for prone shooting. I like to extend the legs all the way and sit...very stable platform. I doubt I'll get to it Monday, but Friday's looking pretty good for some painting and picture taking... |
|||
|
|
AL, USA
|
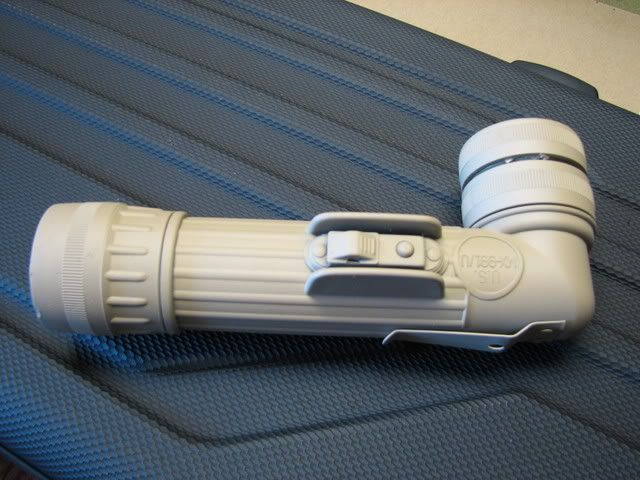
[#8]
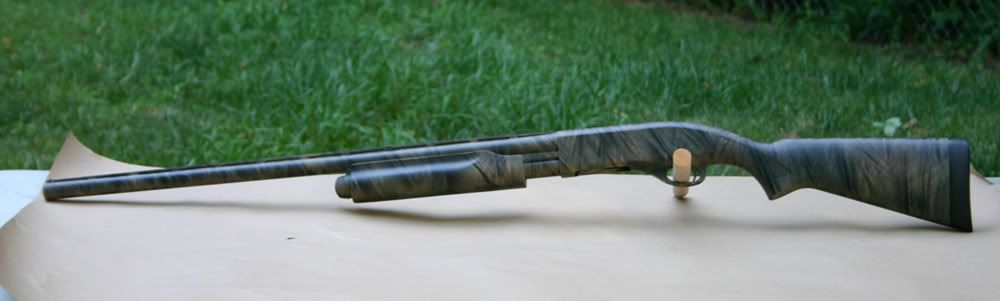
As requested here is a brief tutorial with a few pics. I found an old flashlight that I thought could use some camo. Unfortunately, I did not have any "coyote" type color to use as a base coat so I had to use krylon khaki. I degreased with a bit of brake cleaner and applied the base coat.
 I got my well-used pine needles and put them on the flashlight. No real technique to this. I do try to have the majority of them running perpendicular to the flashlight but that is totally personal preference. For this side of the light, I chose to make the needles rather thick so that very little paint would transfer through...yes, there is a flashlight under there. 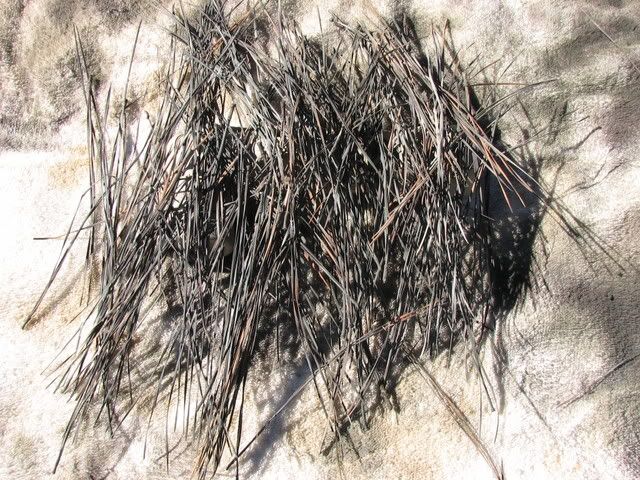 I waited about 5 minutes before removing the pine needles. You will notice the "dots" of paint that got through causing the lines to be a little blurred. I was holdong the can 6"-8" from the pine needles. The good news is that if you use too many needles and you want more color, you can put some needles back on and add a little more color if you want. Personally, I've found that I prefer about half that many needles. 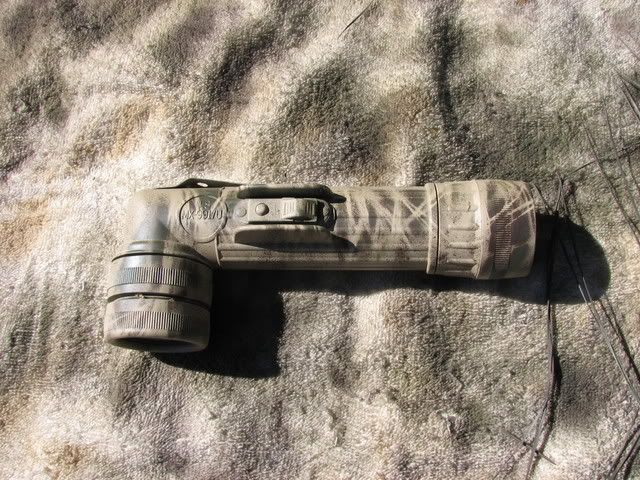 I flipped the flashlight over and got ready to do the other side. This time I only used about half the needles that I used before. I also held the can a little closer to the flashlight...about 3"-4". 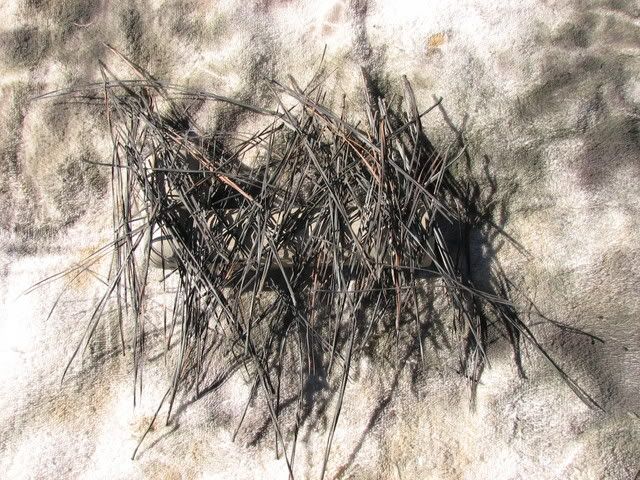 After three stripes of each color...notice the sharper lines and more color transfer. 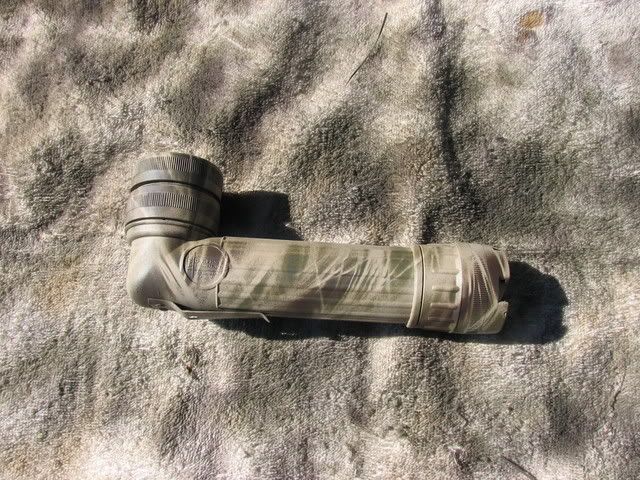 Here is part of my rifle where I was able to use a darker base coat (Norrell's tan) and then applied three colors over it (khaki, OD, brown).   I don't have pics of them, but I made a few practice runs on cardboard using OD as a base coat with khaki and coyote over it and it looked pretty cool but too dark for central AL. I also tried using #57 stone instead of pine needles. I laid the rocks in a stripe pattern of sorts. This gave a flectarn-type look. Pretty neat but again, not exactly what I wanted. Of all the advice I could give, I would say the best thing to do is cut out some cardboard in the shape of your rifle (or whatever it is you want to paint) and practice. Try some different patterns. Place the templates in the woods and on the ground and see how well they blend, etc. Also be creative...I tried laundry bags, gutter guards, leaves and sticks, combos of all the above and all gave neat patterns. I just ended up liking the pinestraw the best. |
|
|
TX, USA
|
[#9]
Sweet tutorial bjwar10. Think I'll give it a try with DuraCoat. I'll post pics.
|
|
|
KY, USA
|
[#10]
Thanks for posting.
Good info. |
|
|
|
[#11]
thanks for showing us your technique. Very nice work
|
|
|
|
|
[#12]
Sweet !!!! Thank's for sharing your technique !!!
|
|
|
|
|
[#13]
Good job. Looks like a new project in my future.
Off topic, but what scope are you running? |
|
|
|
AL, USA
|
[#14]
Nightforce NXS 2.5-10x24 |
|
|
|
IL, USA
|
[#15]
Bump, interesting technique
Sweet Baby Jesus that looks good! At first I thought the carry handle was done in Multicam! |
|
|
|
[#16]
Very nice. Will have to try something like that one of these days.
|
|
|
|
|
[#17]
Tagorama. Gonna have to try this. Thanks BJ
|
|
|
|
AL, USA
|
[#18]
My Form 4 finally came back so I had to get my pine needles back out one more time... 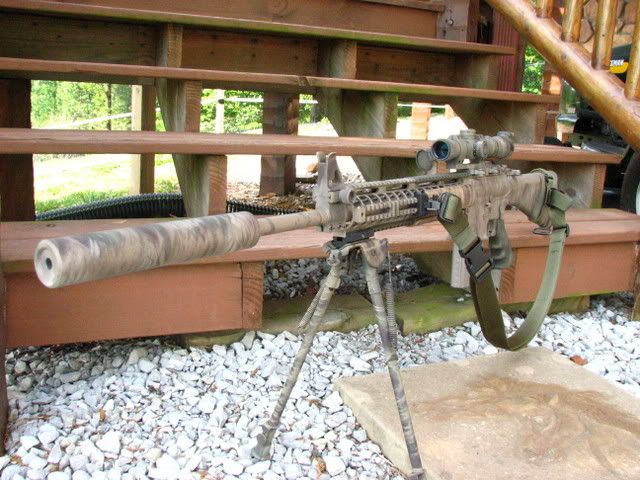 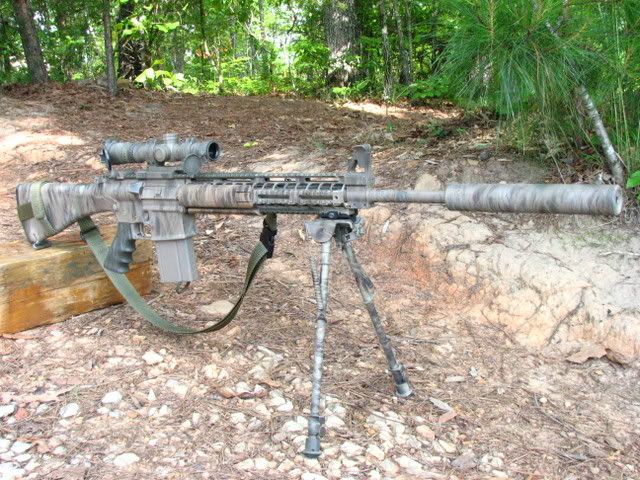 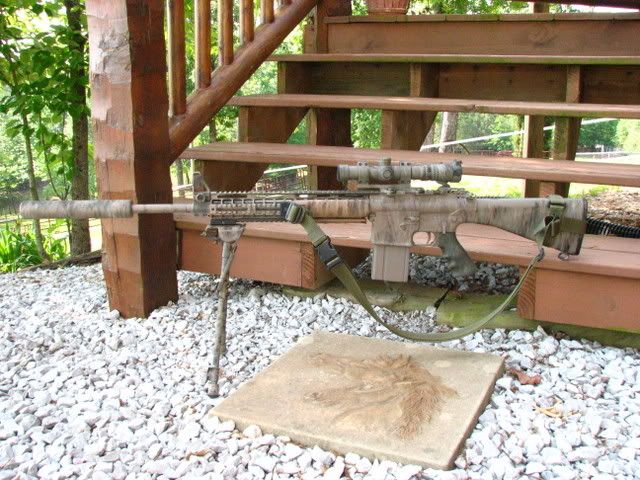
|
|
|
|
[#19]
|
|
|
|
|
[#20]
bjwar, thanks for taking the time to share your method. That is a great looking camo - especially on the last one!
|
|
|
|
AL, USA
|
[#21]
Thamks... |
|
|
|
|
[#22]
that makes a terrific camo pattern
|
|
|
|
AL, USA
|
[#23]
It works pretty good IMHO... 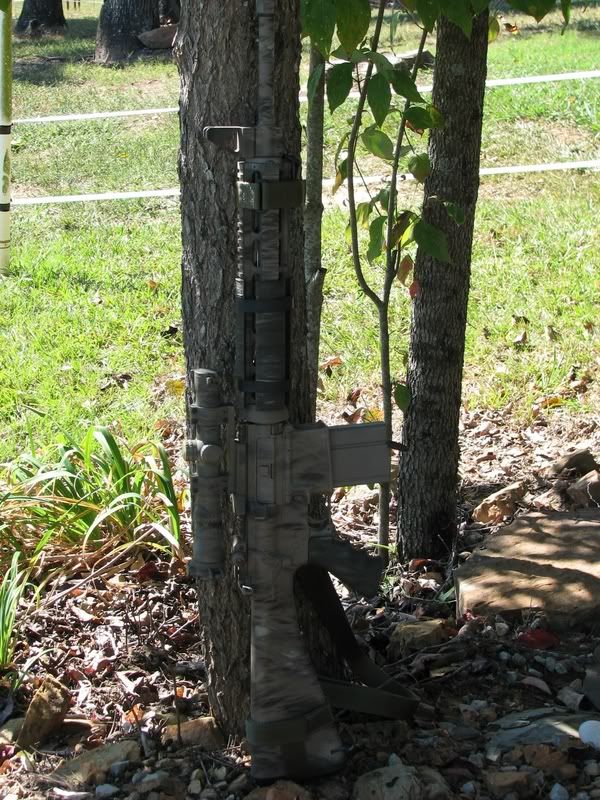 I really like the looks against the ground in these (sorry, we come from a modest family  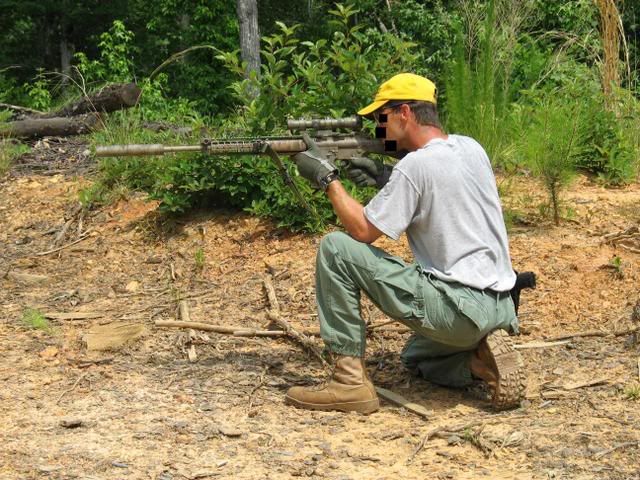
|
|
|
|
OR, USA
|
[#24]
those are seriously some of the coolest paint jobs I have ever seen.
thanks for sharing! 
|
|
|
|
[#25]
That look outstanding. Thank you for the tutorial.
|
|
|
|
|
[Last Edit: talon370]
[#26]
Crazy computer, crazy internet.
|
|
|
|
|
[Last Edit: talon370]
[#27]
.
|
|
|
|
OR, USA
|
[#28]
every time I look at this thread, I am blown away at how good that paint job looks.
very nice work. |
|
|
AL, USA
|
[#29]
Thanks...I chaulk it up to the blind squirrel syndrome seeing how it was my first attempt. |
|
|
|
|
[#30]
That looks amazing!
|
|
|
|
OK, USA
|
[#31]
Thanks very much for your time and effort on this thread. I've wanted to try this for a long time and now believe I have the confidence to try. (That may change standing over a $1500 rifle with a can of paint in my hand
I have an abundance of pine needles and really like the patterns you've gotten here. Rob |
|
|
AL, USA
|
[#32]
The only requirement is that you post pics when completed... |
|
|
|
|
[Last Edit: TxLewis]
[#33]
freaking tag, damn, I gotta try that.
Does it work for wood? Might learn on my SKS before I tackle my ar10Tc TXL ETA, is krylon ok for all colors, or is there a better paint I should use? Thanks TXL |
|
|
|
AL, USA
|
[#34]
It depends on how permanent you want it to be. I used Norrell's Tan Moly Resin for a base coat (thermal cure...ain't coming off unless you blast it) and then camoed it with the krylon. The krylon is slowly fading and wearing off as well as the occasional over spray of Remoil will remove it. The good news is that I can easily add more pattern or remove some if I want to. |
|
|
|
AL, USA
|
[Last Edit: bjwar10]
[#35]
Some good work from eastky454...he used bristles from a broom rather than pine straw and I believe Duracoat.
  |
|
|
|
[#36]
And just where aree you going to get your pine needles, huh? 
|
||
|
|
|
[Last Edit: wildearp]
[#37]
Thanks for the tutorial. I always thought it would more difficult than that.
How did you degrease/clean before shooting? |
|
|
|
AL, USA
|
[#38]
...before spraying? I used brake cleaner and lots of it. I sprayed the entire rifle several times before applying the Norrell's. The only word of caution is to make sure there is not any brake cleaner pooled up in any crevices because when you heat the parts to cure the Norrell's it will cook out and mess up the Norrell's...don't ask how I know this. I used a hair dryer to preheat the parts before spraying the Norrell's. While this got the parts hot enough for the Norrell's it did not get the BC out of the crevices. What I should have done was preheat/bake the parts to make sure the BC was totally gone and then used the hair dryer to keep the parts hot. |
|
|
|
IN, USA
|
[#39]
Thanks alot for the lesson, I have tried it out on two flashlights trying to get it down before I do a rifle and both look awesome. IMHO this is the best camo pattern going, and it's easy to do-now that you showed us all. Thanks a million!
|
|
|
WY, USA
|
[#40]
Great pictures and tutorial
|
|
|
|
[#41]
Tagging for krylon sweetness know how.
|
|
|
|
TX, USA
|
[#42]
*dang* that was cool... thanks for the info and pics!!!
|
|
|
|
[#43]
I thought you cancelled your free subscription?? |
||
|
|
MO, USA
|
[#44]
That's really nice looking. When you paint over the needles do you just paint stripes of the two cover colors side by side or do you give it a once over with one color then adjust the needles and spray the other color on?
|
|
|
AL, USA
|
[#45]
I guess it just depends on how much of what color you want on your rifle. On mine I used OD and brown in alternate stripes and then took the khaki and just put a few dots here and there all without moving the pine needles. |
|
|
|
AL, USA
|
[#46]
|
|
|
|
[#47]
Very nice.
|
|
|
|
KY, USA
|
[Last Edit: eastky454]
[#48]
Bjwar requested that I add the techniques that I have been using that is an alternative to using pine needles. Since I dont have any long pine needles around, I thought hey, why not take a cheap straw broom from Walmart, take it apart and use that. Below are some examples I did today with a 2x4 to show the technique with krylon. I normally use duracoat, which I think is a little easier since using a spray gun, I can control the amount of paint a little easier, but the results are similar. The only thing with duracoat is that it tends to build up on the straws and get kind of sticky, so you will have to keep a close eye on it, so you dont get small blobs of paint transfering from the straws to the gun. When using Duracoat, I mix up 1 1/2 tsp of paint and 1/8 tsp of hardener. That should be enough for one color and saves alot of paint. It also keeps you from putting too much of one color on. After you apply the first color, by the time you clean out the spray gun and mix up the next color, the last coat is dry enough to put on the next coat without any problems. The only other issue I have found is that if you use more than 4 colors, you start to blend out the first 1 or 2 colors you put on unless you really plan out the pattern before hand.
Here are the straws after taking the broom apart.  After the base coat, just grab a few straws, spread them out in your hand, hold them up to the part and simply spray across them. You can adjust the amount of paint applied by passing quickly or more slower. 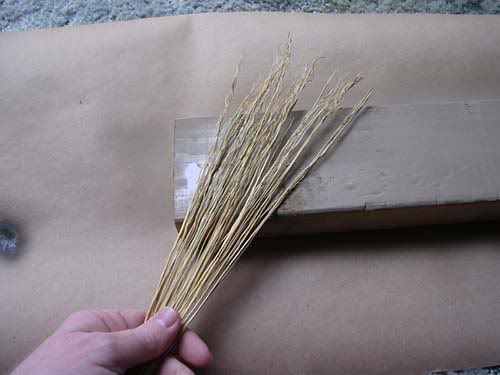 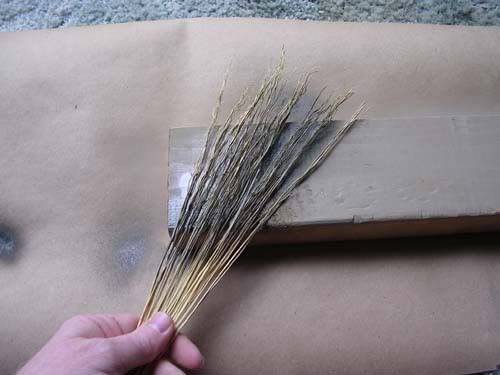 Move the straws around and use different angles. Here is the first coat of green after moving the straws around.  Now grab the brown can and do the same thing.  Here is the finished product.  Here is an AR done with the same procedure with duracoat. Base coat was magpul FDE Apply the green: 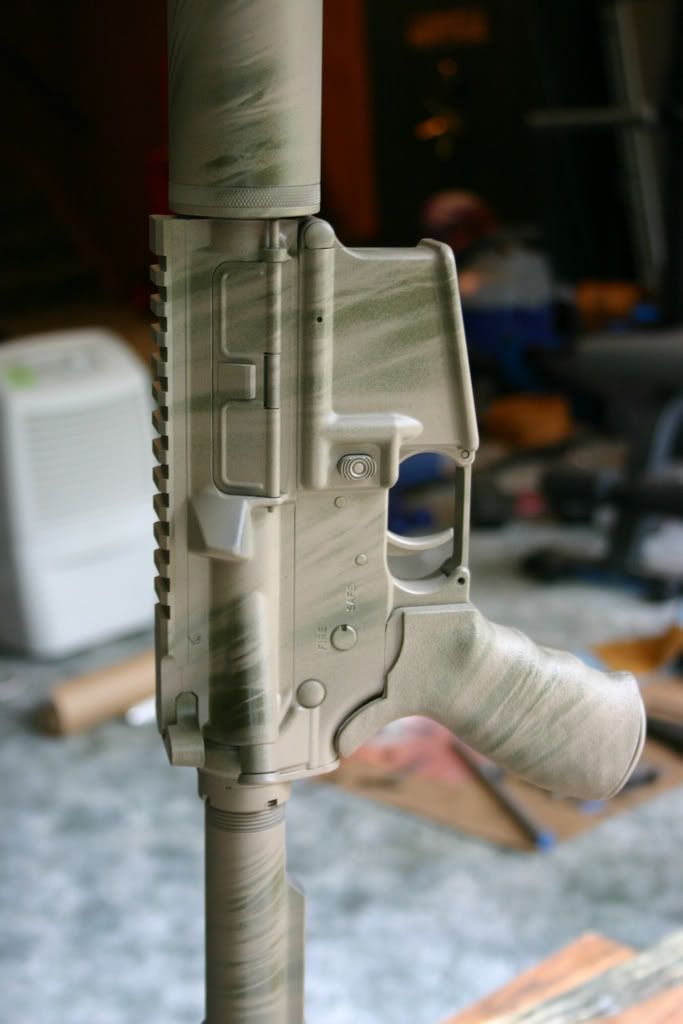 Now a little desert warrior brown: 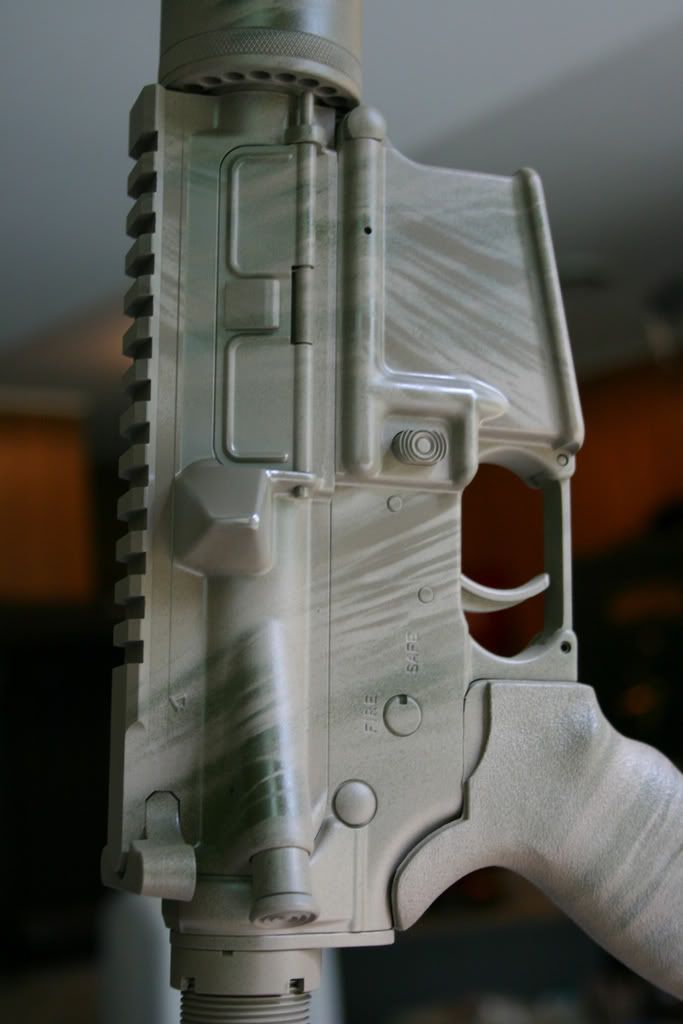 Belgian brown: 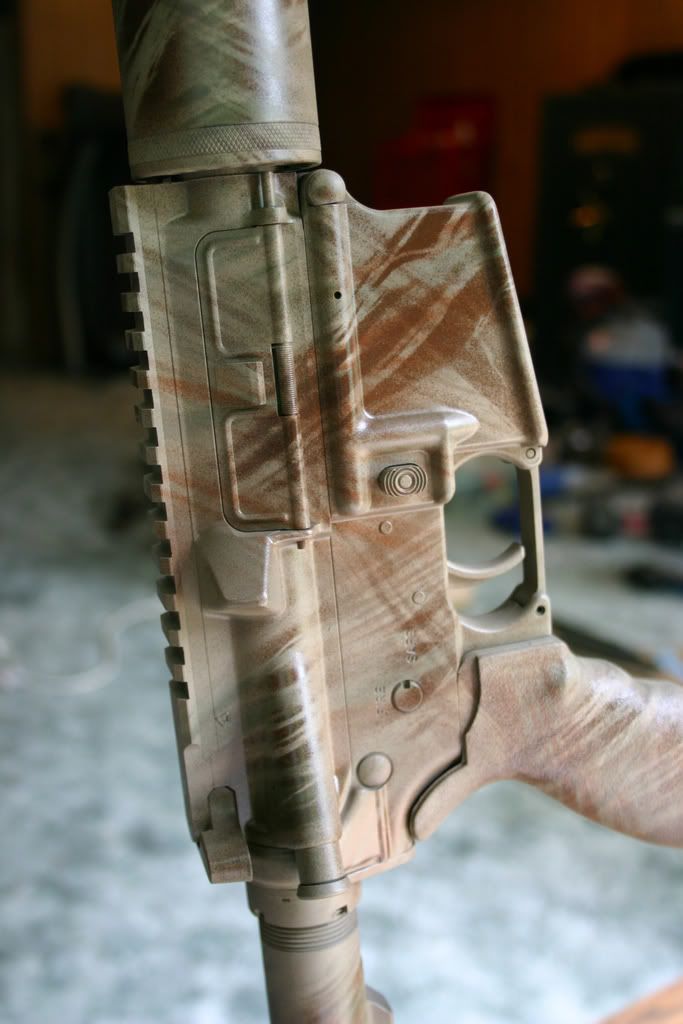 A dark brown (custom mix of belgian brown and black): 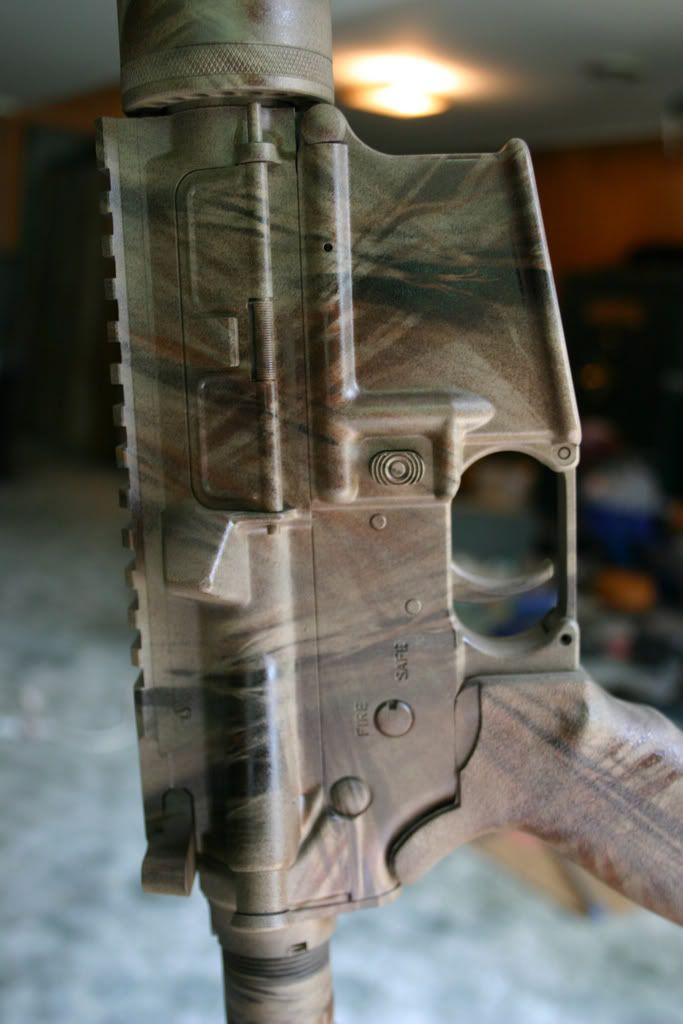 And I like to use black last to give it a shadow appearance. 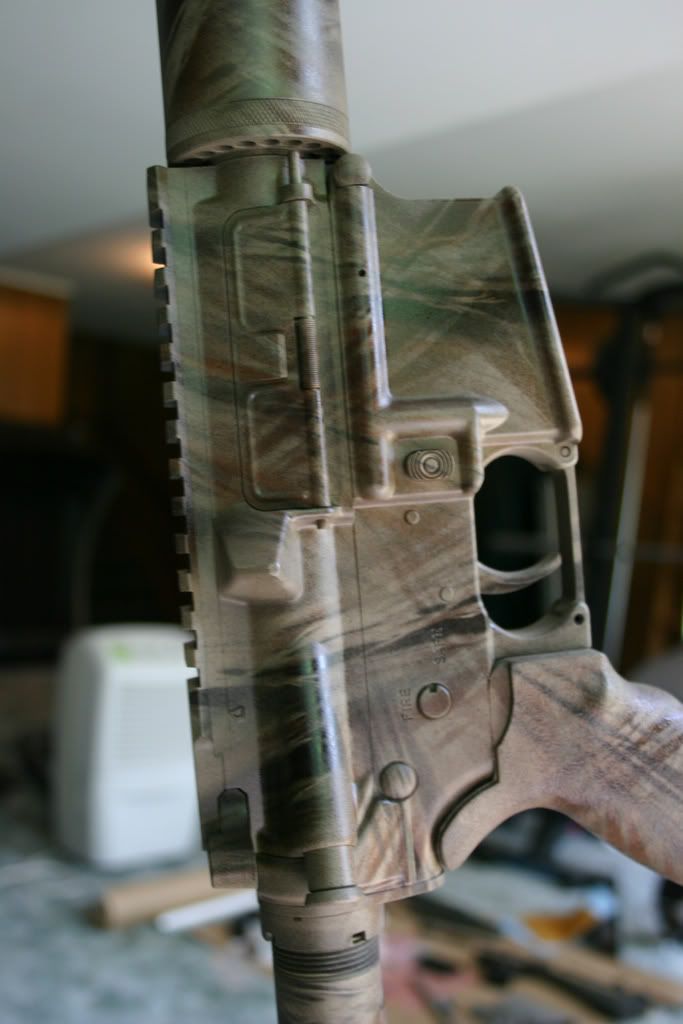 Before clear coat:  Next, I put on a good dose of matte clear coat to dull any shine. And here is the final product:  |
|
|
AL, USA
|
[#49]
Nice |
|
|
|
AL, USA
|
[#50]
Small addition of a GGG front flip to replace the detachable front sight...I didn't have any more Norrell's so I had to improvise when painting the GGG.  
|
|
|
 Win a FREE Membership!
Sign up for the ARFCOM weekly newsletter and be entered to win a free ARFCOM membership. One new winner* is announced every week!
You will receive an email every Friday morning featuring the latest chatter from the hottest topics, breaking news surrounding legislation, as well as exclusive deals only available to ARFCOM email subscribers.

AR15.COM is the world's largest firearm community and is a gathering place for firearm enthusiasts of all types.
From hunters and military members, to competition shooters and general firearm enthusiasts, we welcome anyone who values and respects the way of the firearm.

Subscribe to our monthly Newsletter to receive firearm news, product discounts from your favorite Industry Partners, and more.
Copyright © 1996-2024 AR15.COM LLC. All Rights Reserved.
Any use of this content without express written consent is prohibited.
AR15.Com reserves the right to overwrite or replace any affiliate, commercial, or monetizable links, posted by users, with our own.


