|
Posted: 11/20/2014 2:51:50 PM EDT
So - relative to NV costs - I'm on a relatively shoe-string budget in trying to put together my personal NV gear - but I was pretty sure from the get go that a dual tube binocular setup was where I wanted to end up - it took a lot of searching, researching (and re-searching), and horse-trading to get here, but a lot of folks here in the NV forum have helped me out along the way.
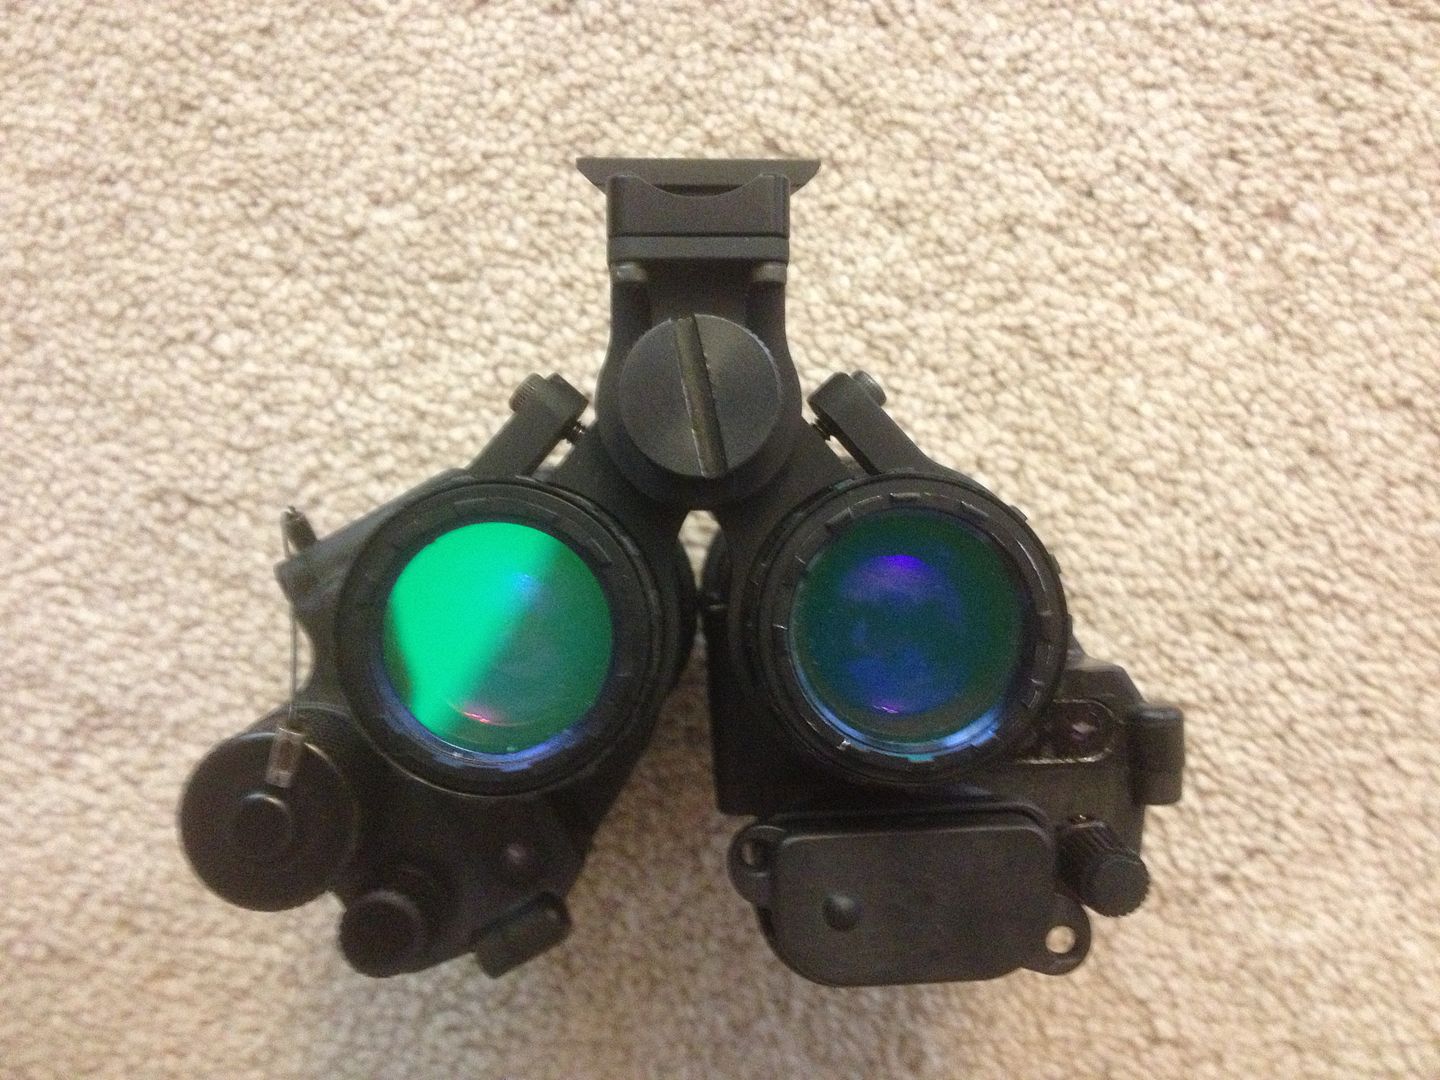
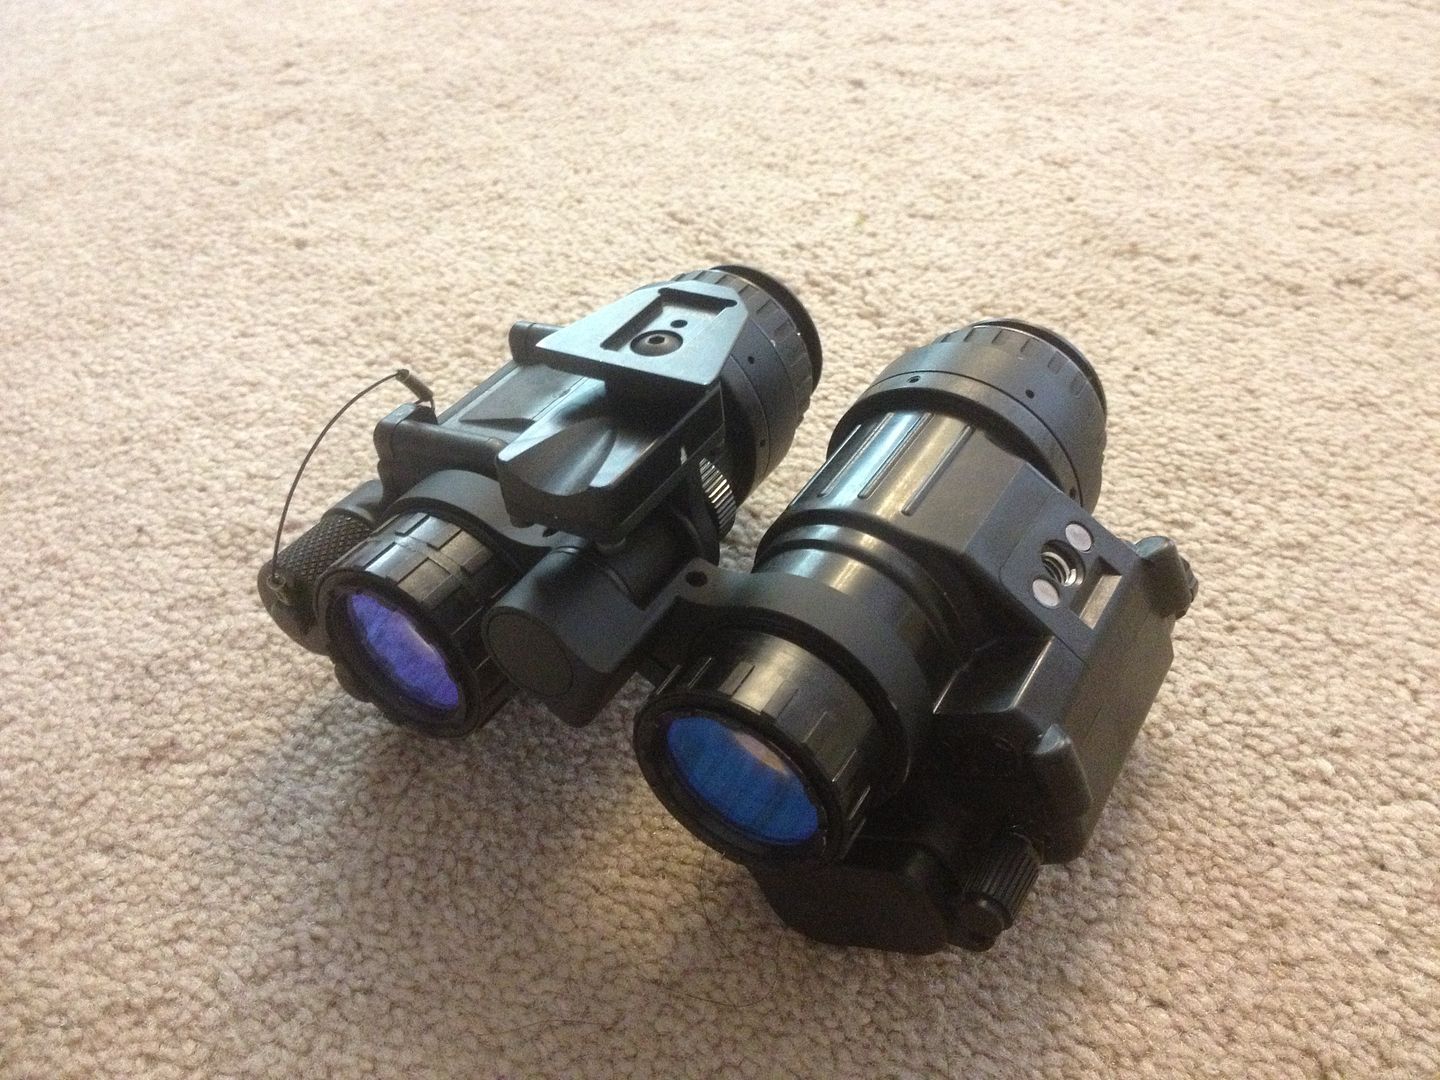
I think I'm pretty much set in terms of the device itself, minus a couple small things that I'd like to do - until I can ever afford an actual BNVD setup, which will likely be a long while off. While it's not the perfect or most ideal setup, it works good-enough, and I'm pretty satisfied with what I ended up with for the time being - over the course of the past year, I've been able to horse-trade into two PVS-14s - unfortunately, they were pretty different, specs-wise, and I had some initial concerns about how well they would work together - one is an OMNI VII autogated tube, while the other is an OMNI III non-gated tube - So - in order to determine whether it was even worth trying to tether them together - I put together this proof of concept: 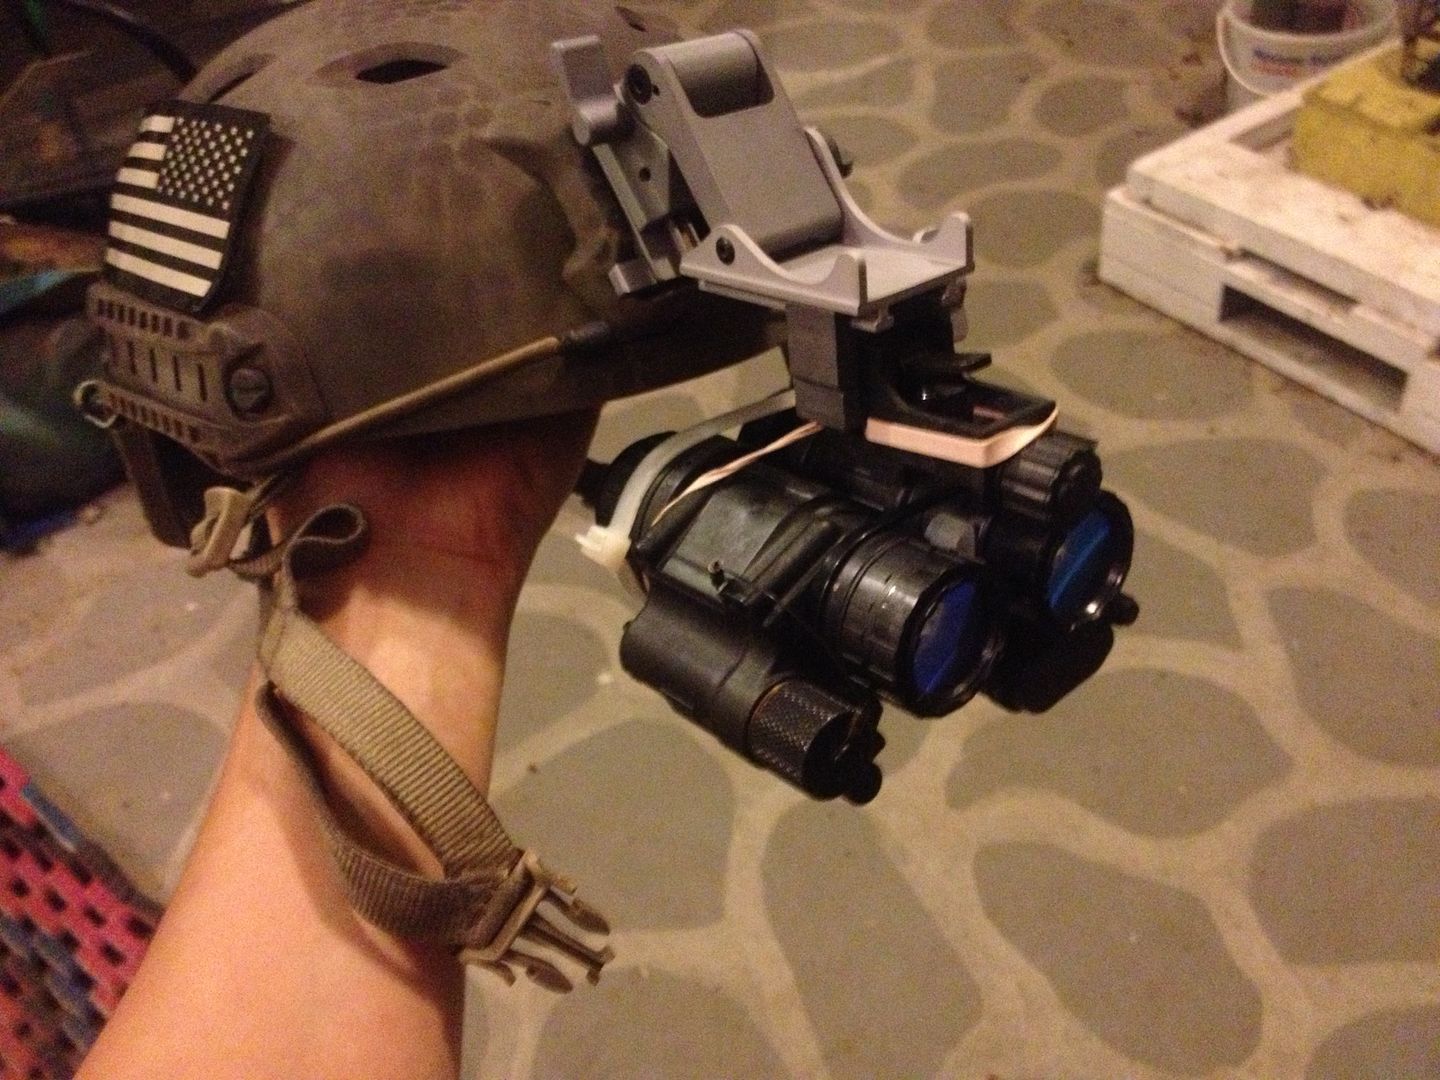
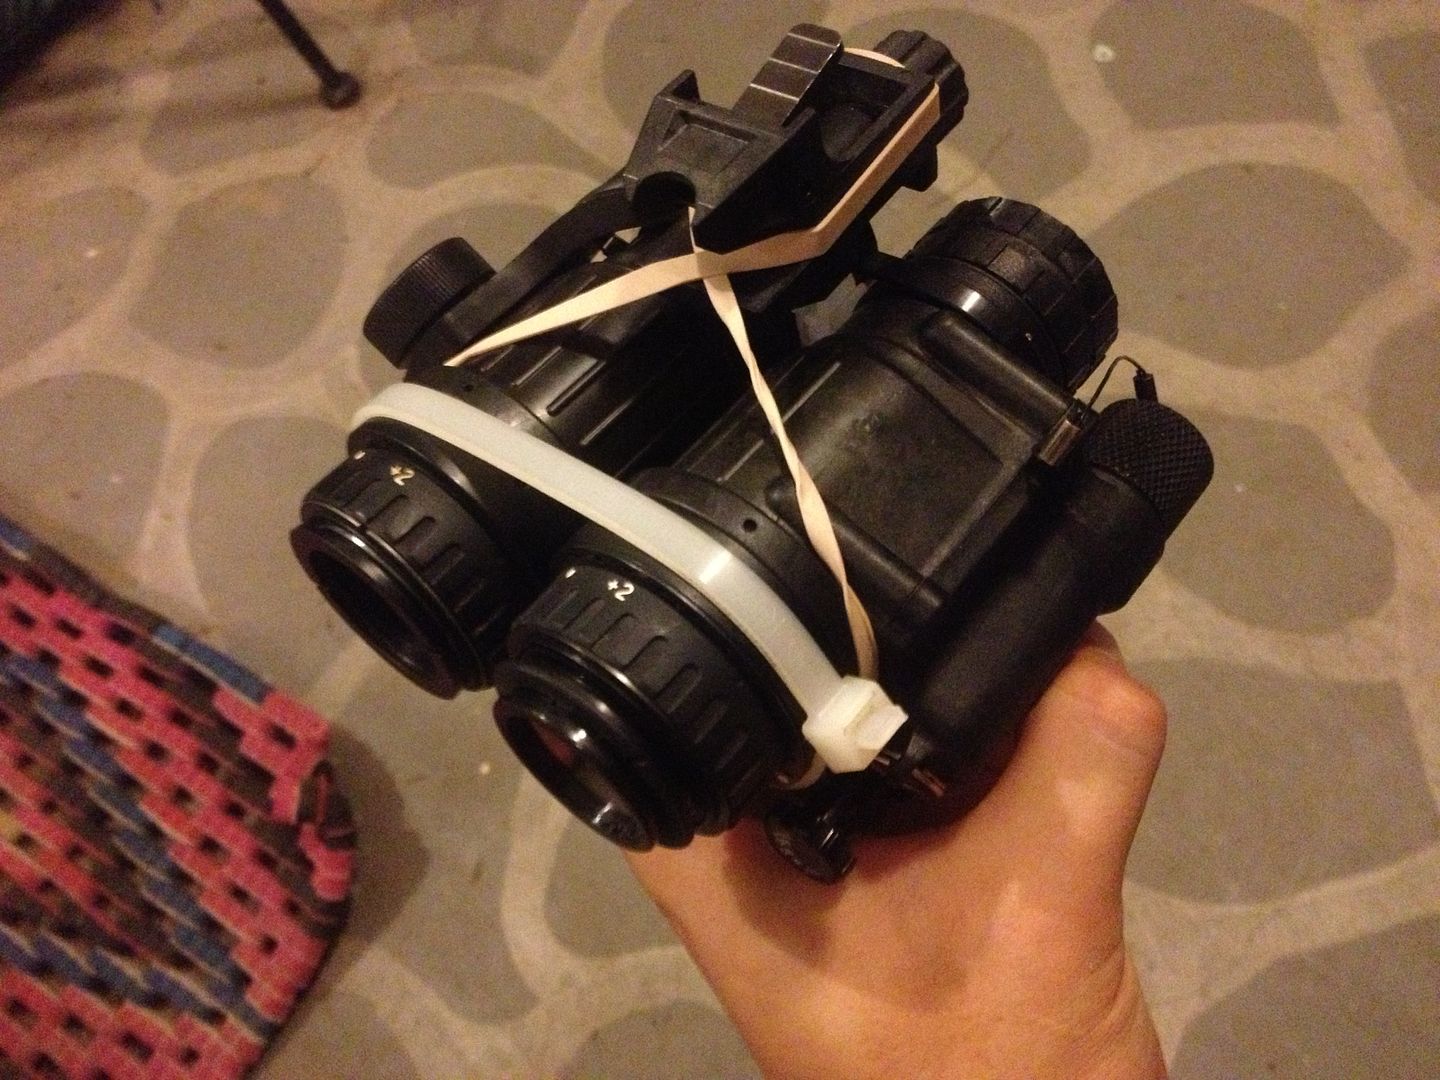


Needless to say, it wasn't the most stable, durable, or practical setup - but it told me what I needed to know - that I could get my eyes to integrate the images from the two disparate tubes into a single, worthwhile, dual tube, stereoscopic picture. Once that was settled, TheHorta was (is being) kind enough to let me borrow his MOD Armory PVS-14 bridge - which is a great unit, with lots of features - and well engineered - but a little heavier and taller than I would have liked to have been. The height issue essentially forced me to crank the elevation adjustment on my old-school Norotos TATM further than I had wanted in order to get it to align properly (adjusting the mounting holes of the mount on the AKA2 mounting plate probably would have quickly solved that) - 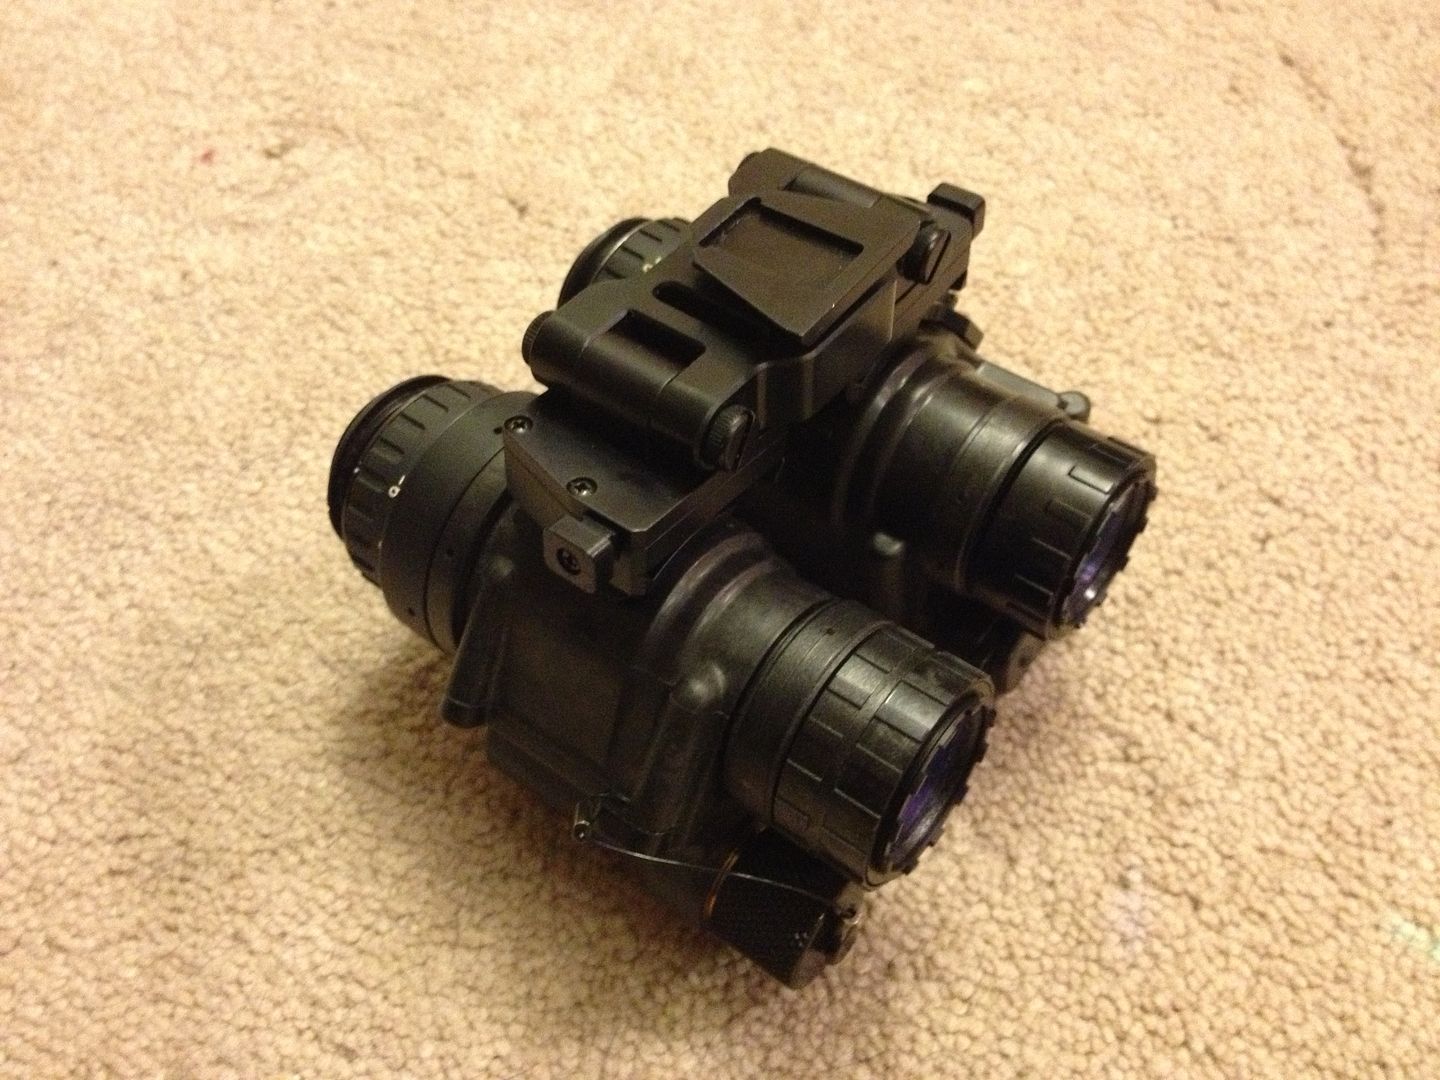
Not long thereafter - I was able to score a great deal on a used N-Vision "standard" bridge mount (not the Advanced), which I had determined would probably be my best bet based on what I was looking for versus weight (at least until the Wilcox bridge comes out, and I'm left salivating at another piece of Wilcox gear I can't afford yet ).
In the "factory" configuration - it's a pretty good, pretty simple and relatively lightweight mount: 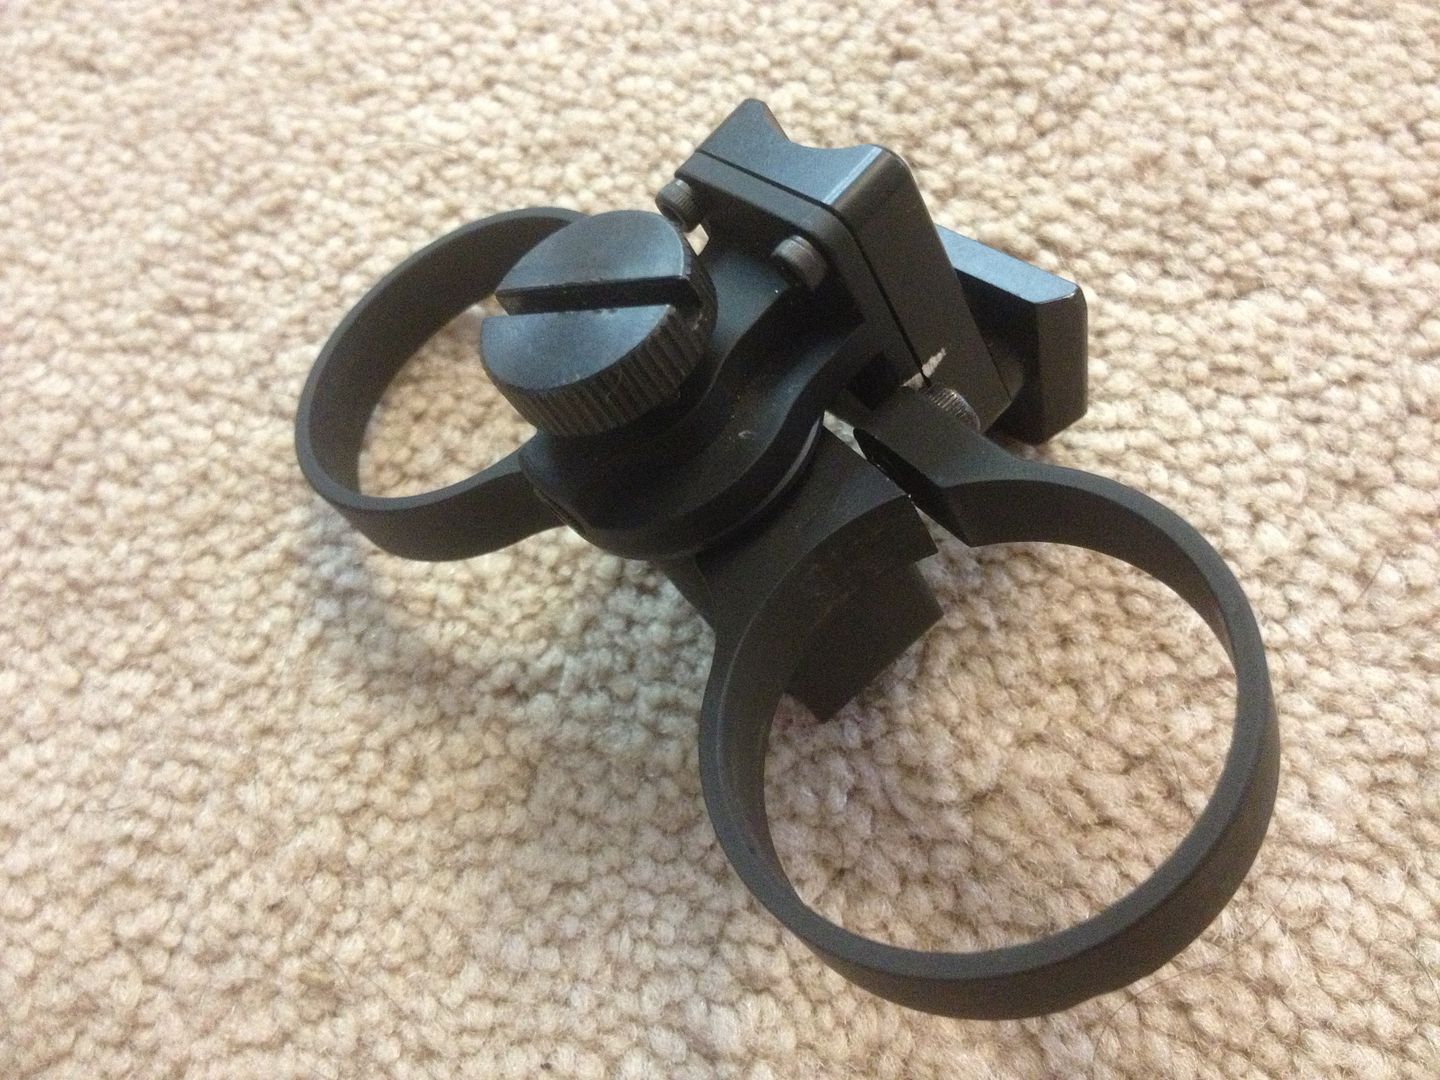
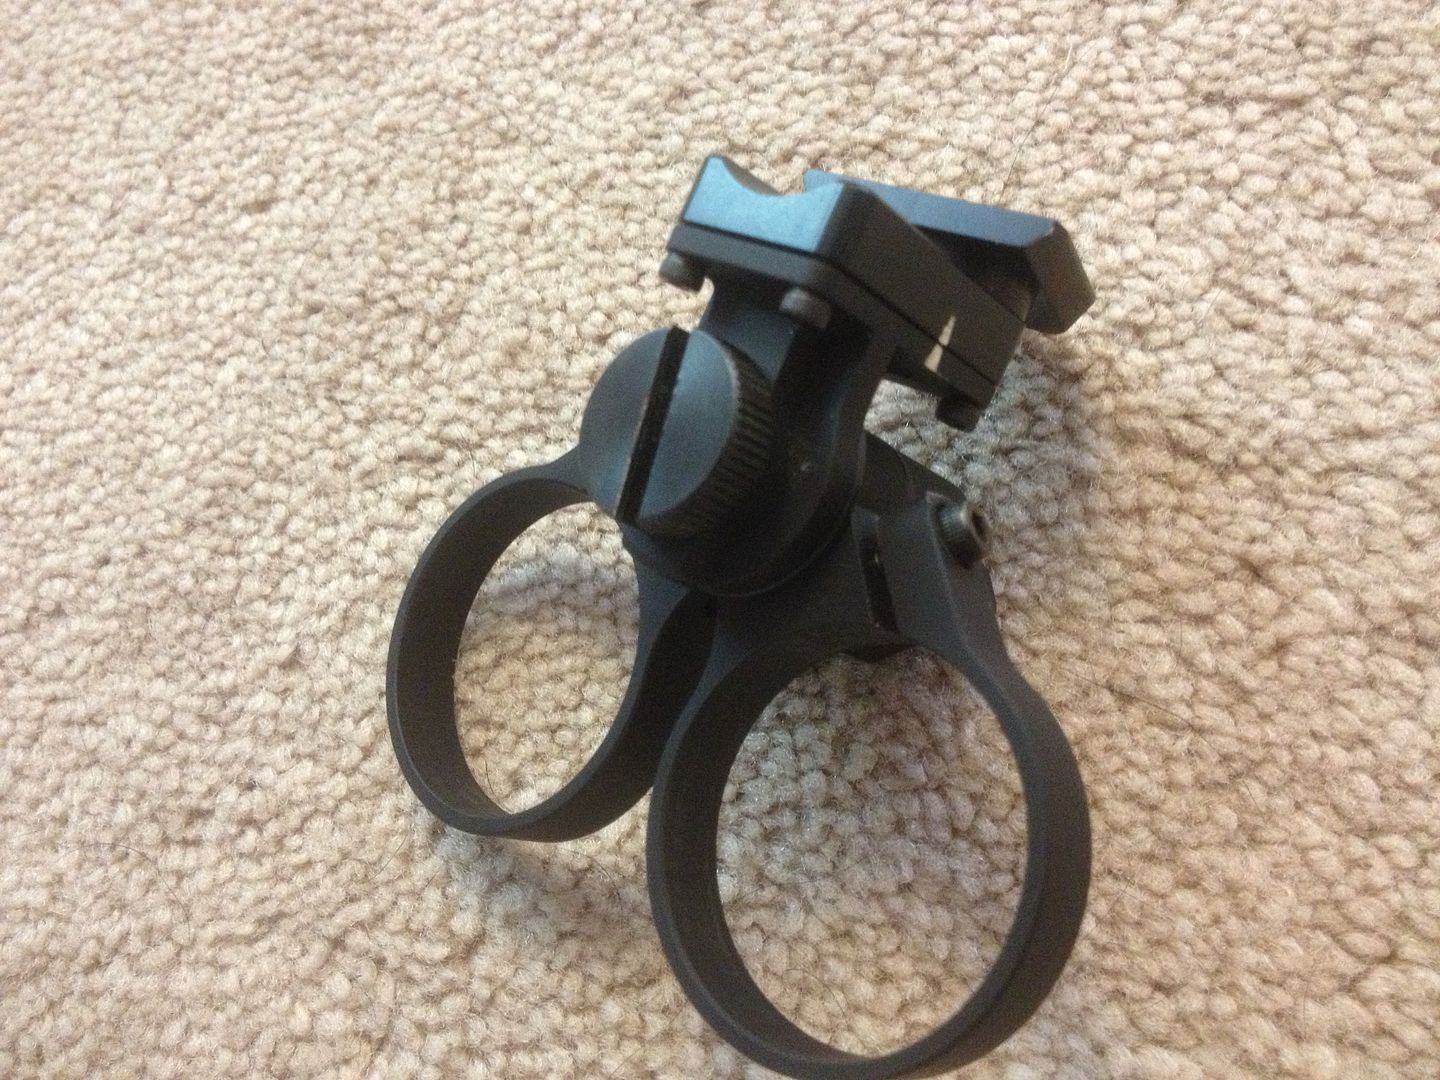
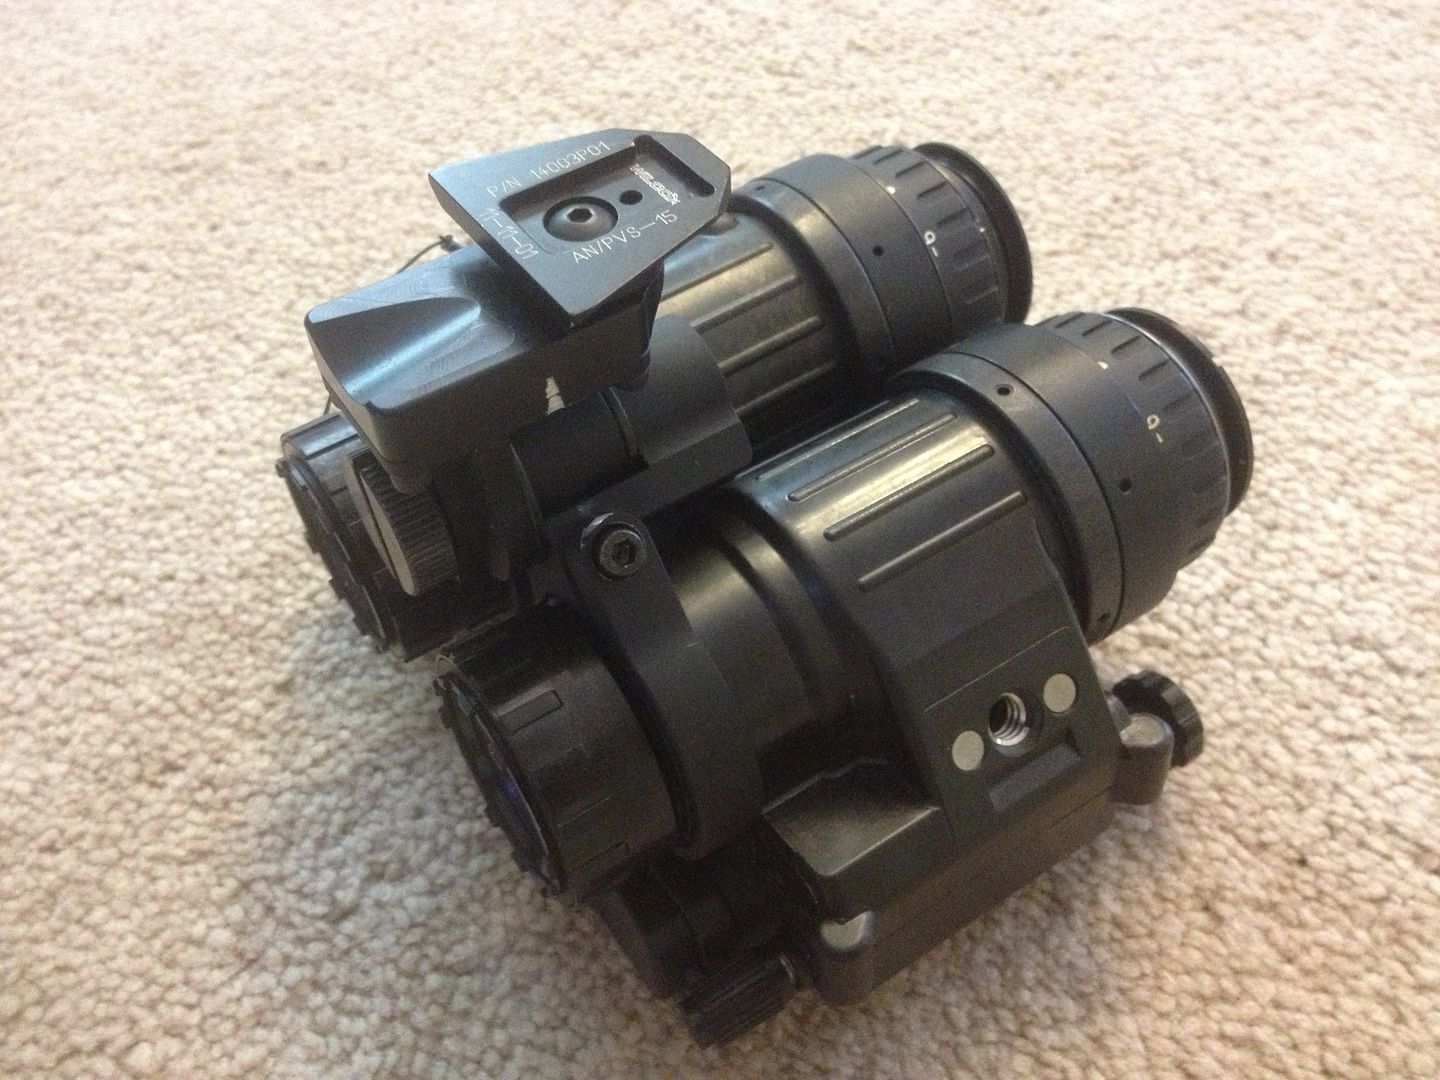
Because of my relatively close set IP distance - in this configuration, it was still a little taller than I might have liked - and the location of the dovetail was a little too far forward for my liking - more on this later. Inevitably, the urge to tinker came about, and I ended up disassembling the entire thing into its component parts: 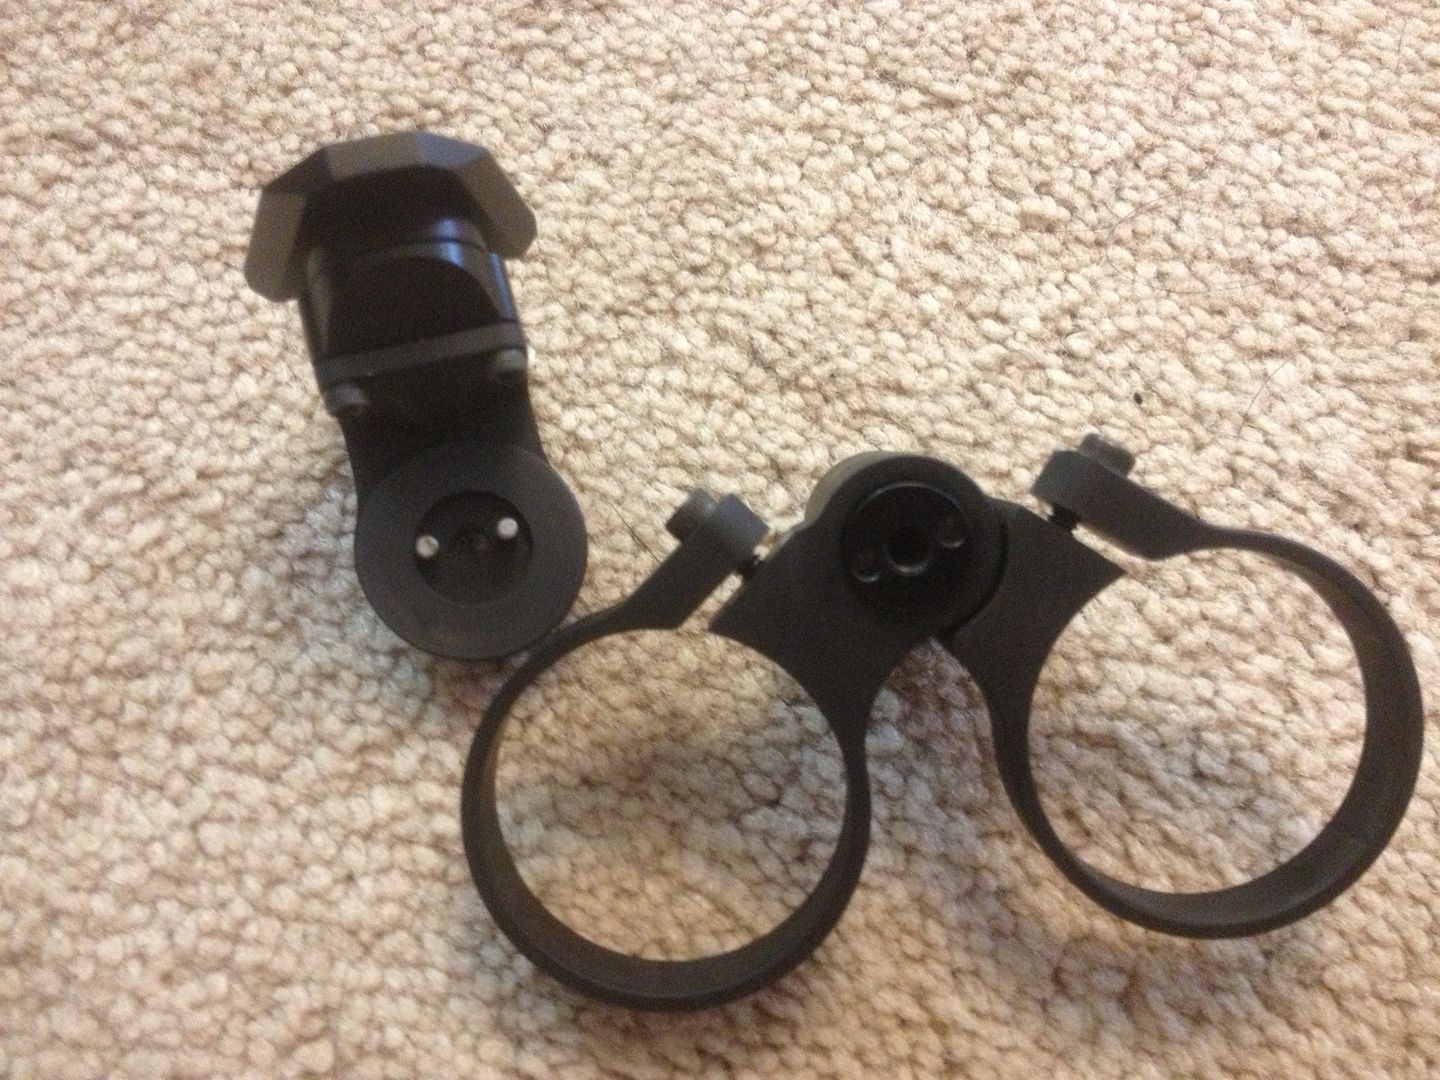
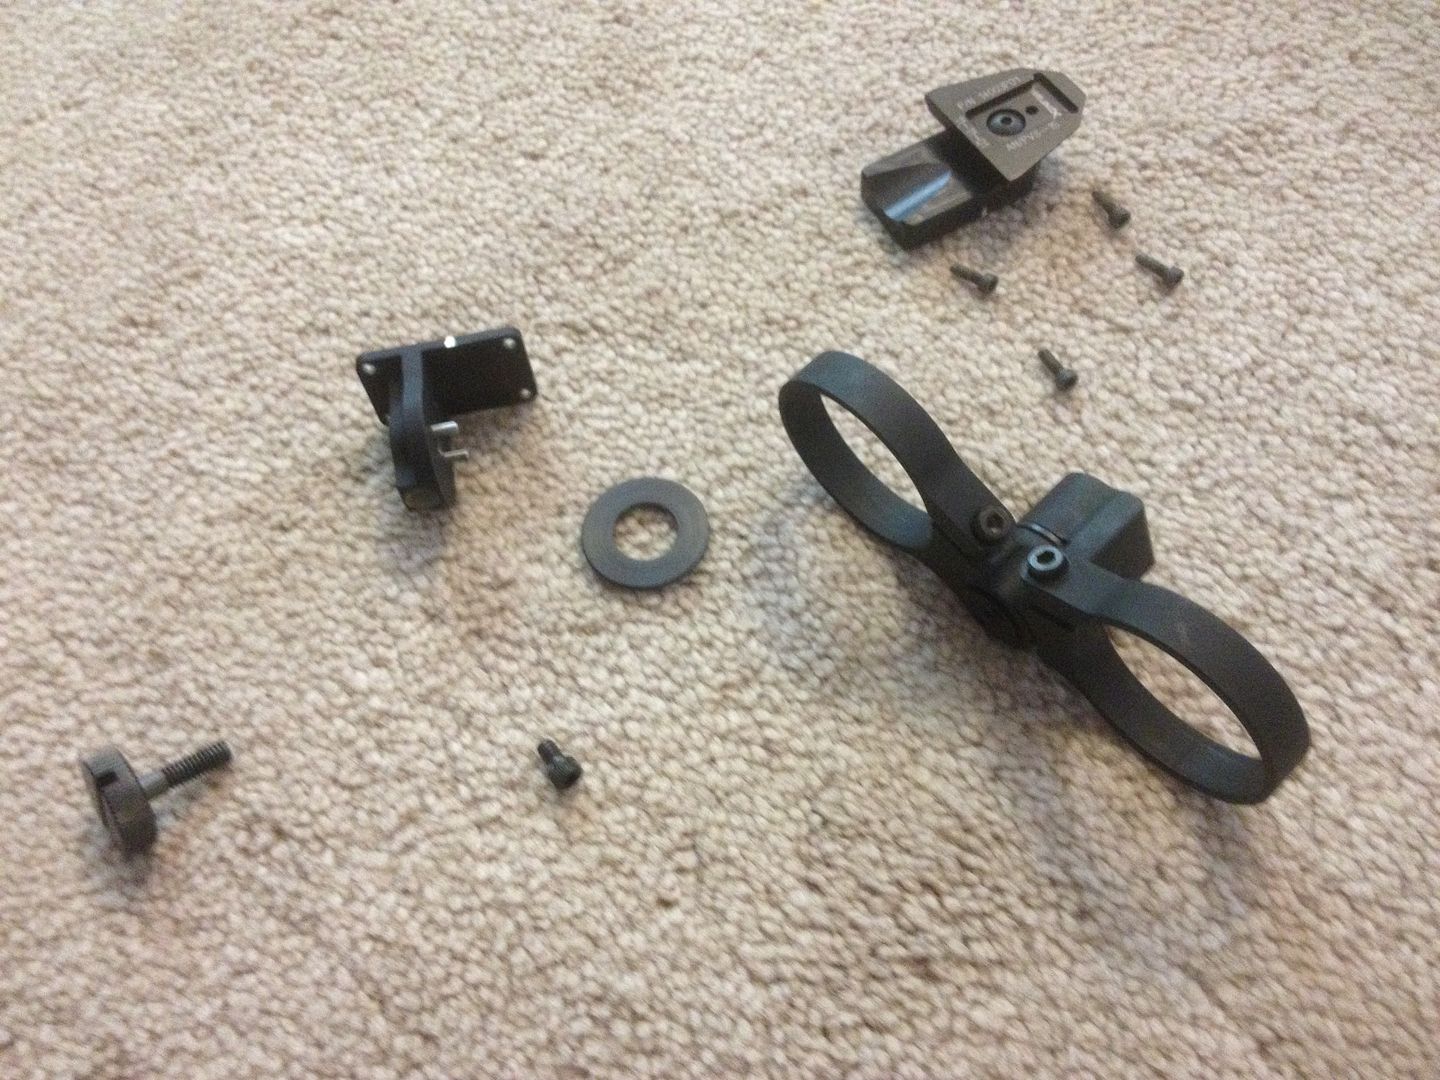
I then reassembled it with the mounting hardware backwards, and the rings "upside-down" in the mount: 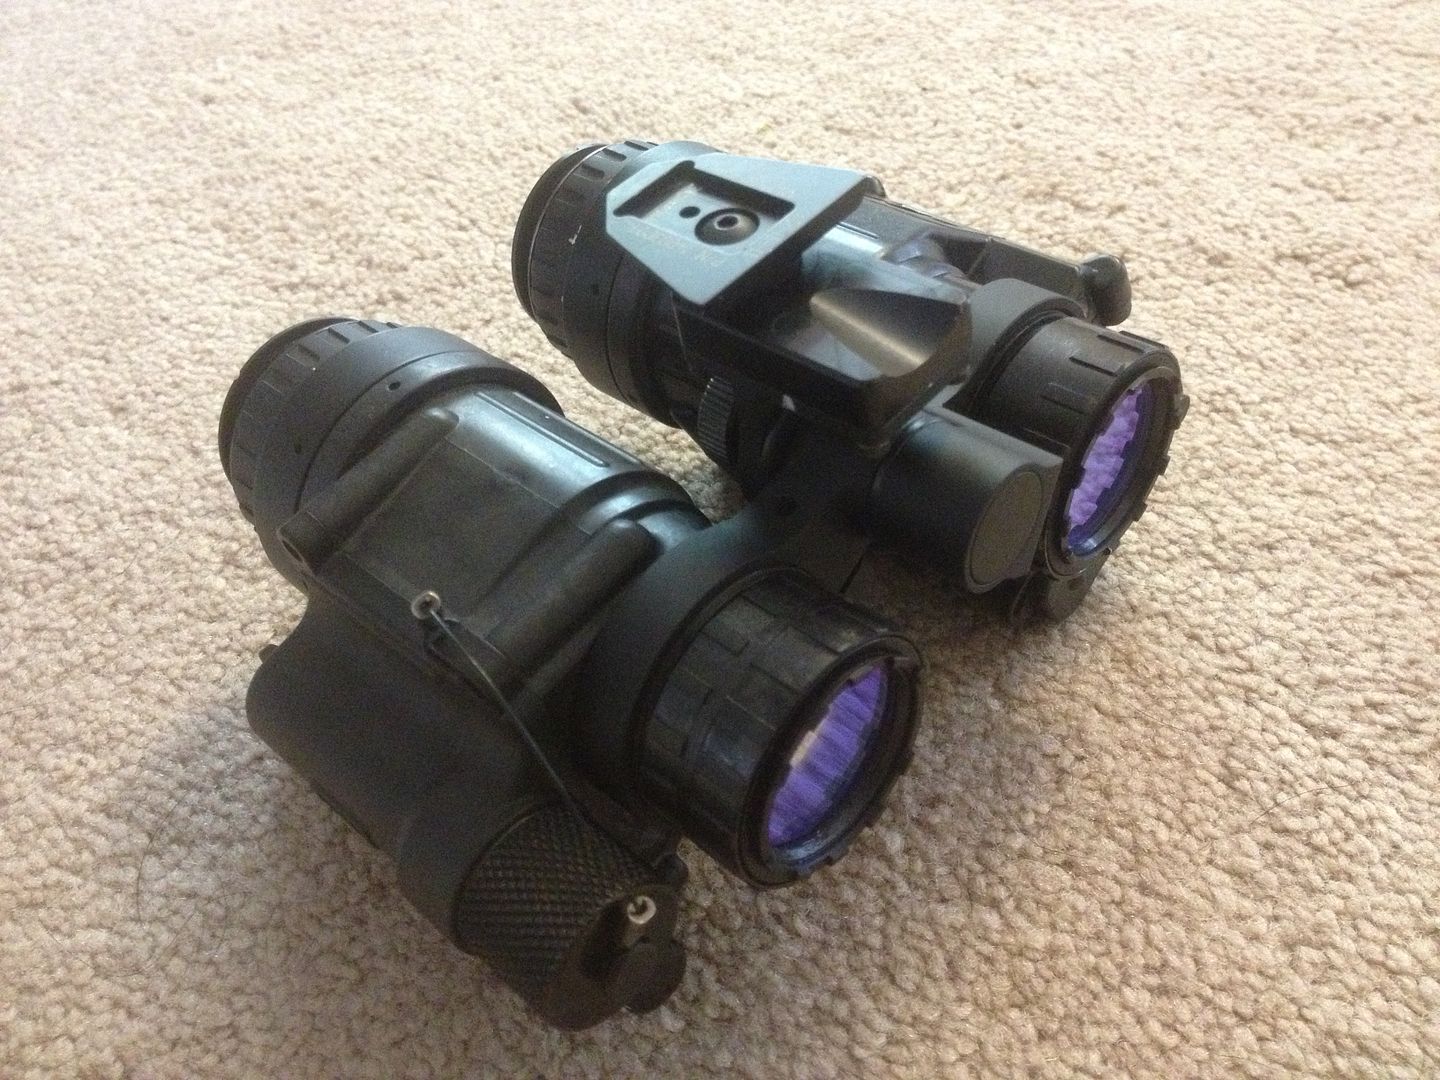
Doing so allowed me to adjust the screw for the friction fit of the adjustment "just right" so that they would generally stay in place - and as a bonus, with the screws to tighten the rings for the monoculars oriented inside now, rather than outside - when the monoculars are brought as close together as they will go, the IP distance was perfect for my eyes/face. 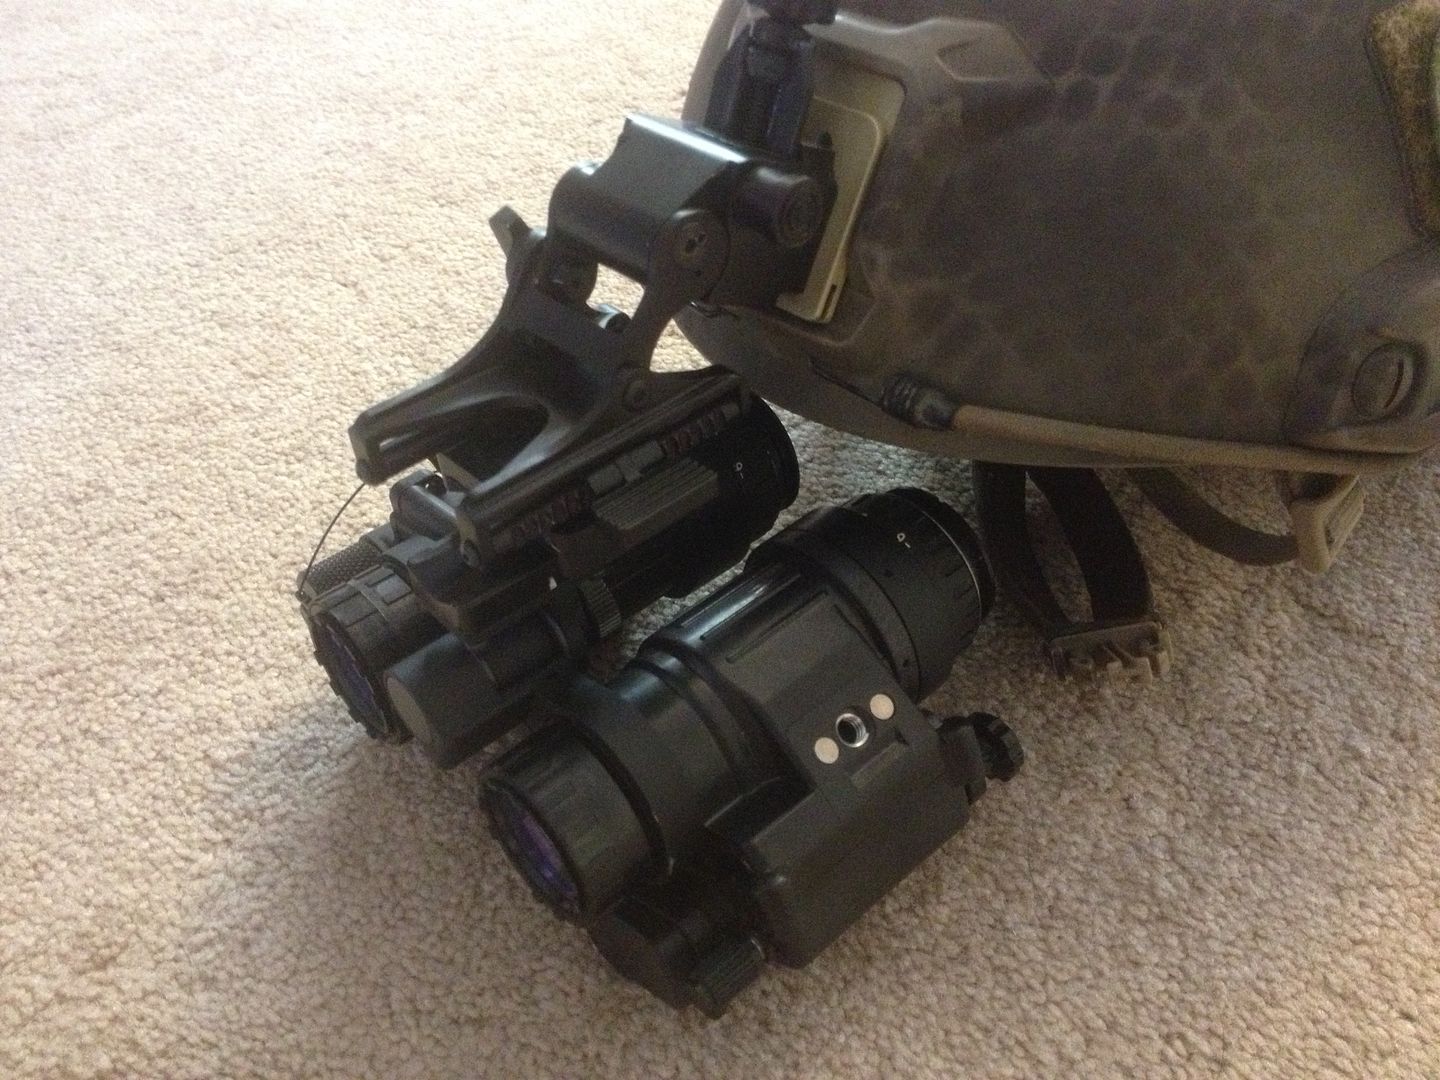
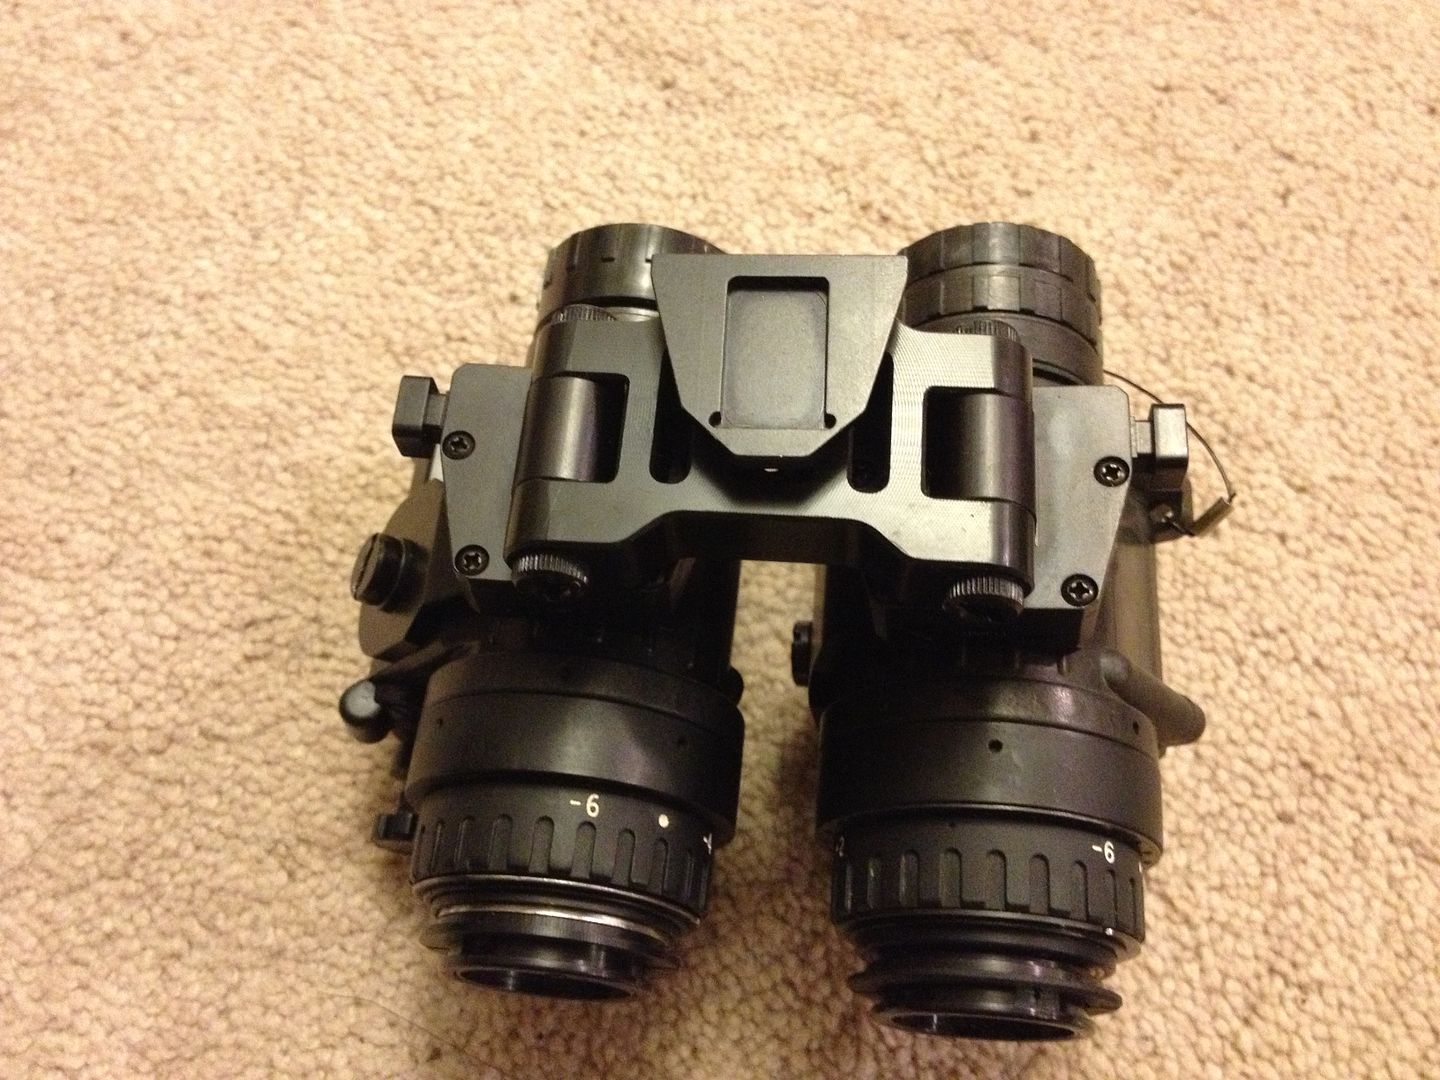
Turning the mount around, likewise gave me more lateral adjustment fore and aft, which, combined with re-orienting the rings, opened, at least for me, a whole other set of possibilities - In this configuration - here it is with the proper eye-relief for use/regular wear: 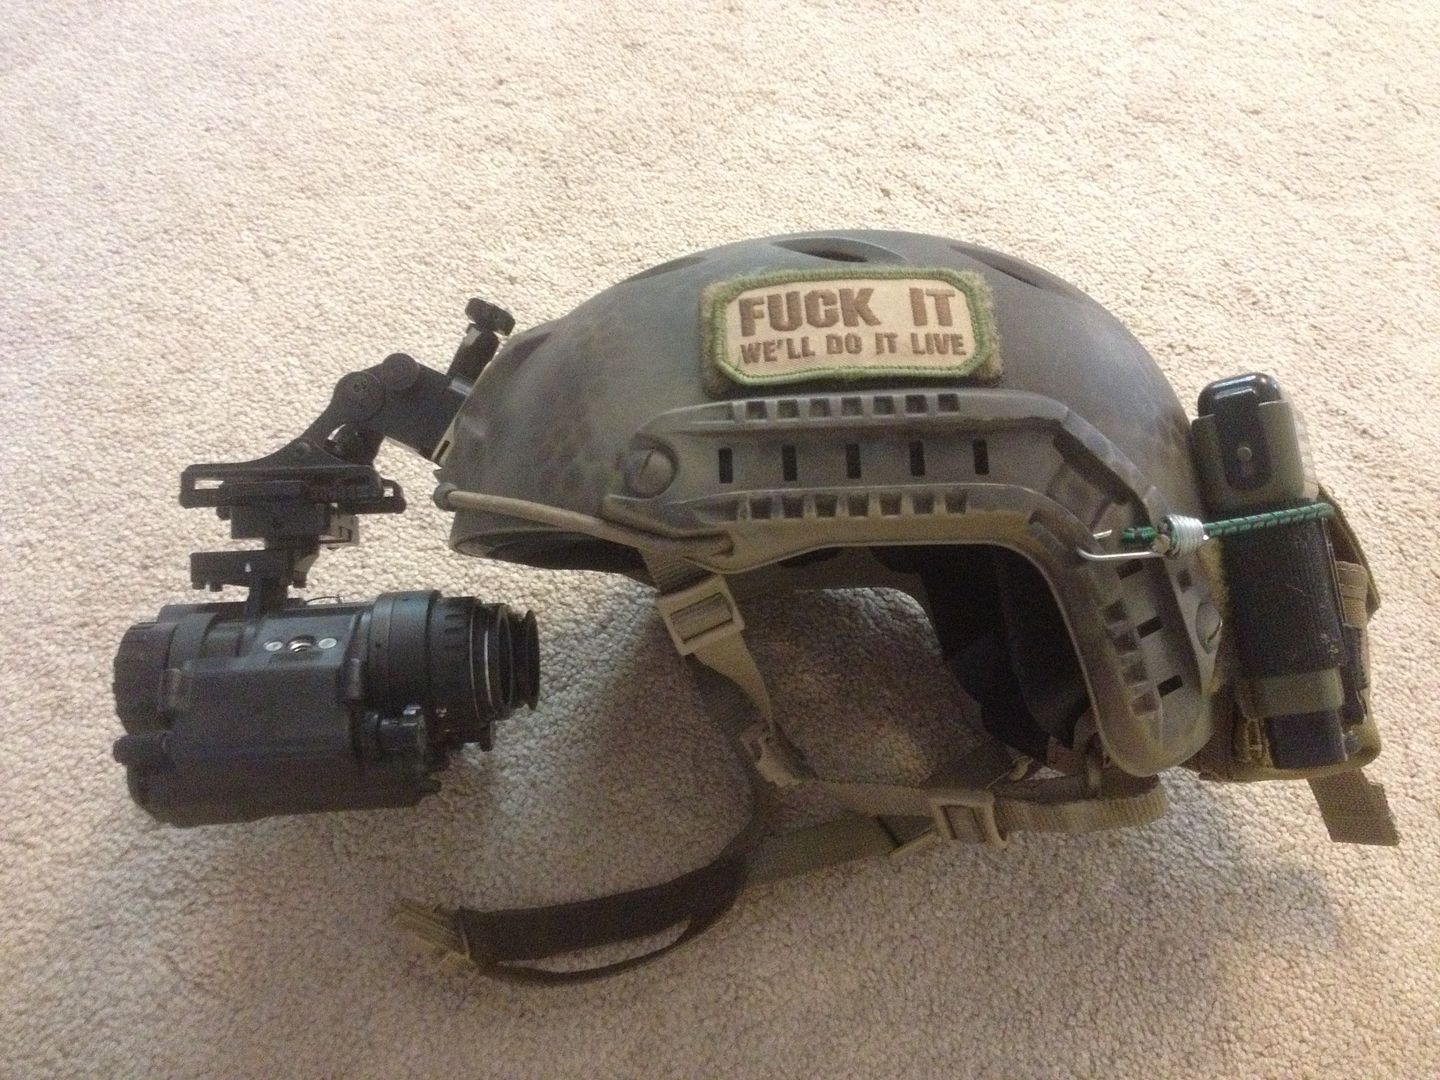
Extended to full forward adjustment, it looks like this: 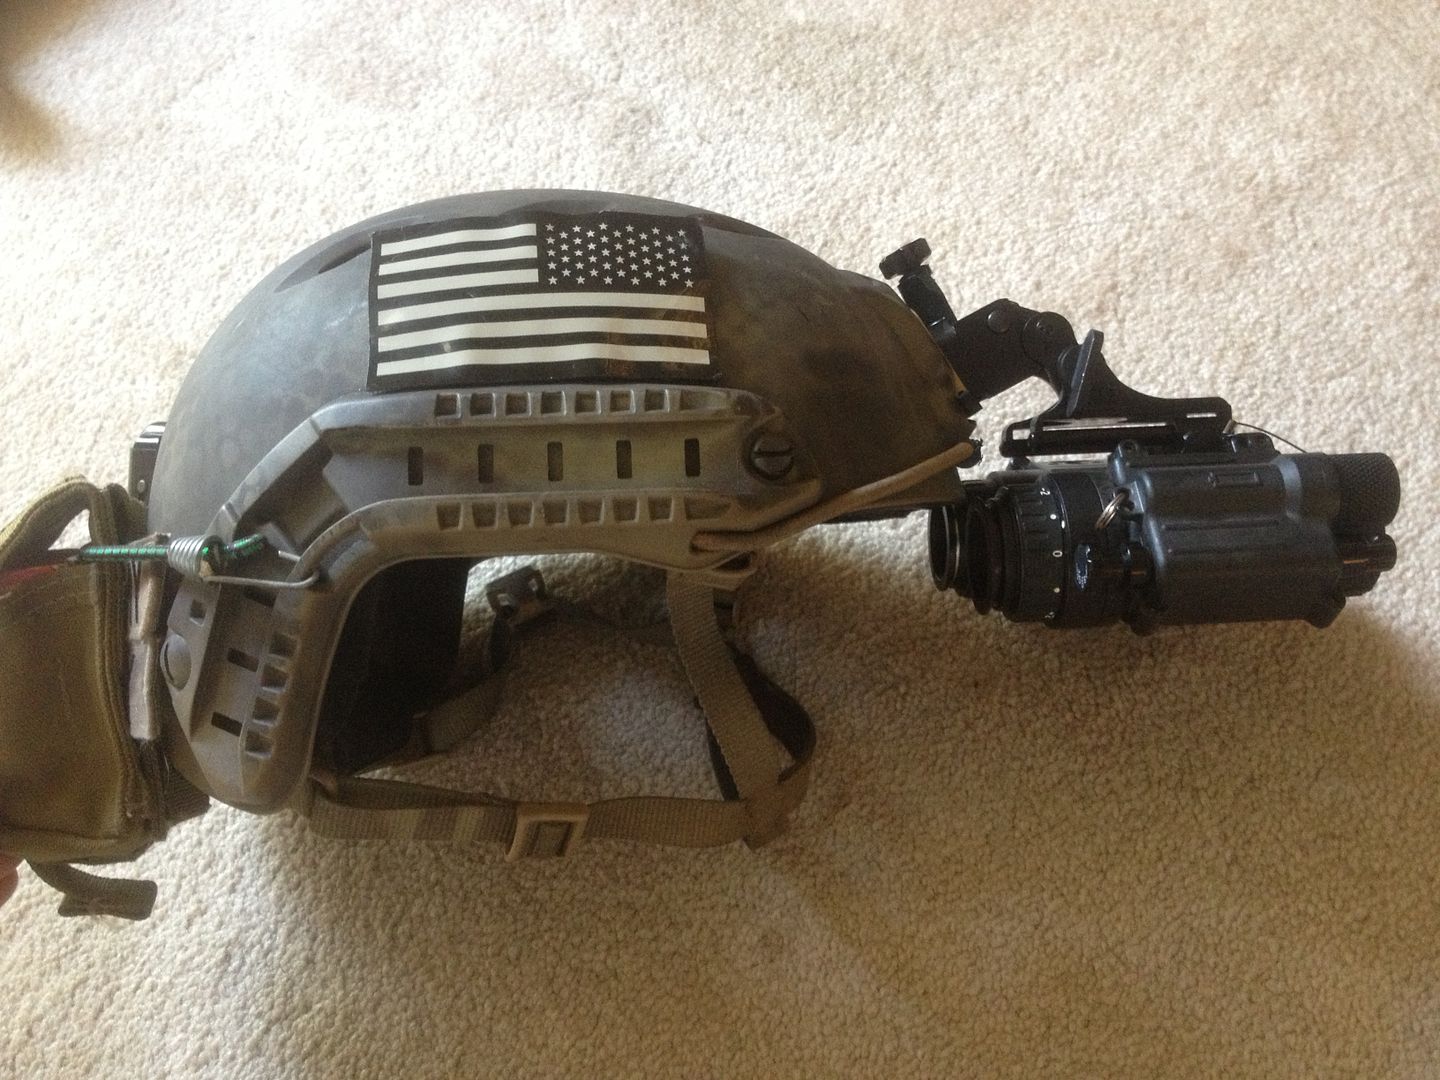
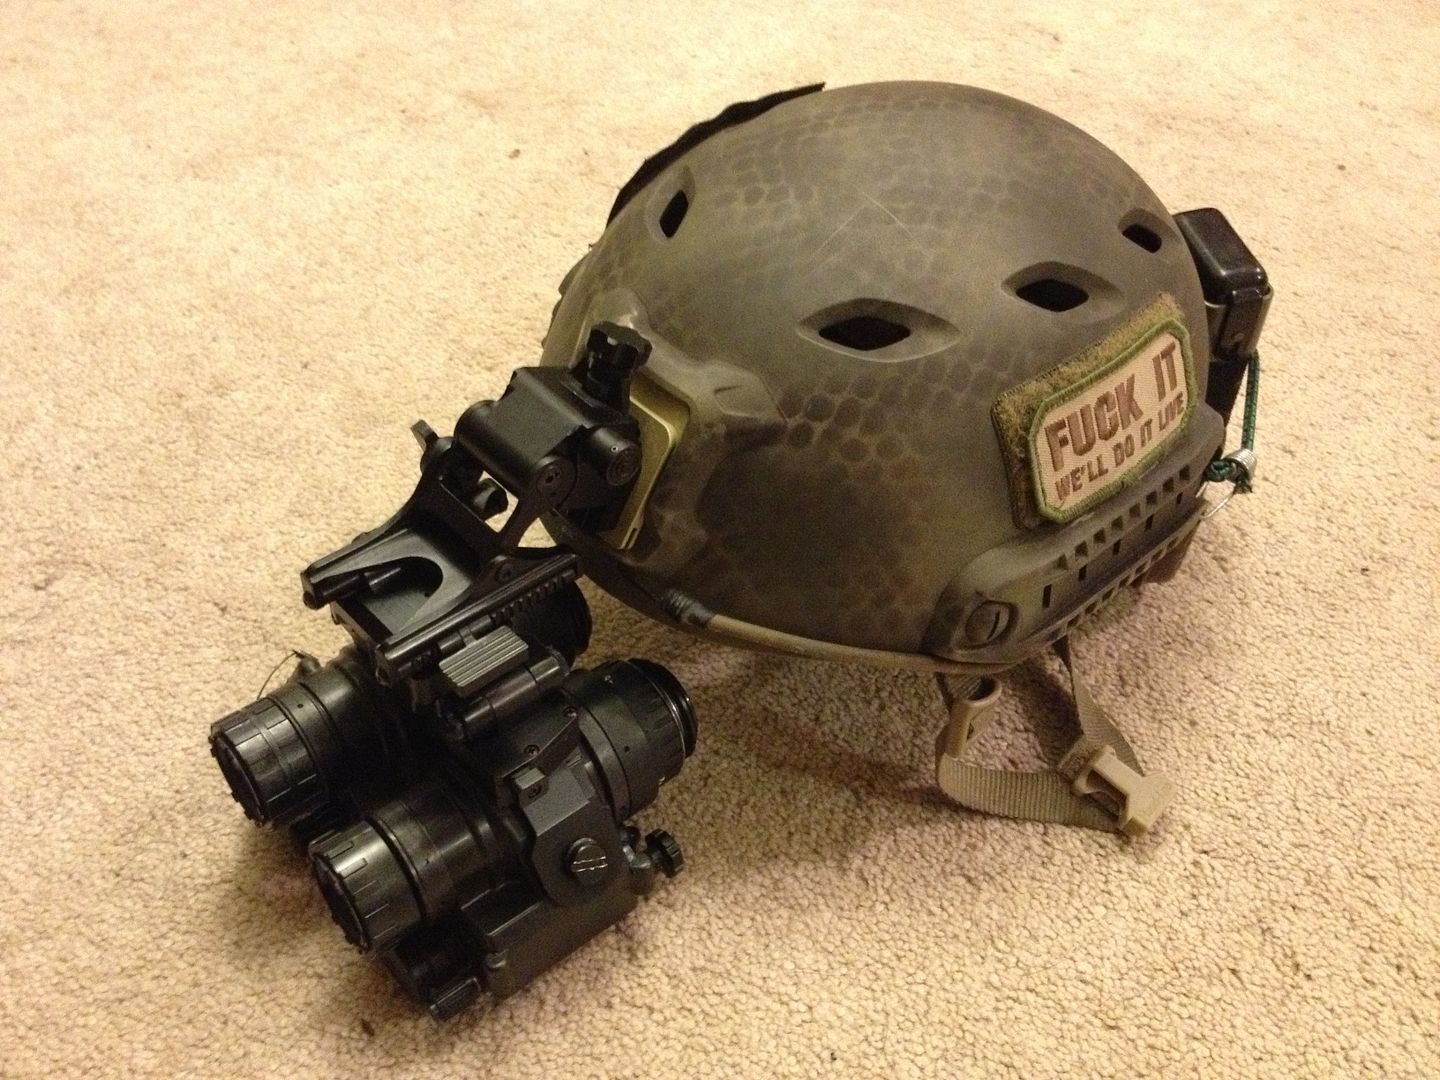
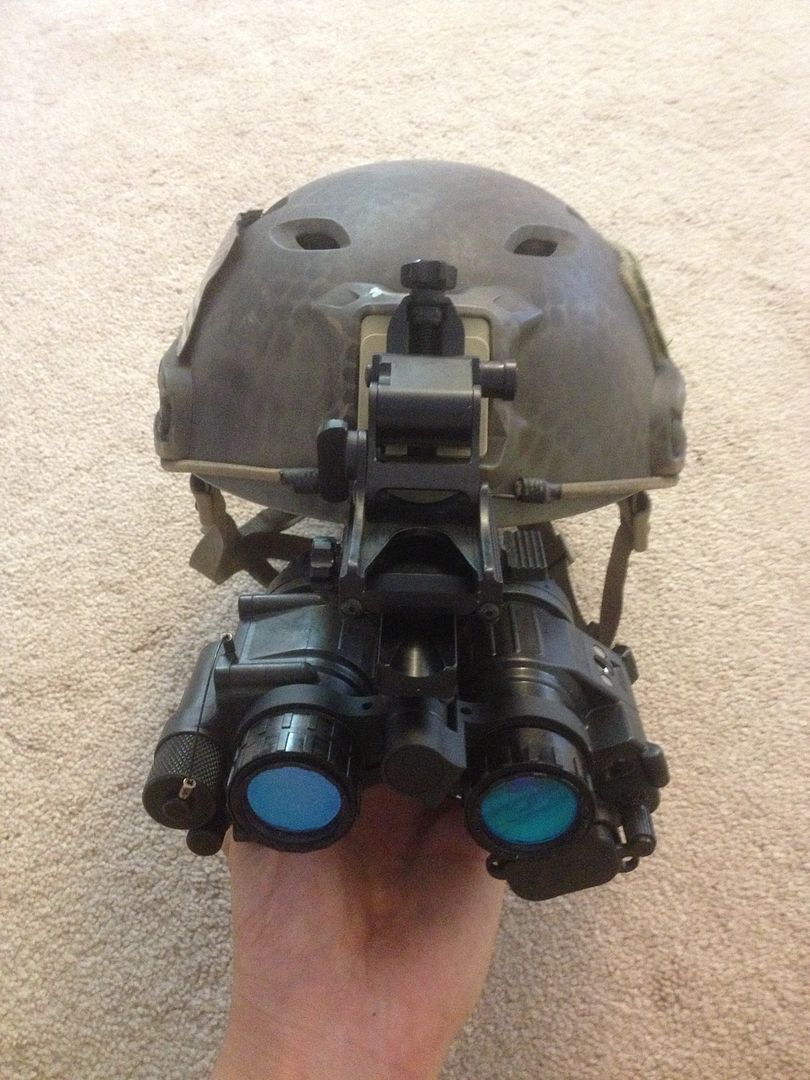
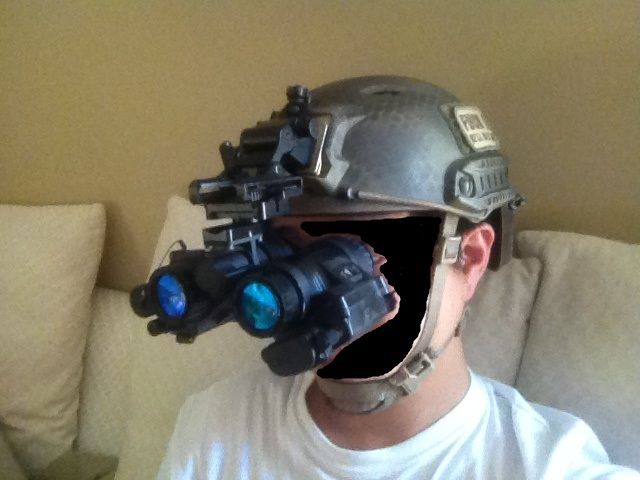
(it's hard to tell - but the edges of the monoculars just barely clear the lip of the helmet) The sum result was to allow this: Seen as worn during "normal" use - 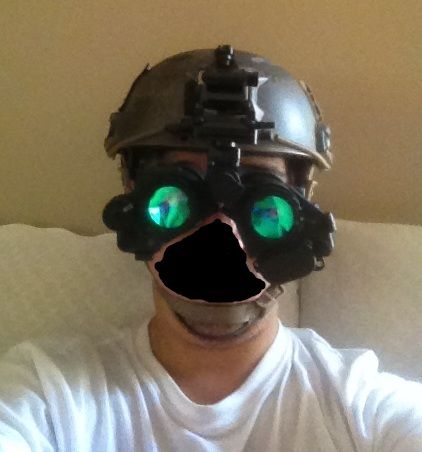
Stowed - 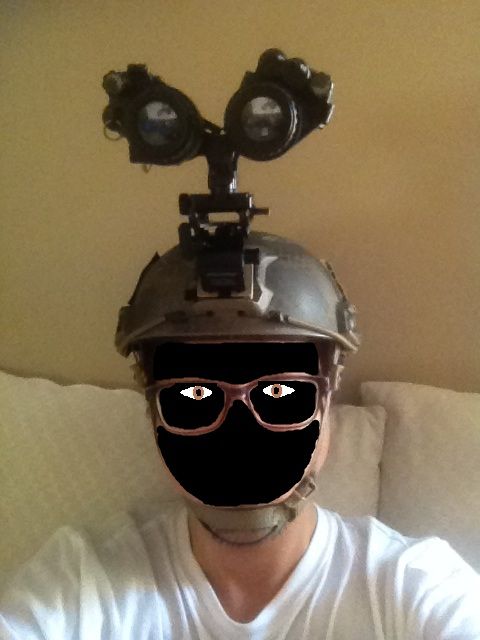
Stowed - with the monoculars folded back - 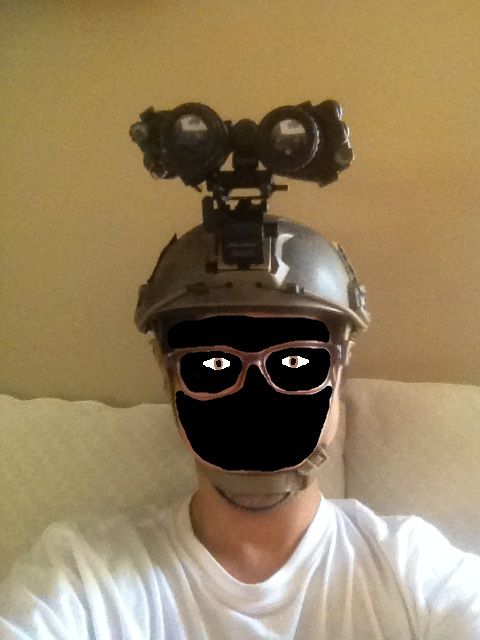
Better yet, though - with the NODs pushed all the way forward on the mount, and clearing the lip of the helmet - 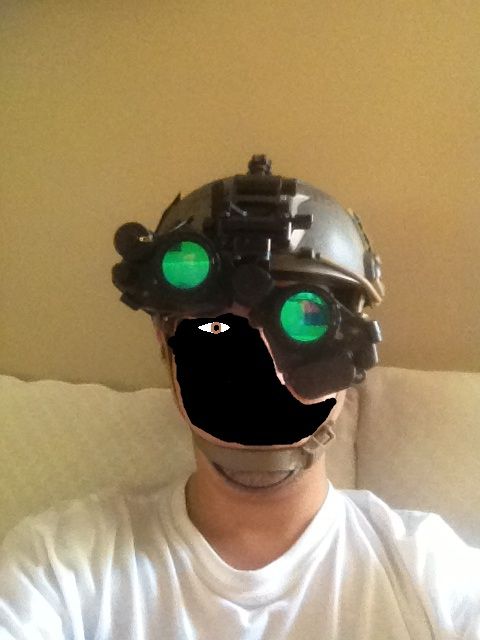
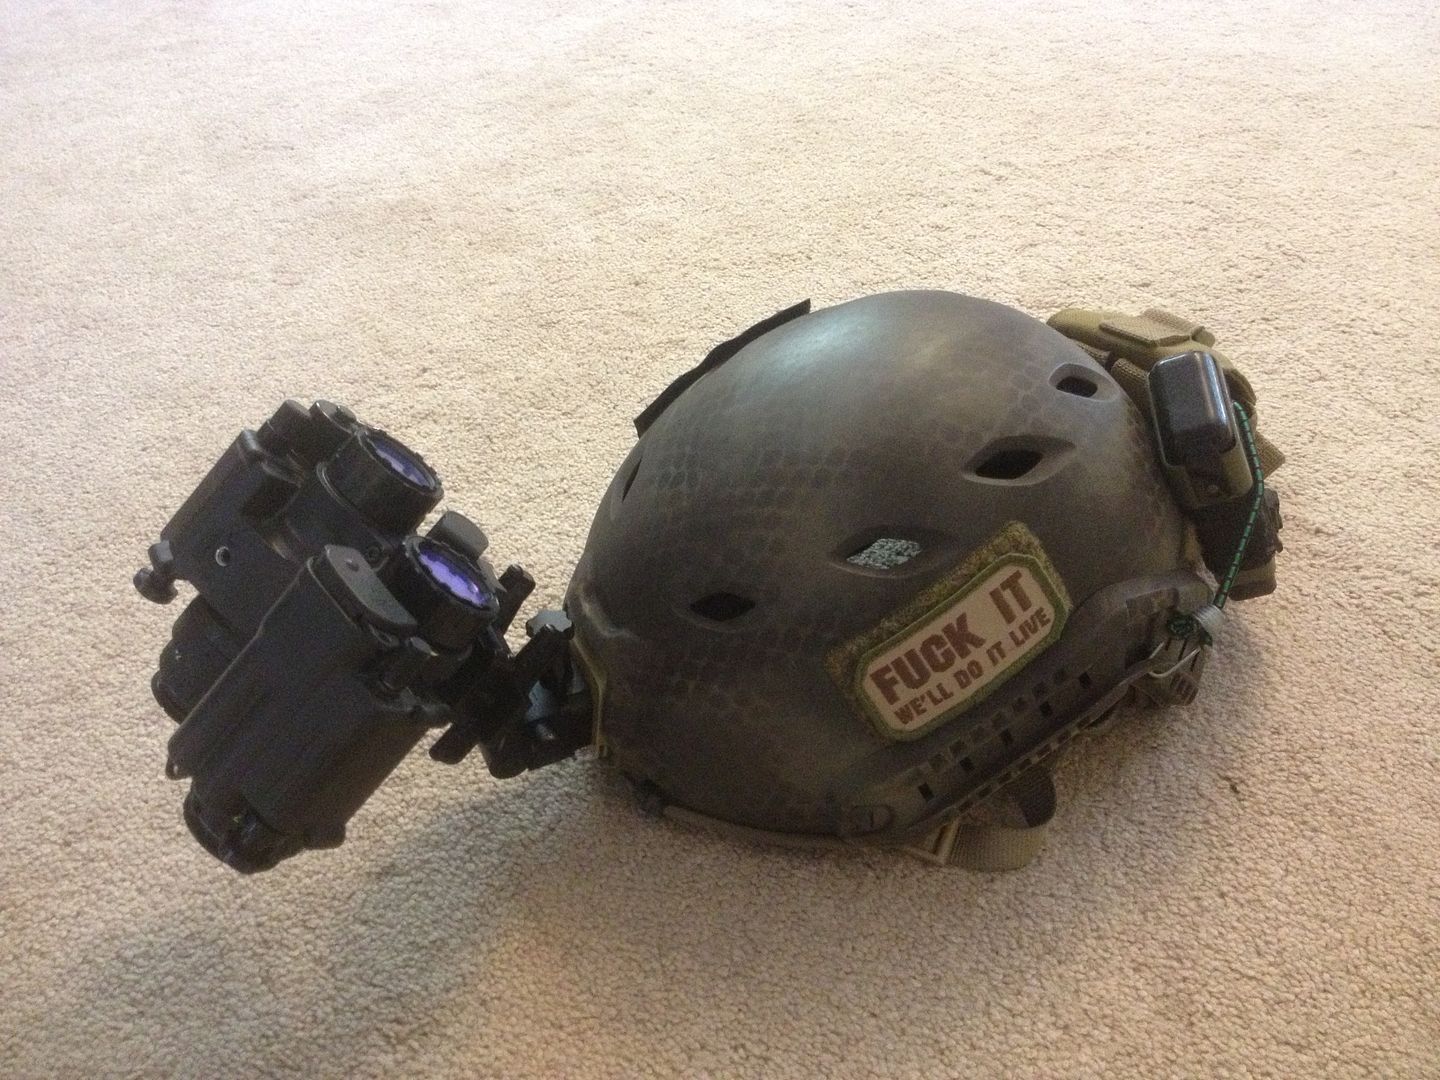
One monocular can be rotated up - it's not a perfect and clear unobstructed view - you can still see the bottom edge of the monocular, but essentially, it's a 90% solution if, say, you're going from a deep brush area to a more varied illumination urban area, for example. You can also do this - 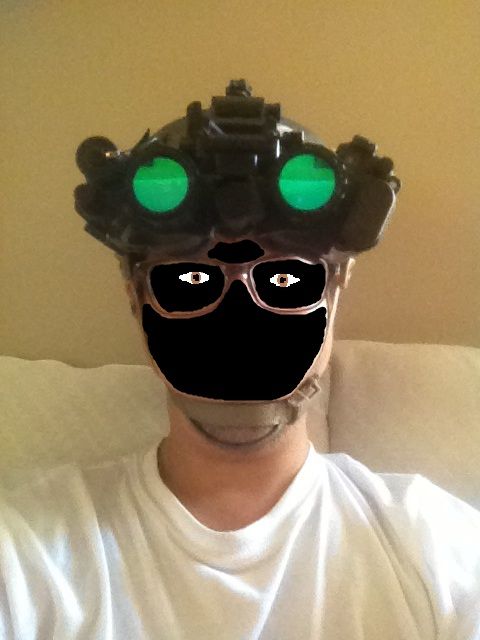
Once again - while you can still see the monoculars in the top of your field of view, the upside-down rings allow you to get the monoculars pretty "flat" when stowed - getting them almost entirely out of your FOV. Here is where the "on the fly" elevation adjustment of the Wilcox mounts could be pretty useful compared to the more precise, but much lower, and much more awkward to operate Norotos screw adjustment - as bringing the mount to max elevation gets the monoculars even further out of your FOV - as does being able to bring the NODs out far enough to clear the lip of the helmet. They're certainly not perfect - they're still heavier than they need to be (by sheer virtue of having independent controls and power supplies), while independent controls complicate operation (though I suppose they make the ad hoc monocular configuration possible), and perhaps are not as solid as a purpose built unit might be - PVS-15s, BNVDs, or Sentinels, these are not - and I'm sure I'd be even happier if the tube specs matched more closely - but I'm pretty satisfied with what I've got - and I think these will keep me happy, likely for several years until if and when I have a major change in income flow and can afford one of the aforementioned purpose-built units. The only things I really want to change now is to replace the dual-AA power supply on the one monocular for a lighter and more streamlined single-AA power supply, and get my grubby little paws on a Wilcox G24 mount - the TATM is a great mount - but IMHO, there are definitely things (having had the opportunity to try one out for a while) that the G24 will lend to this configuration, such as the "on the fly" elevation adjustment. No "in-action" shots yet, unfortunately, but I've taken it out a good bit so far, not as much shooting as I'd like - but overall, it's a great setup for me and my needs - hopefully I'll have more to add soon! P.S. - I notice now that with the chinstrap tightened and the rest of my face blacked-out, my chin pubes look awfully scraggly and disgusting... I'd like to point out that I shave once a month on average, and these photographs just happen to be from about a day or two after one of those occasions. ~Augee |
|
|
|
[#1]
I'm pretty satisfied with what I ended up with for the time being I think that's about as satisfied as we all can ever get with our setups, and our affliction. Great step by step on how you set up the '14's like that, and great to hear others in this community helping out. Awsome setup Augee. P.S. I'm still giggling at the photoshopped eyes.
|
|
|
|
[#2]
Nice DIY.....I LOVE THE BLACK OUT FACE AND EYEBALLS!
Vic |
|
|
|
[#3]
Quoted:
Nice DIY.....I LOVE THE BLACK OUT FACE AND EYEBALLS! Vic That's his real face, Vic. I dunno, there's cool factor to the zip-tie and rubber band. Maybe it's just me. |
|
|
|
[#4]
Quoted:
That's his real face, Vic. I dunno, there's cool factor to the zip-tie and rubber band. Maybe it's just me. Quoted:
Quoted:
Nice DIY.....I LOVE THE BLACK OUT FACE AND EYEBALLS! Vic That's his real face, Vic. I dunno, there's cool factor to the zip-tie and rubber band. Maybe it's just me. That was nice of you to help him out. |
|
|
|
[#5]
Quoted:
That's his real face, Vic. I dunno, there's cool factor to the zip-tie and rubber band. Maybe it's just me. Quoted:
Quoted:
Nice DIY.....I LOVE THE BLACK OUT FACE AND EYEBALLS! Vic That's his real face, Vic. I dunno, there's cool factor to the zip-tie and rubber band. Maybe it's just me. I liked that set up. I woulda rocked it. |
|
|
|
[#6]
I like it!
|
|
|
|
[#7]
|
|
|
|
[#8]
Hey TheHorta did you receive software with your UTM?
|
|
|
|
[#9]
Quoted:
I liked that set up. I woulda rocked it. Quoted:
Quoted:
Quoted:
Nice DIY.....I LOVE THE BLACK OUT FACE AND EYEBALLS! Vic That's his real face, Vic. I dunno, there's cool factor to the zip-tie and rubber band. Maybe it's just me. I liked that set up. I woulda rocked it. It bounced... a lot...
Actually, I think the J-Arm is pretty permanently bent from all the weight on it, and it felt like a sling-shot when you tried to stow it because the RHNO II was pretty new, too, and the FTO was pretty stiff. Also, bayonet mount... ewww.
But hey, it did its job, and did it well - and I got to have probably the junkiest set of Gen. III - head-mounted BNVDs ever devised! ~Augee |
|
|
|
[#10]
|
|
|
|
[#11]
For $200 I can JB weld those 14's together for you.
|
|
|
|
[#12]
Quoted:
For $200 I can JB weld those 14's together for you. For $5 I can staple them directly to his face. |
|
|
|
[#13]
Quoted:
For $5 I can staple them directly to his face. Quoted:
Quoted:
For $200 I can JB weld those 14's together for you. For $5 I can staple them directly to his face. I can write "wilcox" on the staple if it helps sell the job. :) |
|
|
|
[#14]
Gettin' ready for a night out:
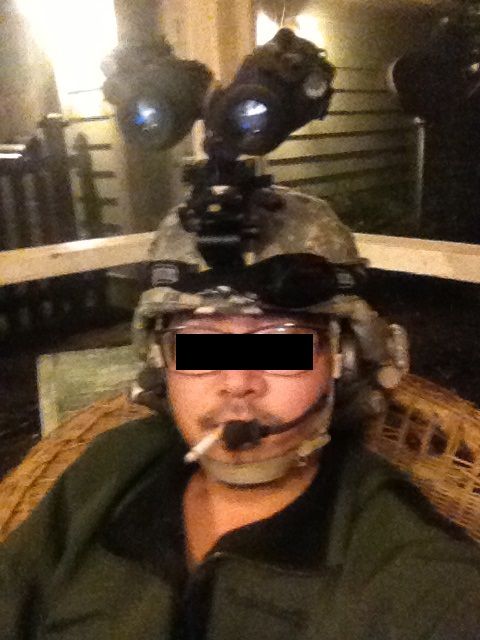
~Augee |
|
|
|
[#15]
Wow! That looks HIGH up over the helmet.
Keeps the smoke away from them. |
|
|
|
[#16]
Quoted:
Wow! That looks HIGH up over the helmet. Keeps the smoke away from them. The TATM does seem to place the NODs pretty high up in the stowed position - which was part of the reason the height of the bridge mount itself was fairly important to me - the "rebuilt" N-Vision mount does place it a little lower in the "deployed" position than the MOD Armory mount, though the MA is obviously much more low-profile in the folded position than the N-Vision, even with the monoculars folded back. The eventual hope, of course, being to get a Wilcox G24 that I can use on all of my helmets - however, I just scored an older Wilcox L3 G10 mount for under $150 shipped that I couldn't resist! Unfortunately, the L3 shrouds appear to be discontinued, and rarely if ever come up alone - meaning that I'll only be able to use it on one ACH, meaning I'm still on the prowl for a G24. It's slowly coming together! ~Augee |
|
|
|
[#17]
Quoted:
Gettin' ready for a night out: http://i1239.photobucket.com/albums/ff502/augeekim/augeekim005/12B7C949-3F37-444E-959E-2D4BEBC11776_zpsd9a8dc6c.jpg ~Augee NICE, I think you need a Cuban cigar instead! Those are sitting up in the airstream.... Vic |
|
|
 Win a FREE Membership!
Sign up for the ARFCOM weekly newsletter and be entered to win a free ARFCOM membership. One new winner* is announced every week!
You will receive an email every Friday morning featuring the latest chatter from the hottest topics, breaking news surrounding legislation, as well as exclusive deals only available to ARFCOM email subscribers.

AR15.COM is the world's largest firearm community and is a gathering place for firearm enthusiasts of all types.
From hunters and military members, to competition shooters and general firearm enthusiasts, we welcome anyone who values and respects the way of the firearm.

Subscribe to our monthly Newsletter to receive firearm news, product discounts from your favorite Industry Partners, and more.
Copyright © 1996-2024 AR15.COM LLC. All Rights Reserved.
Any use of this content without express written consent is prohibited.
AR15.Com reserves the right to overwrite or replace any affiliate, commercial, or monetizable links, posted by users, with our own.


