FL, USA
|
Posted: 8/16/2009 4:40:44 PM EDT
[Last Edit: Hendricks5150]
Here is a short guide on how to pep up your 10/22 stainless model from its current factory blah look. I finished mine today and figured I would share it with you.
Please support a tack of this thread if you learned something from it, think others will learn something from it, or would like to have it at the the top of the page in case if you need it one day. Removing the paint from the receiver (Tal-Strip II Aircraft Coating Remover works on both the gray and black receivers): You will need sand paper (I used 320 400 wet/dry, and 800 wet/dry), 0000 steel wool, a can of Tal-Strip II Aircraft Coating Remover (available at auto parts stores), cardboard box (the box that you received your latest gun toy will work - also pizza boxes work great too (it will give you an excuse to go to pizza hut or order another toy if you do not have ether -WARNING- Aircraft Coating Remover can eat through rubber gloves. Only touch the receiver directly when it is applied if you absolutely have to and do not to get any of the remover on your skin or eyes. This is what happened to my gloves after picking up the receiver to take a picture. I could feel the remover eating through and starting to eat at my skin  Wash your hands thoroughly with warm water and soap if you get this stuff on your skin. Wash your hands thoroughly with warm water and soap if you get this stuff on your skin.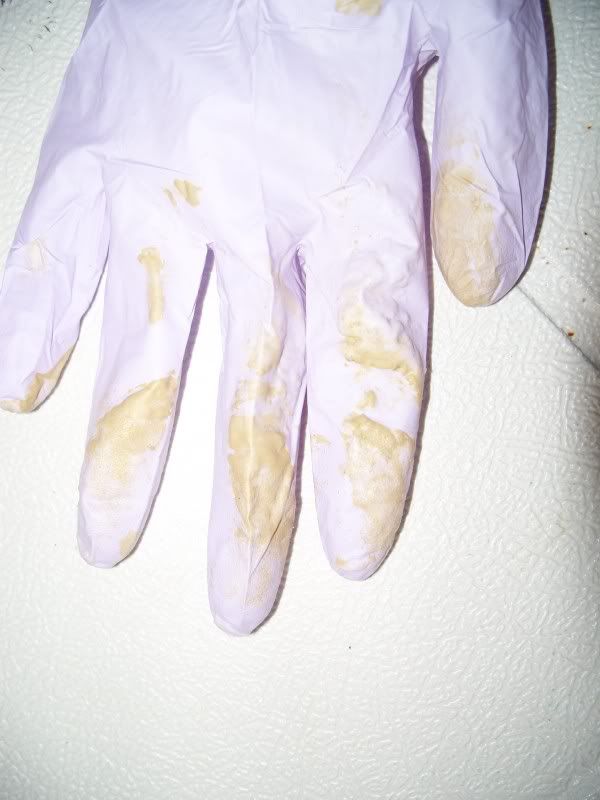 Here is what your new 10/22 stainless will look like before you start: 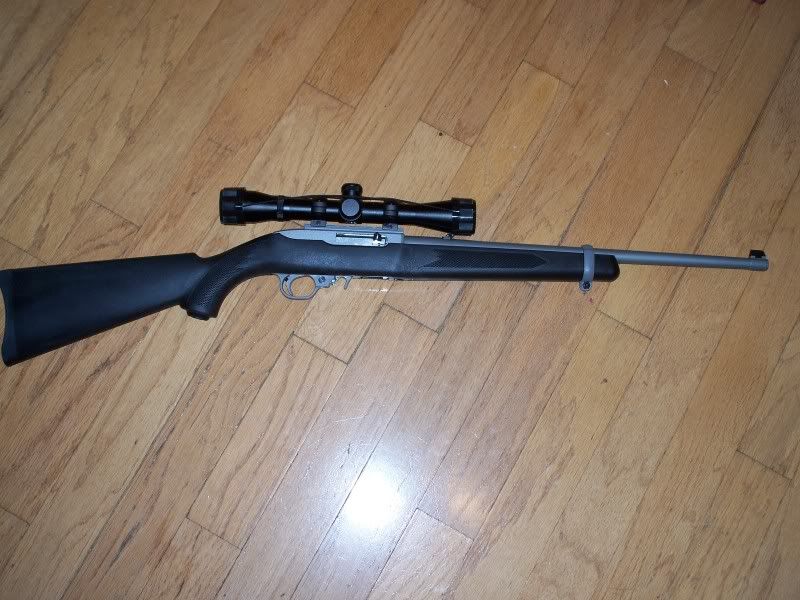 .......... Ok, first you take your cardboard and lay it down on the floor and set your receiver on top. 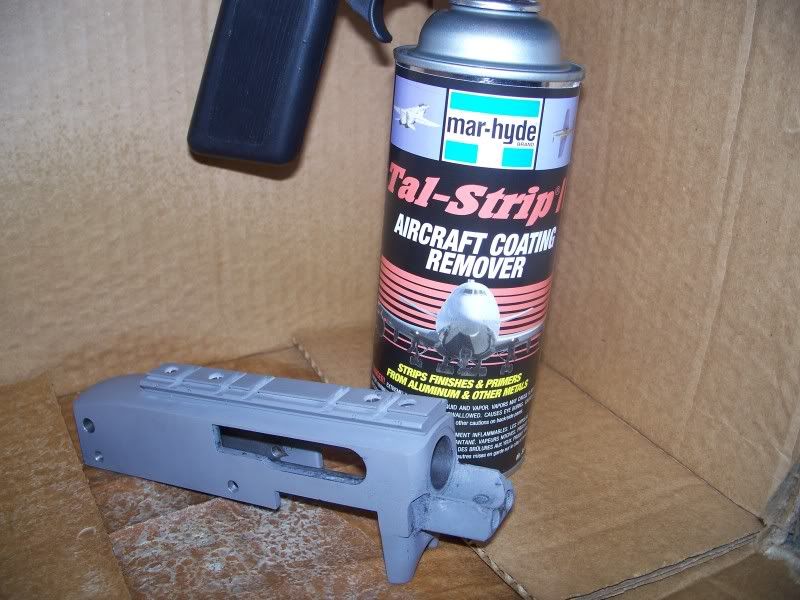 Next shake well and spray the Aircraft Coating Remover liberally over and inside the entire receiver. 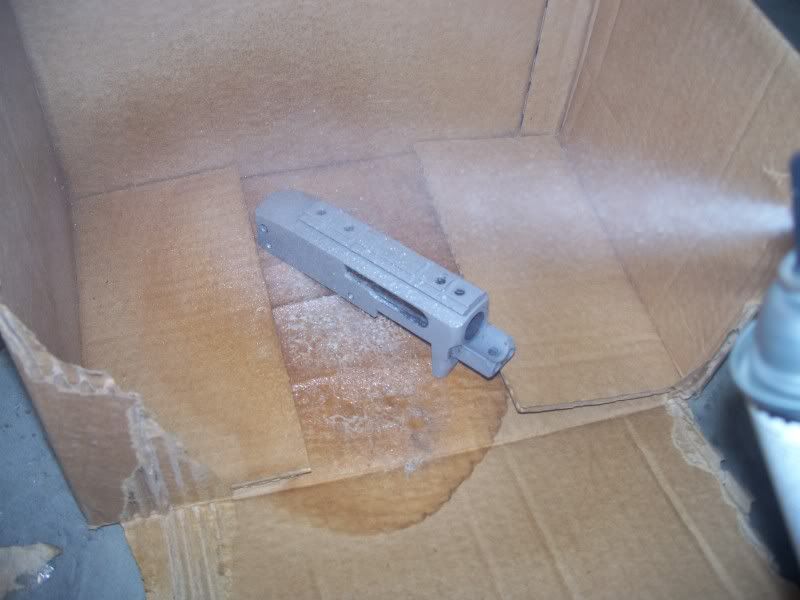 After you spray it on, you will see the paint to start "bubbling". 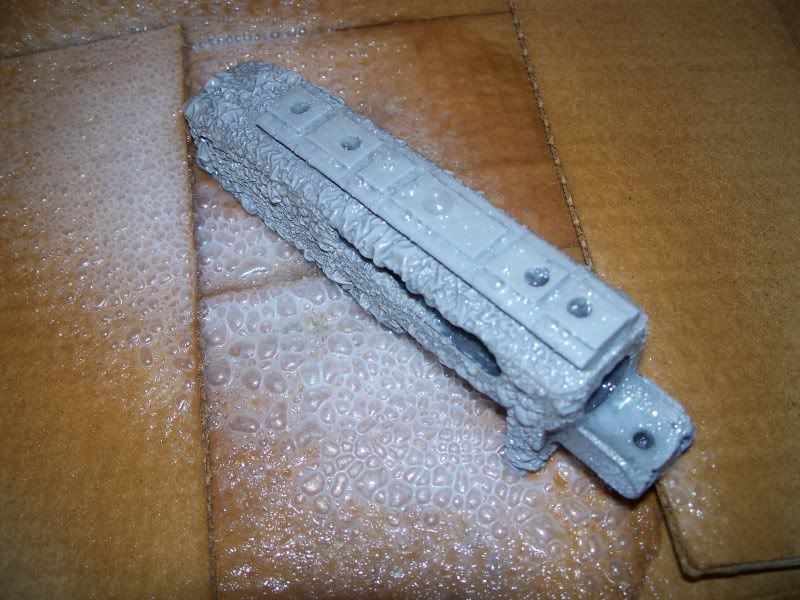 Let the aircraft coating remover set on the receiver for about 30 min. It will then look like this...   Pick up the receiver carefully with a wood dowel/drumstick/pliers/etc and place under hot water. Use the putty knife or other plastic bladed utensil to scrape off the paint. Dry off the receiver and then start sanding with 320 grit paper to get the machining marks off. 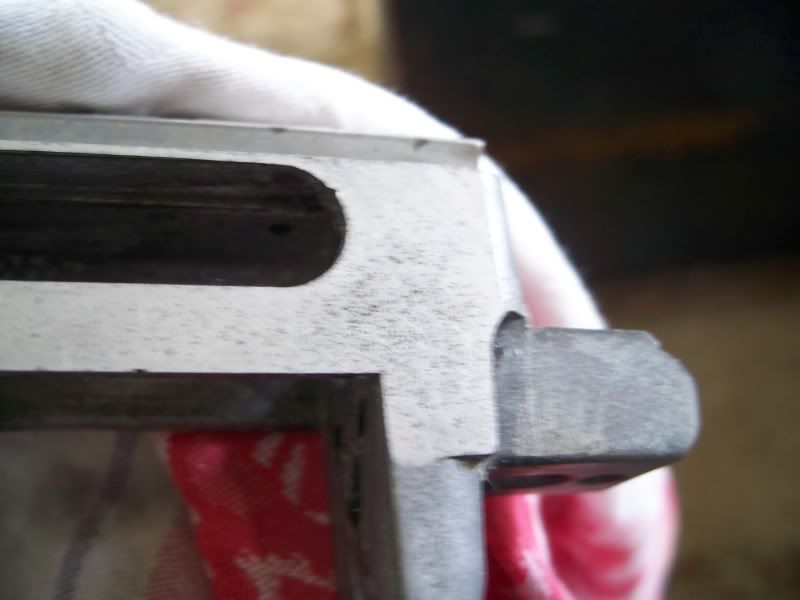 Place the 320 grit sandpaper on a flat surface (table or a sanding block works great) and move the receiver back and forth until the machining marks are gone. Slowly work your way up to the 0000 steel wool Next, flip the receiver over and start over You will also want to sand the top to match the sides. I also sanded the bottom of the receiver near the mag well.  Getting the paint off the barrel: -NOTE- Take the barrel off before you try this. You will need sand paper (I used 320 400 wet/dry, and 800 wet/dry), 0000 steel wool, a punch (I used a wood drumstick), hammer, and a lot of time. And possibly some Ben-Gay If you have a lathe or other method of hooking the barrel up to something to make it spin, this will take a lot of time off of the project. First you need to remove the iron sights. You have to take the sights out a certain way, looking down the barrel with the chamber in front of you tap the sights left to right. The rear sight has a small pin that goes through the "fork" part of the sight. Punch that pin out so you do not break off the "fork" part of your rear sight. Since the Aircraft Coating Remover won't work on this finish (I tried ), you have to do this the long way. DO NOT sand the part of the barrel that will go inside the receiver. You don't want your barrel to have a loose fit. Cut a piece of 320 grit sandpaper in half width ways, wrap the sand paper around the barrel, and start twisting the sandpaper on the barrel. DO NOT run the sandpaper up and down the barrel. Keep using the 320 grit until the machining marks are gone (newer models - it will take a while). Slowly work your way up to 0000 steel wool, or to your desired finish. Reinstall the iron sights by pushing them back in from right to left (looking at the chamber) Polishing the bolt: You will need to get sand paper (I used 320 400 wet/dry, and 800 wet/dry), 0000 steel wool, a barrel mop (I used a 20ga mop), a drill or dremel, and some flitz polish (other chrome polishes will work too - available at auto parts stores) You are first going to start out with an ugly unpolished bolt. Depending on how bad the machining marks are it may take you longer or shorter to polish your bolt.   Place the 320 grit sandpaper on a flat surface (table or a sanding block works great) and move the bolt back and forth until the machining marks are gone. Slowly work your way up to sanding the bolt with 0000 steel wool. Once you have gotten most of the scratches out put the bore mop on your drill/dremel and put some flitz polish (or other chrome polish) on the mop. Work the mop as a buffing wheel on the bolt to work out the rest of the scratches. Next, flip the bolt over and start over You will want to polish the sides of the bolt and the top of the bolt. This will improve your action and make it smoother to operate as well as make it look a lot nicer. Once you are done, scrub down the bolt with the brush that you use for cleaning and some solvent to get any shavings or left over polish out. Finished product: 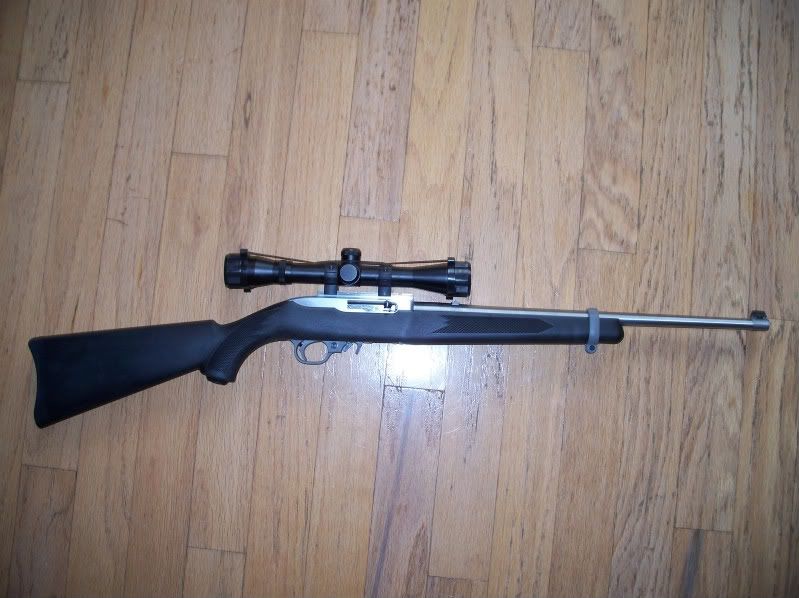  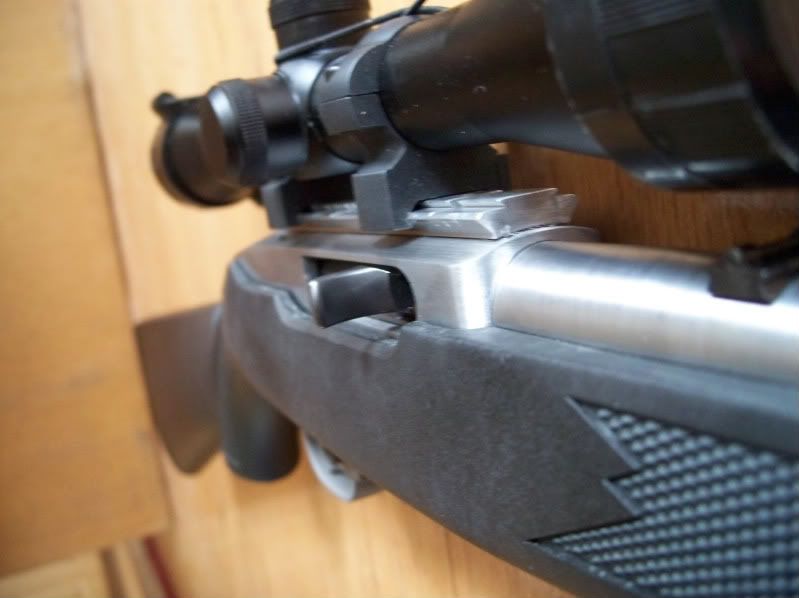 ETA: I took the scope base off after writing this tutorial and sprayed the receiver again with Tal-Strip as well as the bottom of the scope base. I later replaced the factory scope base with a Weaver base and turned the gun into this... 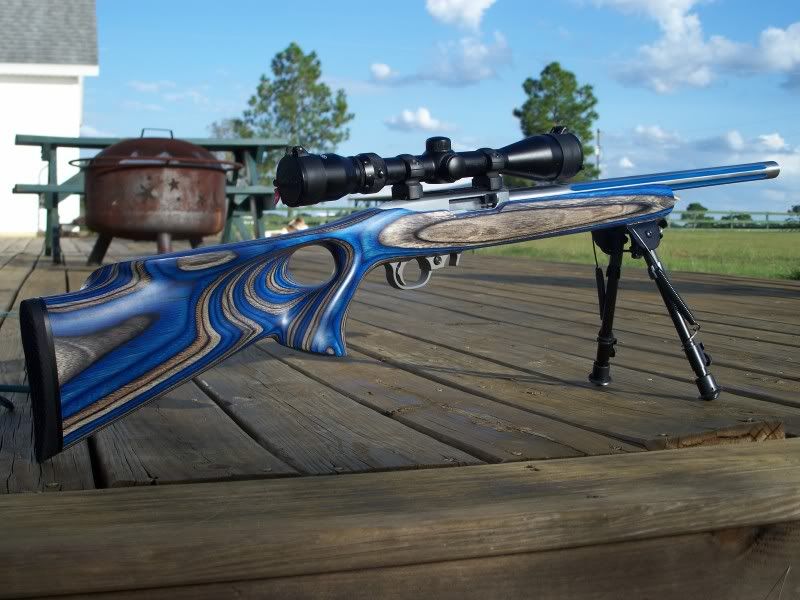 |
|
|
NC, USA
|
[#1]
Why didn't you remove the sight base before stripping? Second, how are you going to prevent oxidation of the aluminum? Lots of work and definetly better looking then factory.
|
|
|
FL, USA
|
[#2]
Originally Posted By singtoe:
Why didn't you remove the sight base before stripping? Second, how are you going to prevent oxidation of the aluminum? Lots of work and definetly better looking then factory. I red lock tighted it on. I couldn't find my soldering iron to heat up the screws to take the base off. I plan on replacing the stock on my 10/22 and when I do so, I will take the base off and get the rest of the paint. Put some flitz polish on some 0000 steel wool and rub it in once a year or so. It keeps the aluminum in tip top shape |
|
|
|
[#3]
Originally Posted By Hendricks5150: Originally Posted By singtoe: Why didn't you remove the sight base before stripping? Second, how are you going to prevent oxidation of the aluminum? Lots of work and definetly better looking then factory. I red lock tighted it on. I couldn't find my soldering iron to heat up the screws to take the base off. I plan on replacing the stock on my 10/22 and when I do so, I will take the base off and get the rest of the paint. Put some flitz polish on some 0000 steel wool and rub it in once a year or so. It keeps the aluminum in tip top shape |
|
|
|
FL, USA
|
[#4]
Originally Posted By wetidlerjr:
Originally Posted By Hendricks5150:
Originally Posted By singtoe:
Why didn't you remove the sight base before stripping? Second, how are you going to prevent oxidation of the aluminum? Lots of work and definetly better looking then factory. I red lock tighted it on. I couldn't find my soldering iron to heat up the screws to take the base off. I plan on replacing the stock on my 10/22 and when I do so, I will take the base off and get the rest of the paint. Put some flitz polish on some 0000 steel wool and rub it in once a year or so. It keeps the aluminum in tip top shape I haven't had that happen to me. If you want you can use a micro fiber cloth to rub the polish in. |
|
|
|
[#5]
Originally Posted By Hendricks5150: I haven't either but I have seen numerous warnings and also concerning steel wool on stainless steel.Originally Posted By wetidlerjr: Originally Posted By Hendricks5150: Originally Posted By singtoe: Why didn't you remove the sight base before stripping? Second, how are you going to prevent oxidation of the aluminum? Lots of work and definetly better looking then factory. I red lock tighted it on. I couldn't find my soldering iron to heat up the screws to take the base off. I plan on replacing the stock on my 10/22 and when I do so, I will take the base off and get the rest of the paint. Put some flitz polish on some 0000 steel wool and rub it in once a year or so. It keeps the aluminum in tip top shape I haven't had that happen to me. If you want you can use a micro fiber cloth to rub the polish in. |
|
|
|
FL, USA
|
[Last Edit: Hendricks5150]
[#6]
Originally Posted By wetidlerjr:
Originally Posted By Hendricks5150:
I haven't either but I have seen numerous warnings and also concerning steel wool on stainless steel.
Originally Posted By wetidlerjr:
Originally Posted By Hendricks5150:
Originally Posted By singtoe:
Why didn't you remove the sight base before stripping? Second, how are you going to prevent oxidation of the aluminum? Lots of work and definetly better looking then factory. I red lock tighted it on. I couldn't find my soldering iron to heat up the screws to take the base off. I plan on replacing the stock on my 10/22 and when I do so, I will take the base off and get the rest of the paint. Put some flitz polish on some 0000 steel wool and rub it in once a year or so. It keeps the aluminum in tip top shape I haven't had that happen to me. If you want you can use a micro fiber cloth to rub the polish in. Fascinating, what is the problem? (edit- I'm not being snotty, just curious) Maybe use stainless steel wool if regular steel wool is bad then. |
|
|
FL, USA
|
[#7]
so this confirms they are actually painting the stainless steel barrels - just when you thought Ruger couldn't get any dumber.
|
|
|
FL, USA
|
[#8]
Originally Posted By Rocketfish:
so this confirms they are actually painting the stainless steel barrels - just when you thought Ruger couldn't get any dumber. Yeah I agree. I really don't see why they are painting them, they look so much better plain. If you do some of the work that I did above, you start seeing how they are skimping on everything. All the machining marks on the receiver, bolt, and barrel are crazy. The gun still shoots great and is super reliable. Thank God I got one before that started changing
|
|
|
NC, USA
|
[#9]
Originally Posted By Hendricks5150:
Originally Posted By Rocketfish:
so this confirms they are actually painting the stainless steel barrels - just when you thought Ruger couldn't get any dumber. Yeah I agree. I really don't see why they are painting them, they look so much better plain. If you do some of the work that I did above, you start seeing how they are skimping on everything. All the machining marks on the receiver, bolt, and barrel are crazy. The gun still shoots great and is super reliable. Thank God I got one before that started changing You have one they haven't changed? |
|
|
FL, USA
|
[#10]
Originally Posted By singtoe:
Originally Posted By Hendricks5150:
Originally Posted By Rocketfish:
so this confirms they are actually painting the stainless steel barrels - just when you thought Ruger couldn't get any dumber. Yeah I agree. I really don't see why they are painting them, they look so much better plain. If you do some of the work that I did above, you start seeing how they are skimping on everything. All the machining marks on the receiver, bolt, and barrel are crazy. The gun still shoots great and is super reliable. Thank God I got one before that started changing You have one they haven't changed? I meant that I am thankful that I got a 10/22 before ruger screws with them even more and they stop shooting well out of the box
|
|
|
GA, USA
|
[#11]
Originally Posted By Rocketfish:
so this confirms they are actually painting the stainless steel barrels - just when you thought Ruger couldn't get any dumber. Does this mean that the blue barrels are really stainless barrels with paint on them? I bought a Charger and on the Ruger website it describes the barrel as "10 inch alloy steel". |
|
|
FL, USA
|
[#12]
Originally Posted By PeaceKeeper2:
Originally Posted By Rocketfish:
so this confirms they are actually painting the stainless steel barrels - just when you thought Ruger couldn't get any dumber. Does this mean that the blue barrels are really stainless barrels with paint on them? I bought a Charger and on the Ruger website it describes the barrel as "10 inch alloy steel". A lot of them are powder coated/painted. They might still blue some of them. |
|
|
|
[#13]
Originally Posted By Rocketfish:
so this confirms they are actually painting the stainless steel barrels - just when you thought Ruger couldn't get any dumber. Interesting, I emailed Ruger and they said the barrels are simply sandblasted to a matte finish. |
|
|
|
|
[#14]
Originally Posted By Hendricks5150:
Originally Posted By PeaceKeeper2:
Originally Posted By Rocketfish:
so this confirms they are actually painting the stainless steel barrels - just when you thought Ruger couldn't get any dumber. Does this mean that the blue barrels are really stainless barrels with paint on them? I bought a Charger and on the Ruger website it describes the barrel as "10 inch alloy steel". A lot of them are powder coated/painted. They might still blue some of them. Mine(Talo Classic) was labelled as blued-doesn't look "obviously" painted, so if it is they used a good color match to bluing. |
|
|
|
FL, USA
|
[Last Edit: Rocketfish]
[#15]
Originally Posted By shack357:
Interesting, I emailed Ruger and they said the barrels are simply sandblasted to a matte finish. Yeah, that would make a lot more sense, but the OP has described "removing paint from the barrel". Ahhh, this explains why the OP couldn't remove the paint from the barrel with the aircraft stripper - it's not paint!
|
|
|
FL, USA
|
[Last Edit: Hendricks5150]
[#16]
Originally Posted By Rocketfish:
Originally Posted By shack357:
Interesting, I emailed Ruger and they said the barrels are simply sandblasted to a matte finish. Yeah, that would make a lot more sense, but the OP has described "removing paint from the barrel". Ahhh, this explains why the OP couldn't remove the paint from the barrel with the aircraft stripper - it's not paint! It's something. Certainly not bead blasted, it would look like stainless steel. What makes me believe that it is paint is that the bolts that hold the barrel on scratched the "paint" off the bottom of the barrel on installation at the factory. I guess I should add a before pic. Edit: Pic added. |
|
|
NE, USA
|
[Last Edit: Whisper44]
[#17]
nice job finishing what ruger is cutting corners on...
|
|
|
FL, USA
|
[#18]
Originally Posted By Whisper44:
nice job finishing what ruger is cutting corners on... Thanks |
|
|
|
[#19]
good thread. tacked
|
|
|
|
FL, USA
|
[#20]
Originally Posted By Hoplite:
good thread. tacked Thanks |
|
|
WA, USA
|
[#21]
Don't understand the sticky, it's been done many times (with scope mount of LMAO!)
Raw aluminum need at least a clear coat (if not anodizing) 
|
|
|
FL, USA
|
[#22]
Originally Posted By Rocker:
Don't understand the sticky, it's been done many times (with scope mount of LMAO!) Raw aluminum need at least a clear coat (if not anodizing) Mine is still in great shape and I took the scope mount off after making this thread and replaced it with a Weaver mount. |
|
|
|
[Last Edit: 1911smith]
[#23]
Clear Coat is the best way of keeping aluminum wheels shiny without oxidizing. Every two years or so we take the clear coat off with 0000 steel wool and gasoline. No pressure applied. Then buff out to mirror shine and recoat. If I decide to do my 10/22 and probably will since it has stainless bull barrel. I'd polish with every cleaning from the field. Keep the polish applied and it won't oxidize. Put it away in a closet and forget. It will. Thanks for the tip.
|
|
|
|
|
[#24]
I agree with the comments about adding corrosion protection for the receiver. But, you could also cite the old practice used on bright finished muzzle loading military muskets that were kept shiny by the soldiers as part of their duty.
The steel barrel will remain fairly rust free if given a high polish to 600 grit wet or dry paper. I have some 4130 tubing I polished 3 or 4 years ago, then wiped with oil, that is still bright. Repolishing aluminum with steel wool is poor practice that will aggravate corrosion. Use scotch brite pads from the grocery store, or get fancy and buy aluminum wool from an aircraft supplies seller. I really like the idea of polishing the receiver, bolt, and barrel, but I don't agree with leaving the job unfinished and generating more work later. Here's a new, related topic - Did you consider polishing the inside of the receiver where the bolt rides? Does the bolt feel sloppier in the reciever now? |
|
|
|
|
[#25]
The bolt doesn't feel sloppy, it just feels smooth now. Before it felt kind of gritty when I cycled it.
I didn't polish the inside because I figured it will get polished and broken in with time (after putting less than 1k rounds through it, I can already start to see it working itself out.) |
|
|
|
|
[#26]
Letting the bolt lap itself in might be the best way since the receiver is aluminum.
Your thread is making me think I may buy a new rifle to get a donor action, but I sure hate the idea of taking on another project with polishing right now. |
|
|
|
|
[#27]
Originally Posted By AeroE:
Letting the bolt lap itself in might be the best way since the receiver is aluminum. Your thread is making me think I may buy a new rifle to get a donor action, but I sure hate the idea of taking on another project with polishing right now. I know what you mean. Polishing can get quite monotonous. I find that it goes by faster if you watch TV while doing it. |
|
|
|
|
[Last Edit: hotrod_sxty8]
[#28]
I did mine up a couple of years ago (the non painted reciever)
wet sanded it and polished, also did a red inlay in the ruger label with red model paint, I didn't sand that side I didn't want to hurt the label. and I took the bolt to the polishing wheel too.. this mod (the bolt polish)definaltly improves the cycling action. obligatory pic coming up... 


|
|
|
|
|
[#29]
That looks great
I wish I had a buffing wheel to get mine to have a mirror finish. |
|
|
|
|
[#30]
the wheels are pretty cheap, I'm a hobby polisher just do a lil work for friends and my self so I picked up a couple of wheels at the local hardware store they are pretty cheap I think I have less than 50 bucks in all of my polishing equipment (not including the various mag/alluminum polishes I have purchased thru the years...trying all the different brands) I have 3 wheels one is a stitched 6 inch wheel for the coarse polish stock removal I use the coarse polishing sticks for this one, then I have 2 buffer wheels that are used with the jewlers rouge sticks for the final polish. I have a dremmel kit too but I only use that for porting and polishing throttle bodies.
the other wheel I have is @3 inches that I use on my diegrinder for polishing automotive wheels. and I use an antique motor with a belt driven arbor with the wheels so I didn't have to buy a bench grinder...I'm a tightwad....lol funny thing is I started polishing car audio amplifiers and wheels for myself for friends that wanted something different( back in the early 90's I was an installer) |
|
|
|
|
[#31]
How is that Dremel Kit? I saw it at Wal-Mart and didn't know if it was any good.
I have an old grinder as well (Given to me by my great grand father - No idea how old the grinder is). I wonder if a buffing wheel will fit on it. |
|
|
|
|
[#32]
the dremmel kit is pretty decent I use it mostly for removing casting marks and smoothing out seams. for polishing with it it's a lil fast for me I use my air diegrinder for that so I can control the speed and watch out for the dremmel it can cut real deep reeal fast....
the older grinder should do a pretty good job you may need to get an arbor adaptor to fit the polishing wheels. |
|
|
|
|
[#33]
I lucked out and got one of the last all-metal 10/22's. It's a stainless, and the trigger housing is aluminum, as is the barrel band.
The receiver, trigger housing, barrel band, and magazine release all had the funky paint on them. (I had a 90's era 10/22 and the aluminum was clear anodized, no paint.) But the barrel was stainless steel with no coating and a good finish. I wound up having to go through this process with the receiver because I used gun scrubber spray to clean the gun, and it marred the paint. So, I just stripped the paint off and left the aluminum bare. As for those people worried about corrosion, the Marlin Model 60 stainless has a bare, uncoated aluminum receiver form the factory. No problems there. |
|
|
|
|
[#34]
Mine looks exactly the same after posting this thread. Still looks sharp
|
|
|
|
NJ, USA
|
[#35]
if I bought one of the new matte black 10/22s and stripped the barrel and the receiver, is it just the same? I would assume its all the same materials... so I oculd make a 10/22 DSP look all nice and stainless, right?
|
|
|
|
[#36]
Originally Posted By njitmetal: if I bought one of the new matte black 10/22s and stripped the barrel and the receiver, is it just the same? I would assume its all the same materials... so I oculd make a 10/22 DSP look all nice and stainless, right? The receiver will be the same. I would not recommend stripping the barrel since it would not be stainless steel. |
|
|
|
NJ, USA
|
[#37]
Originally Posted By Hendricks5150:
Originally Posted By njitmetal:
if I bought one of the new matte black 10/22s and stripped the barrel and the receiver, is it just the same? I would assume its all the same materials... so I oculd make a 10/22 DSP look all nice and stainless, right? The receiver will be the same. I would not recommend stripping the barrel since it would not be stainless steel. ohhhh OK. thats what I was wondering... thanks for the info. |
|
|
|
[#38]
I did this to a couple of mine. I replaced the blued barrels, one with a VQ and the other with a stock stainless bbl. I beadblasted the anodize off, which you could also do with the paint. I then hit it with a green or purple scotchbrite wheel in a buffer to smooth it out. I then went to 600 grit wetsand and then used Wenol red and Wenol Blue to polish to a mirror, by hand. This was a fairly fast process, with the Scotchbrite wheel doing most of the heavy work. Mine have been done for close to 10 years and I haven't had to repolish. Many aluminum polish compounds have a preservative in them. A final coat of Carnauba wax will do the same thing for you.
FYI, for chems, use nitrile gloves, the thicker the better. Latex is useless for chems. |
|
|
|
MS, USA
|
[#39]
very cool thread.............I have an old 10/22 with a black receiver and it got scratched right on the top..........like two inches long. you can see it took everything off. I may do this now to the receiver just to clean it up.
I have a charger barrel on there now...it is blued.........but I also am using an Arch Angel pistol stock and you can only see part of the receiver.............hmmmmmmmm I think it would look great! |
|
|
|
[#40]
This may be a dumb question, but how can I tell the difference between a stainless 10/22 & an aluminium 10/22?
I picked up what I thought was a stainless one in a pawn shop a while back, and after reading this thread, I'm wondering if it isn't aluminium. The barrel is stainless, and I would say it matches the receiver, but now I'm curious. Either way, I want to polish the barrel (and if possible, the reciver), can I do this with a buffing wheel on my grinder and some polishing compound? Gene |
|
|
|
|
[Last Edit: Hendricks5150]
[#41]
Originally Posted By GENESMITH: This may be a dumb question, but how can I tell the difference between a stainless 10/22 & an aluminium 10/22? I picked up what I thought was a stainless one in a pawn shop a while back, and after reading this thread, I'm wondering if it isn't aluminium. The barrel is stainless, and I would say it matches the receiver, but now I'm curious. Either way, I want to polish the barrel (and if possible, the reciver), can I do this with a buffing wheel on my grinder and some polishing compound? Gene The difference on the stainless and "basic" (black) model is that the barrels are made of different steel (stainless model has a stainless steel barrel. I'm not sure what kind of steel the black one is made of). All factory 10/22 receivers are made of aluminum. You can do the polishing on the setup that you described. You will want to use sand paper first to get rid of the tooling marks (you will see them when you take the paint off). Remember when working on the barrel, don't sand the length (muzzle to chamber). You always sand around the barrel. Its a total pain in the ass, but if you have a way of making the barrel spin, it would make it a ton faster. |
|
|
|
|
[#42]
Here is the one I'm talking about:

I've since changed out the stock: 
I know it's hard to see in the pic, but the barrel already has a stainless finish, and the receiver is bare aluminum. There are no tool marks, I just want to clean up the shine on it. (hope that makes sense) I'll have to get some better pics. Gene |
|
|
|
|
[#43]
Originally Posted By GENESMITH: Here is the one I'm talking about: http://media.ar15.com/media/viewFile.html?i=17914 I've since changed out the stock: http://media.ar15.com/media/viewFile.html?i=18023 I know it's hard to see in the pic, but the barrel already has a stainless finish, and the receiver is bare aluminum. There are no tool marks, I just want to clean up the shine on it. (hope that makes sense) I'll have to get some better pics. Gene Ah ok, I remember that 10/22. You still will want to work up to 2k or higher sand paper (probably could start with 800) and then move onto the buffing wheel with compound. |
|
|
|
|
[#44]
yup the barrel is stainless and the reciever is alluminum.
you can polish the barrel on the wheel. and the reciever really needs to be wet sanded then polished on the wheel. |
|
|
|
|
[#45]
Originally Posted By ryanwilson1979:
very cool thread.............I have an old 10/22 with a black receiver and it got scratched right on the top..........like two inches long. you can see it took everything off. I may do this now to the receiver just to clean it up. I have a charger barrel on there now...it is blued.........but I also am using an Arch Angel pistol stock and you can only see part of the receiver.............hmmmmmmmm I think it would look great! Don't get caught unless it's registered as a SBR. The charger barrel on a rifle receiver is illegal unless registered, and it's surprising how many people don't know that. |
|
|
|
|
[#46]
Are all stainless 10/22 recievers that pitted and rough under the paint or did that aircraft paint remover react to the aluminum?
And how to protect a bare reciever if I bead blast it for a matte look since it is not real stainless? Posted Via AR15.Com Mobile |
|
|
|
|
[Last Edit: Hendricks5150]
[#47]
Originally Posted By LA_357SIG: Are all stainless 10/22 recievers that pitted and rough under the paint or did that aircraft paint remover react to the aluminum? And how to protect a bare reciever if I bead blast it for a matte look since it is not real stainless? Posted Via AR15.Com Mobile I can only speak for my receiver. I first tried Easy-Off oven cleaner as recommended by some other users. Little did I know that Easy-Off likes to eat aluminum, so some damage was done to my receiver. The Easy-Off could very well have caused the pitting but I do not know if the pitting is on other factory receivers. I would have to strip another down with Tal-Strip II in order to find out. I can pretty much guarantee that a new 10/22 (unless Ruger takes their head out of their asses) will have heavy tooling marks on the receiver. The marks are so heavy that you can actually see them trough the paint. These tooling marks do come out with sanding though. The receiver will be fine if you bead blast it. Keep it clean and stored dry like you would with any other firearm. |
|
|
|
USA
|
[#48]
i just bought today the black 10/22 with the polished stainless barrel, i can strip this down and polish the receiver to make it look like your's correct, thanks
|
|
|
|
[#49]
Originally Posted By FatAndy: i just bought today the black 10/22 with the polished stainless barrel, i can strip this down and polish the receiver to make it look like your's correct, thanks Yep. |
|
|
|
|
[#50]
Originally Posted By Hendricks5150:
Originally Posted By LA_357SIG:
Are all stainless 10/22 recievers that pitted and rough under the paint or did that aircraft paint remover react to the aluminum? And how to protect a bare reciever if I bead blast it for a matte look since it is not real stainless? Posted Via AR15.Com Mobile I can only speak for my receiver. I first tried Easy-Off oven cleaner as recommended by some other users. Little did I know that Easy-Off likes to eat aluminum, so some damage was done to my receiver. The Easy-Off could very well have caused the pitting but I do not know if the pitting is on other factory receivers. I would have to strip another down with Tal-Strip II in order to find out. I can pretty much guarantee that a new 10/22 (unless Ruger takes their head out of their asses) will have heavy tooling marks on the receiver. The marks are so heavy that you can actually see them trough the paint. These tooling marks do come out with sanding though. The receiver will be fine if you bead blast it. Keep it clean and stored dry like you would with any other firearm. I left mine on for about 2 min and it came right off. I dunked it into a bucket of water until it stopped bubbling. I scraped most of it off with a chopstick before I put it in the water. 
The machining marks are bad but no pitting. 
And if you reeeaaalllyyy want to spruce up your stainless 10/22 you can RIT dye your silver trigger guard any color you want. I wasted 1/2 a bottle of black and 1 hour trying to dye it with hot tap water like the directions said the first time. Then I heated up some water in a sauce pan on high then brought it down to 6 then added just a little and it took less than 1 minute to totally darken. same with the trigger. |
|
|
|
 Win a FREE Membership!
Sign up for the ARFCOM weekly newsletter and be entered to win a free ARFCOM membership. One new winner* is announced every week!
You will receive an email every Friday morning featuring the latest chatter from the hottest topics, breaking news surrounding legislation, as well as exclusive deals only available to ARFCOM email subscribers.

AR15.COM is the world's largest firearm community and is a gathering place for firearm enthusiasts of all types.
From hunters and military members, to competition shooters and general firearm enthusiasts, we welcome anyone who values and respects the way of the firearm.

Subscribe to our monthly Newsletter to receive firearm news, product discounts from your favorite Industry Partners, and more.
Copyright © 1996-2024 AR15.COM LLC. All Rights Reserved.
Any use of this content without express written consent is prohibited.
AR15.Com reserves the right to overwrite or replace any affiliate, commercial, or monetizable links, posted by users, with our own.


