|
[#1]
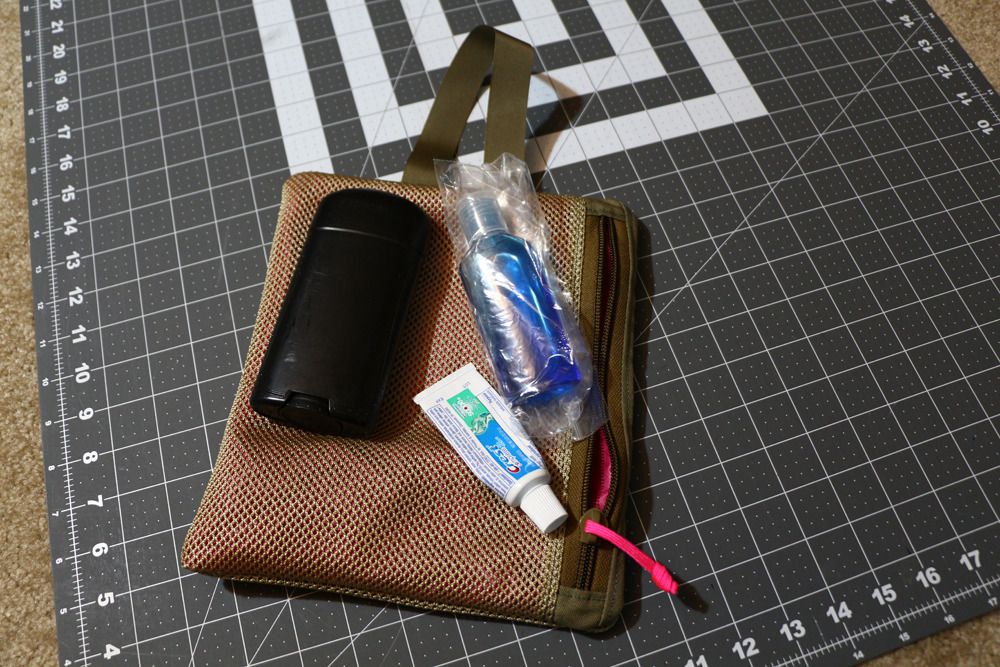
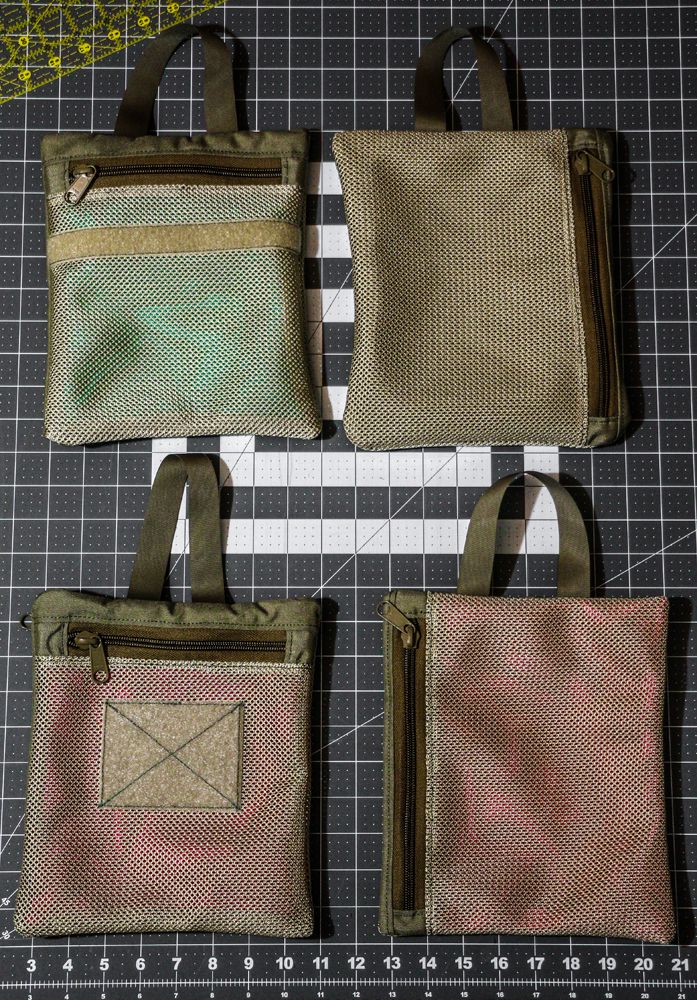
Here's some of my most recent projects:
Christmas 2017: Toiletry bags 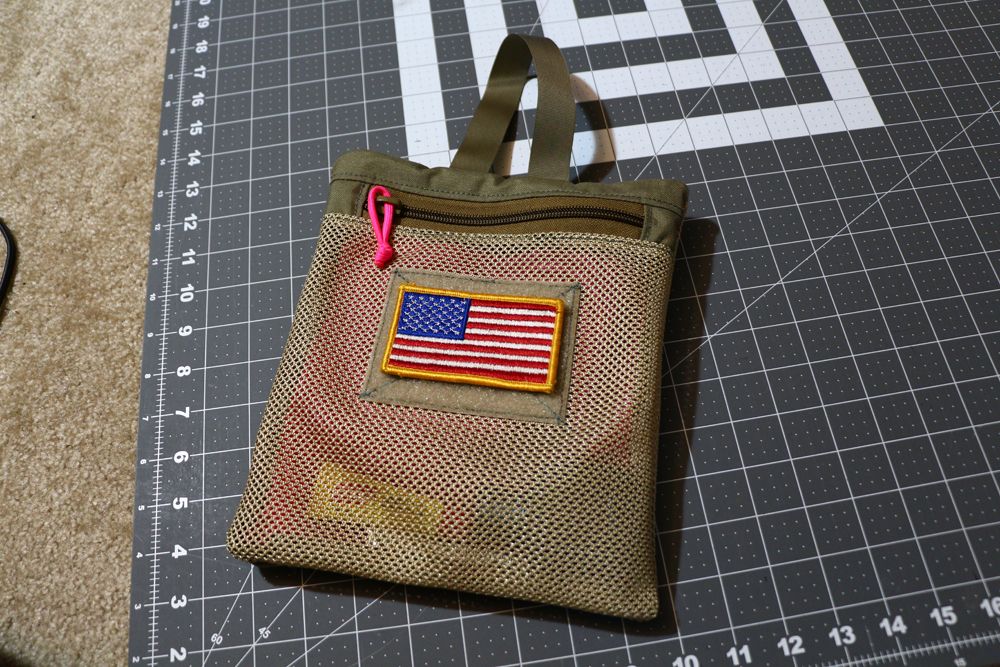
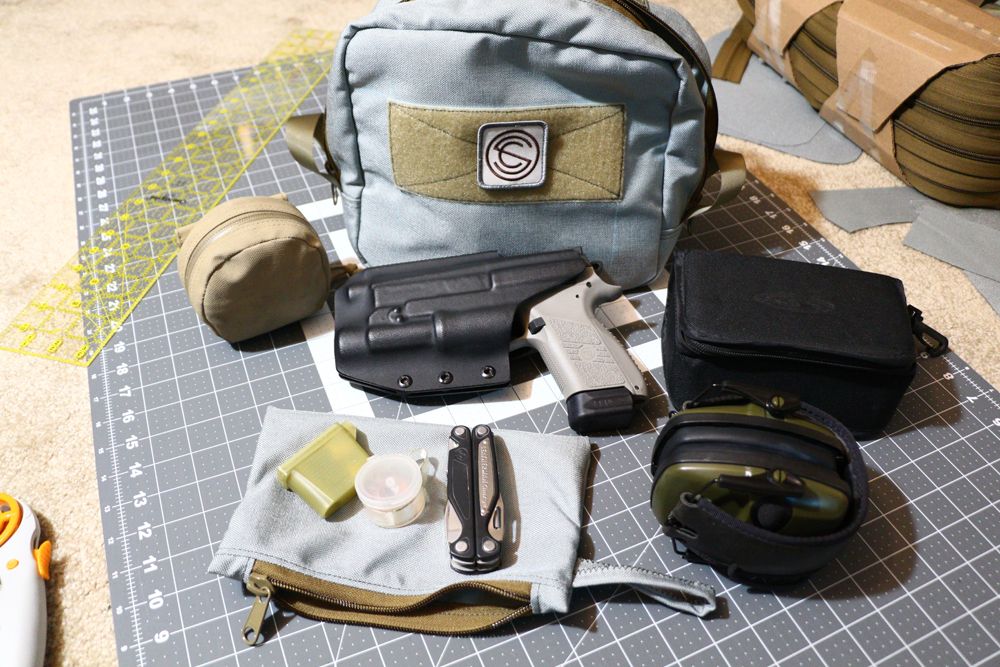
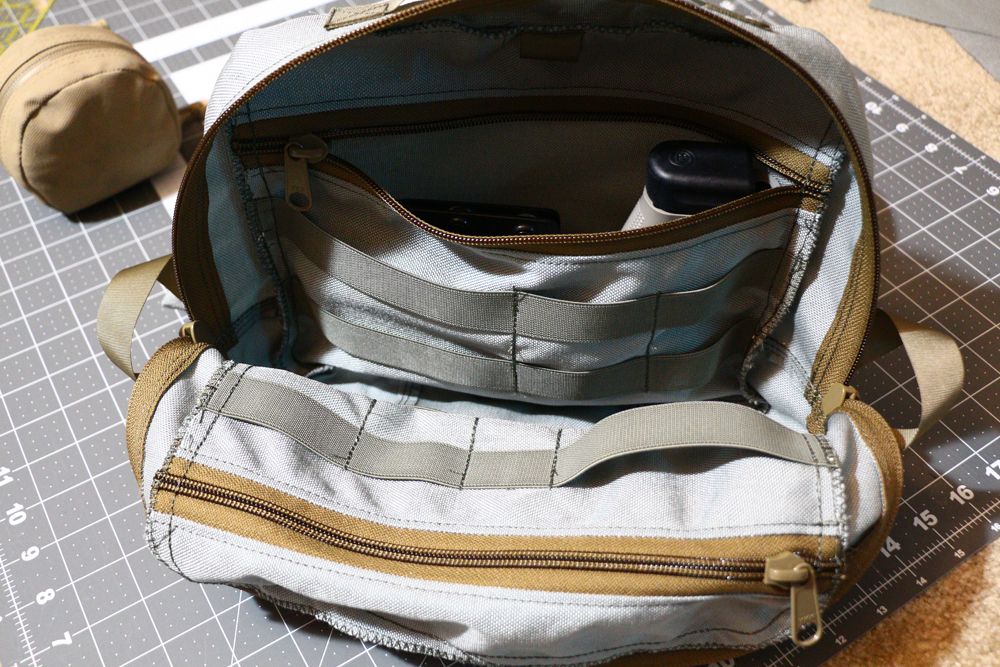
Range PPE bag: 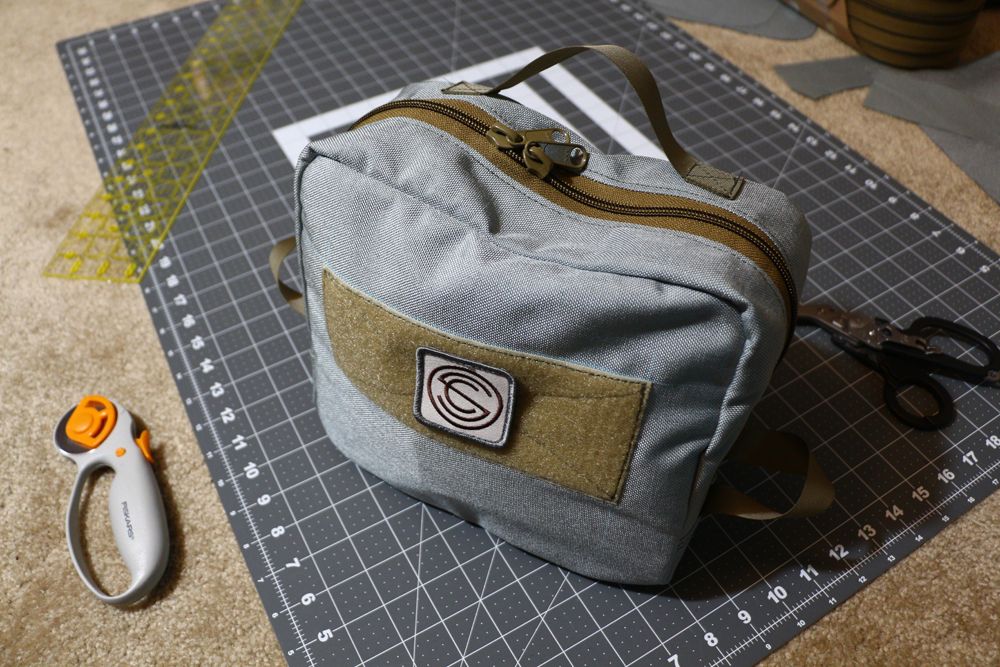
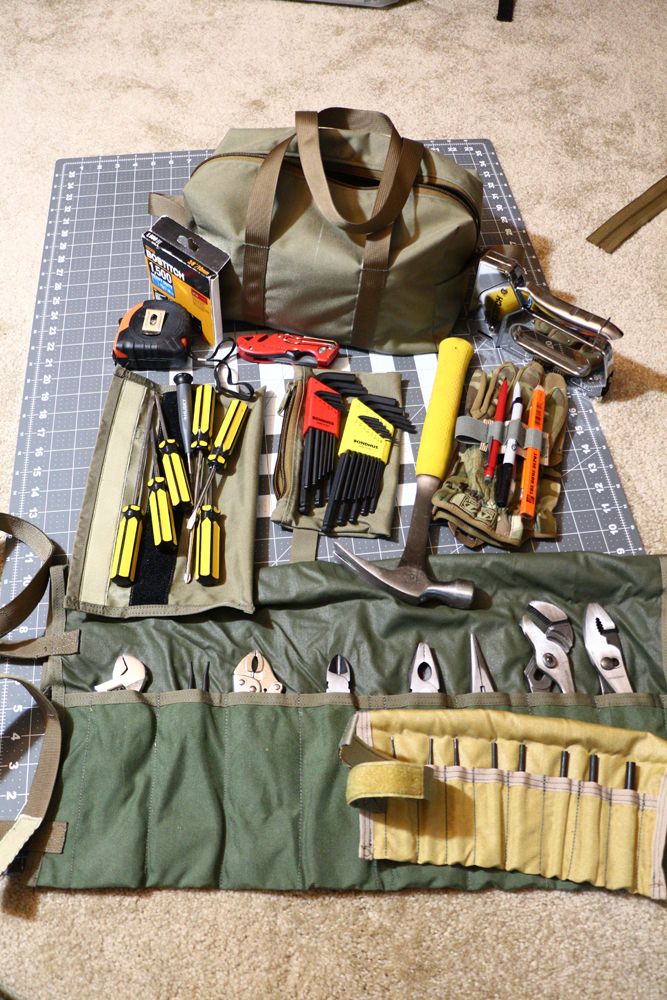
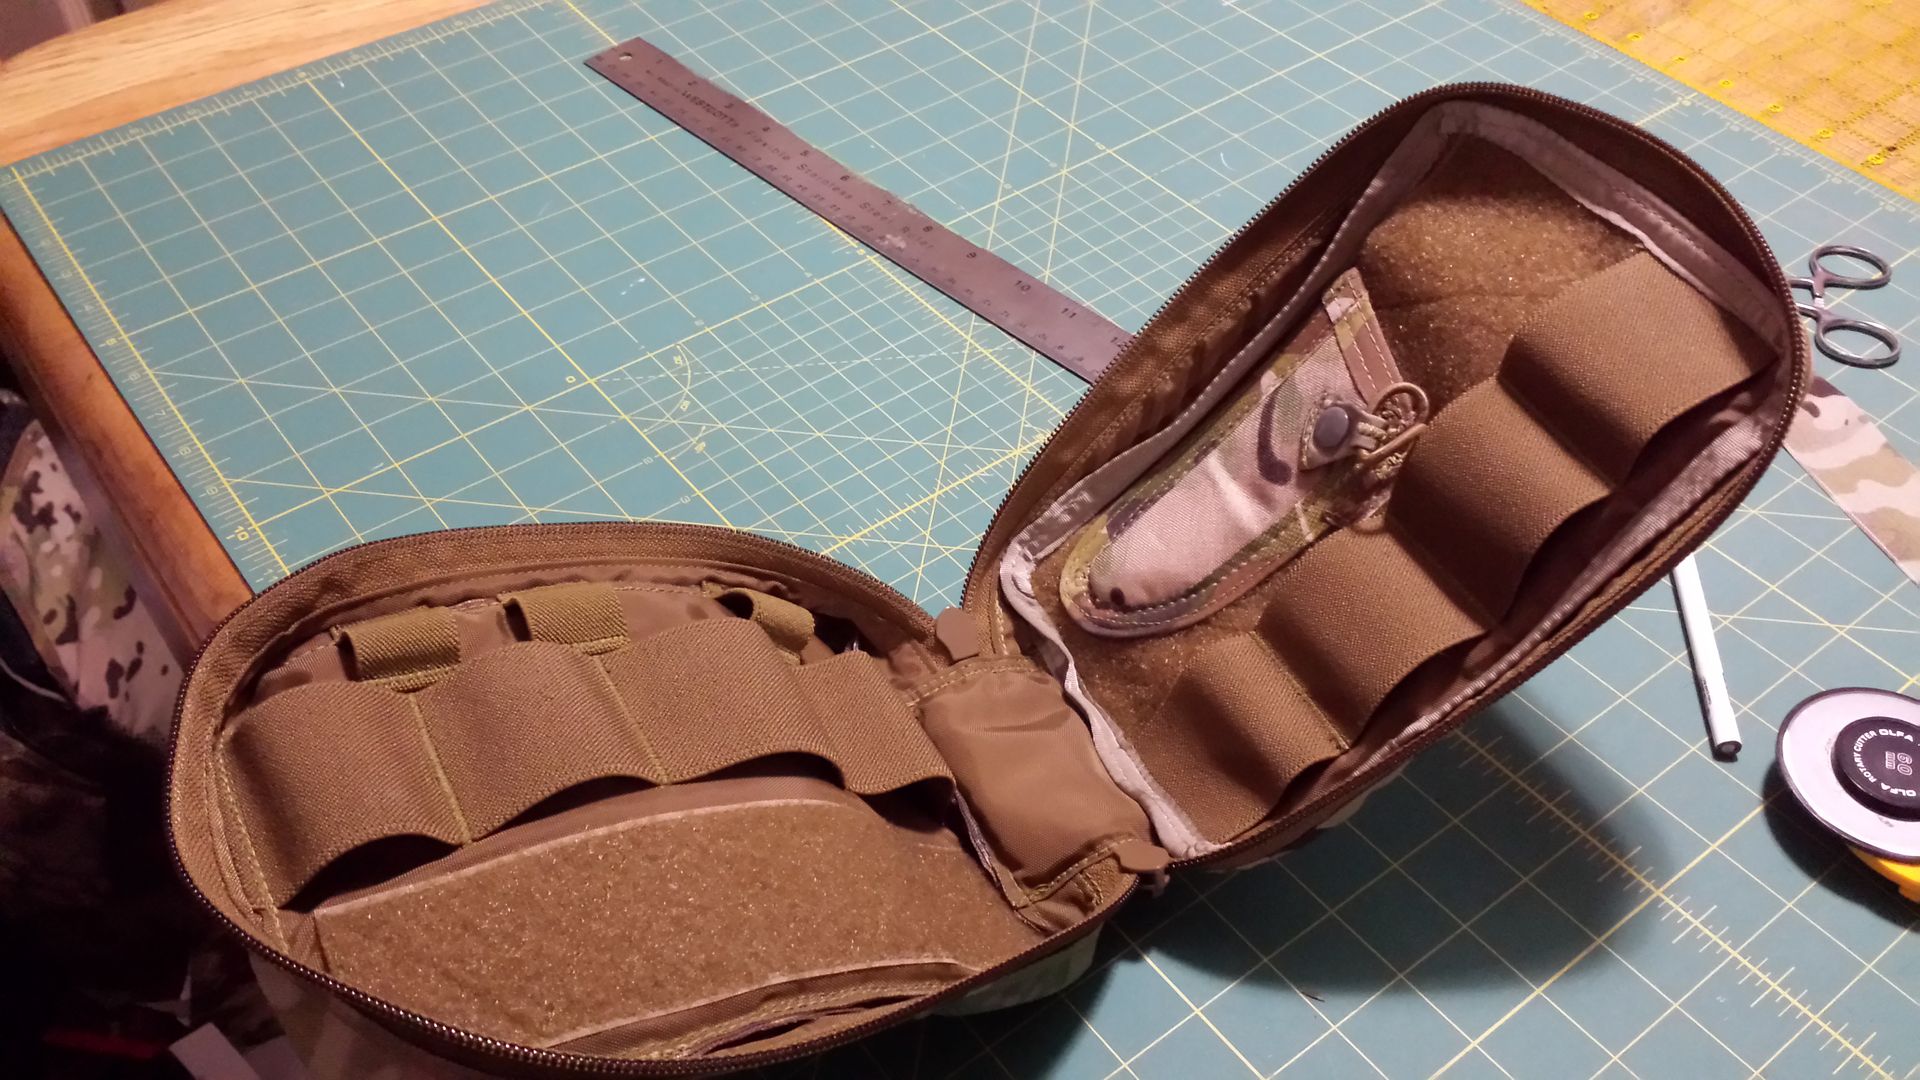
Tool bag + pouches: 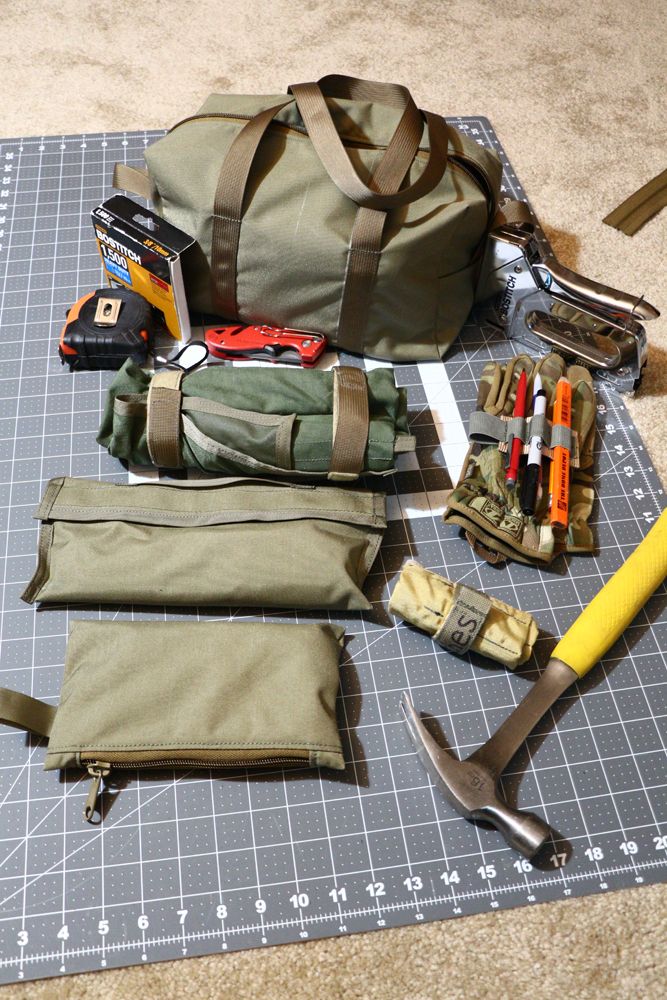
|
|
|
|
[#2]
LOL, this thread is not what I thought it was. The only thing I have sewed up lately is myself. With a $1500 obama care deductible at the emergency room I sew up most of my own cuts and slashes, that has been working out pretty well so far. Anytime you go to the hospital you risk getting sick. Sewing yourself up on your kitchen table alleviates that risk.
Nice stuff your making there! |
|
|
|
[#3]
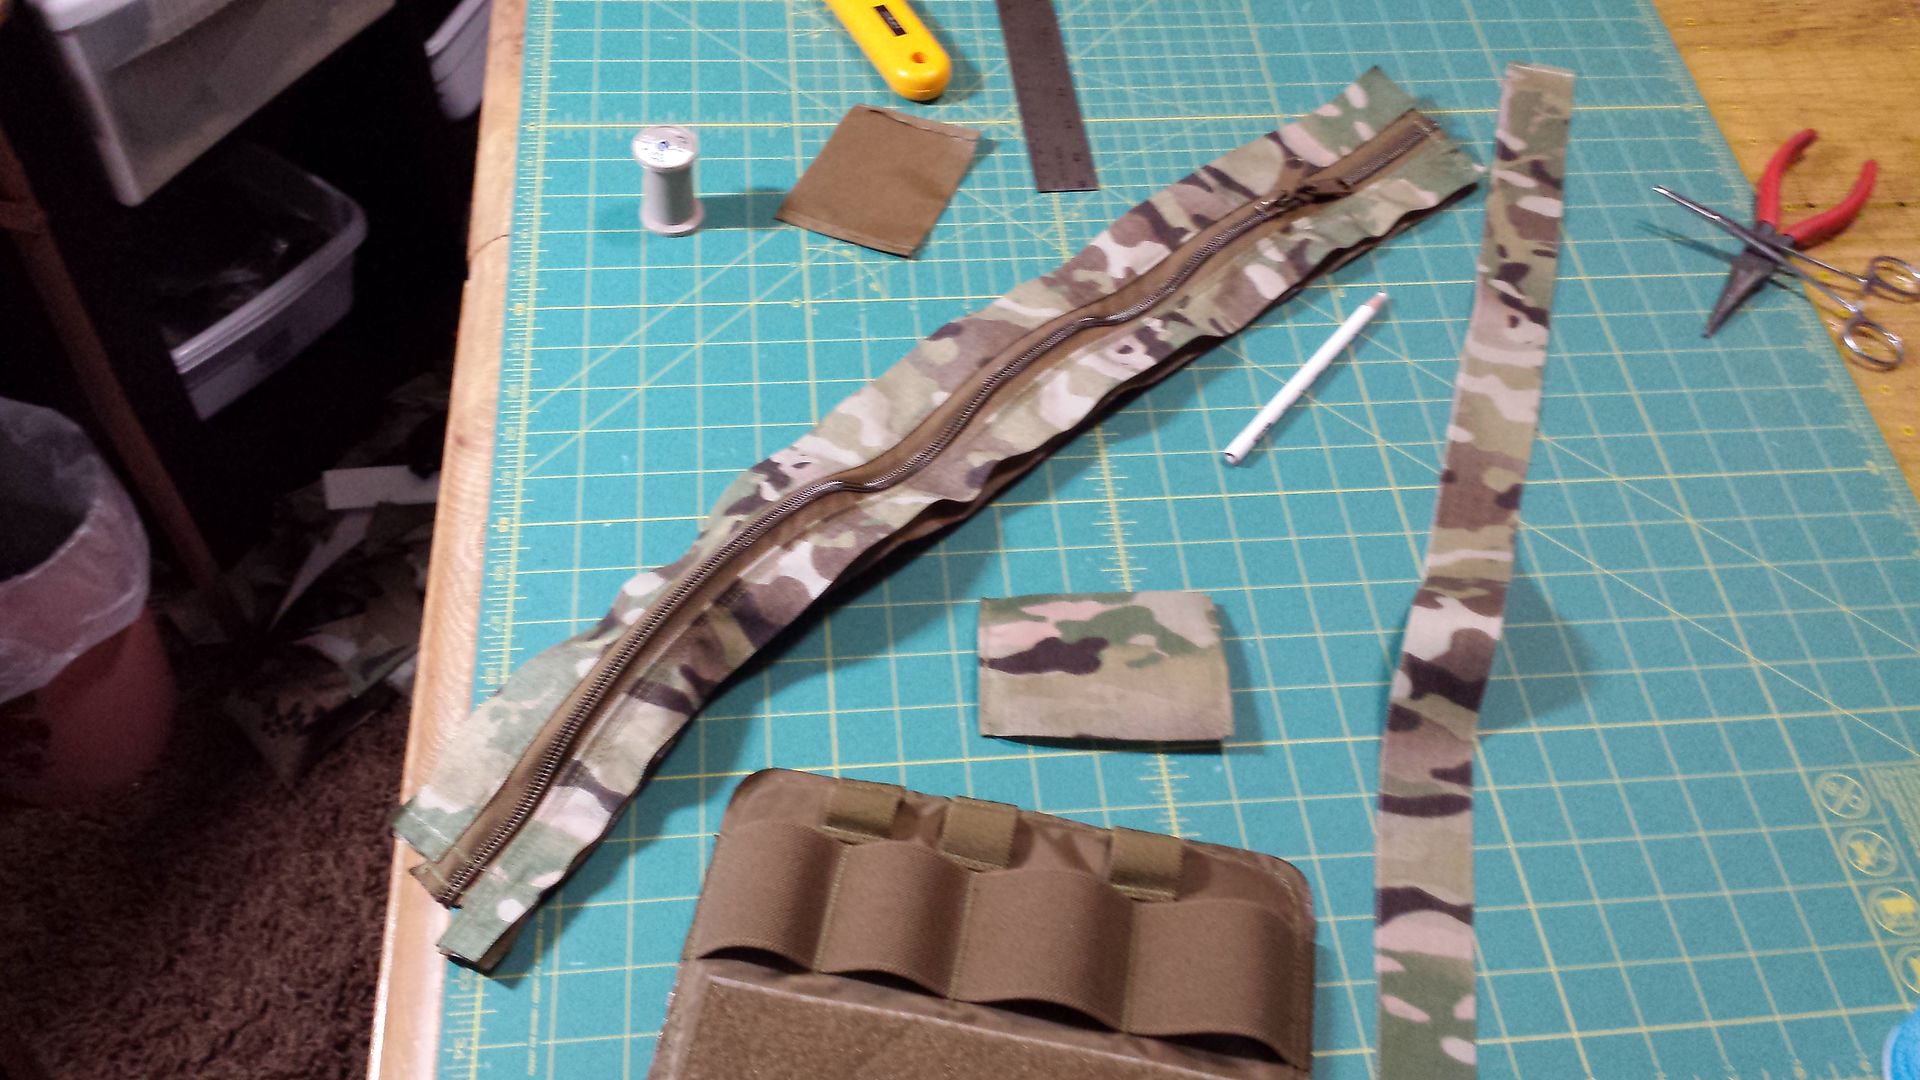
Looking good, Spud. I'm so bad at zippers

I'll get some pics of my nicer projects ASAP |
|
|
|
[#4]
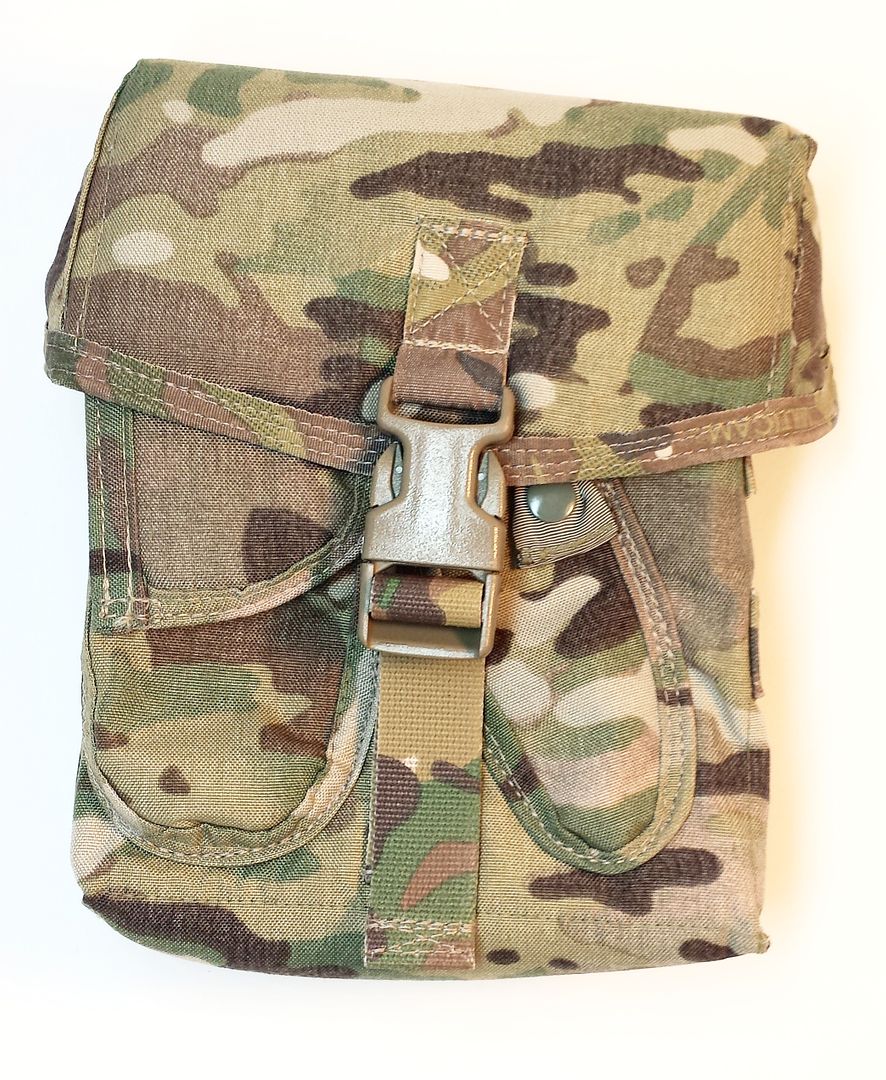
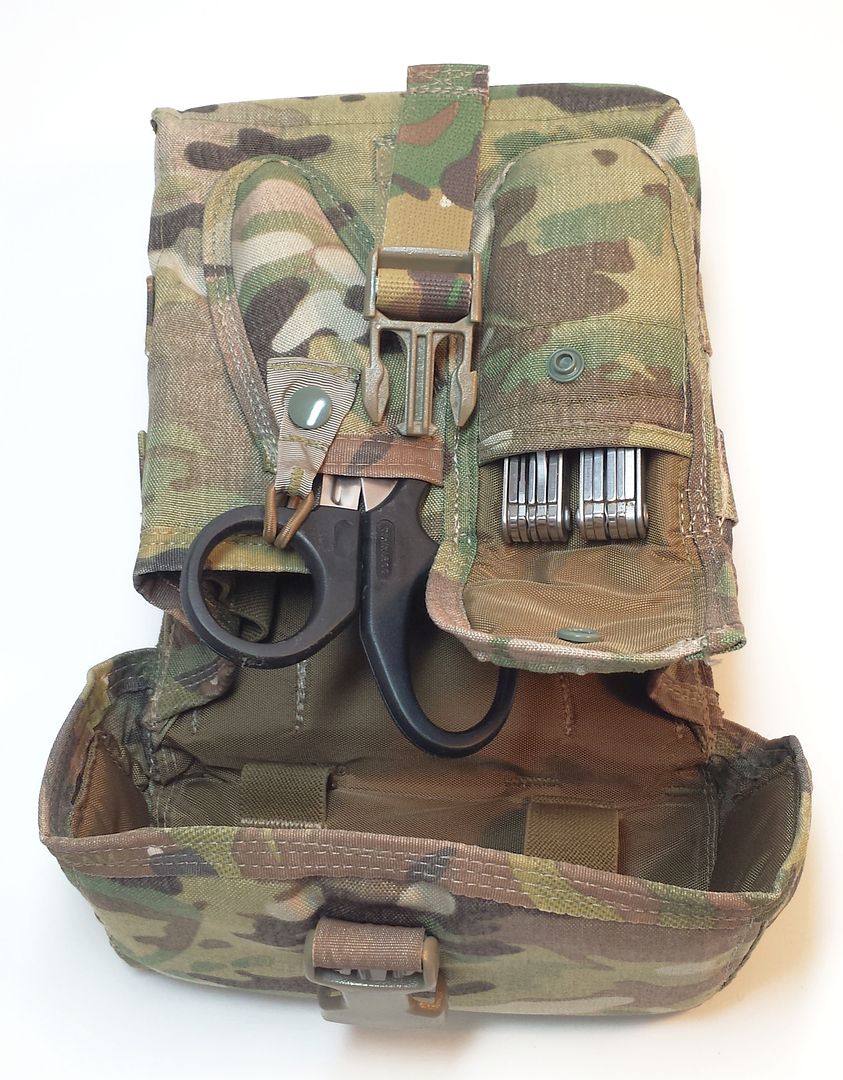
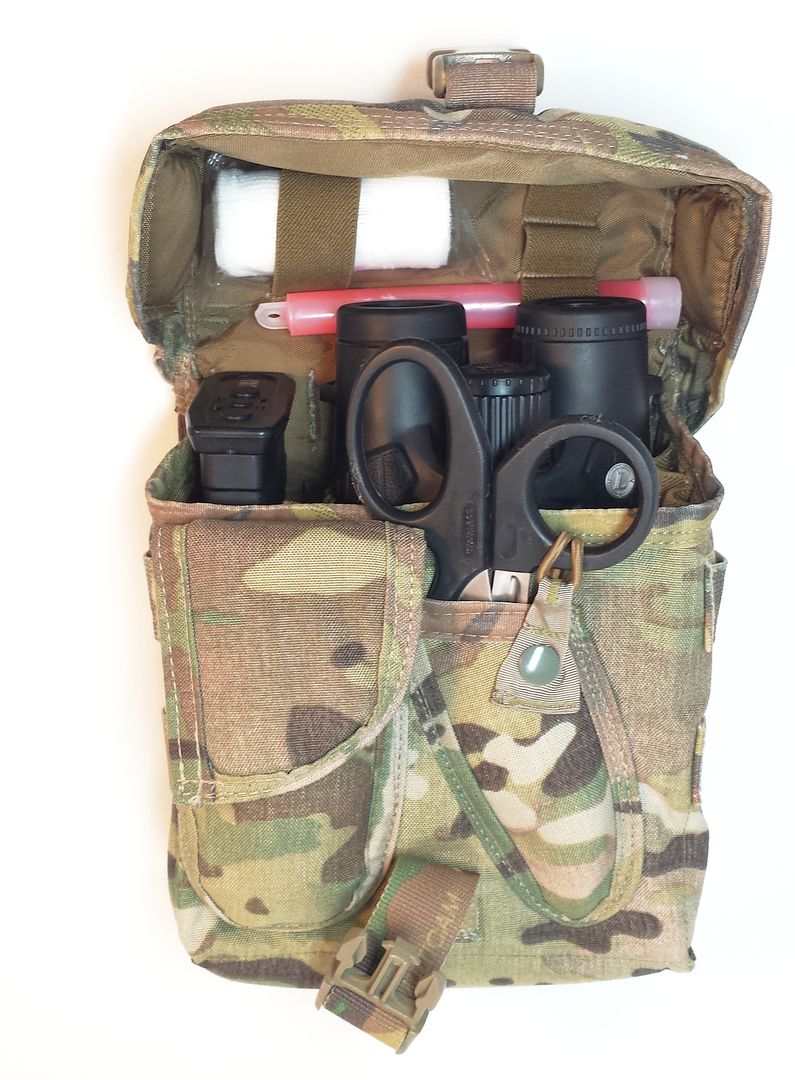
Small Utility Pouch
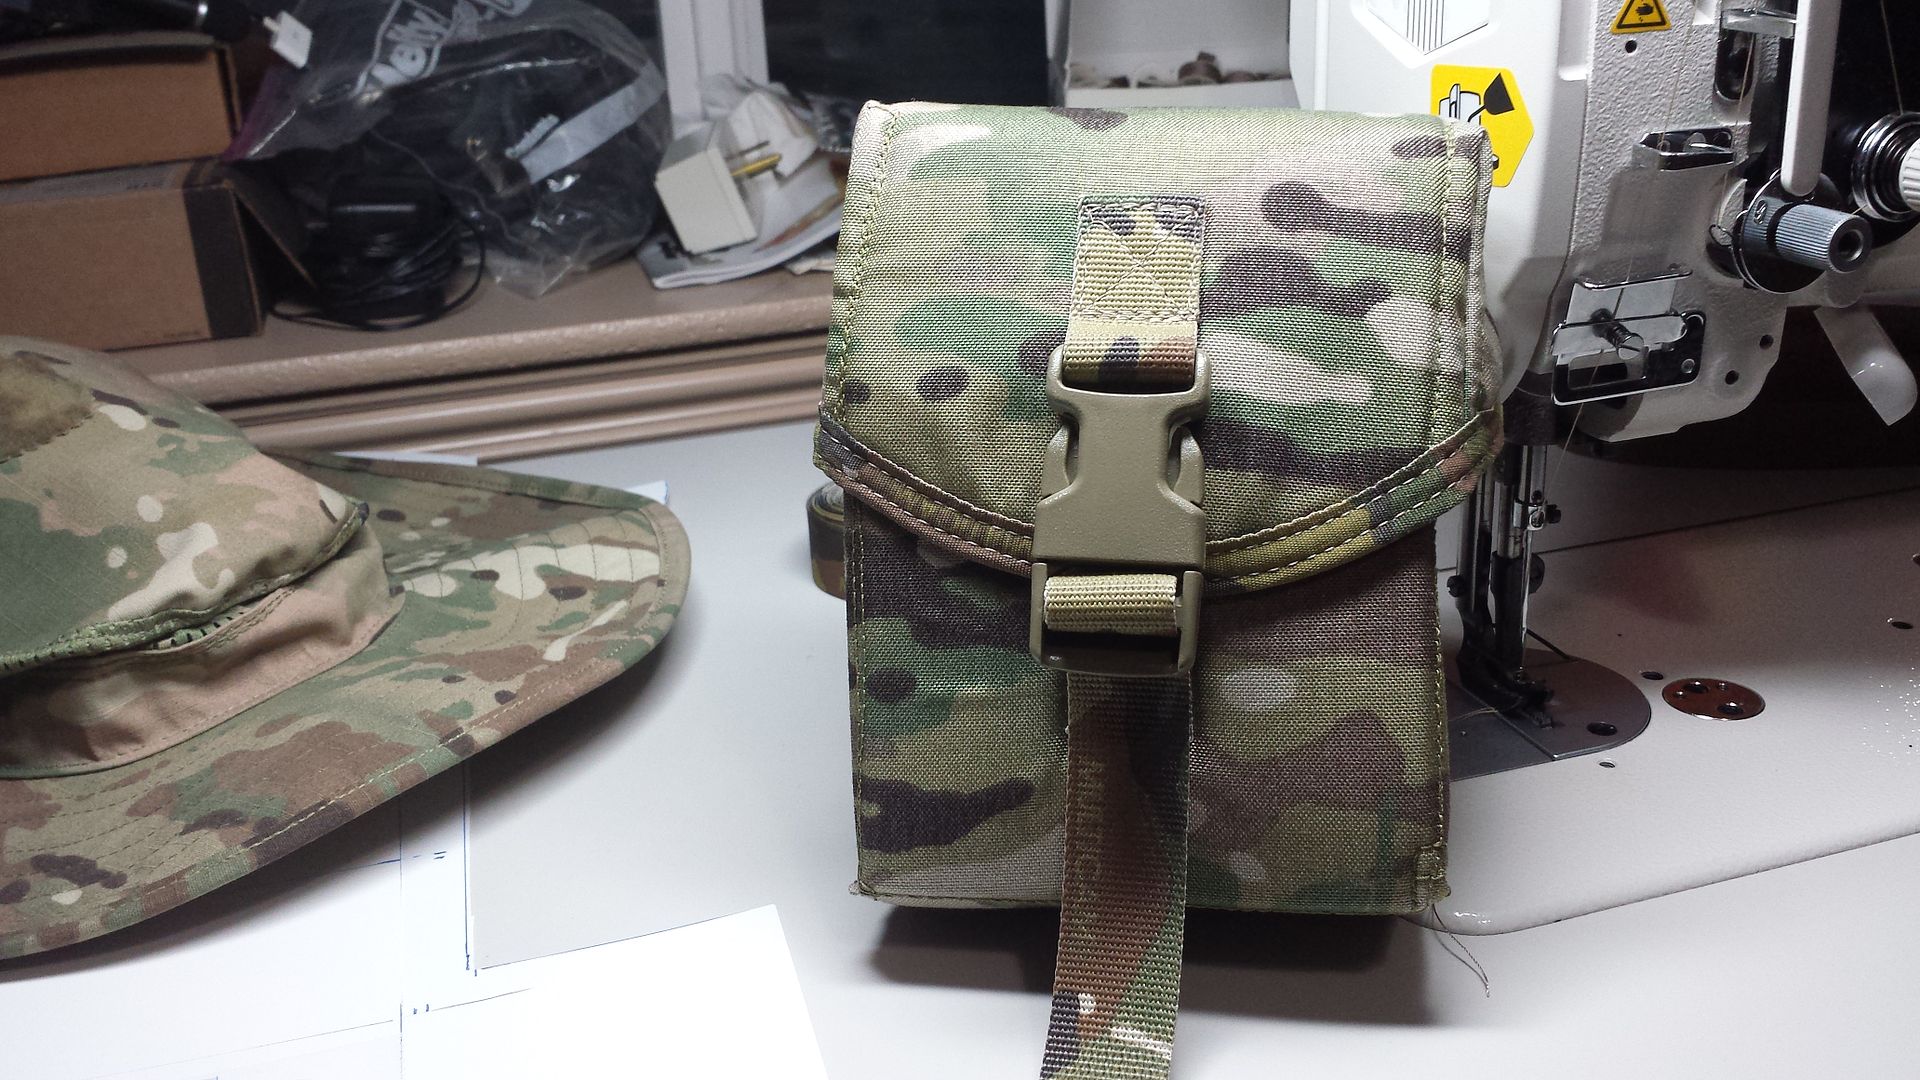
SAW Pouches 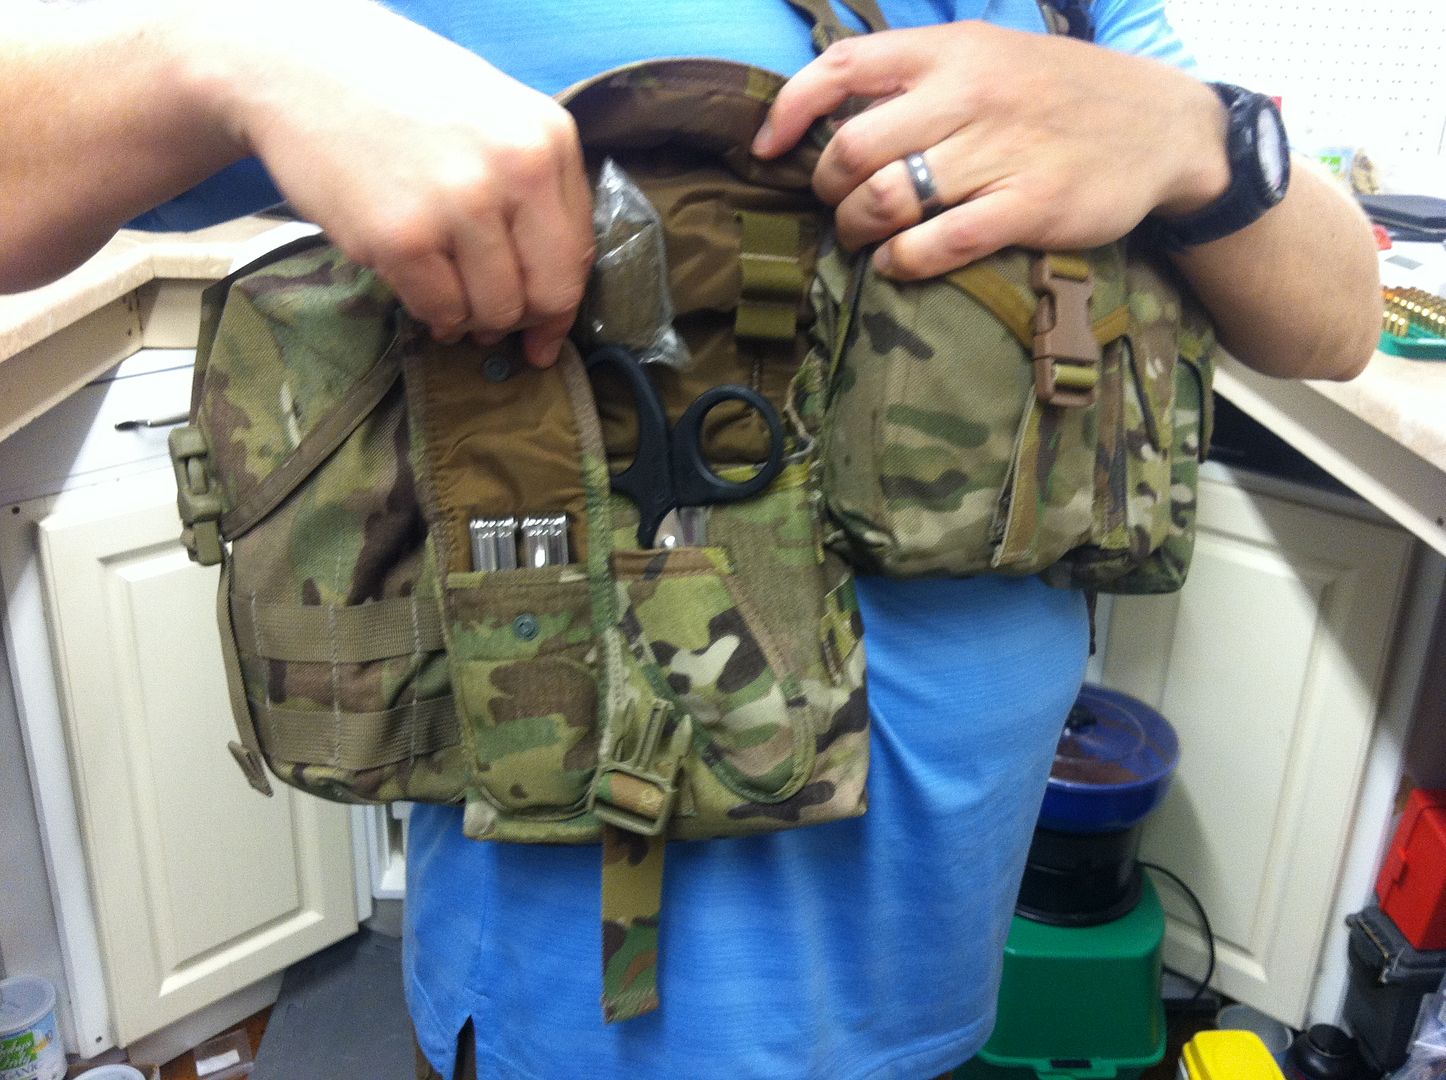
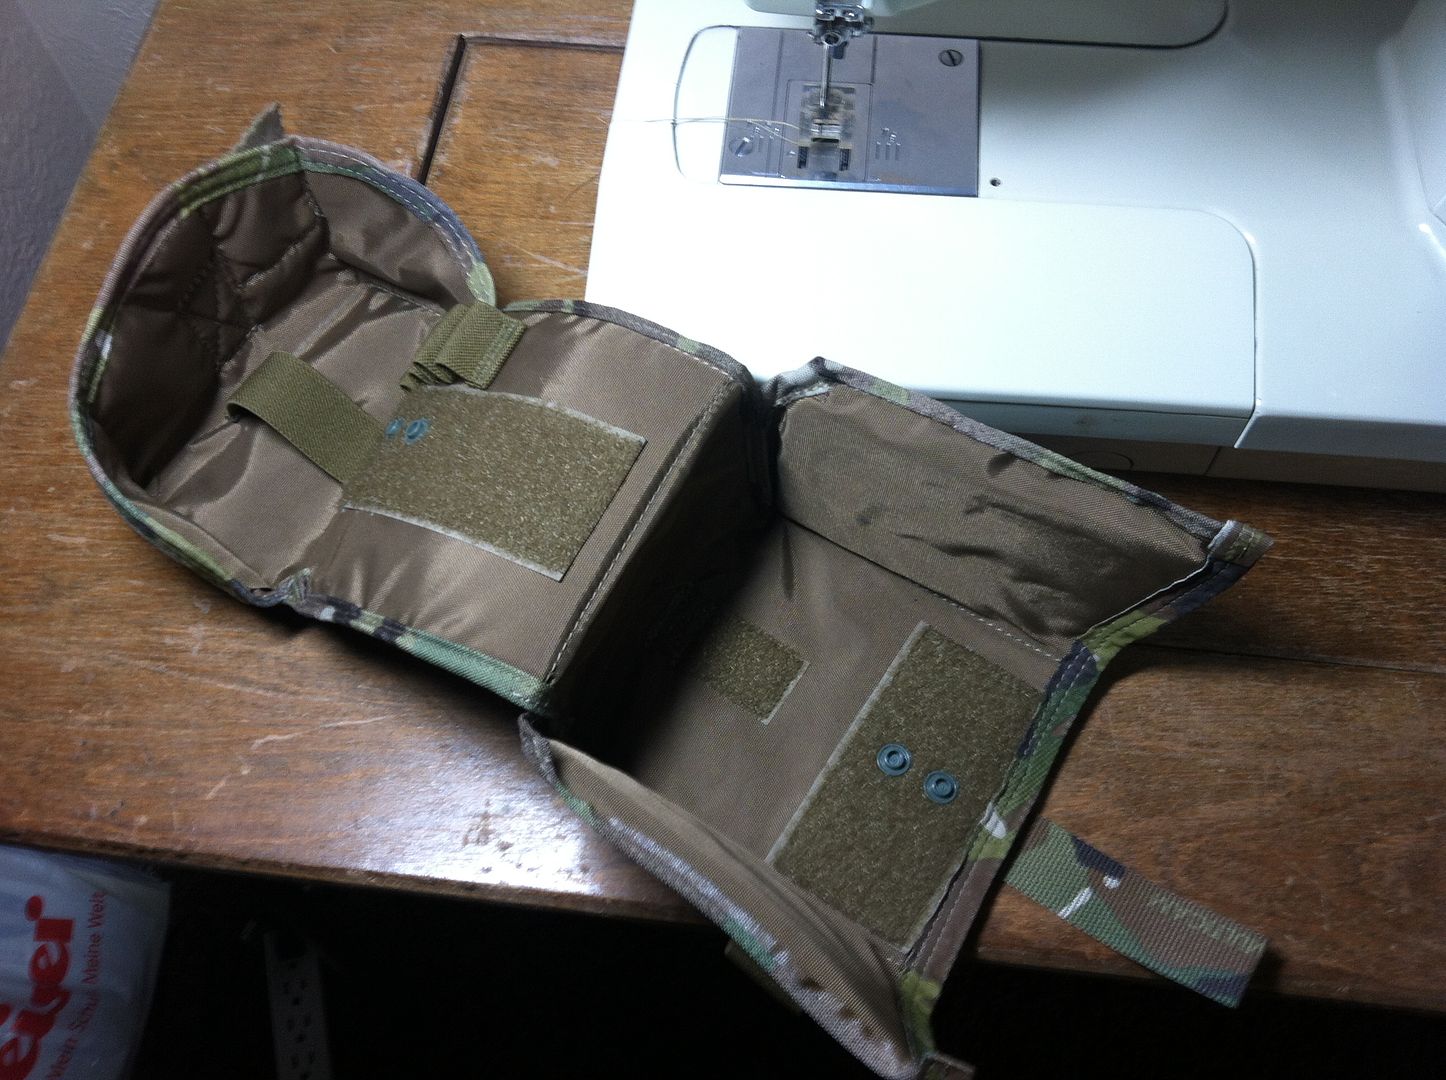
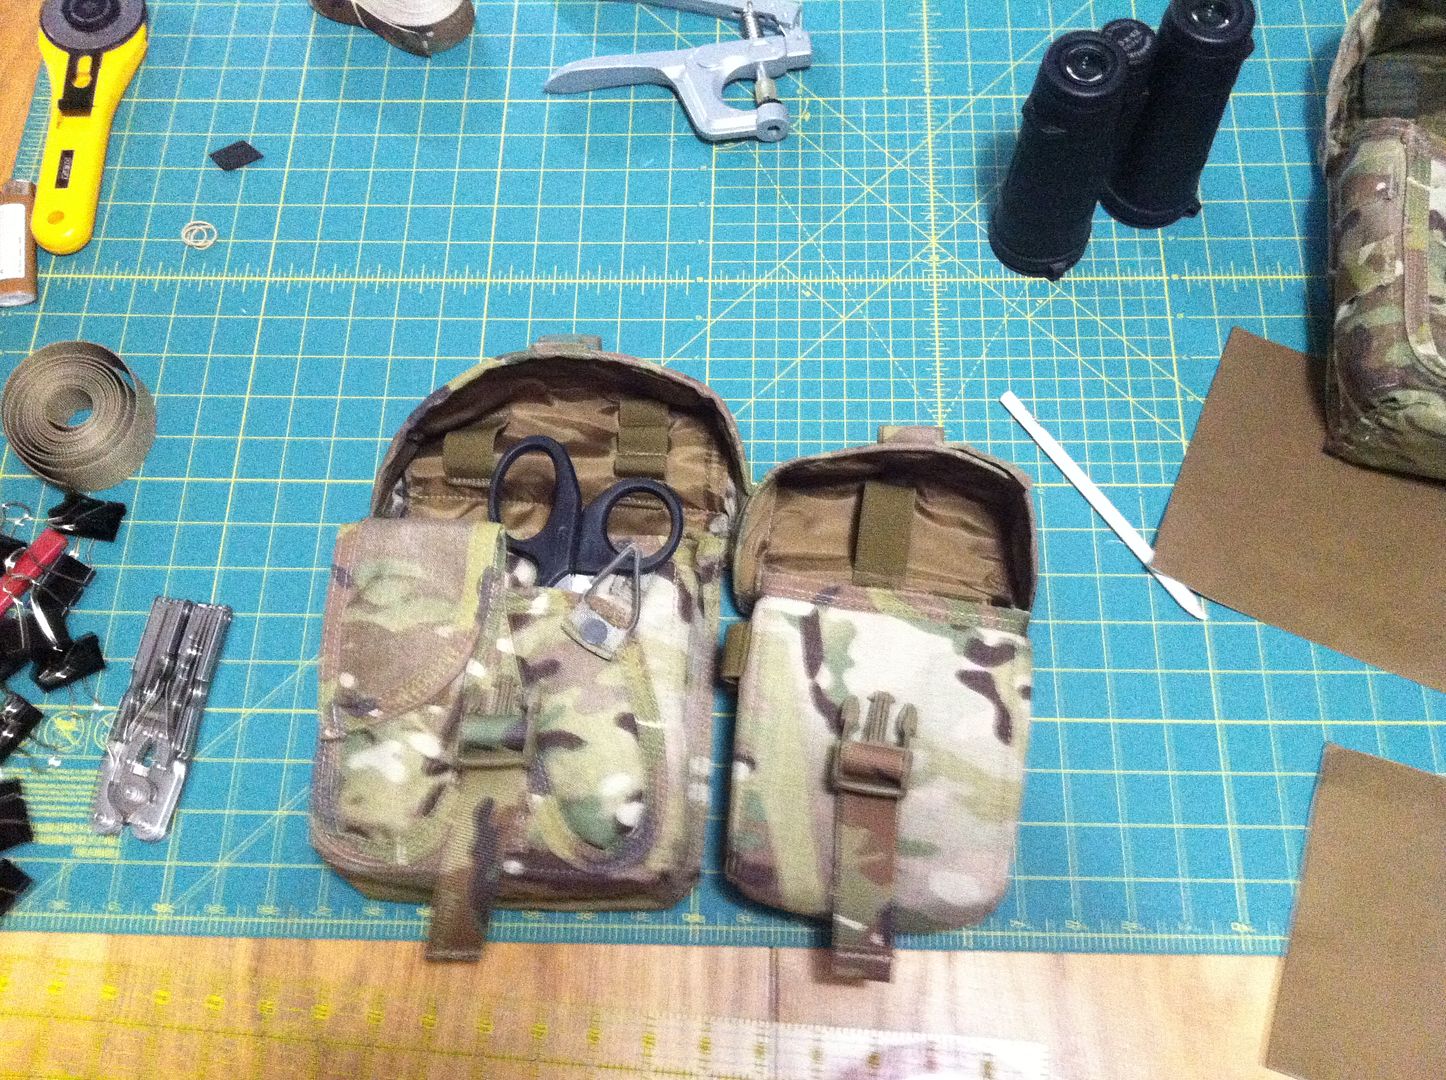
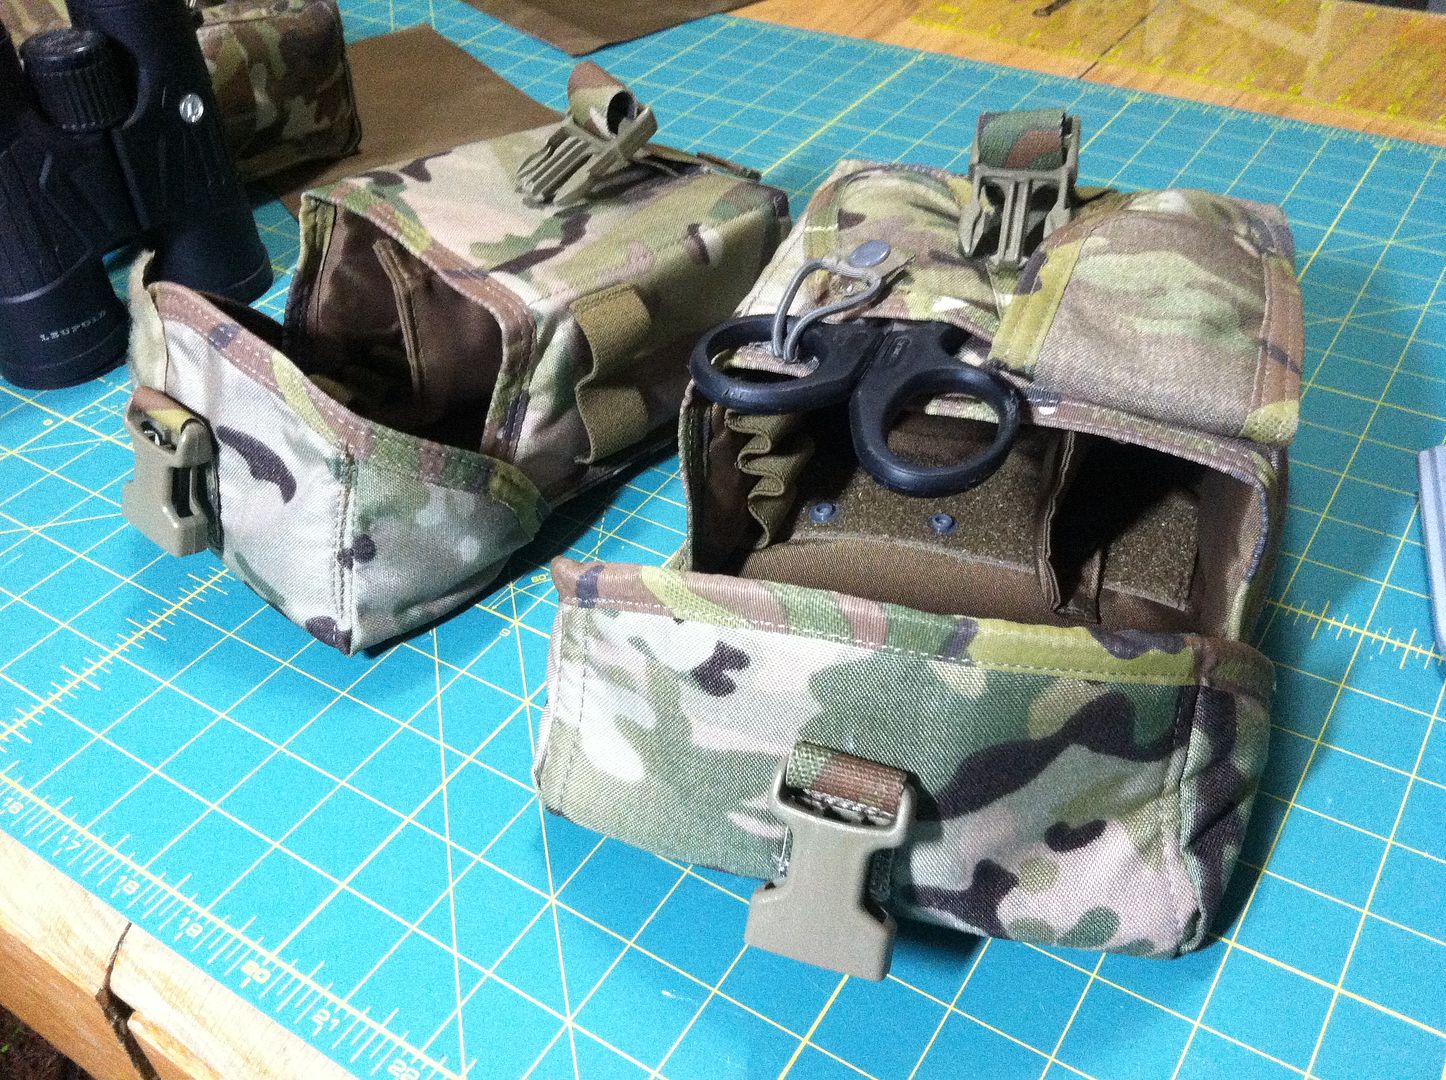
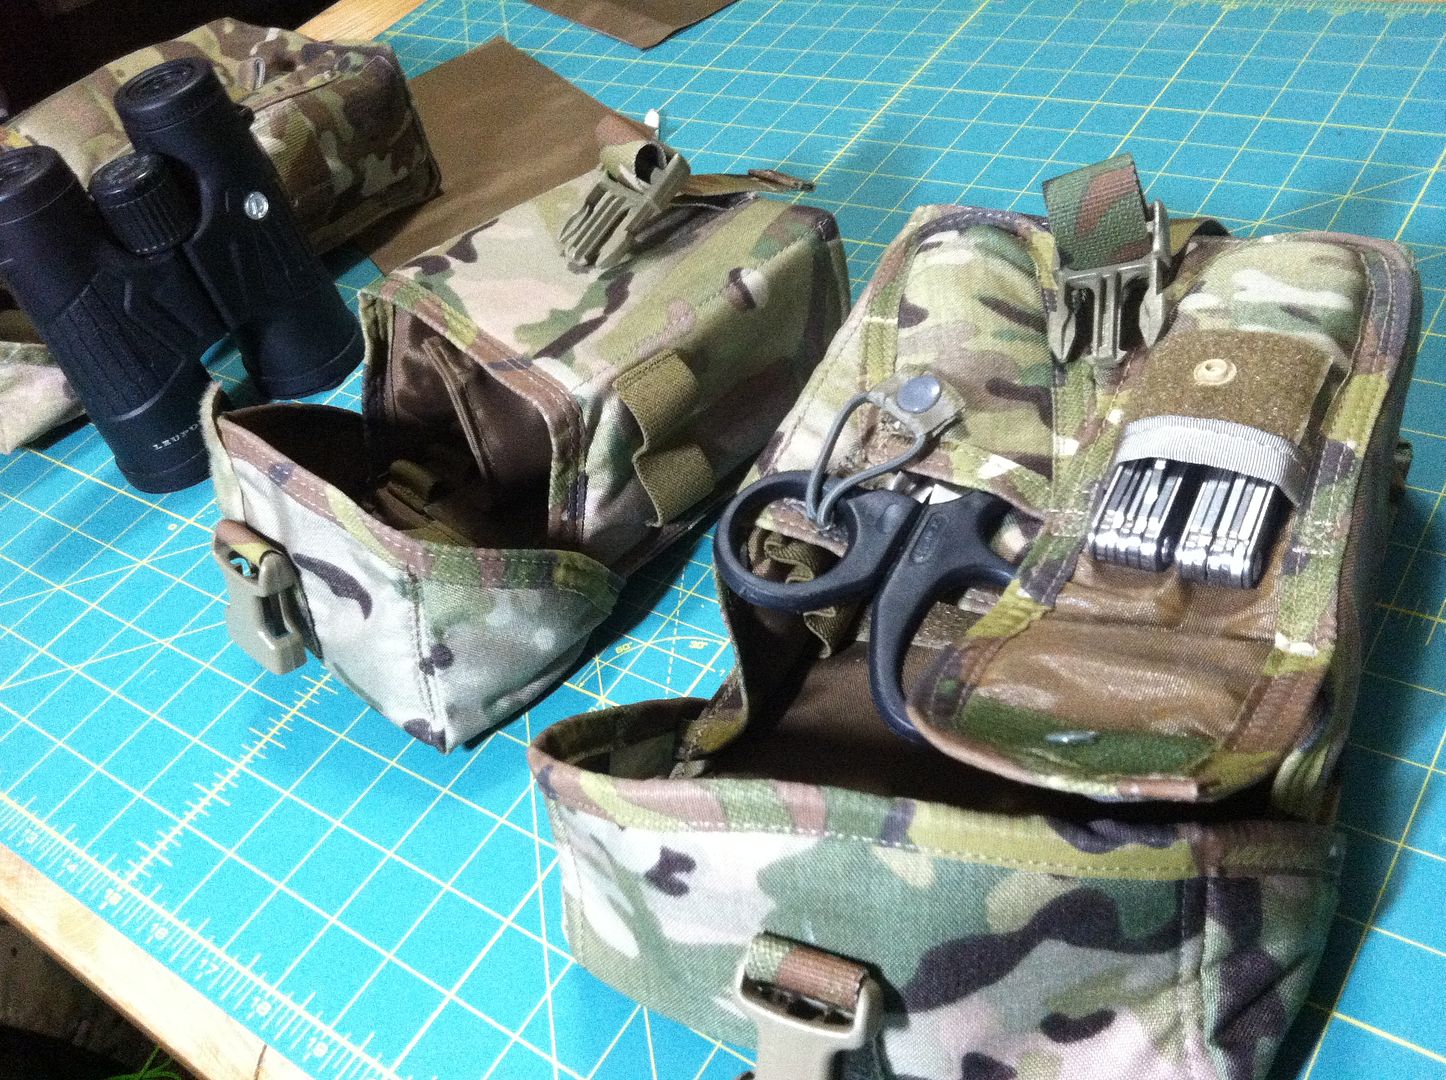
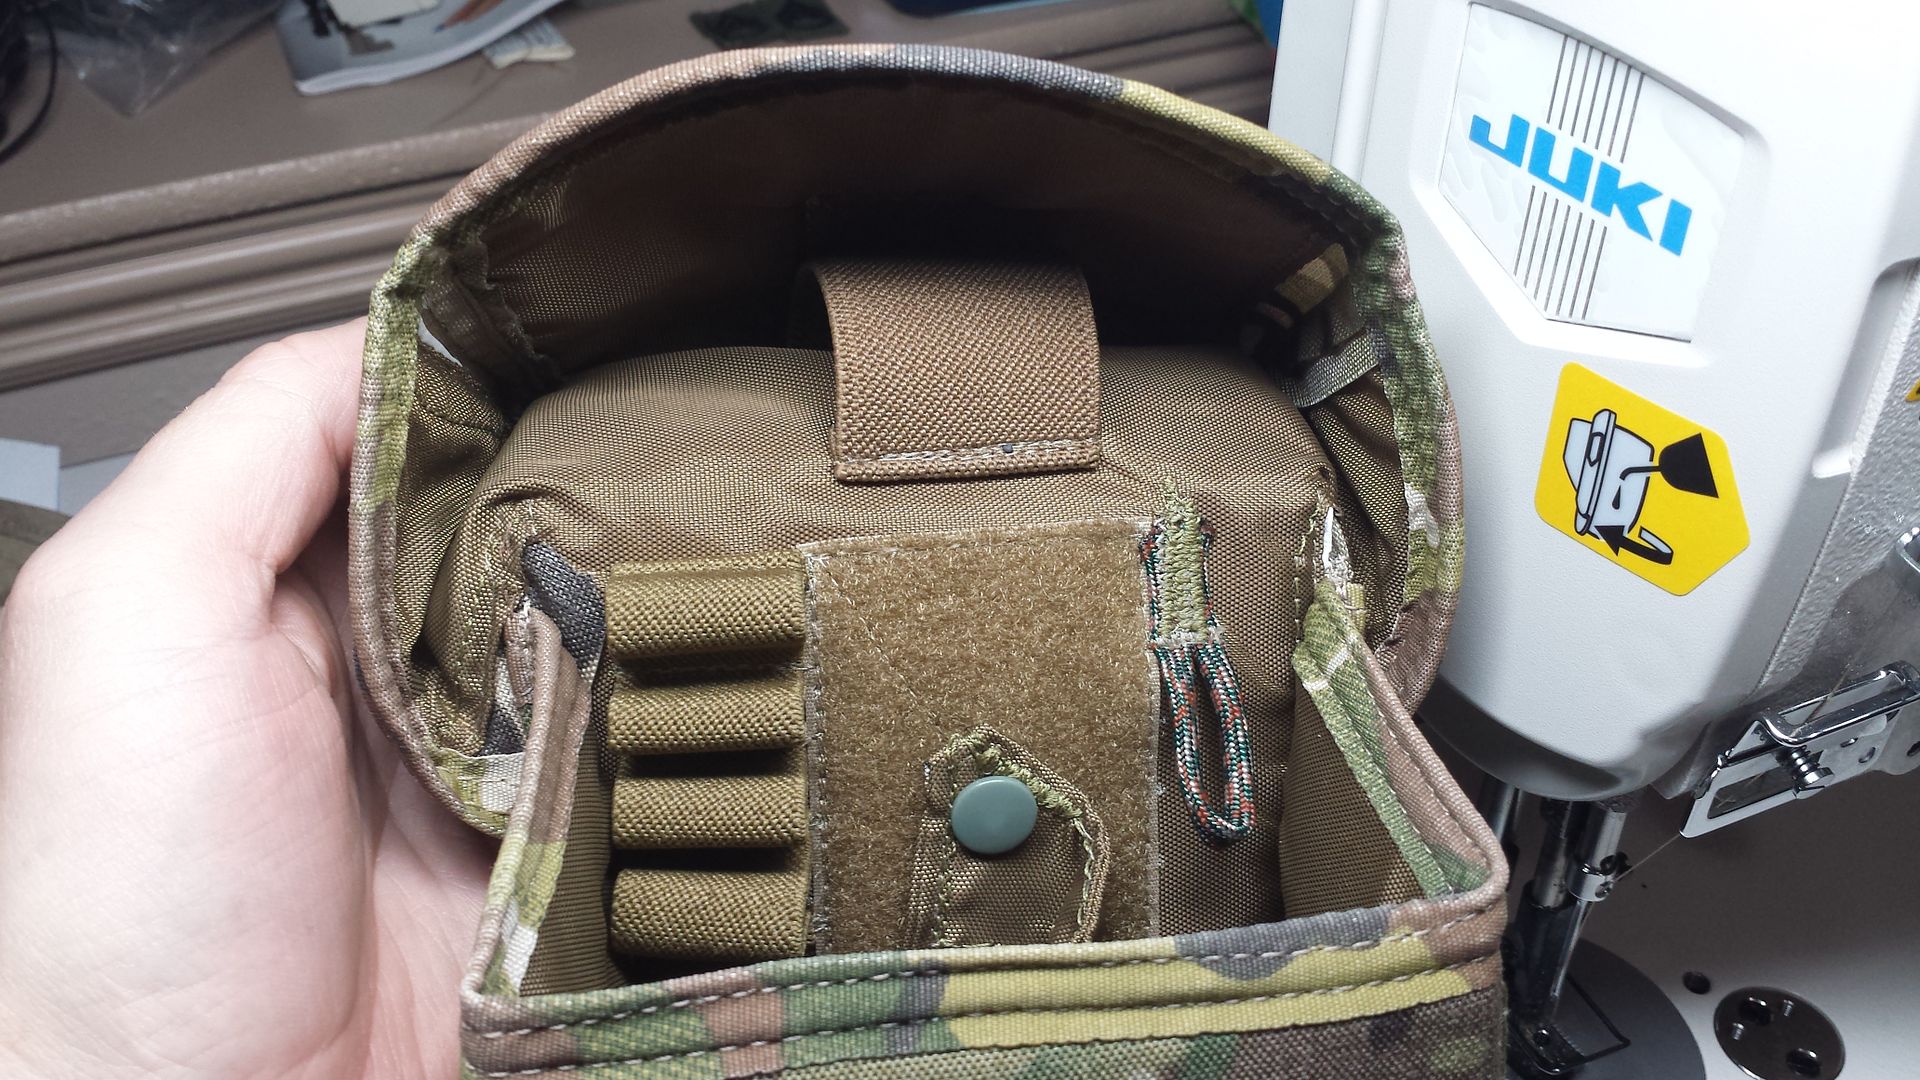
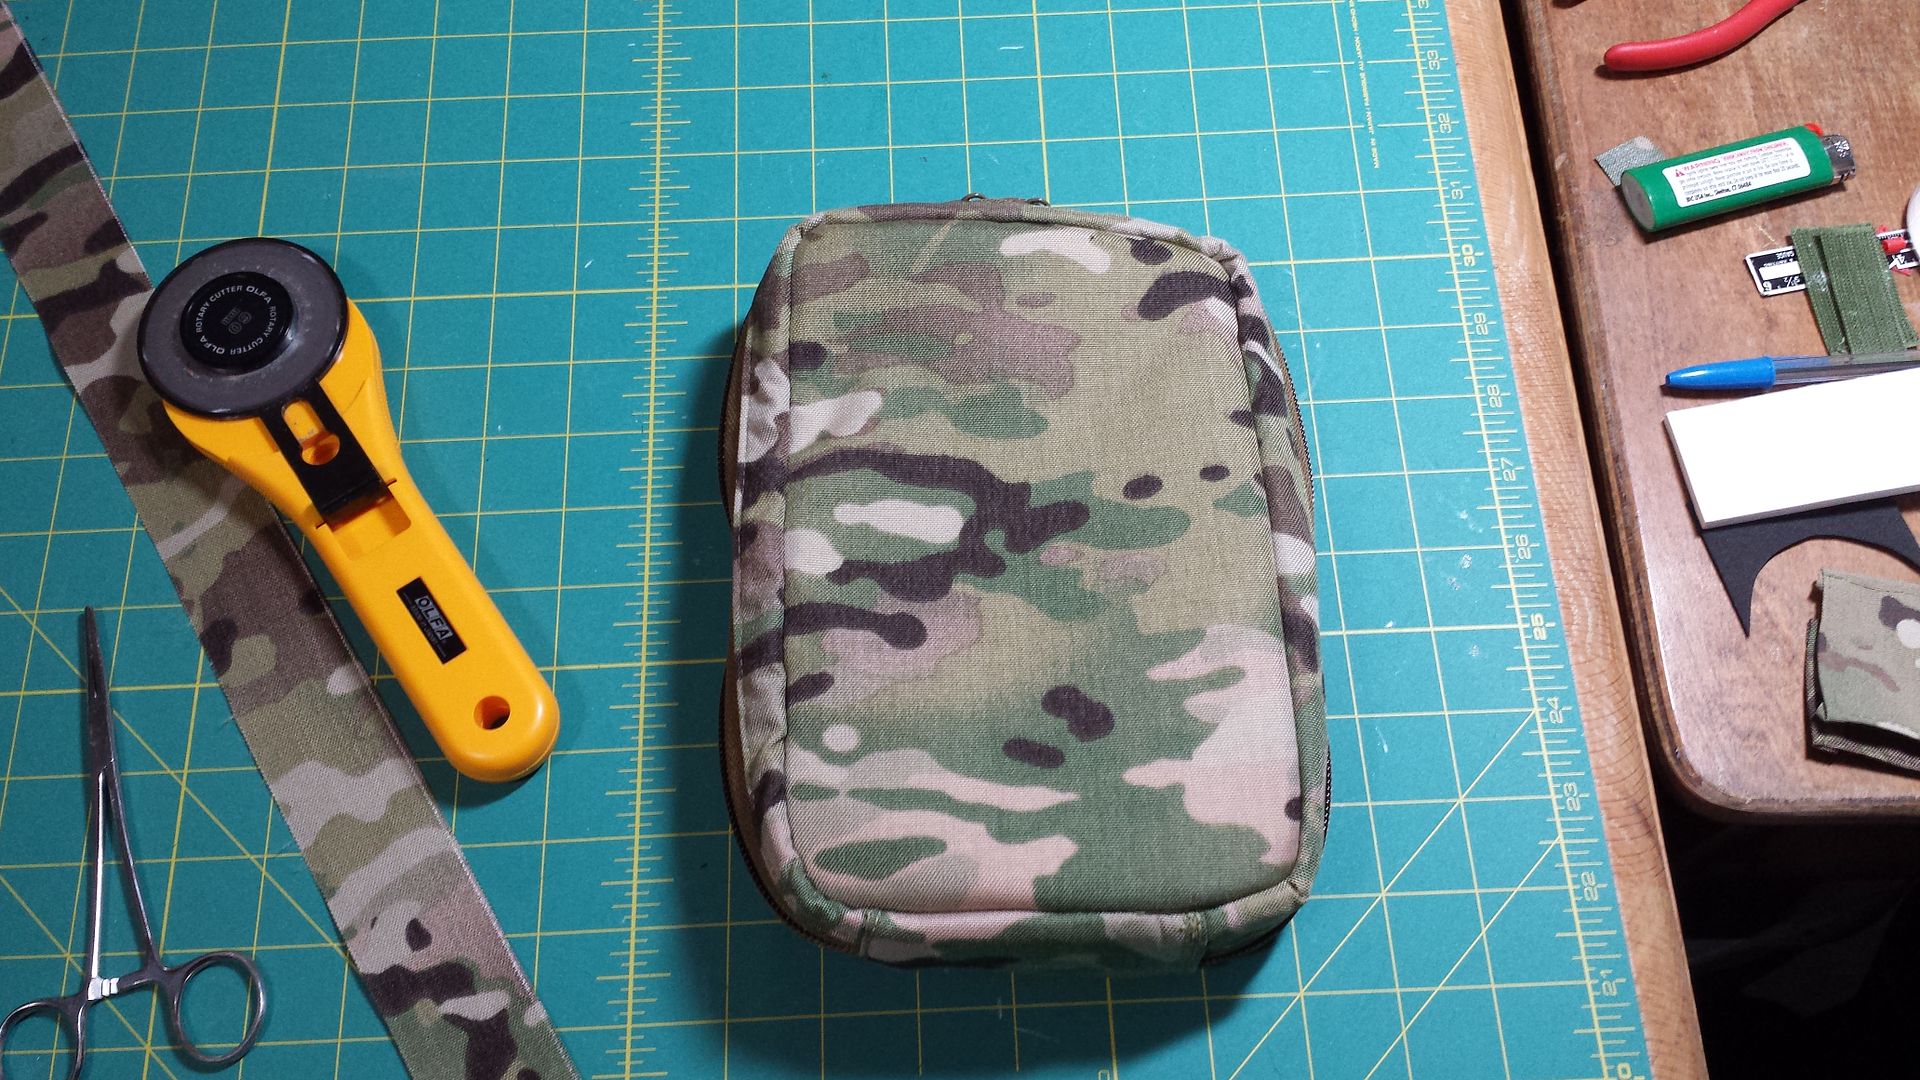
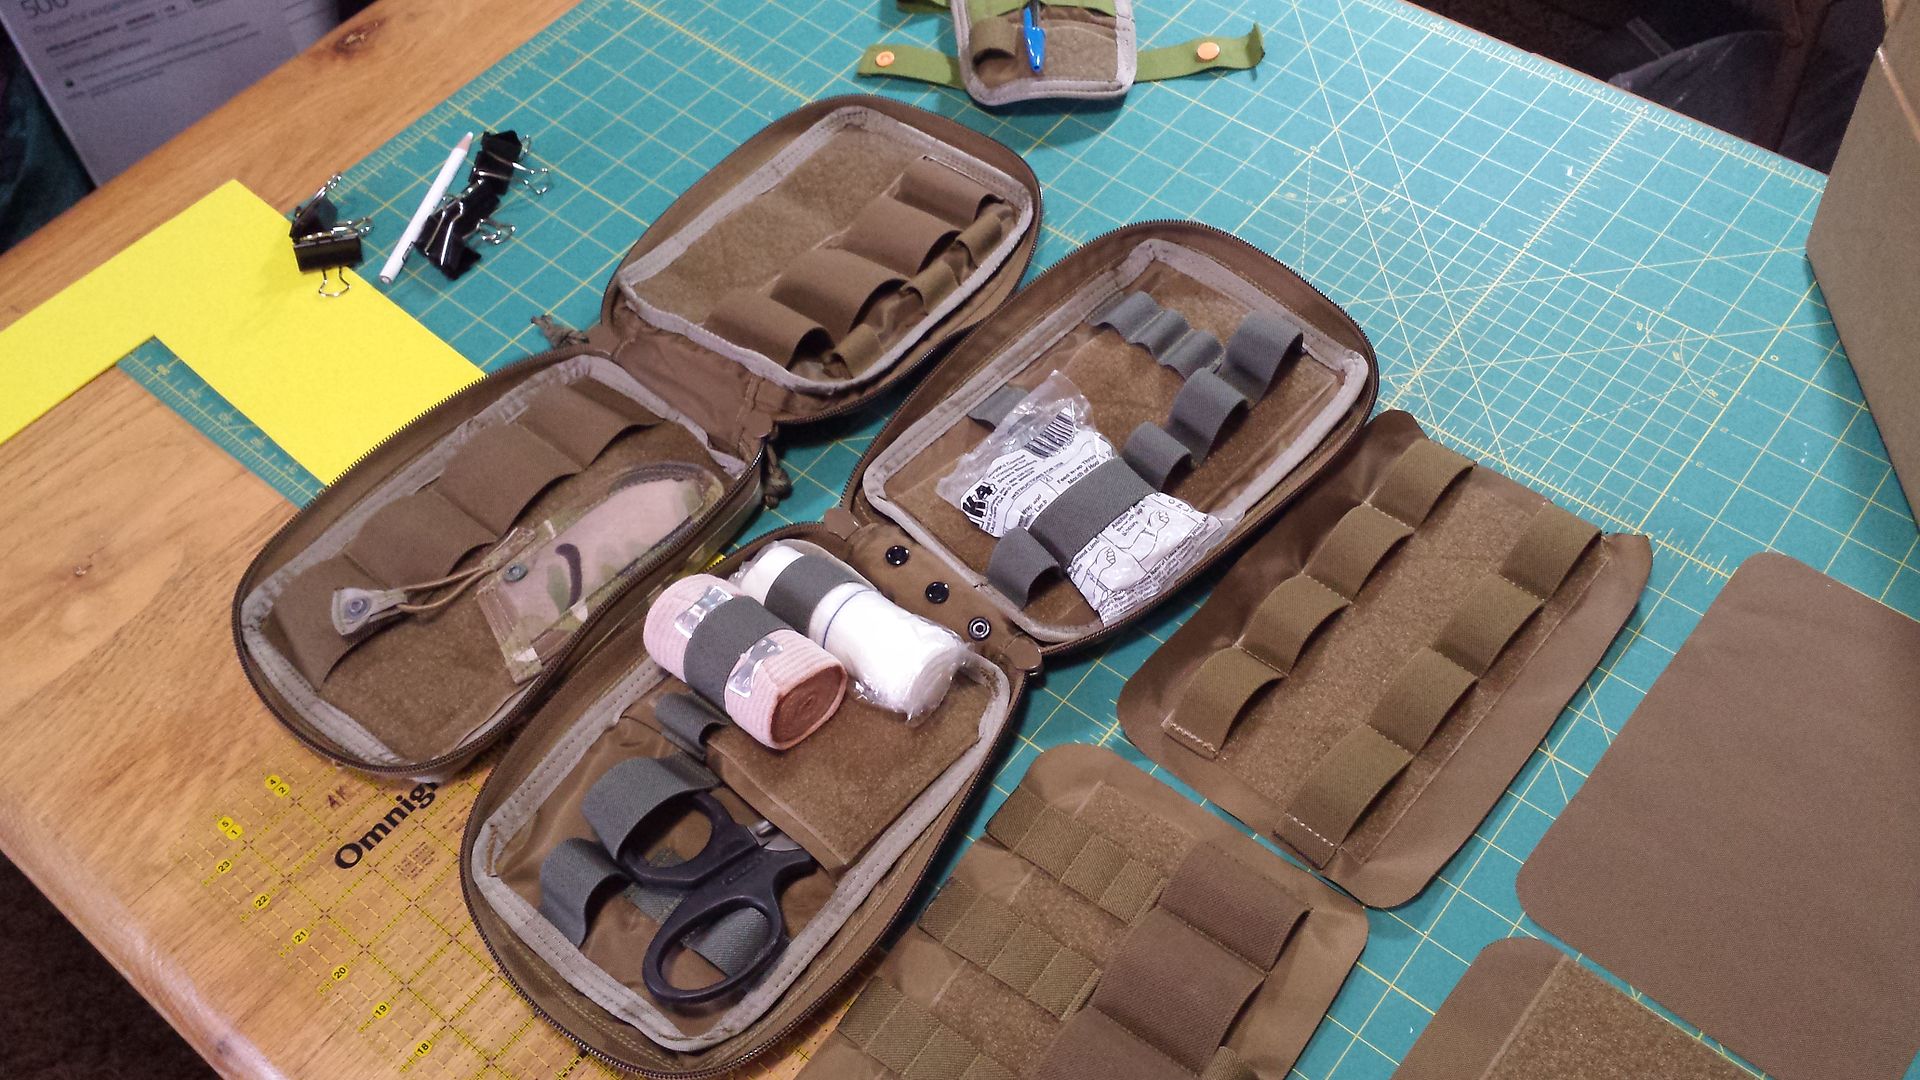
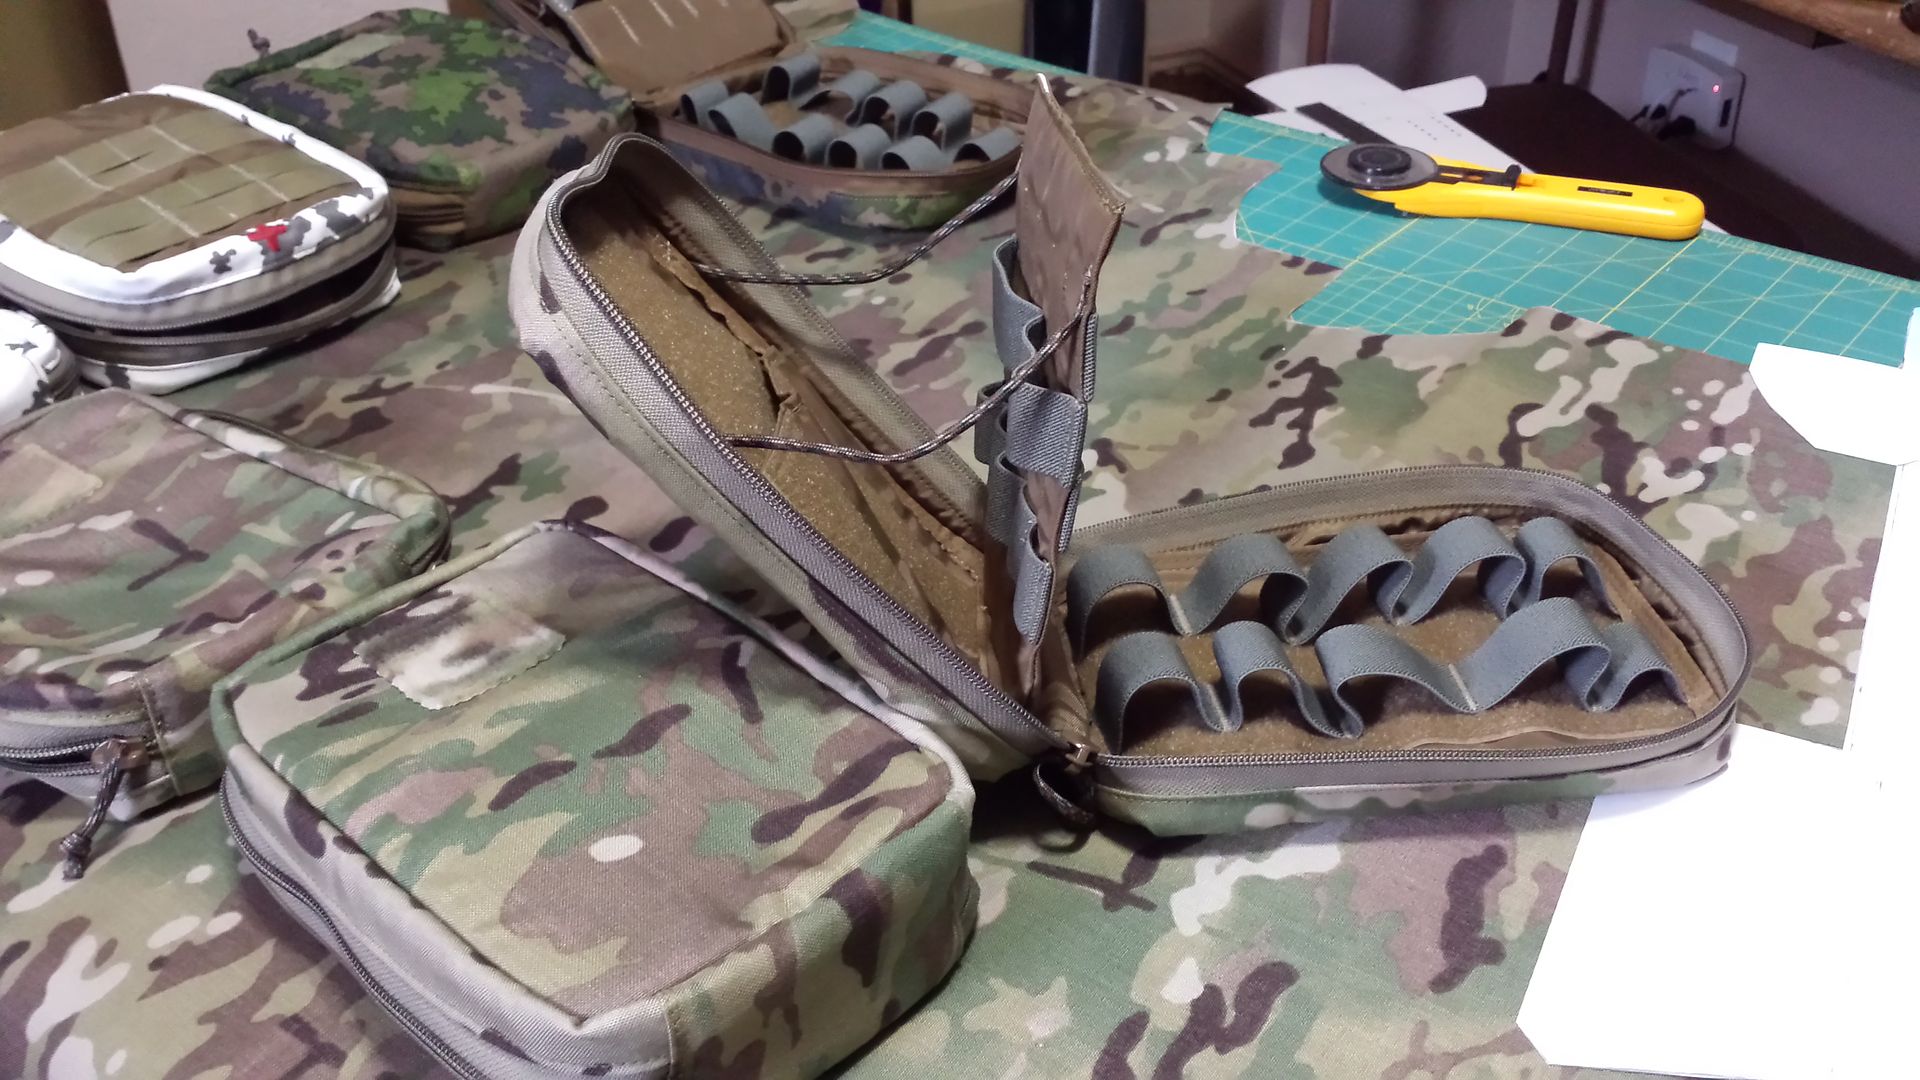
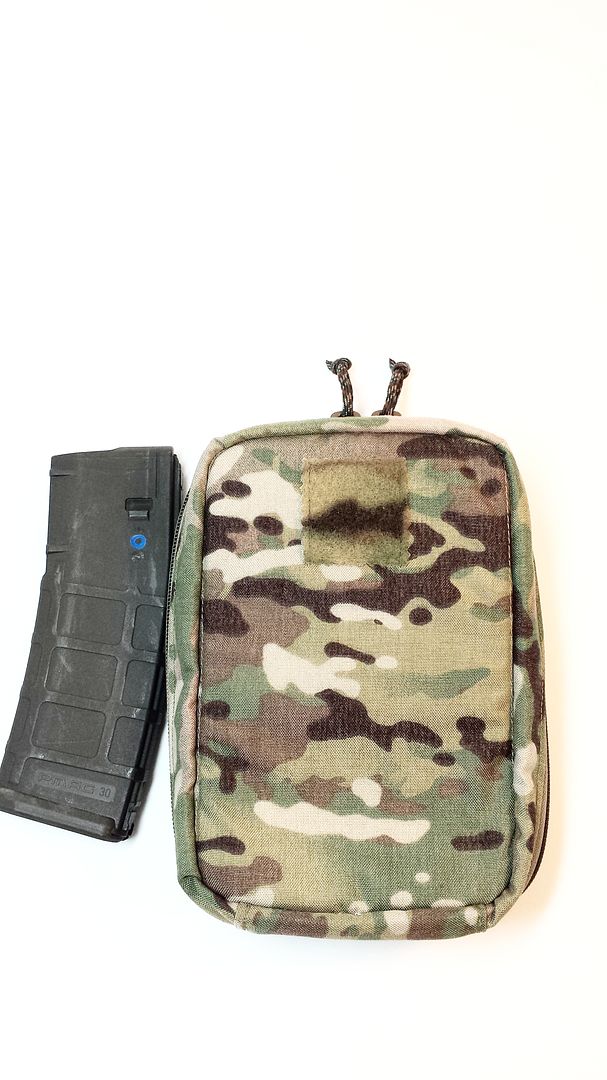
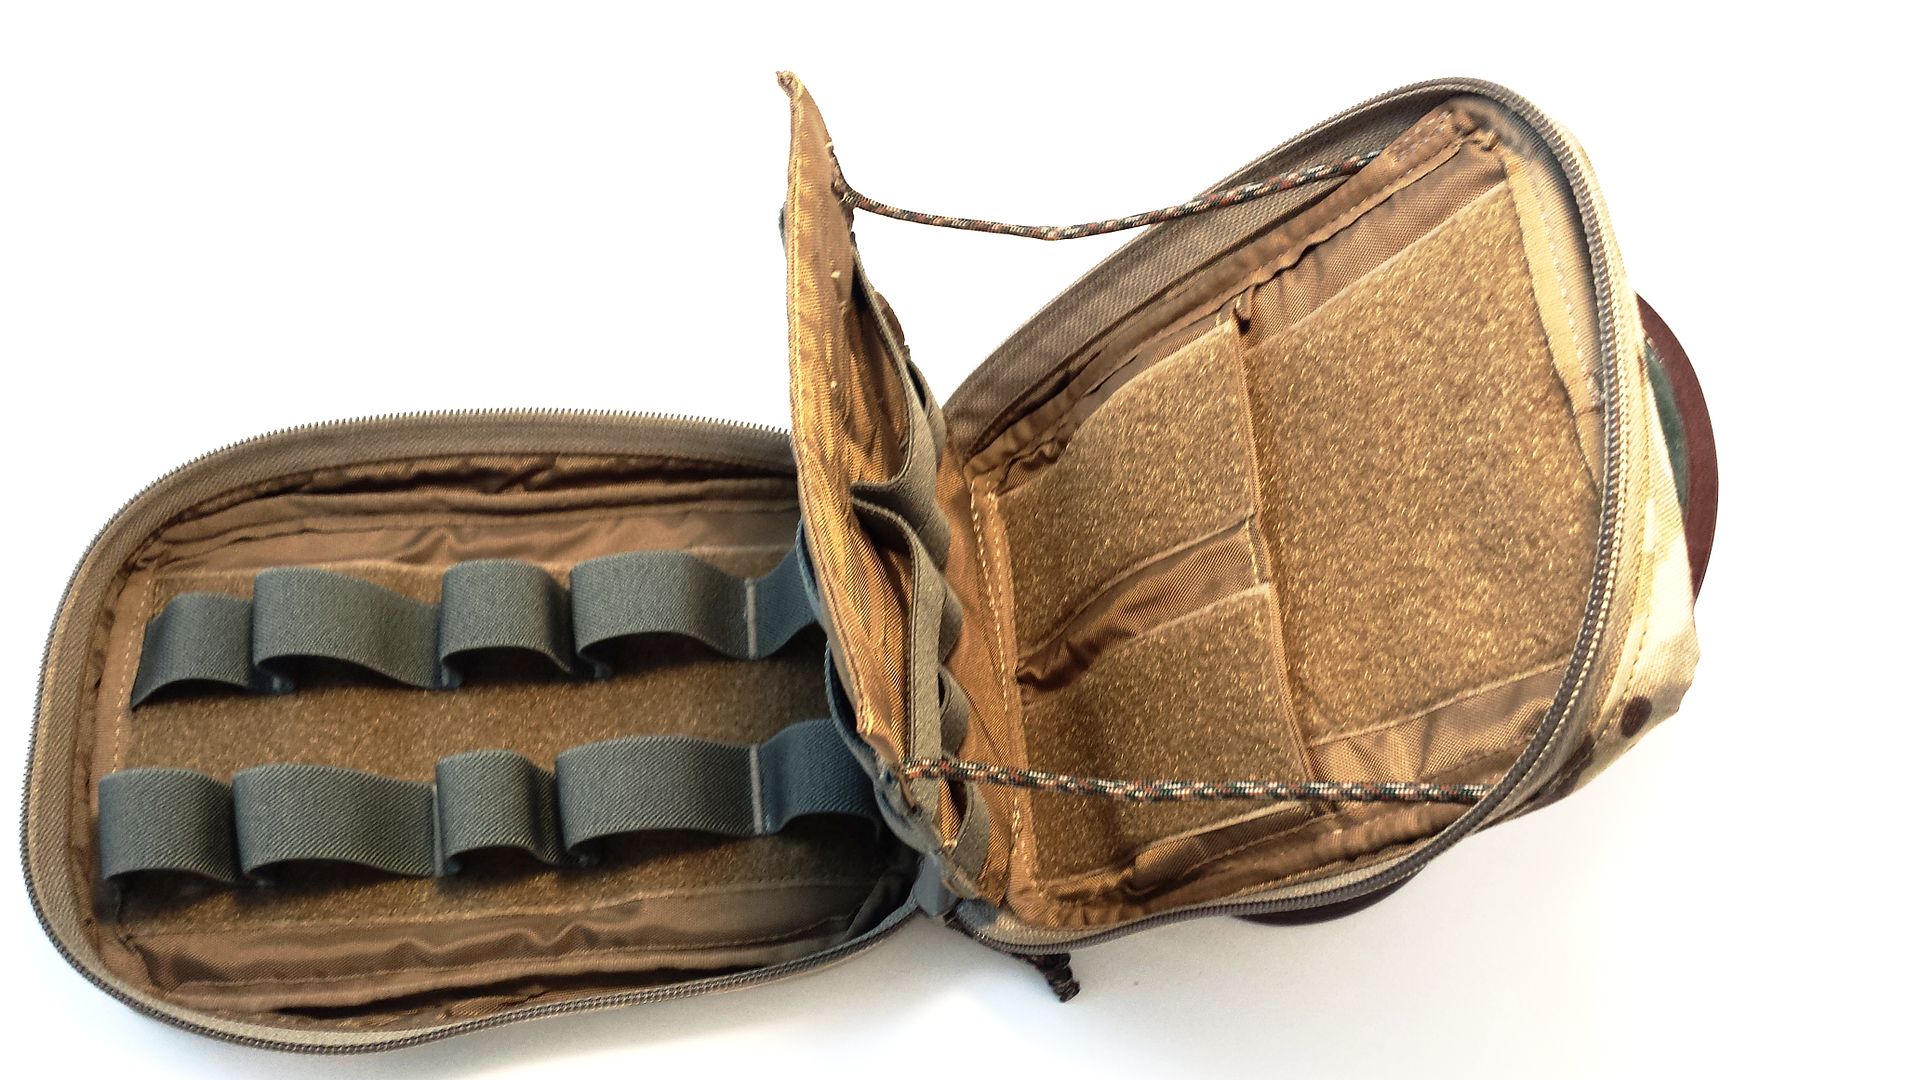
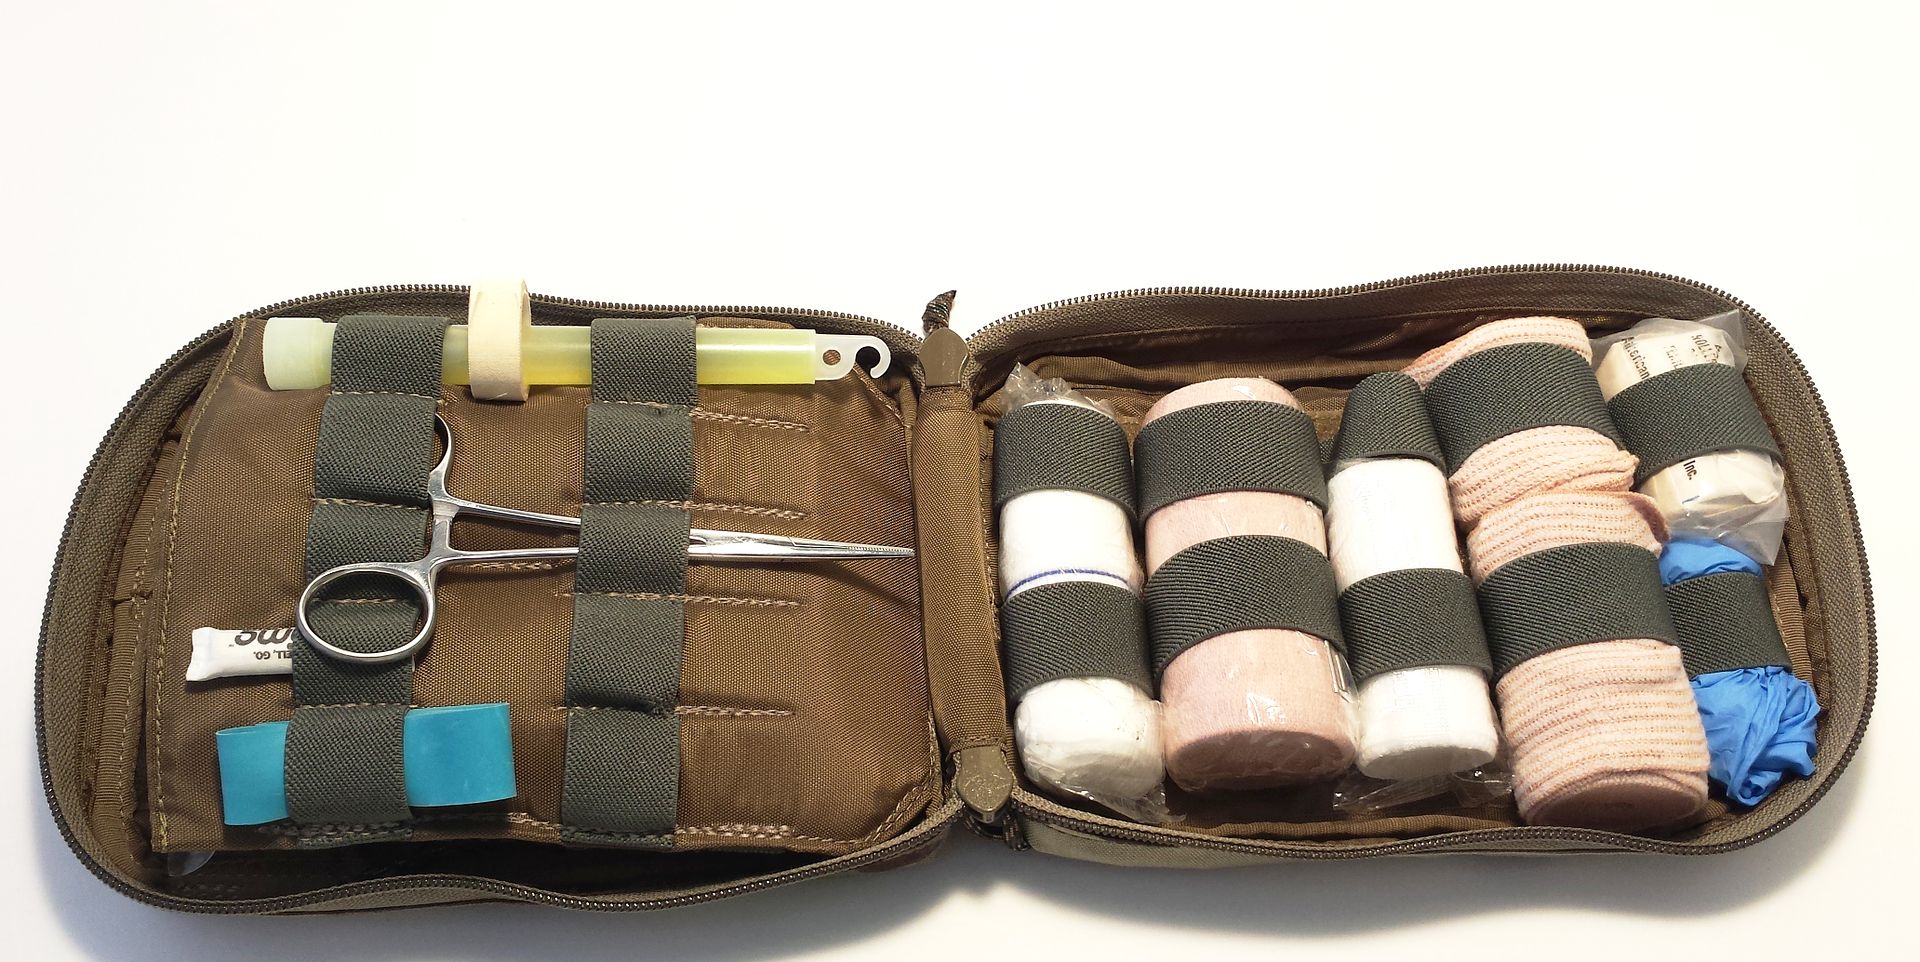
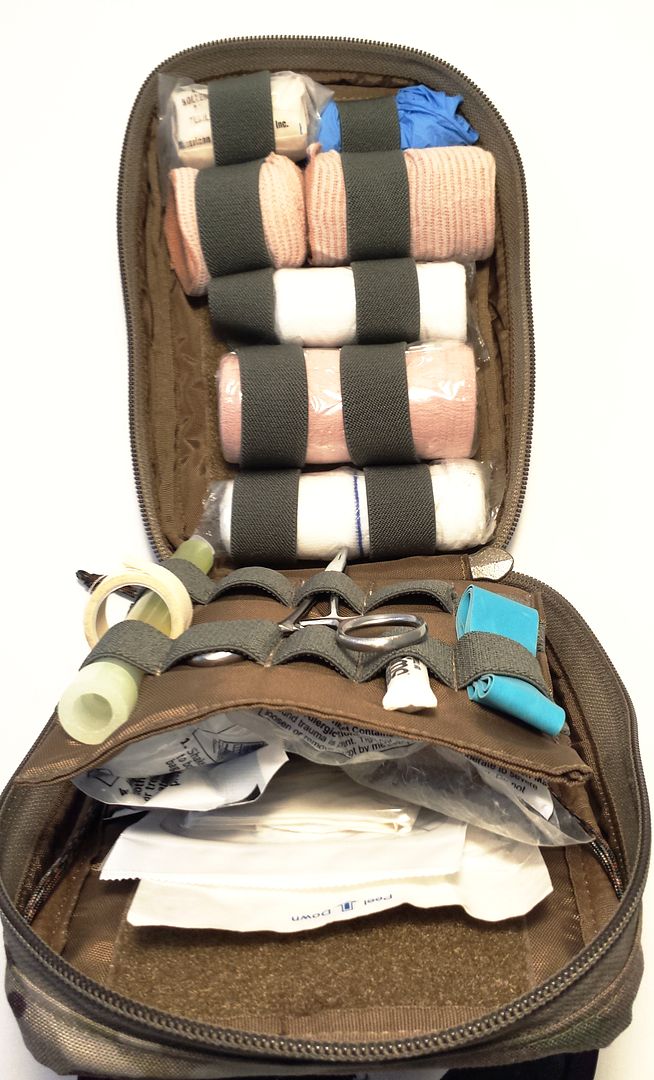
IFAK 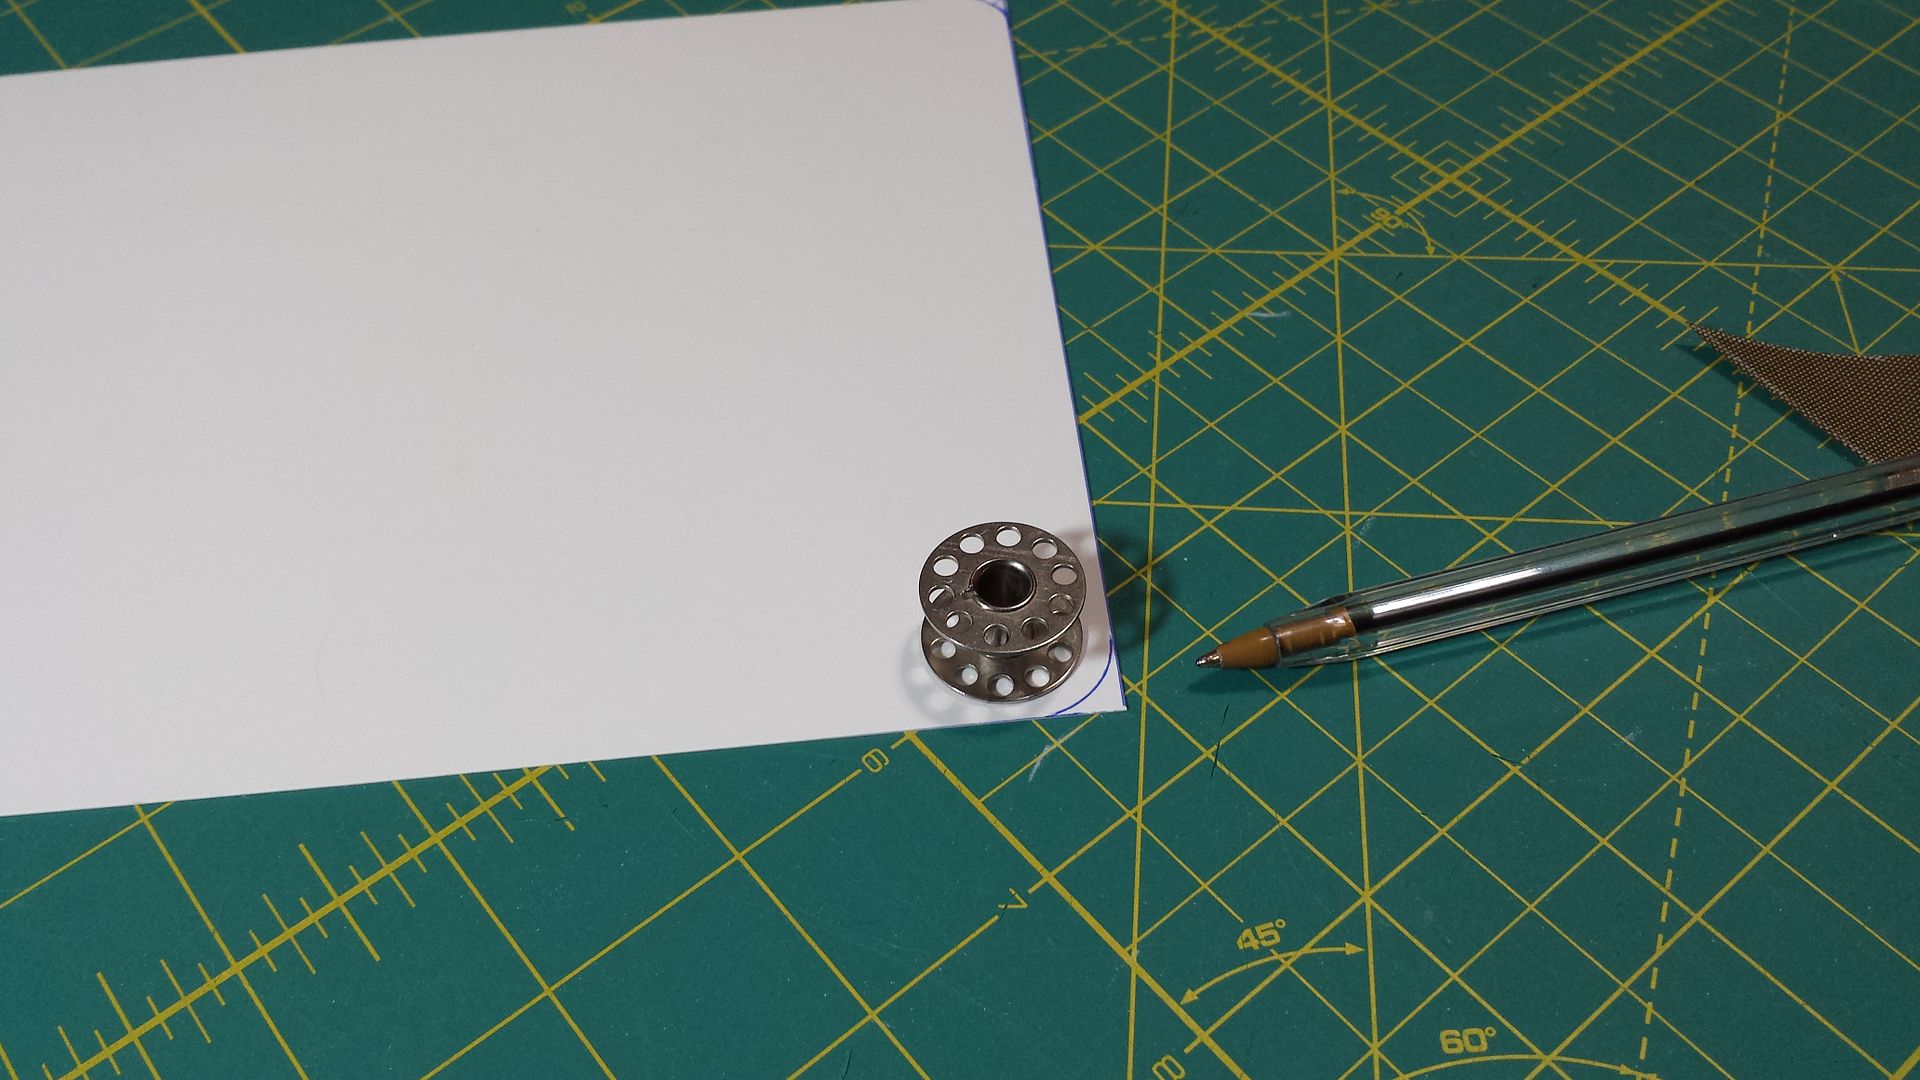


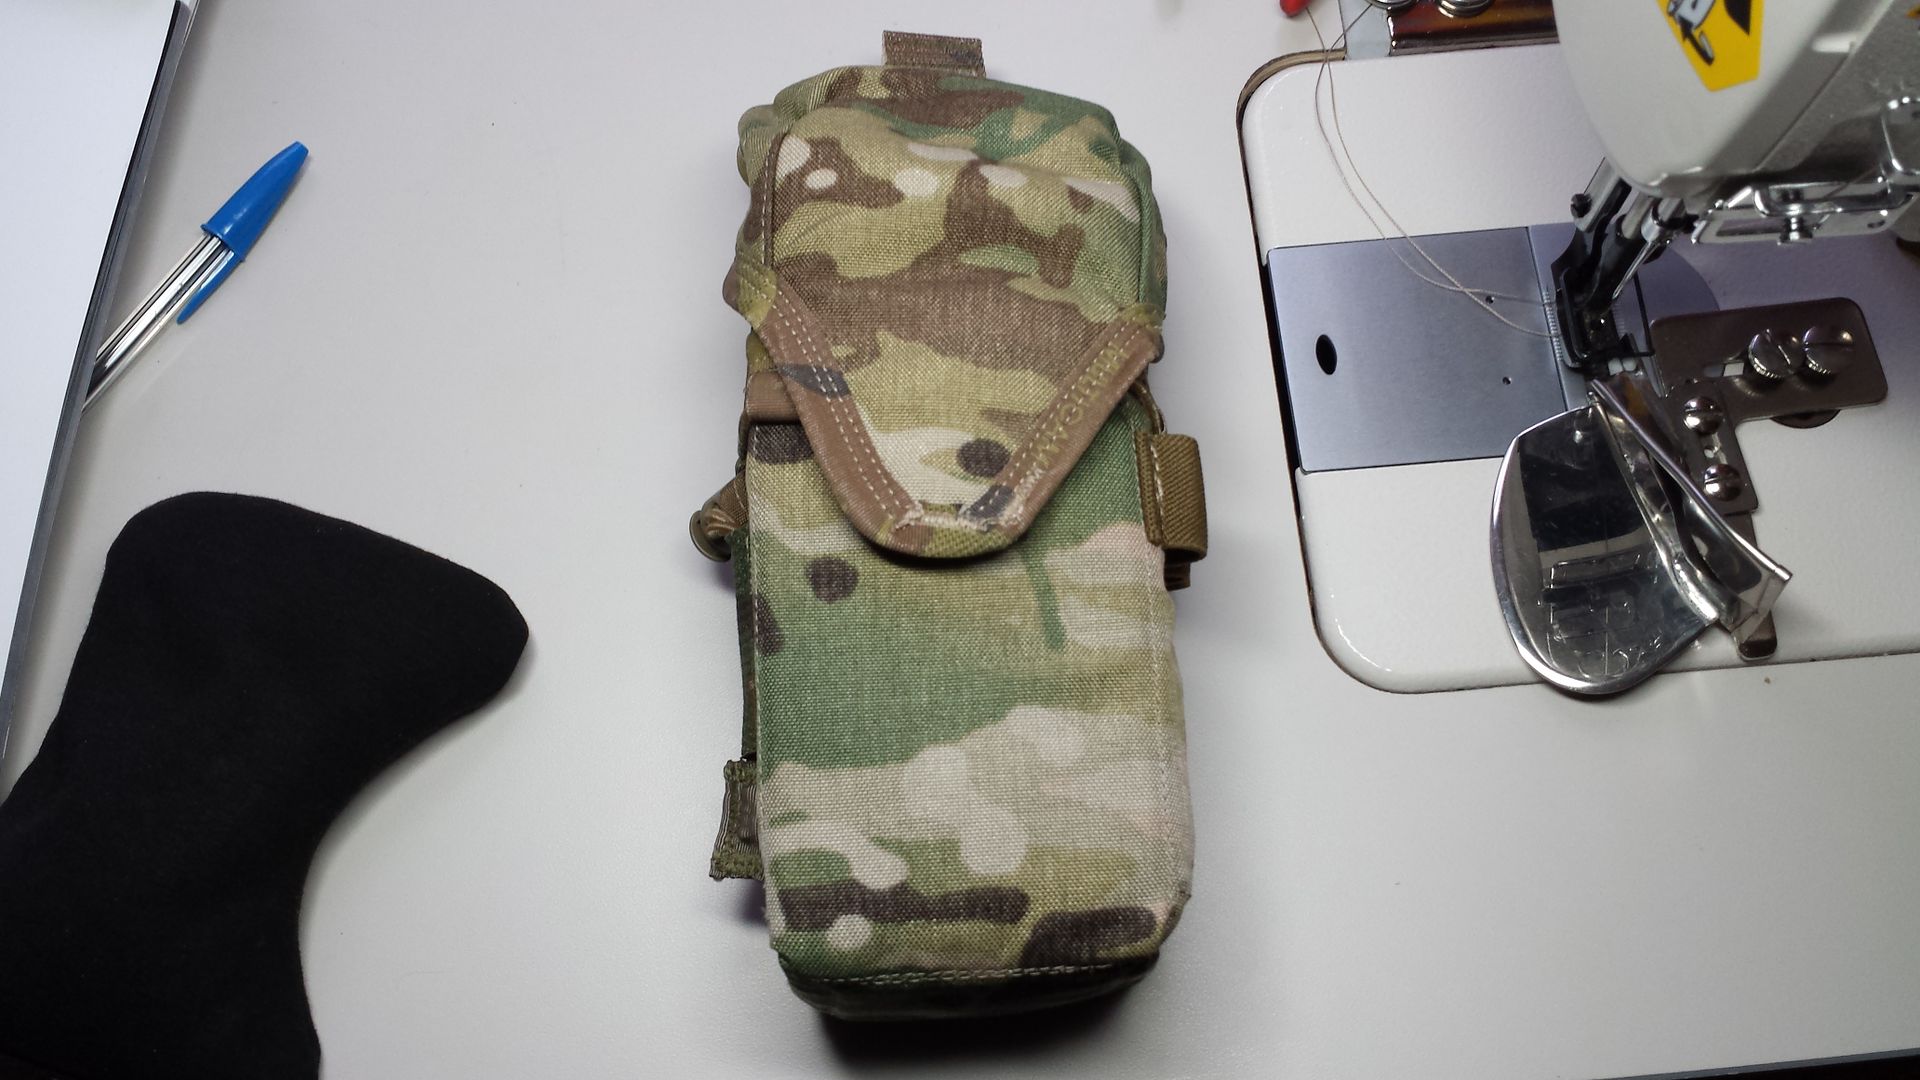
M4/SR25 Mag Pouches w/ Quick Access, Full-Coverage, Fully Padded 
|
|
|
|
[#5]
Holy shit, you guys have some nice workmanship.
I'm impressed with both the quality of the designs, as well as the level of attention to the details. Have any of you done a step-by-step thread that I missed? Cause I can make a machine sing, but the level of complexity and detail is beyond anything I have tried. |
|
|
|
[#6]
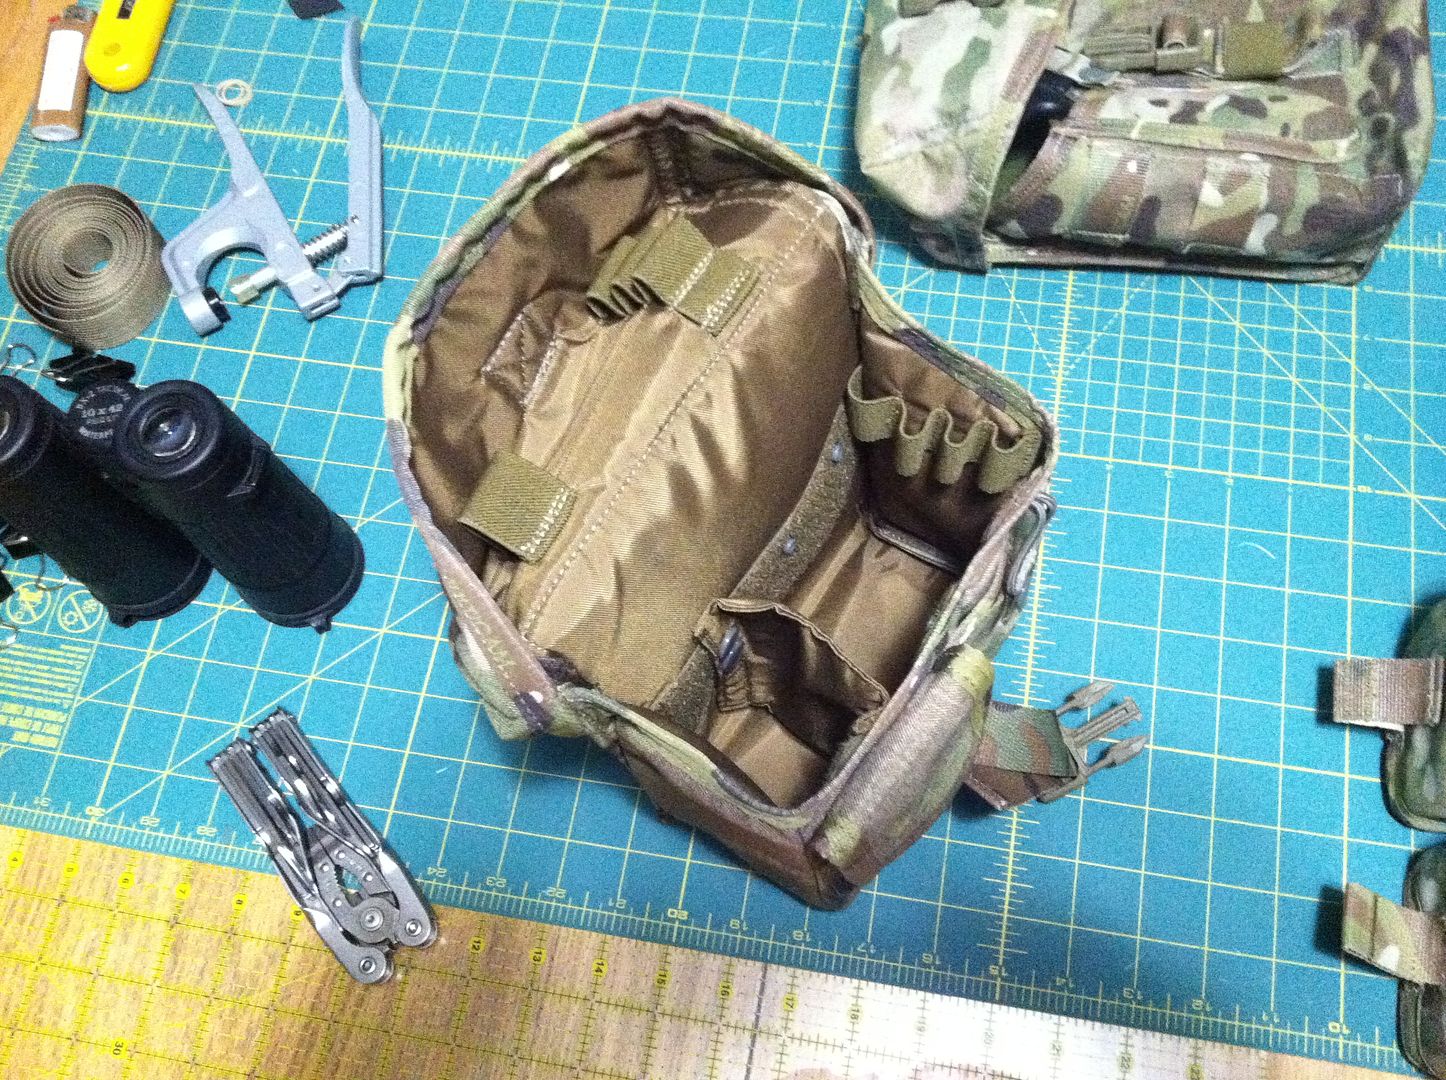
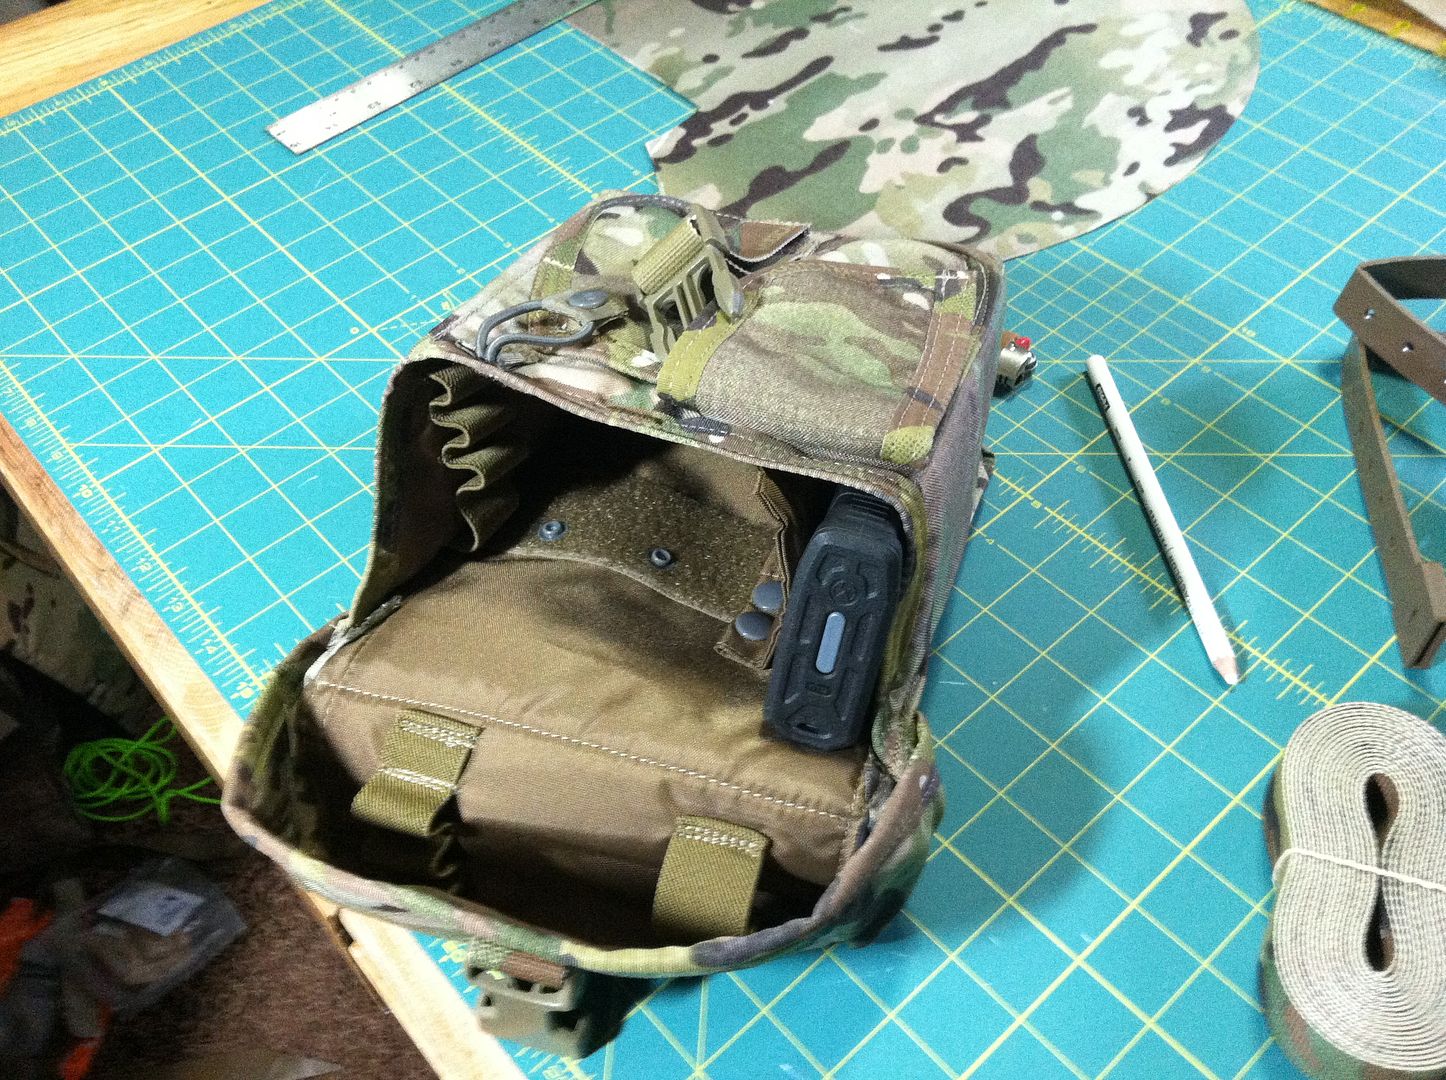
I did a tutorial on the IFAK.
The flat work is easy, even with it being padded. The zippers get kinda sketchy on you, but not anything bad if you've been sewing for many years. The final assembly I do on my Juki 1541S with binding tape and a binder. I bind everything together inside, at least double-stitched. There are a lot of really nice IFAKs on the market nowadays, but I didn't see anything that did what I wanted, especially with the amount of medical training and real-world injury experience I have. I'm working on a 2x M4, 3x pistol mag shingle right now that is fully padded. Very difficult to machine the 3 pistol mag pouches to the face of the M4 pouches. |
|
|
|
[#7]
|
|
|
|
[#8]
I love the matching LBE setup; colors look great.
What do you guys use for padding? I do all of my work on a $150 plastic Brother machine. That Juki really makes me jealous. I'm currently ironing some binding tape by hand since my machine doesn't have a jig to dispense it. |
|
|
|
[#9]
Thanks! Yeah I like the coyote/ranger green combo myself. This is the foam I use for shoulder straps. It cuts easy and has a good "slide" to it when trying to fit it inside things.
Foam |
|
|
|
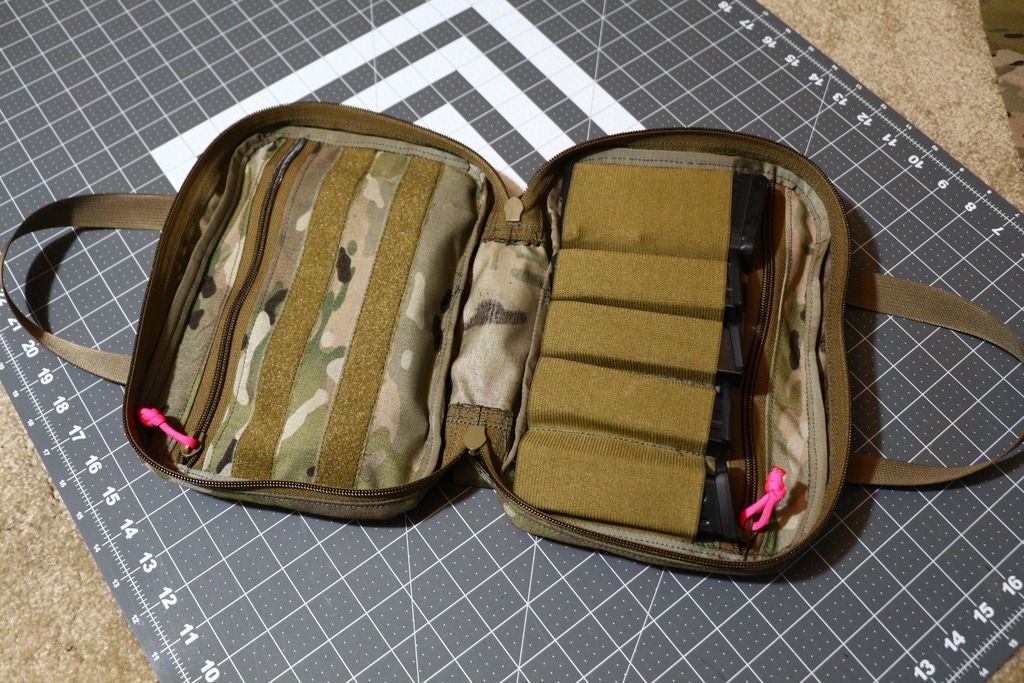
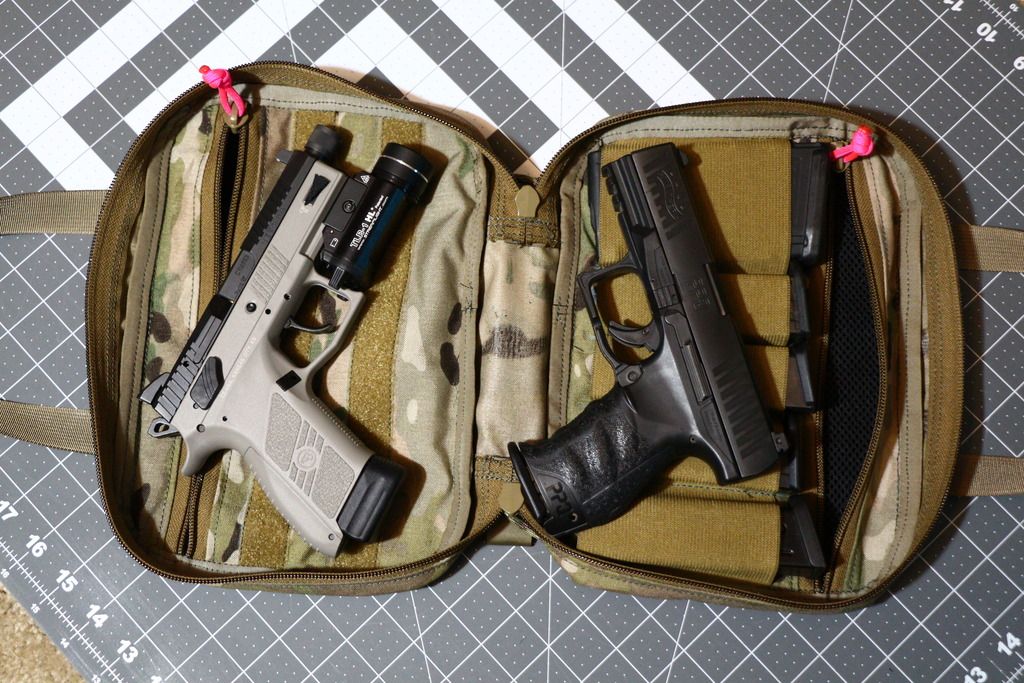
[#10]
Cool, I used some padded mesh to make my pistol case (below) but that seems like an expensive option. I'll order some of that to try out.

|
|
|
|
[#11]
Very nice work guys.
|
|
|
|
[#12]
What thread are y'all using?
I've wanted to get into this but never know what thread to use. |
|
|
|
[#13]
Quoted:
What thread are y'all using? I've wanted to get into this but never know what thread to use. My go to is 69# nylon. |
|
|
|
[#14]
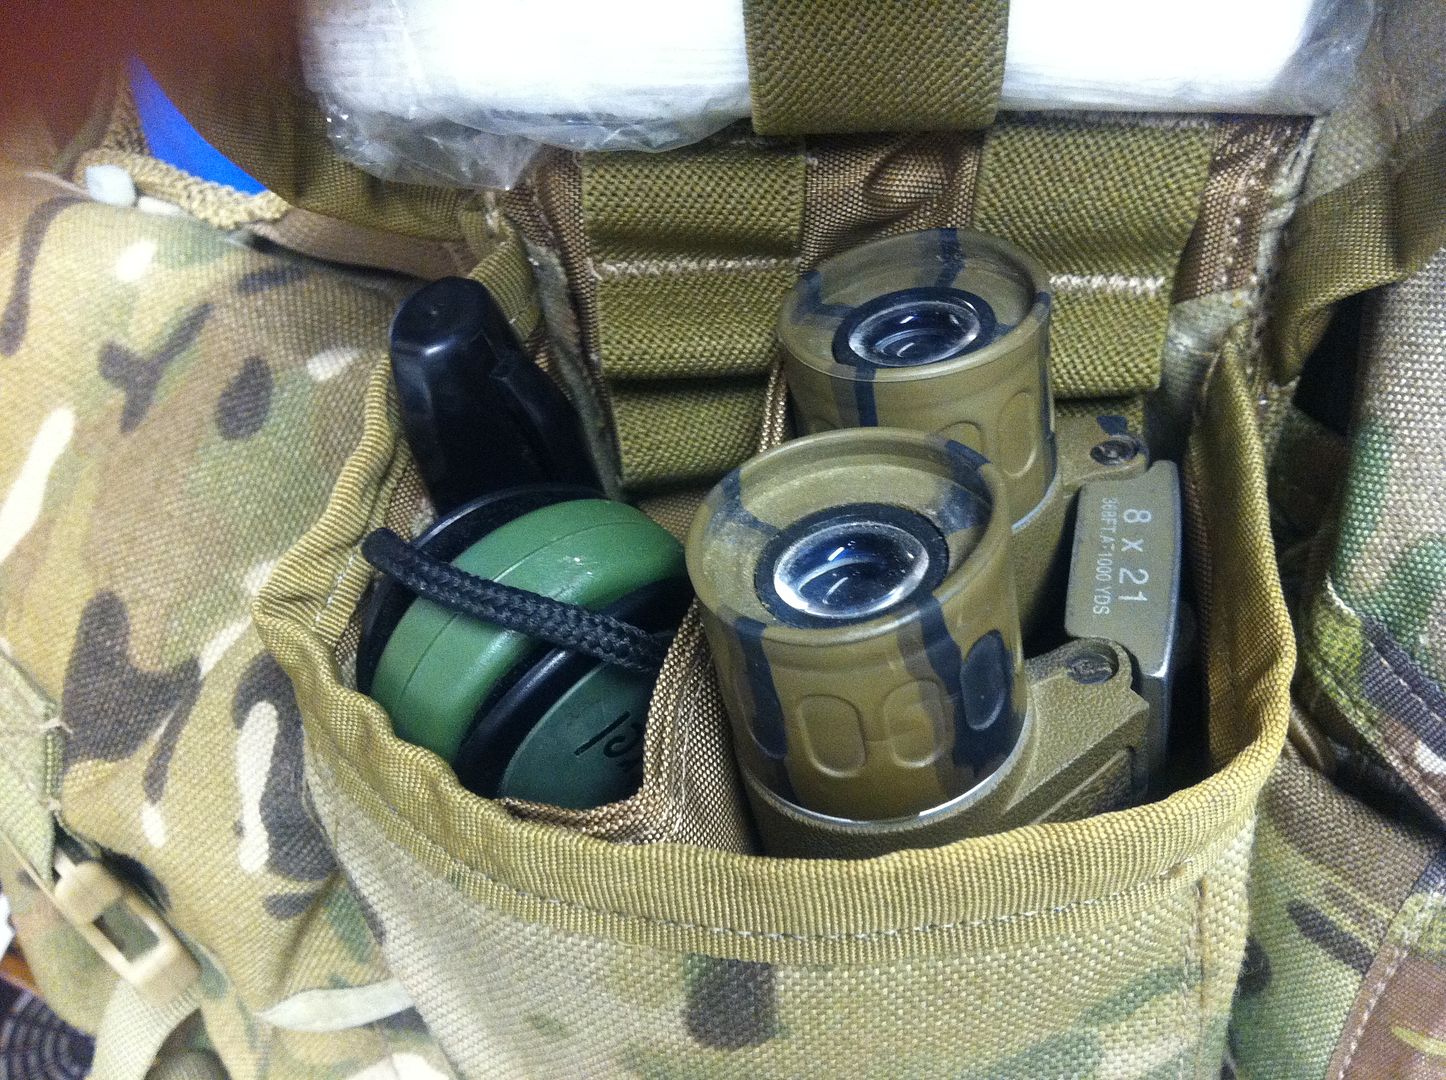
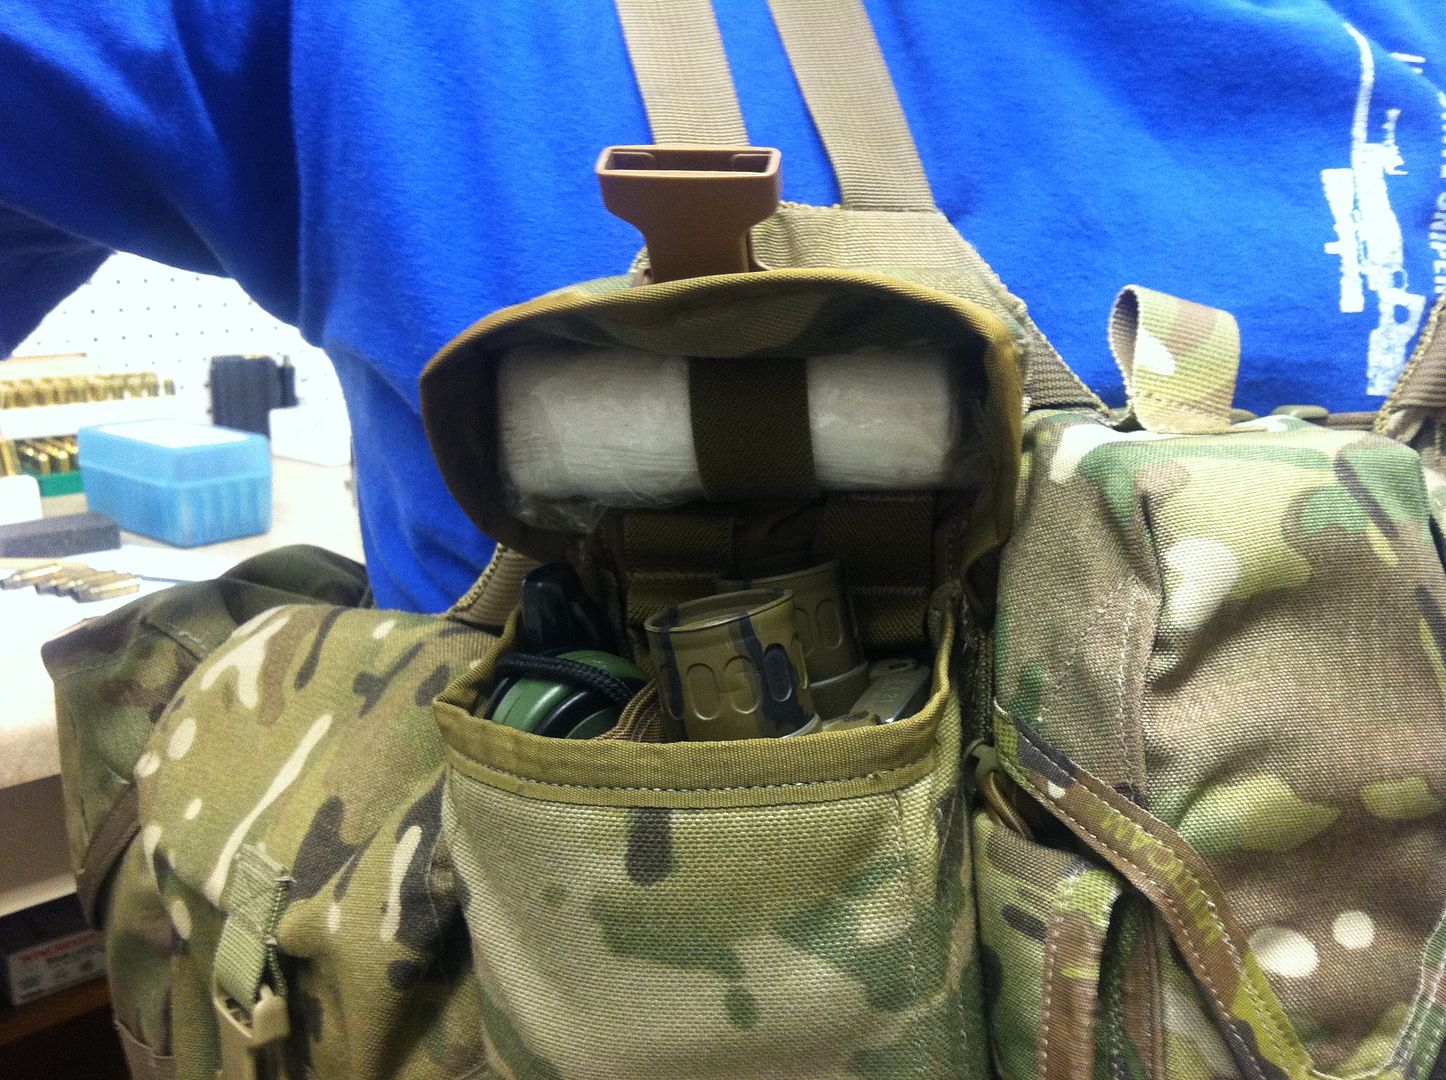
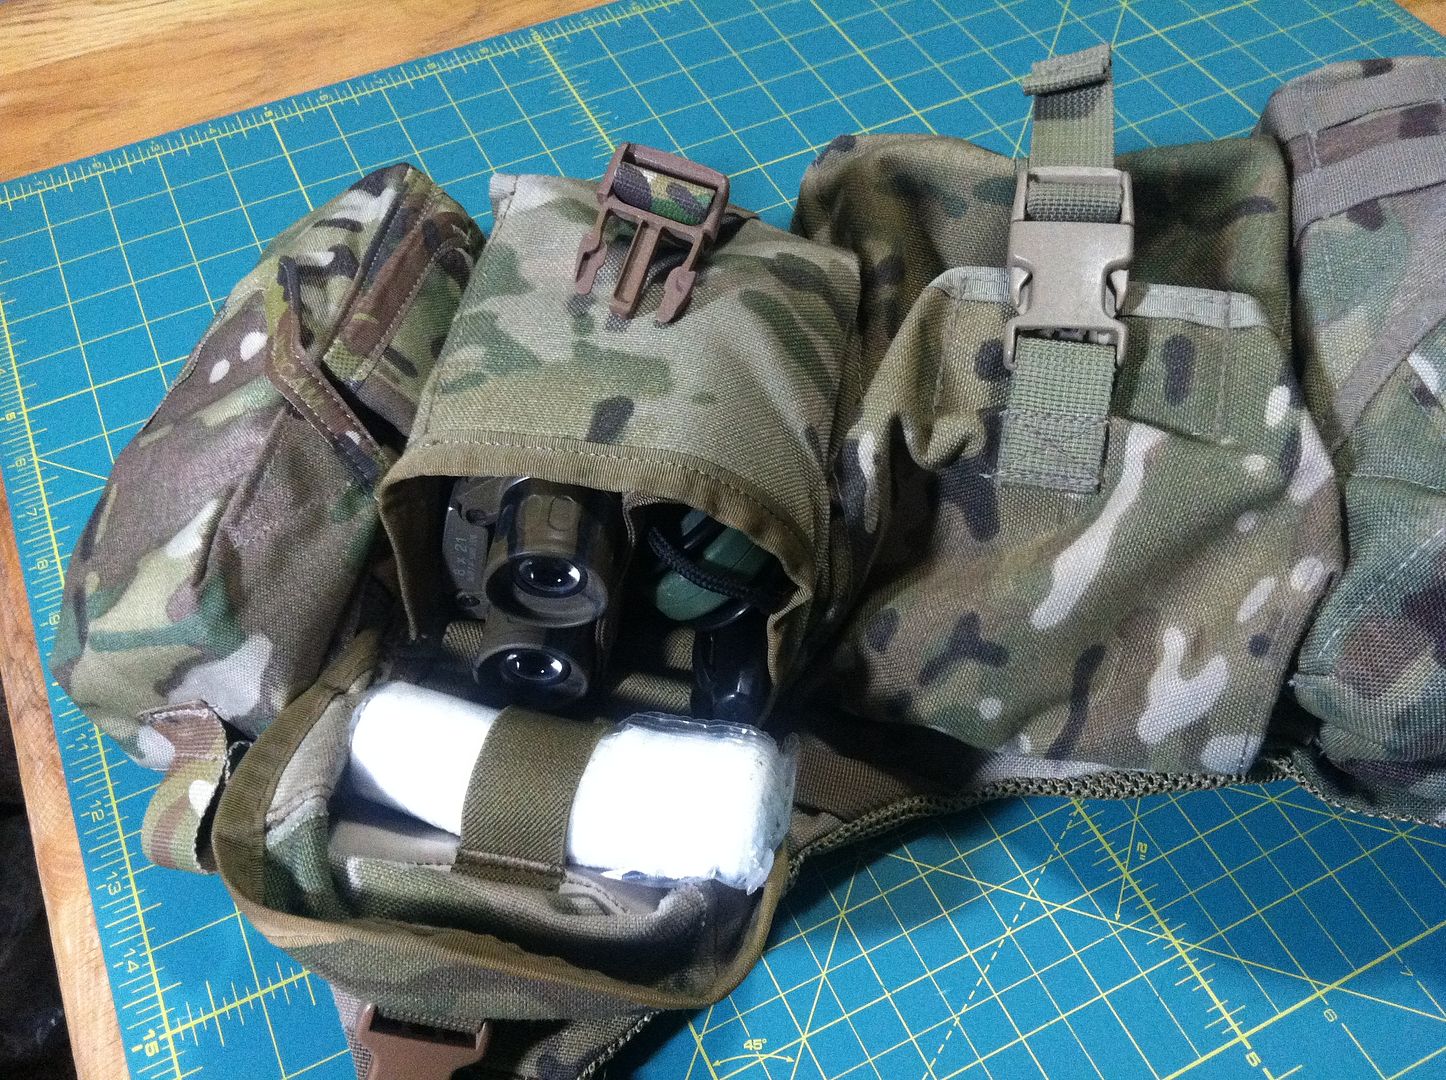
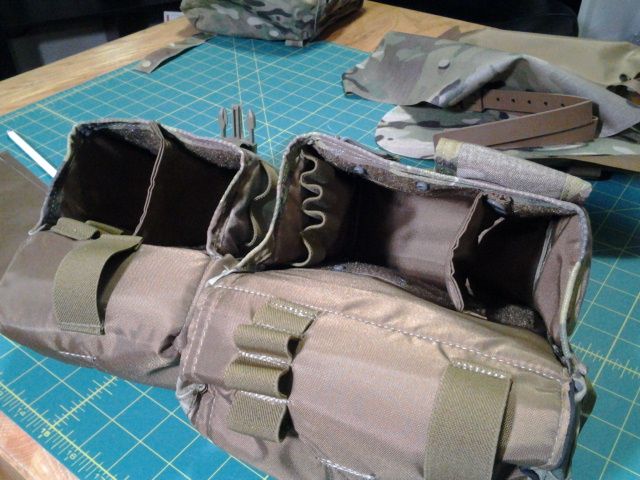
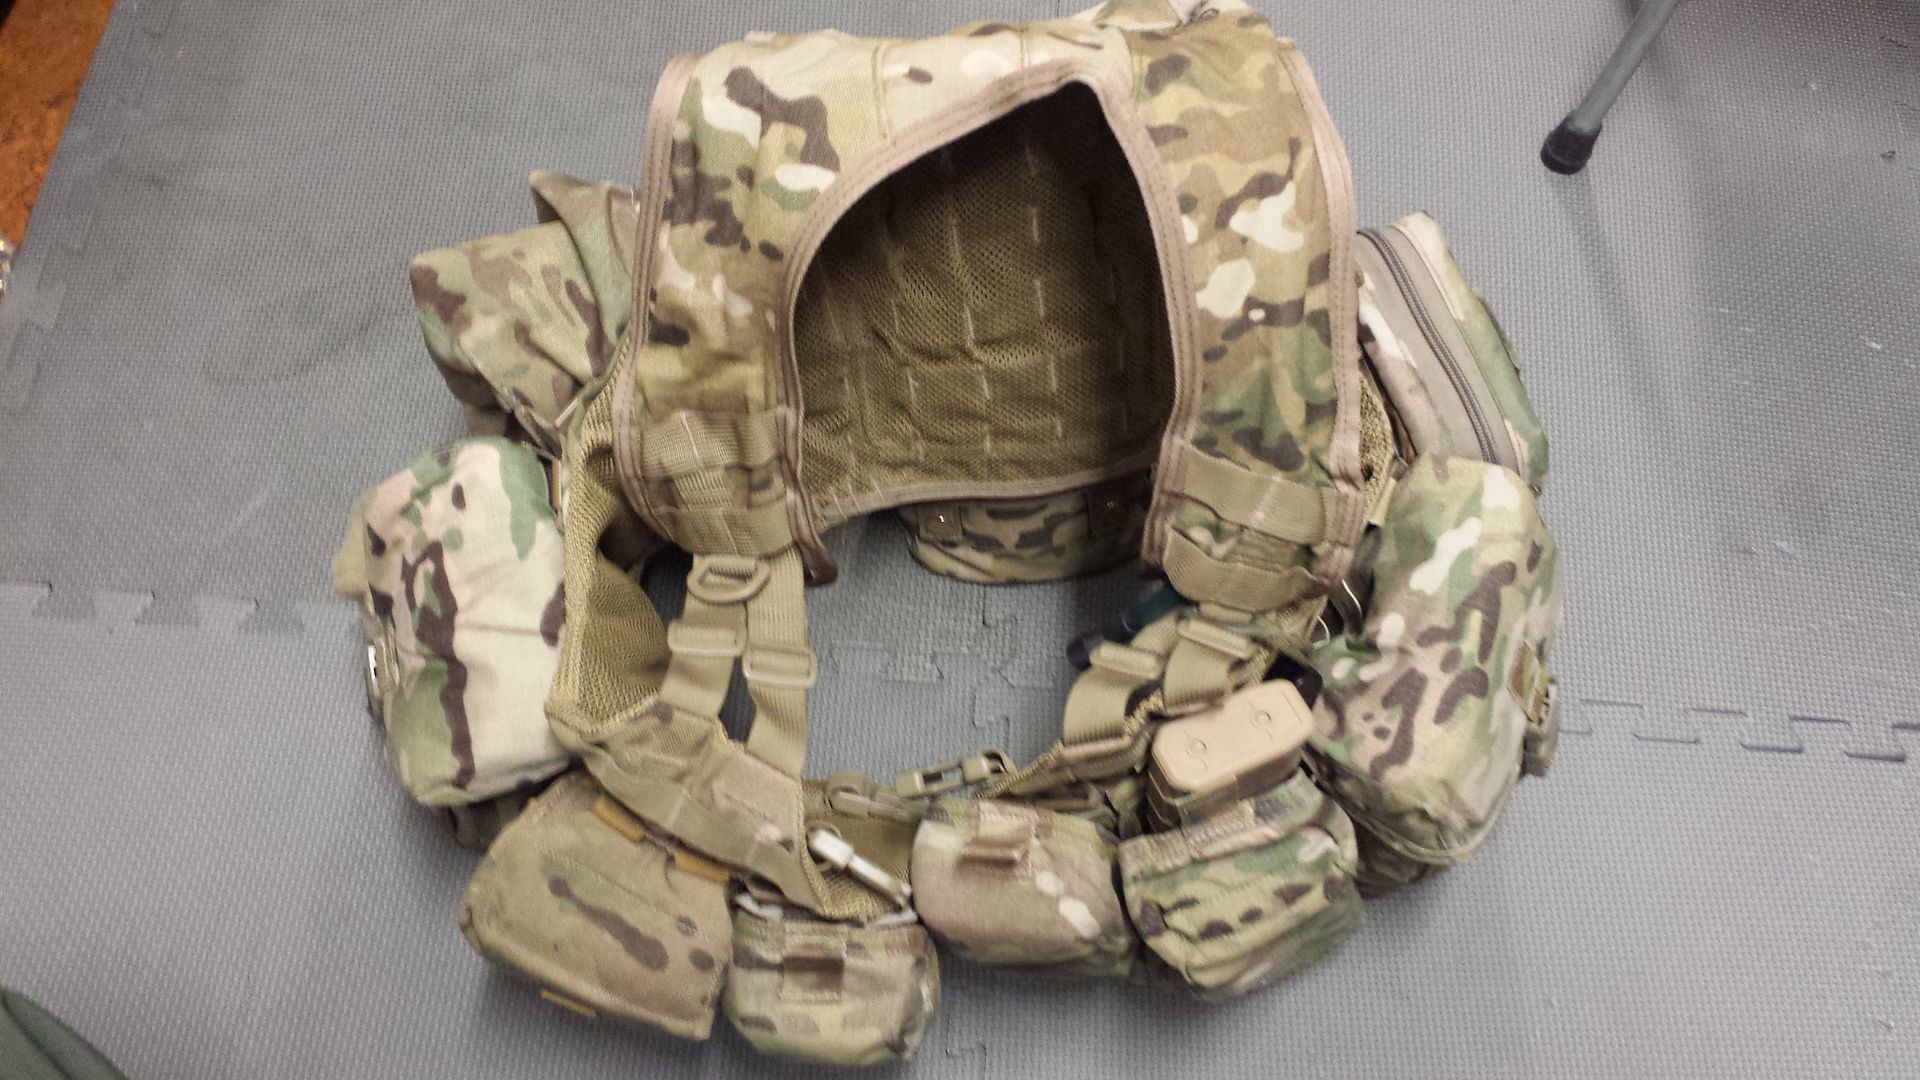
I made this vest back in 2008. Have been using it ever since. I've updated my pouches from what I used back then, designed my own mag pouches, IFAK, started making my SAW pouches in MC that I used to make in Woodland when I was still in.
I basically took every little lesson-learned and gear peculiarity that I liked from the Brits, Aussies, and the mods we made in Recon units. I'm working on something else for some people right now that is pretty fun, basically a really lo-pro chest rig that also allows plates, but doesn't look like a dedicated plate carrier at all. I need to take some more pics out in the wild. 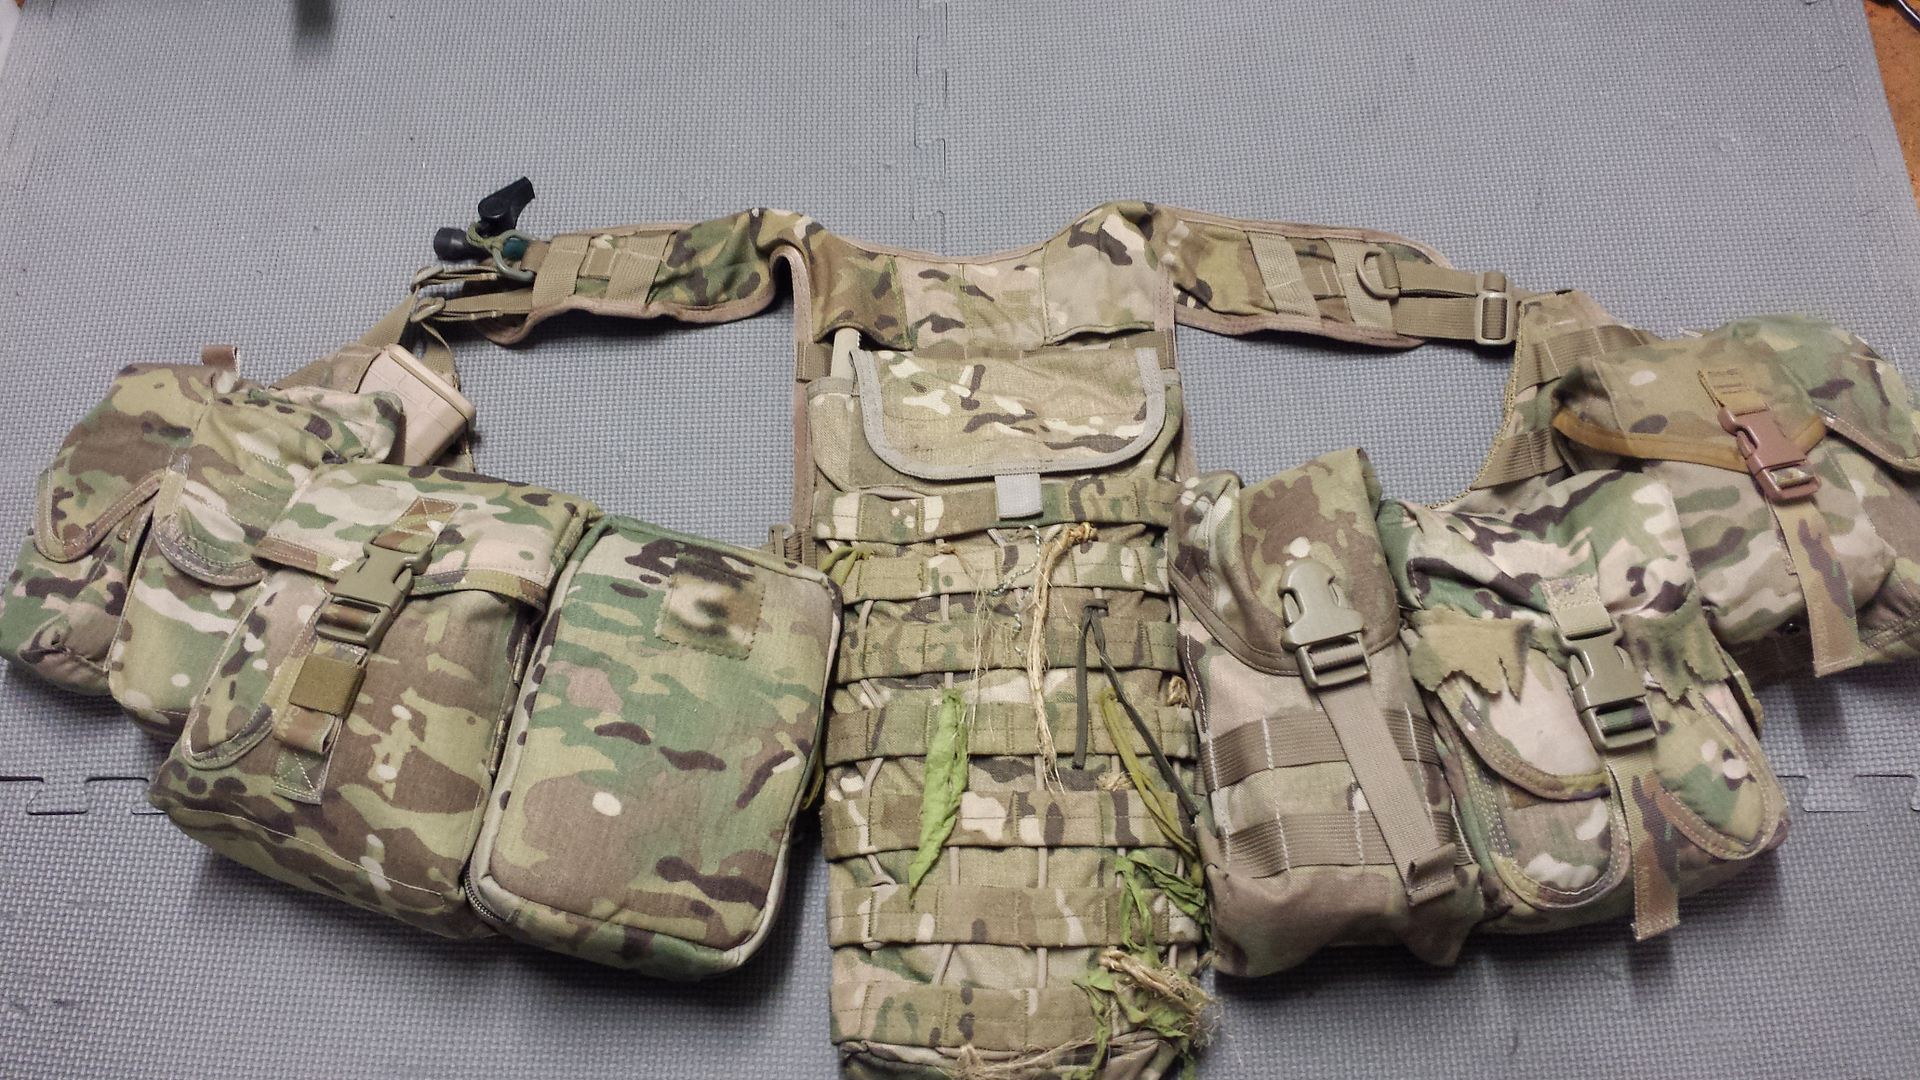

|
|
|
|
[#15]
I use T70 (AKA #69) bonded nylon thread. Not sure my machine could handle much more than that. Needles are a size 16 or 18, made for sewing "denim".
Where did you get your skills, LRRPF? Just years of DIY experience? |
|
|
|
[#16]
As stated, Tex 70 Nylon thread and a size 18 needle.
Most home sewing machines will struggle with some of the layer stitching that's required for stuff like this but you should be able to get by. |
|
|
|
[#17]
Quoted:
I use T70 (AKA #69) bonded nylon thread. Not sure my machine could handle much more than that. Needles are a size 16 or 18, made for sewing "denim". Where did you get your skills, LRRPF? Just years of DIY experience? My mom taught me how to sew by hand at an early age for some reason. I also used to make my own little 3D structures from card stock or construction paper, so I learned how things needed tabs and connection pieces, and the math that made a box or weird shapes come together. I started collecting military TA-50 when I was a kid as well. Right off the bat, it was clear to me that it wasn't quality equipment at all, and needed fixing, or a better design from scratch. I started modifying my LC-1 "Y" harness suspenders by removing the front webbing, and adding 2 webbing straps in the rear in order to convert them into "H" Harness configuration, which balanced out the load in the rear of the old pistol belt better. Some other companies at the time (late 1980s) had commercially-available nylon H harnesses as well, through Brigade Quartermaster, US Cavalry, and Ranger Joe's, which were sold in stores outside of Fort Bragg, Fort Lewis, and Fort Benning through the early 2000s. One thing I would do to my LC-1 gear was reinforce the seams on the Type 8 nylon on the mag pouches, canteen pouches, and compass/first aid pouches, since they were poorly made. It allowed me to tighten up the fit of the pouches to the pistol belt, rather than have them hang off. In Infantry units, the first thing you did when you got to your Platoon was tie down all your pouches per the unit SOP, since the crap would fall off if you relied on the garbage ALICE clips. I made my first Ghillie suit according to detailed instructions from 2 guys who had been through Sniper School, who worked in the Recruiting station I joined through in my home town. This was back in the day of OG107s, tent canvas, all-OD green base suits for the most part, along with flight suit bases as well. After joining, in my 1st and 2nd Scout Sniper Platoons, I got tired of making stuff by hand for Ghillie suits, and knew I would need a heavy duty machine in the future. In Long Range Surveillance, we did a lot of mods to our gear, and I used one of the machines that one of the other Team Leaders had in the Company. This guy was a genius, made all kinds of amazing gear, from integrated man-portable hide site systems, to lightweight Ghillies for recon, to vests, leg rigs, pouches, you name it. I heard about him years before I met him, back in my first Scout Platoon. I got a heavy duty machine shortly after while at Fort Lewis, which I used to make gear for Platoon mates, mainly Ghillie suits and pouches. I came up with a SAW pouch design based on what I had seen from the Brits, using the US SAW pouch template, while adding specialized pouches to the outside, along with elastic retention for the inside. A lot of people asked for those wherever I was stationed. I also made my own slings, but stopped making them once the 2-point, quick-adjust slings came out. I've never really been happy with any of the gear out there, other than some of the British kit, which is ready-to-go out of the bag, even their old PLCE. |
|
|
|
[#18]
Very interesting story, thanks. One benefit of growing up during almost 20 years of war is a never-ending supply of tactical gear options. So much has changed over the past 10 years even. I can only imagine how bad the gear was when you were first starting out.
|
|
|
|
[#19]
What machine would someone want to buy as a part time tinkerer? If a home machine would struggle what's the next step and not break the bank?
|
|
|
|
[#20]
Quoted:
What machine would someone want to buy as a part time tinkerer? If a home machine would struggle what's the next step and not break the bank? Older used industrial machine. Consew, Juki, etc. That's what I did. Just finished swapping the clutch motor for a servo on the pristine 1968 consew I bought for $100. Totally programmable on the servo motor with needle positioner. Machine cost is $230 for everything. |
|
|
|
[#21]
I use a brother cs6000i for $150 new. No regrets. I've put about 5,000yds of thread through it with zero issues. It can handle 98% of what I throw at it. Sometimes it struggles with really thick seams of webbing / cordura but I just manually move the needle then.
Old machine, made of metal, would be the next step up. |
|
|
|
[#22]
I typically don't share my stuff cause most of it I design and sell as a small part time business. However the stuff for myself I don't intend to sell I'll show.
Range bag I made, all sides are rigid so the bag does not collapse under a heavy load 

Simple plate carrier with fully adjustable pouches. Pouches were a concept design and were not a big success. 
Chest rig with soft armor built into front and back panels. Has pouches with kydex inserts. 
Opscore helmet cover. 
|
|
|
|
[#23]
Range bag is pretty awesome. I tried making an OpsCore helmet cover once...it was an epic fail.

Made a step-by-step of my latest project for the new guys. Some simple shoulder pads: Shoulder pads tutorial 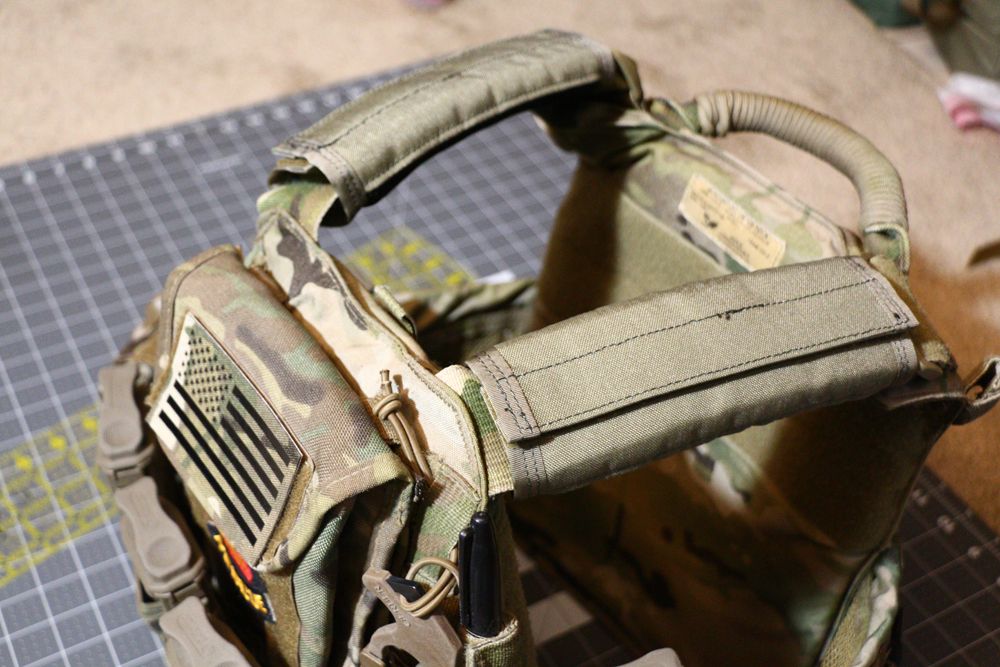
|
|
|
|
[#24]
Thanks, yeah I really hate doing bags, it's just allot of pieces that need to go together in a specific order and the more pieces you put together it gets hard as hell to get under the machine, even for a bigger industrial machine. Yeah opscore helmet provides certain challenges if you can't design in 3D.
On thread and needles, I use between 21 and 23 size needles. I use ether t70 (69) or t90 (92) bonded nylon threads depending on the project. Rare cases I use t135 (138) thread but mostly for load bearing or riggers type sewing. Also more rare I use nomex threads when I'm working with heat materials. I like those shoulder pads, simple and effective. All your work shows high skill, vary neat, and well put together. Few more pictures I found hiding. This was a custom ordered slick side hydration pouch and radio pouch. 

Molle backed 6x mag pouch. 
|
|
|
|
[#25]
Thanks, I try to keep my stuff as professional looking as possible. Sewing has ruined me though. I can't pick up a piece of gear or clothing without analyzing the craftsmanship.
All the pouches / pads / slings on my work armor came from my machine with the exception of the M4 pouches; I need to make some. Those MC Arid pouches look good. I just don't know how you guys come up with these complex bags and plate carriers. That kind of stuff would take me weeks to make, if I could even figure out how to design it. |
|
|
|
[#26]
Very nice and "neat-oh" factor stuff here. I just started teaching myself how to do some of this. I am no where near this level. I started learning to use a sewing machine because I wanted to learn leather crafting and stitching by hand sucks, especially with some arthritis in the thumb joints. So, I bought a Singer 111W153 five months ago. I have since learned how to make tote bags, duffles and a square aircraft carryon bag.
I want to make a M-1936 musette bag, but I can't find a pattern for it. Anyone have an idea where I might find such a pattern? Unlike you guys, when I try to reverse engineer something or design it myself, it doesn't come out the way I envisioned it. If you promise not to laugh, I'll post some pics of my creations. small tote: Medium tote: Duffle: |
|
|
|
[#27]
Totes are fun. I made a few that we use to go grocery shopping--we get lots of fuel points as a result. Makes me laugh when I see what other people us--my GF stood in one of my totes as I carried her around the living room. Probably a bit overbuilt.
As for the M-1936 bag pattern, I was not able to find one online. It looks like a pretty simple bag though. Do you a pattern for everything you make, or can you build simple stuff without one? If you can find a cheap one on eBay, you could cut the stitching and use that as your pattern. Not sure what your budget is or how close you want yours to be to the original. |
|
|
|
[#28]
Quoted:
Totes are fun. I made a few that we use to go grocery shopping--we get lots of fuel points as a result. Makes me laugh when I see what other people us--my GF stood in one of my totes as I carried her around the living room. Probably a bit overbuilt. As for the M-1936 bag pattern, I was not able to find one online. It looks like a pretty simple bag though. Do you a pattern for everything you make, or can you build simple stuff without one? If you can find a cheap one on eBay, you could cut the stitching and use that as your pattern. Not sure what your budget is or how close you want yours to be to the original. I have bought a couple cheap Chinese made musettes. They are close enough in pattern for a knock off. I have torn them apart and tried to make patterns from them. Like I said before, what I take apart and what I end up making don't exactly look the same. As for my totes and duffles, I use basic patterns that were provided by the guy who sold me my machine. He used to make bags commercially years ago. I sat with him a few times and watched him put different shaped bags together. He (intentionally) didn't give me everything, but I have the basic part shapes and then modify or improvise from there. I have been using upholstery, 12oz artist canvas, and #8 duck canvas as materials. I took my Maxpedition Falcon-II to my mentor/machine guy to see if we could reverse engineer it and he thought it was a "nightmare". After looking at all the stuff in this thread, I'm thinking it might be hard, but not impossible after I get some more practice. I'm not looking to make tactical gear, but I would like to know how it's done, if nothing more than for the knowledge of how to measure and shape the stuff. I'm more interested in making stuff for travel and EDC, but based on a military look, like the M-1936 bag. I'd like to make them out of leather after I get good at fabric. Do you guys offer lessons? |
|
|
|
[#29]
Backpacks are time consuming and require lots of steps. Need to make sure everything lines up and that you don't forget anything during assembly. I am self-taught...you don't want lessons from me.
Plus there is still a lot of stuff I don't know how to do. That's one of the reasons I made this thread. Ask for advice / see how other people do things.
|
|
|
|
[#30]
Very cool. OP could you add some links for some sources of material to your post?
|
|
|
|
[#31]
71st EOD!! lol I spend most of time at Hood with the 79th. Out for a while now, was Battalion Assistant S3 for too long. |
|
|
|
[#32]
Quoted:
Backpacks are time consuming and require lots of steps. Need to make sure everything lines up and that you don't forget anything during assembly. I am self-taught...you don't want lessons from me. Plus there is still a lot of stuff I don't know how to do. That's one of the reasons I made this thread. Ask for advice / see how other people do things.Sounds like me. I am also more or less self teaching, with some demonstration time, but by the time I get home and try it myself, I have forgotten a lot of how it was done.
I'm trying to make another duffle like the one I have pictured above. Par for the course, something isn't lining up and I have had to take it back apart. I think I know the mistake, but I'm done for this evening. I'll try to fix it in the morning. However, I did figure out a way to wrap the webbing in leather to make a nicer handle today. I'm just glad there are others here that share the same interest. 5 or 6 months ago, I couldn't make (sew) anything. Yet, I still can't replace a button with out looking like something Dr. Frankenstein made. |
|
|
|
[#34]
Quoted:
71st EOD!! lol I spend most of time at Hood with the 79th. Out for a while now, was Battalion Assistant S3 for too long. Quoted:
71st EOD!! lol I spend most of time at Hood with the 79th. Out for a while now, was Battalion Assistant S3 for too long. Nice, it's a good group. Army EOD seems to have a pretty amazing training budget, at least the guys at Riley did. I was AF but got the patch when we deployed under CJTF Paladin. Quoted:
Very cool. OP could you add some links for some sources of material to your post? I do a lot of my shopping on eBay but Rockywoods has everything you need at premium prices. RBTR is good for Climashield insulation and light ripstop (if you want to make a woobie). Links added. PM me if there is something specific you're looking for. Quoted:
Sounds like me. I am also more or less self teaching, with some demonstration time, but by the time I get home and try it myself, I have forgotten a lot of how it was done.
I'm trying to make another duffle like the one I have pictured above. Par for the course, something isn't lining up and I have had to take it back apart. I think I know the mistake, but I'm done for this evening. I'll try to fix it in the morning. However, I did figure out a way to wrap the webbing in leather to make a nicer handle today. I'm just glad there are others here that share the same interest. 5 or 6 months ago, I couldn't make (sew) anything. Yet, I still can't replace a button with out looking like something Dr. Frankenstein made. I draw out my plans before I start cutting or sewing anything. Found that's the best way to increase the odds of success when it comes to lining stuff up. Seam allowance can really throw you off if you're not careful on some projects and it's easy to overlook. Since there is a lack of information on this sort of sewing, I usually look at ladies sewing flowery bags to figure out the basics of how pieces are attached and in what order. That's worked well for me on a few projects (like grocery totes). |
|
|
|
[#35]
I found an old Singer machine in the classifieds, took it to a shop for a clean and lube, but it still keeps bird nesting on me? I haven't been able to really make any thing because of this. Any suggestions from the hive?
|
|
|
|
[#36]
Quoted:
I draw out my plans before I start cutting or sewing anything. Found that's the best way to increase the odds of success when it comes to lining stuff up. Seam allowance can really throw you off if you're not careful on some projects and it's easy to overlook. Since there is a lack of information on this sort of sewing, I usually look at ladies sewing flowery bags to figure out the basics of how pieces are attached and in what order. That's worked well for me on a few projects (like grocery totes). I draw mine out using patterns that I made from plastic. Then put it together like a jigsaw puzzle. This is the end of the duffle bag above, made with a zipper pocket. This is the third time I'm trying this bag and the part that didn't line up right was when I was trying to sew the end piece on to the main body. I ended up with some extra material going around. You are right, in that it might be the seam allowance. Rounds edges and corners aren't my best skills yet. Totes are easier and I tried to master them first. But, in doing that, I didn't try this bag again for a couple months, so it's like starting from scratch again. The first time I made it was right after it was shown to me (2 or 3 months ago) then I made the one pictured above last week and I had the same problem. I'm glad I'm not trying to make a living at this.
|
|
|
|
[#37]
Quoted:
I found an old Singer machine in the classifieds, took it to a shop for a clean and lube, but it still keeps bird nesting on me? I haven't been able to really make any thing because of this. Any suggestions from the hive? Have you tried to re-thread the machine? Then adjusting the tension on the threads? That's usually the first thing that is recommended. |
|
|
|
[#38]
Tagged. My new sewing machine was delivered this week.
|
|
|
|
[#39]
I'll play, haven't made much that was successful but this pack turned out nice. Designing and actually making a custom piece is HARD. I didn't make the actual straps for this though.


|
|
|
|
[#40]
tag
|
|
|
|
[#41]
Quoted:
I draw mine out using patterns that I made from plastic. Then put it together like a jigsaw puzzle. This is the end of the duffle bag above, made with a zipper pocket. https://www.AR15.Com/media/mediaFiles/3725/IMG-0074-154462.JPG This is the third time I'm trying this bag and the part that didn't line up right was when I was trying to sew the end piece on to the main body. I ended up with some extra material going around. You are right, in that it might be the seam allowance. Rounds edges and corners aren't my best skills yet. Totes are easier and I tried to master them first. But, in doing that, I didn't try this bag again for a couple months, so it's like starting from scratch again. The first time I made it was right after it was shown to me (2 or 3 months ago) then I made the one pictured above last week and I had the same problem. I'm glad I'm not trying to make a living at this. Use heavy paper clips or small clamps from the hardware store. Once you have your patterns worked out, you can hold everything down really nicely and remove each clamp as you progress along the seam. If you are trying to hold layers together on turns, it will be a mess. Use the clamps. This will be one of the most helpful things you can do, I have found.
|
|
|
|
[#42]
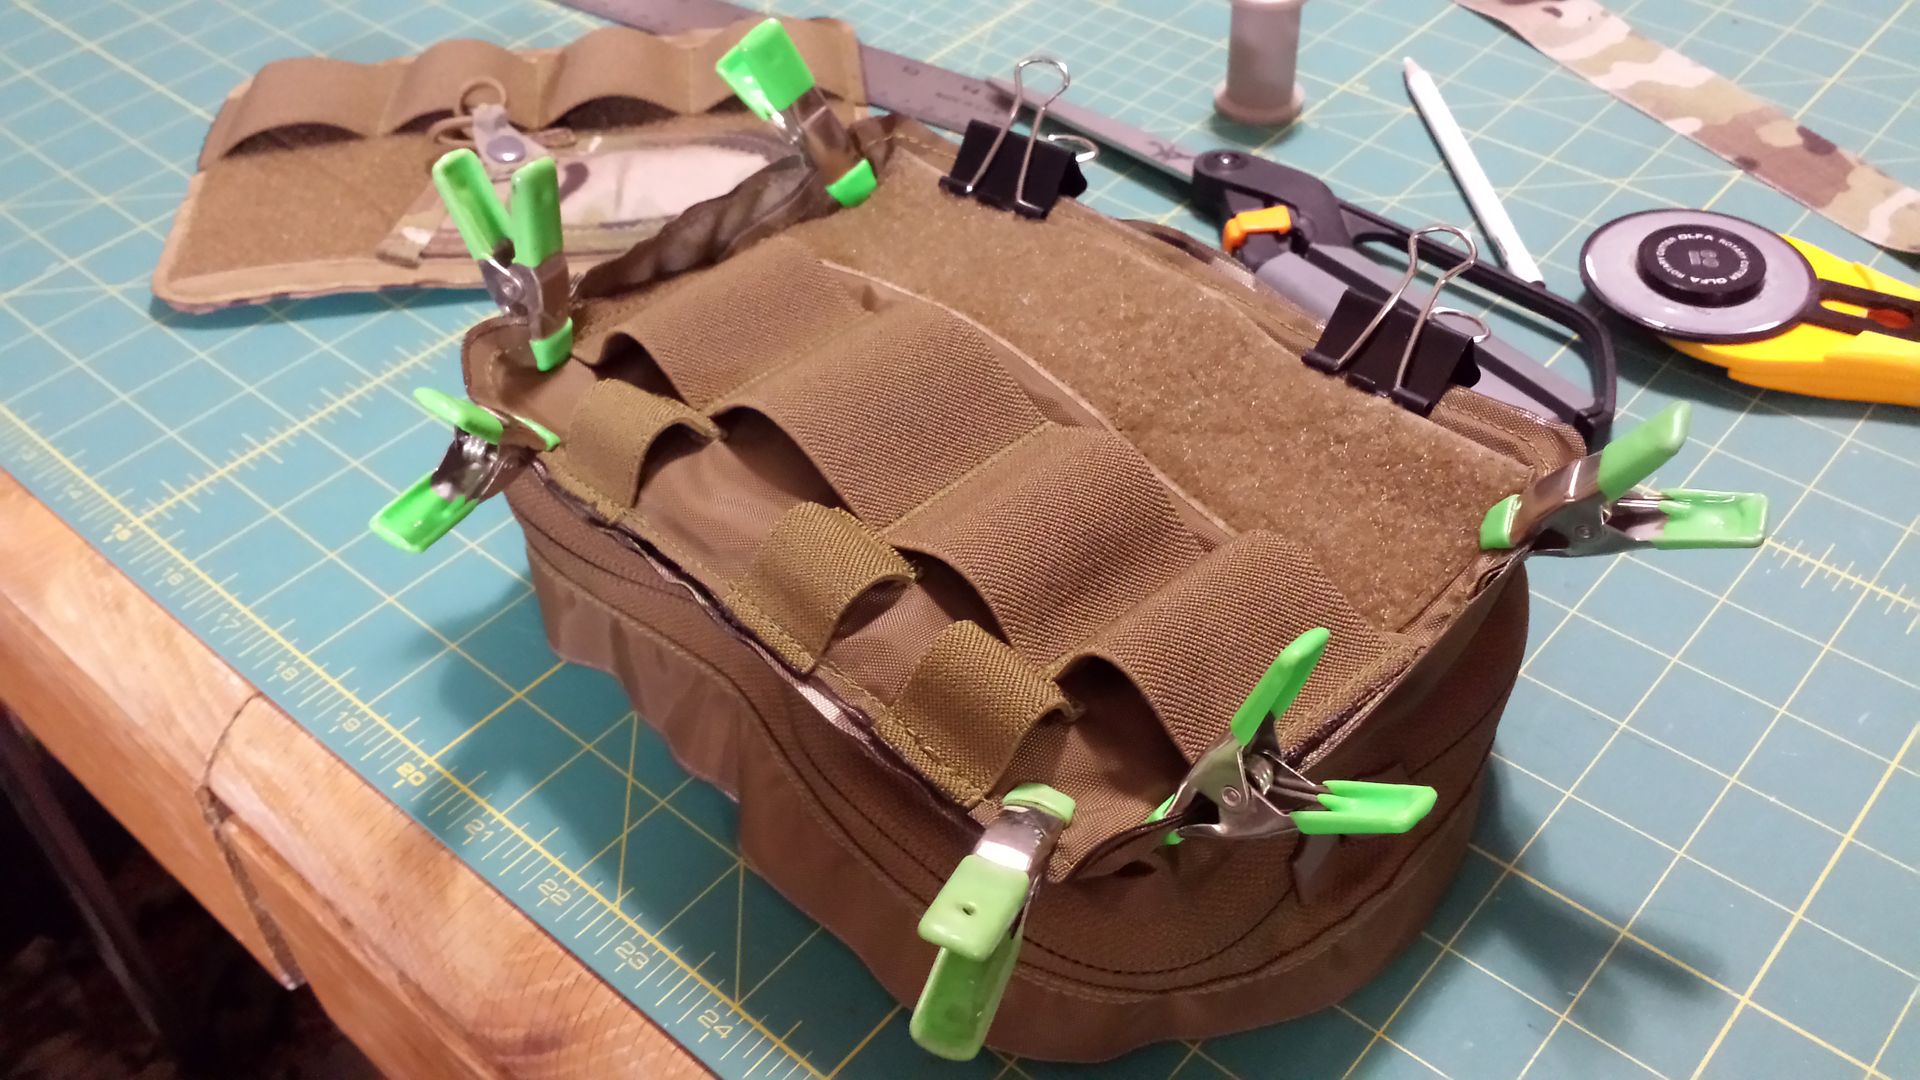
Quoted:
Use heavy paper clips or small clamps from the hardware store. Once you have your patterns worked out, you can hold everything down really nicely and remove each clamp as you progress along the seam. If you are trying to hold layers together on turns, it will be a mess. Use the clamps. This will be one of the most helpful things you can do, I have found. http://i1085.photobucket.com/albums/j422/LRRPF52/21st%20Century%20Load%20Bearing%20Kit/20161129_1802331_zpsgxxlel6d.jpg http://i1085.photobucket.com/albums/j422/LRRPF52/21st%20Century%20Load%20Bearing%20Kit/20161129_1841481_zpslcpnyjft.jpg What he said. Additionally, I like to mark the 4 mid points of each piece to make sure it's all lined up while sewing. The tick marks should line up if all is well. |
|
|
|
[#43]
Quoted:
What he said. Additionally, I like to mark the 4 mid points of each piece to make sure it's all lined up while sewing. The tick marks should line up if all is well. I do that also. Sorry I didn't mention it. I just mark the 6 o'clock for zippered pouches, and equalize the rest of the landmarks. You can also use fabric glue to hold things together, combined with the clamps. If you're working a batch, you can mock-up several items with glue and clamps, then start on the oldest one once they're all set. Gutermann fabric glue is quality stuff that doesn't clog machines once you let it dry. I've seen some people who like to use a lot of hot glue guns, but that gets messy and can clog your shuttle with rubbery glue bits. |
|
|
|
[#44]
Awesome projects! Thanks for starting the thread.
I make roll pouches for tools and mend clothes, but I've never tried anything more advanced. I'll tag for the time when I get caught up in my other hobbies. |
|
|
|
[#45]
SONOFABITCH.......I have a hard time tying my boots.
There's some nice work here guys. |
|
|
|
[#46]
Quoted:
Here's some of my most recent projects: Christmas 2017: Toiletry bags http://i281.photobucket.com/albums/kk228/SpudCrushr/Sewing/IMG_9807_zpsqmynnmlk.jpg~original http://i281.photobucket.com/albums/kk228/SpudCrushr/Sewing/IMG_9808_zpsyfwrk2be.jpg~original http://i281.photobucket.com/albums/kk228/SpudCrushr/Sewing/IMG_9701_zpswp0ykijk.jpg~original Range PPE bag: http://i281.photobucket.com/albums/kk228/SpudCrushr/Sewing/IMG_9800_zpsq94skuva.jpg~original http://i281.photobucket.com/albums/kk228/SpudCrushr/Sewing/IMG_9802_zpsjpaxnlin.jpg~original http://i281.photobucket.com/albums/kk228/SpudCrushr/Sewing/IMG_9803_zpsnndfc1fs.jpg~original Tool bag + pouches: http://i281.photobucket.com/albums/kk228/SpudCrushr/Sewing/IMG_9805_zpsnycy6kzi.jpg~original http://i281.photobucket.com/albums/kk228/SpudCrushr/Sewing/IMG_9804_zpsonmejofm.jpg~original |
|
|
|
[#47]
Quoted:
Can I get on your Christmas list? I promise to be good, at least sort of. I would say yes, but you appear to be a Marine. I'd hate to know that you ate and / or broke the bag within the first week of receiving it. |
|
|
|
[#48]
Quoted:
I would say yes, but you appear to be a Marine. I'd hate to know that you ate and / or broke the bag within the first week of receiving it. |
|
|
|
[#49]
Awesome stuff!
I use clips and hot glue gun to get hard angles or frustrating pieces to stay together to sew them. Your machine has to like eating the glue, which mine does not mind and in fact will eat right through kydex without a skipped stitch. |
|
|
|
[#50]
Quoted:
Chest rig with soft armor built into front and back panels. Has pouches with kydex inserts. |
|
|
 Win a FREE Membership!
Sign up for the ARFCOM weekly newsletter and be entered to win a free ARFCOM membership. One new winner* is announced every week!
You will receive an email every Friday morning featuring the latest chatter from the hottest topics, breaking news surrounding legislation, as well as exclusive deals only available to ARFCOM email subscribers.

AR15.COM is the world's largest firearm community and is a gathering place for firearm enthusiasts of all types.
From hunters and military members, to competition shooters and general firearm enthusiasts, we welcome anyone who values and respects the way of the firearm.

Subscribe to our monthly Newsletter to receive firearm news, product discounts from your favorite Industry Partners, and more.
Copyright © 1996-2024 AR15.COM LLC. All Rights Reserved.
Any use of this content without express written consent is prohibited.
AR15.Com reserves the right to overwrite or replace any affiliate, commercial, or monetizable links, posted by users, with our own.


