|
Posted: 6/13/2017 10:12:04 AM EDT
I picked up a 1921 mfg Remington model 11. Well used (as expected for these old workhorses) but the stocks were solid and the gun has a very tight feel to it. No signs of abuse.
However, while the gun will cycle correctly AFTER the trigger is pulled, I cannot cycle shells through the action by hand and the bolt will not lock back on empty UNLESS the trigger is pulled first. The shell carrier operates correctly AFTER the trigger is pulled but does not move when the bolt is cycled after the trigger resets. My first thought would be the Carrier Spring, Carrier Dog or Dog Spring but the Carrier operates very strongly each time (one time) after the trigger is pulled. I haven't torn the action completely apart yet but I was hoping this problem might sound familiar to someone before I started. I discovered the problem before I bought the gun, which is why I got it for $190 so I have some financial room for replacement parts. Worst case scenario is I can sell the unmolested barrel and sound wood (no cracks) for more than I have into the purchase. Any input or predictions before I get started? Thanks all |
|
|
|
[#1]
I think your right in looking at the carrier dog and spring
|
|
|
|
[#2]
I got an old one out recently. The lube had all dried up and it wouldn't function. Maybe a real good cleaning?
|
|
|
|
[#3]
Quoted:
I got an old one out recently. The lube had all dried up and it wouldn't function. Maybe a real good cleaning? |
|
|
|
[#4]
Quoted:
I think your right in looking at the carrier dog and spring |
|
|
|
[#5]
Quoted:
I was hoping you would show up Now the video.  ANIMATION = Light Twelve Auto 5 Firing Cycle Animation another  ANIMATION Browning AUTO 5 "action of the bolt on the firing pin" and one more  Browning A5 (full disassembly and operation) One more for the road 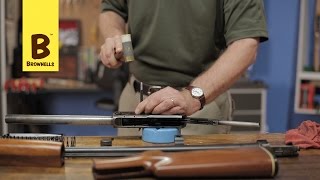 Browning A5 Maintenance Series: Disassembly |
|
|
|
[#6]
Quoted:
Glad to help. Here's a good video showing how that action works. I would thoroughly clean your gun first. Look for debris and or broken stock pieces to see if anything is locking up the action when the hammer is cocked. Your best bet is going to be to remove the stock, trigger assembly and bolt/carrier assembly. blow everything out with Non-Clorinated brake parts cleaner, scrub with a toothbrush. Then lube with Remoil and reassemble. See if that cures it. If so it was just sludged up like an old engine with Quaker State oil. If not, look at the carrier spring, carrier dog and carrier dog spring. Also check trigger assembly function. Now the video. another and one more One more for the road |
|
|
|
[#7]
Quoted:
Oh yeah, that's the good stuff. Thanks! Quoted:
Quoted:
Glad to help. Here's a good video showing how that action works. I would thoroughly clean your gun first. Look for debris and or broken stock pieces to see if anything is locking up the action when the hammer is cocked. Your best bet is going to be to remove the stock, trigger assembly and bolt/carrier assembly. blow everything out with Non-Clorinated brake parts cleaner, scrub with a toothbrush. Then lube with Remoil and reassemble. See if that cures it. If so it was just sludged up like an old engine with Quaker State oil. If not, look at the carrier spring, carrier dog and carrier dog spring. Also check trigger assembly function. Now the video. another and one more One more for the road |
|
|
|
[#8]
Does anyone know if the Browning A5 action spring PLUG is a drop in replacement for the original wooden Remington model 11 PLUG? I have the whole gun in pieces and while there doesn't seem to be a problem with the original action spring and wooden plug, this would be a good time to replace both these almost 100 year old parts.
BTW- As soon as I got into the action I think I found the problem described in my original post. The carrier spring had one leg UNDER the carrier instead of resting on top (as looking into the upside-down receiver). This orientation is wrong and was forcing the front of carrier into the "up" position. However, I can't figure out how the carrier worked at all when the hammer was down Anyway, for shooting purposes, I am replacing the action spring (and action spring plug) recoil spring and magazine spring just as a preventive measure. Thanks for any and all input |
|
|
|
[#9]
I think that plug will drop right in....
|
|
|
|
[#10]
Quoted:
I think that plug will drop right in.... |
|
|
|
[#11]
Quoted:
Yes it will. Quoted:
Quoted:
I think that plug will drop right in.... |
|
|
|
[#12]
I saw mine was pretty nasty, so I had a guy make me one from brass at work :D
|
|
|
|
[#13]
Well, got it back together but I am still having the same problem. The shell Carrier remains in the "up" position. I removed the trigger group and discovered the same condition as before. The Carrier Spring was compressed so far back the the leg no longer sits properly on the Carrier and now applies spring pressure in the wrong direction.
ETA- As I play with it, it seems like Carrier is being allowed to move too far "up" and the Carrier Spring leg is then moving off where it is supposed to be. |
|
|
|
[#14]
I sorted it out!
It seems the leg of the Carrier Spring that rides on the Carrier itself was a little too short. So much so that when the front of the Carrier was lifted into the extreme "up" position, the spring leg slid off the back and got under it enough to apply force in the opposite direction. I compared the spring to another original Rem.11 and a Browning replacement and the spring leg was about 1/32" too short. Not enough to really notice unless it was causing a problem. The spring did not look broken but that leg may have worn down sliding against the Carrier over time. It may have been an out of spec spring to begin with. The gun is old but the spring looked much newer. It did not have the same patina as the rest of the internal parts and it did not match the finish of the Carrier Spring in the other model 11 I examined. It had what seemed like a semi-gloss painted finish. It may have been a sub-standard replacement spring from years ago that either wasn't dimensioned correctly or wore down from bad heat treatment. I used a Wolff manufactured Browning Auto5 replacement spring I had in my spare parts box. I had to cut out the notch for the receiver stud. A Dremel with a shaping stone worked nicely but that spring steel took a bit of patience to grind to shape. That was good though because it allowed me to get an exact fit without removing material too fast and risking ruining the part. I periodically dunked it water to keep it from getting too hot. It was never more than warm to the touch while working it but I didn't want to take any chances. I buffed the cut edge with a rubber wheel to polish it and remove any burs. I touched it up with some cold blue just because I am OCD that way. Nobody will ever see it but now it looks like a factory part. So, with the action working as it should, I reinstalled the buttstock. I applied a thin layer of Acra-Glass where the receiver and tangs meet the wood. There was a slight shrinkage gap about the thickness of two pieces of copy paper. The Acra-Glass filled that in nicely. It looks good and will help prevent future cracks from developing. I only need to reinstall the front end. I have a replacement mag tube spring, recoil spring and friction piece spring to finish the refresh of this classic gun. |
|
|
|
[#15]
Quoted:
Yes it will. Quoted:
Quoted:
I think that plug will drop right in.... |
|
|
 Win a FREE Membership!
Sign up for the ARFCOM weekly newsletter and be entered to win a free ARFCOM membership. One new winner* is announced every week!
You will receive an email every Friday morning featuring the latest chatter from the hottest topics, breaking news surrounding legislation, as well as exclusive deals only available to ARFCOM email subscribers.

AR15.COM is the world's largest firearm community and is a gathering place for firearm enthusiasts of all types.
From hunters and military members, to competition shooters and general firearm enthusiasts, we welcome anyone who values and respects the way of the firearm.

Subscribe to our monthly Newsletter to receive firearm news, product discounts from your favorite Industry Partners, and more.
Copyright © 1996-2024 AR15.COM LLC. All Rights Reserved.
Any use of this content without express written consent is prohibited.
AR15.Com reserves the right to overwrite or replace any affiliate, commercial, or monetizable links, posted by users, with our own.


