|
Posted: 9/22/2014 5:19:47 PM EDT
So, I have heard and read a lot of complaints about the trigger on the FNS pistols.
That is juxtaposed with some of the other things I have heard and read raving about how great they are... I think that due to the metal stamping and MIM process used to produce the parts, there can be some significant variation from pistol to pistol. I know the Dave Sevigny did his own trigger job, including clipping a spring or 2, and got a 4# (I think) trigger. Being adventurous (or dumb...?), I decided to attempt a DIY trigger job. I use the 9L is USPSA, so that is what I stated with. When I got the gun, the trigger was a hair over 7#s. I had done a quick job with some sand paper on the safety block and the point of the sear that presses it. Just cleaning those 2 points up got the trigger down to 6-6.5#. I wanted more... I decided to convert the gun to Froglube, so I detail striped the whole thing and while it was part, I did a little polishing. These guns contain a LOT of parts! 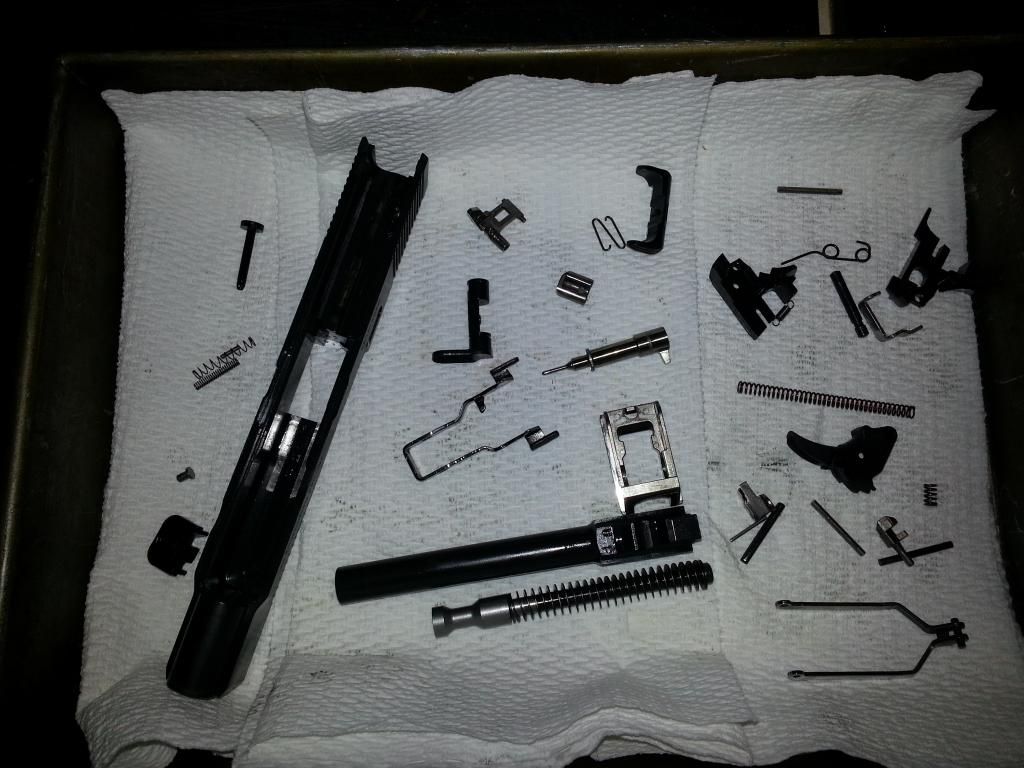 It is not too hard to identify the points where parts rub against each other. One major point is the outside of the trigger bars that rub on the inside of the frame. This is what the factory trigger bar looks like: 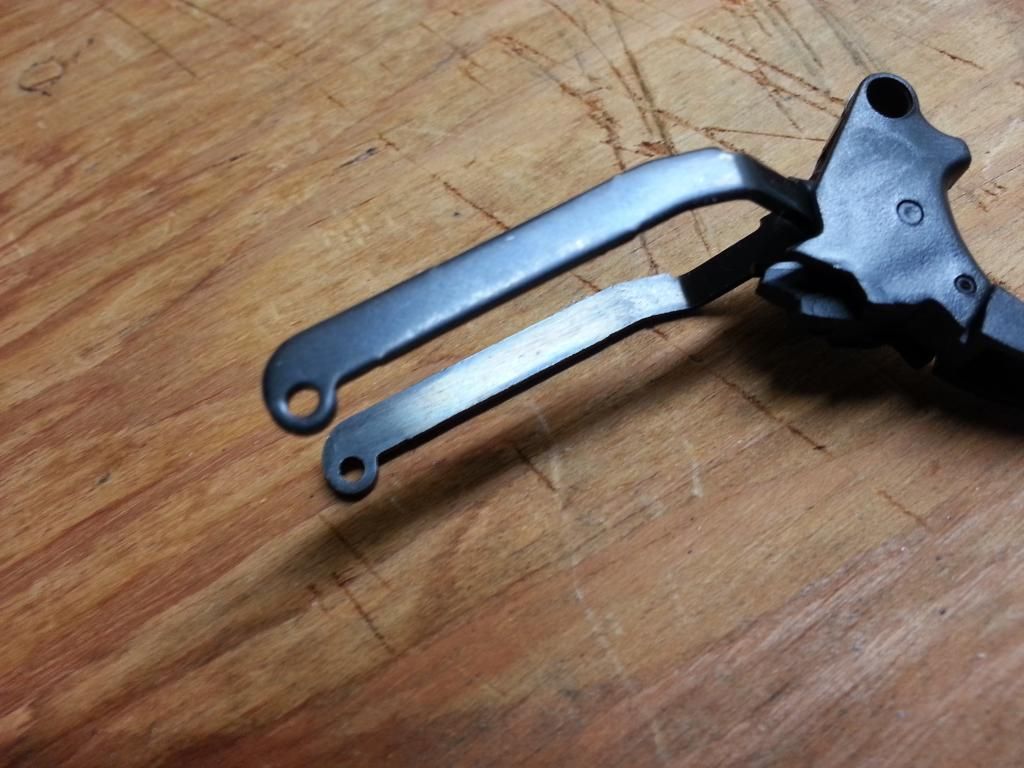 It has a "nice" black finish, but since is actually rides along the inside of the frame, the finish actually causes drag. Compound that with the fact the stamped steel is uneven and has very rough edges and you have a trigger pull that is not very smooth. The trigger bar also rubs on the slide stop when the trigger is pulled, so the roughness here is very noticeable: 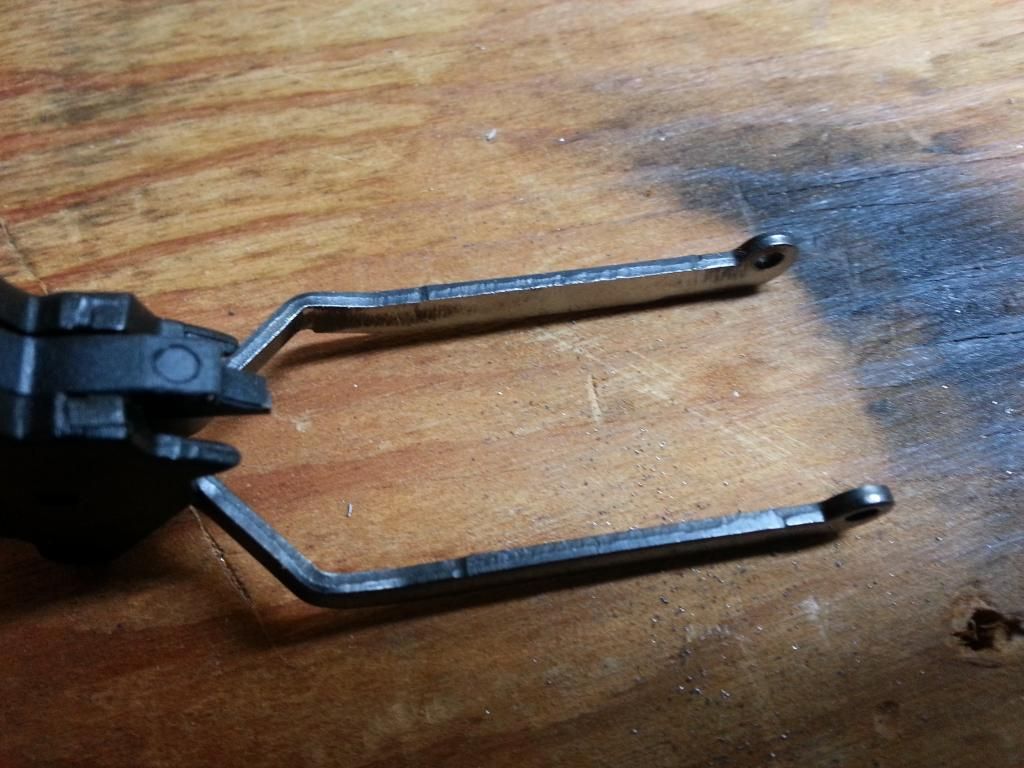 I filed, sanded, and polished on this piece until it looked like this: 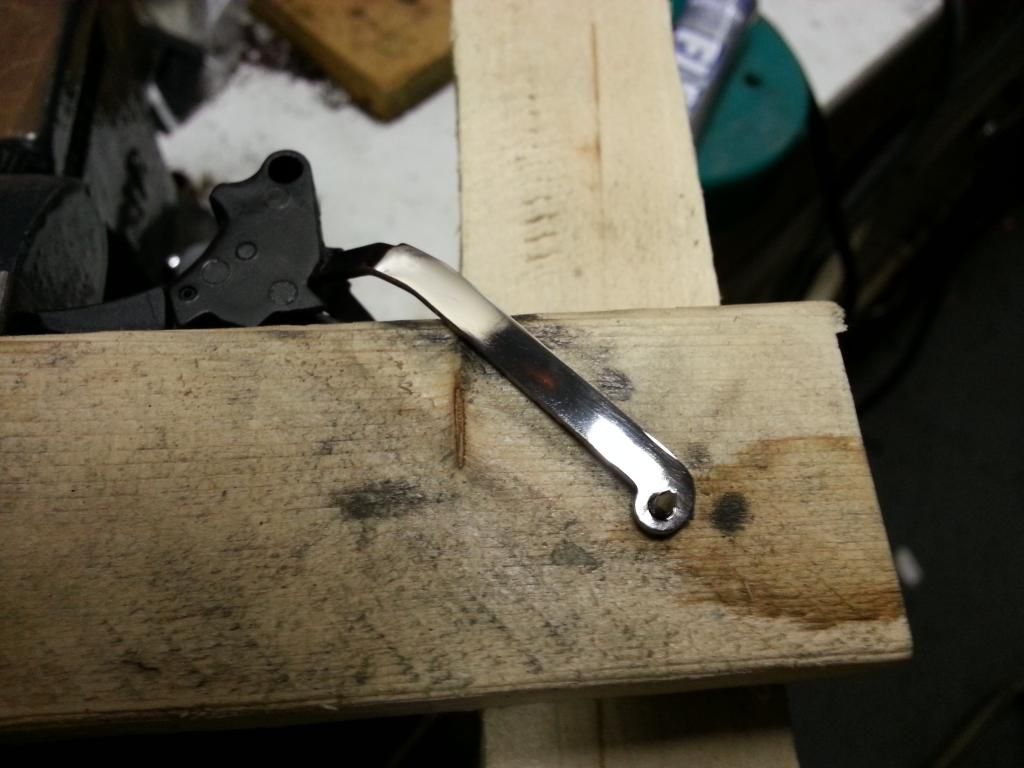 I also did what I could to polish the inside of the frame where the trigger bar rides. It is polymer and it was already pretty smooth, so I just used some 600 grit sandpaper and finished it up with some Flitz. I also worked on the points of the slide stop that the trigger bag rubs against. Here are some "in-process" photos: 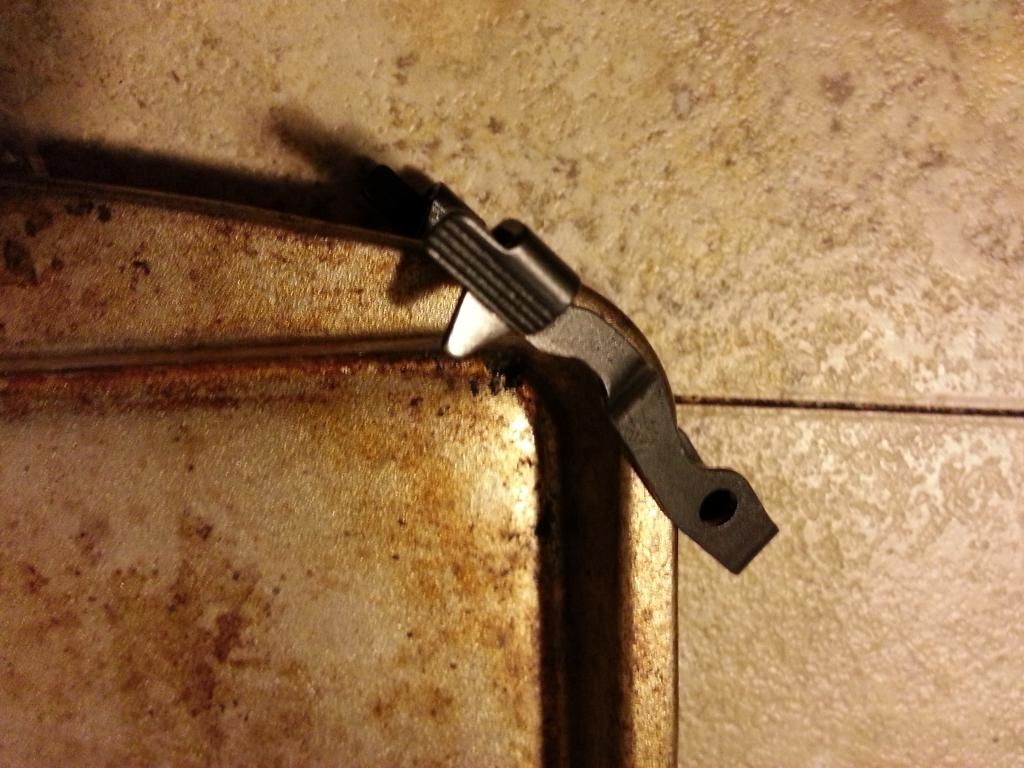 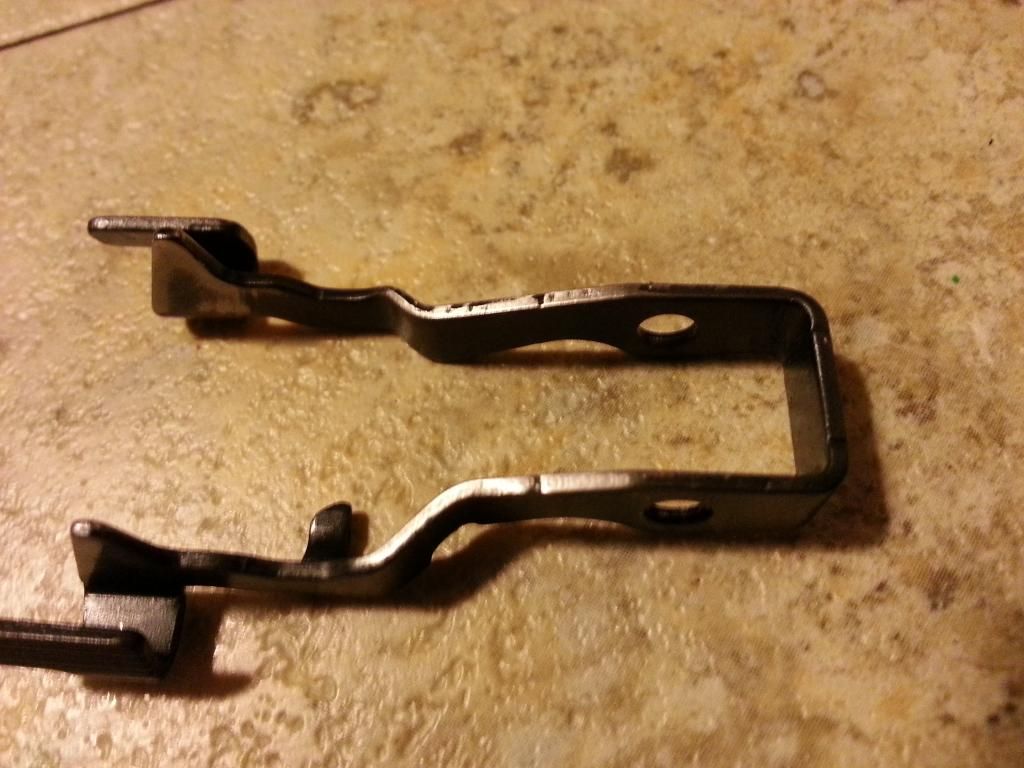 Here is the firing pin block and the piece of the sear that depresses it. Both were smoothed and contoured with files and sandpaper before getting polished up:  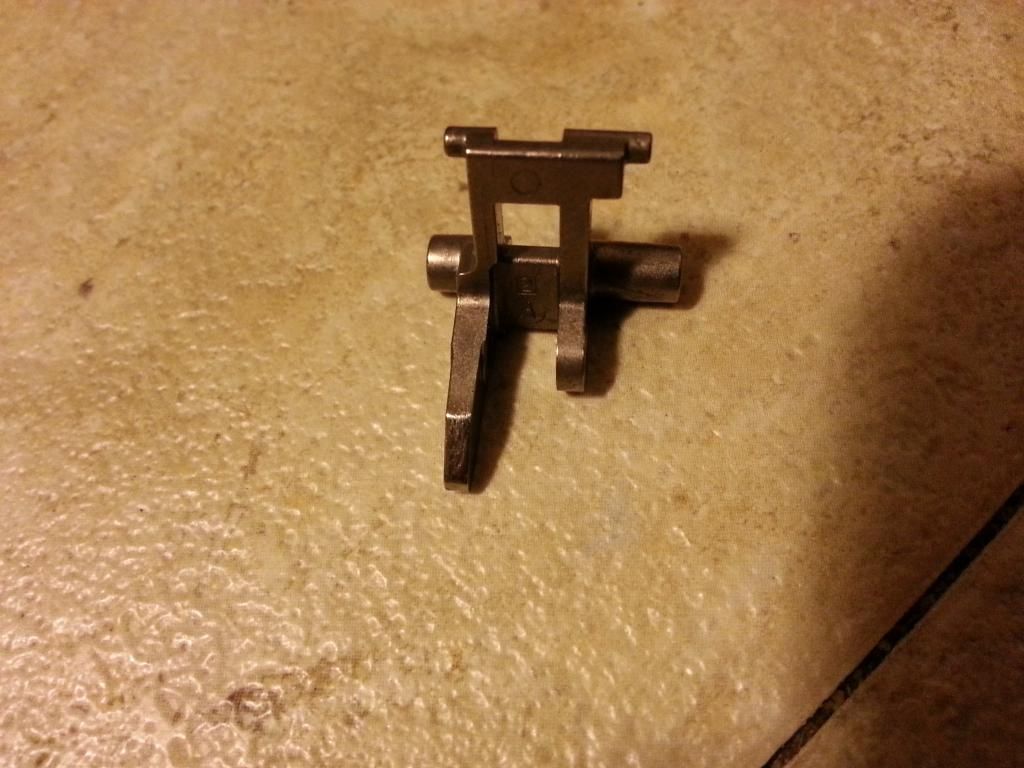 I also did a little work on the disconnector and its engagement point on the striker assembly: 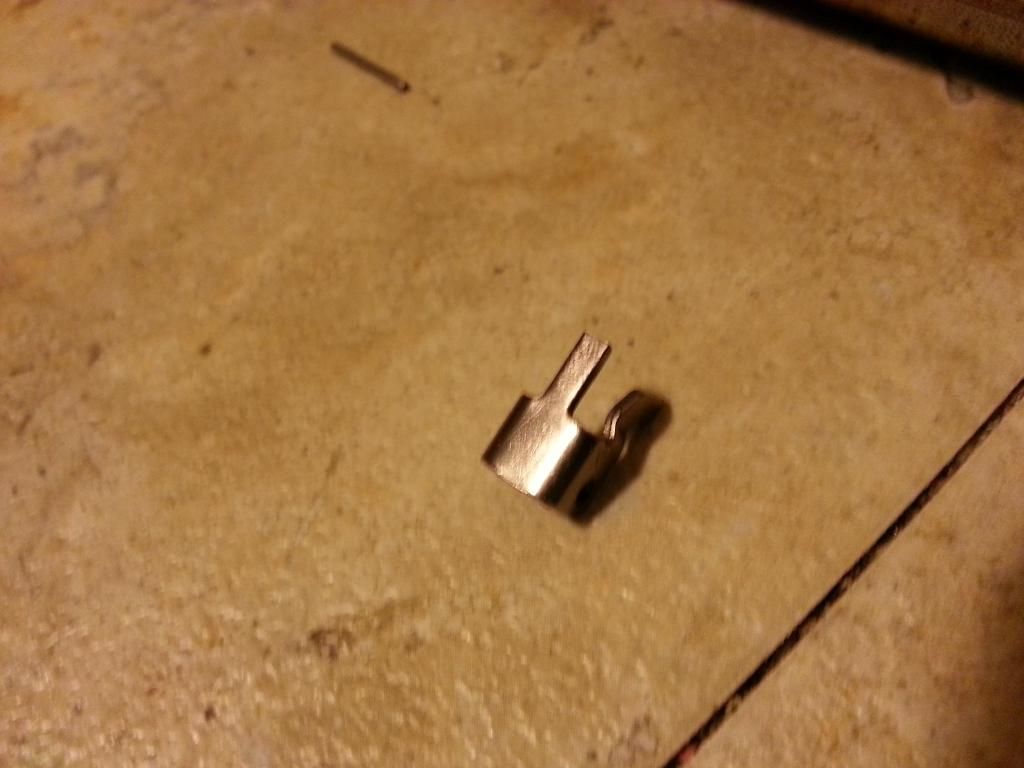 Finally, I cleaned up the channel that the striker assembly rides in as well as the channel in the striker assembly that the striker spring rides in. I ended up taking another full pound out of the trigger, without clipping any springs or doing anything too radical with reshaping the sear or disconnector. I put 117 rounds trough it yesterday with no hiccups. 5 pound break (IPSC legal!) 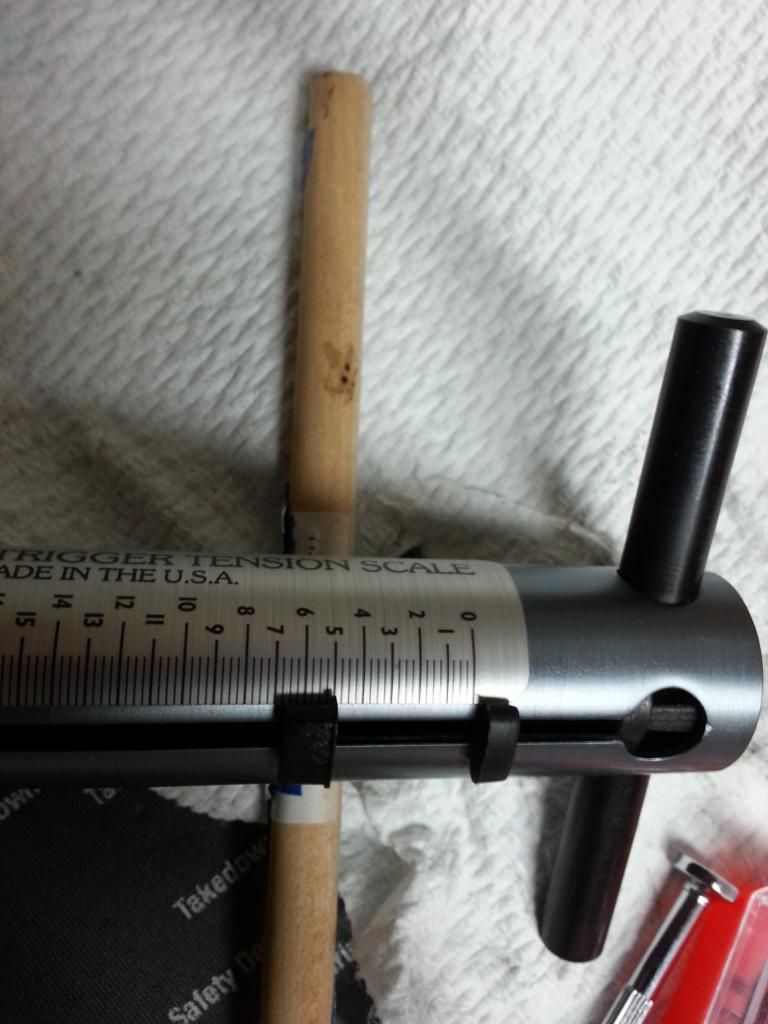 Thanks for reading!  |
|
|
|
[#1]
Hey bob,
Fantastic post. Can you provide detail or video or illustration of how you got the lower part disassembled please. I found excellent videos on the slide takedown, but have found nothing on a COMPLETE disassembly. I love doing my own work, but know my limitations and can't go in blind. Not with my FNS40 baby anyways. Thanks, Doc |
|
|
|
[#2]
Very nice! Excellent post, thank you!
|
|
|
|
[#3]
Excellent post! Thank you!
Strongly considering a FNs. Good to know that there is a remedy to a gritty trigger that everyone seems to complain about. |
|
|
|
[#4]
Great post, thanks for the tutorial.
Do the triggers on these pistols tend to wear-in and get better over time, or is some work required to facilitate improvement? |
|
|
|
[#5]
On an unrelated note, what sights are you using? Those aren't factory!
|
|
|
|
[#6]
Quoted:
Hey bob, Fantastic post. Can you provide detail or video or illustration of how you got the lower part disassembled please. I found excellent videos on the slide takedown, but have found nothing on a COMPLETE disassembly. I love doing my own work, but know my limitations and can't go in blind. Not with my FNS40 baby anyways. Thanks, Doc https://www.youtube.com/watch?v=UFuJMbMO4YI It's on a FNS 9C, but all internal parts are pretty much the same. Kudos to this dude who made the video. He goes off camera a few times, but it's definitely detailed enough to get the idea of how it's done. |
|
|
|
[#7]
That's cool and I wanted an FNS for USPSA but 5lbs is too heavy IMO. Maybe I'll get an FNS compact and try it.
FYI there's guys on Enos who are getting around 3lbs I think. There's a thread on it. |
|
|
 Win a FREE Membership!
Sign up for the ARFCOM weekly newsletter and be entered to win a free ARFCOM membership. One new winner* is announced every week!
You will receive an email every Friday morning featuring the latest chatter from the hottest topics, breaking news surrounding legislation, as well as exclusive deals only available to ARFCOM email subscribers.

AR15.COM is the world's largest firearm community and is a gathering place for firearm enthusiasts of all types.
From hunters and military members, to competition shooters and general firearm enthusiasts, we welcome anyone who values and respects the way of the firearm.

Subscribe to our monthly Newsletter to receive firearm news, product discounts from your favorite Industry Partners, and more.
Copyright © 1996-2024 AR15.COM LLC. All Rights Reserved.
Any use of this content without express written consent is prohibited.
AR15.Com reserves the right to overwrite or replace any affiliate, commercial, or monetizable links, posted by users, with our own.


