|
Posted: 5/8/2013 1:11:40 AM EDT
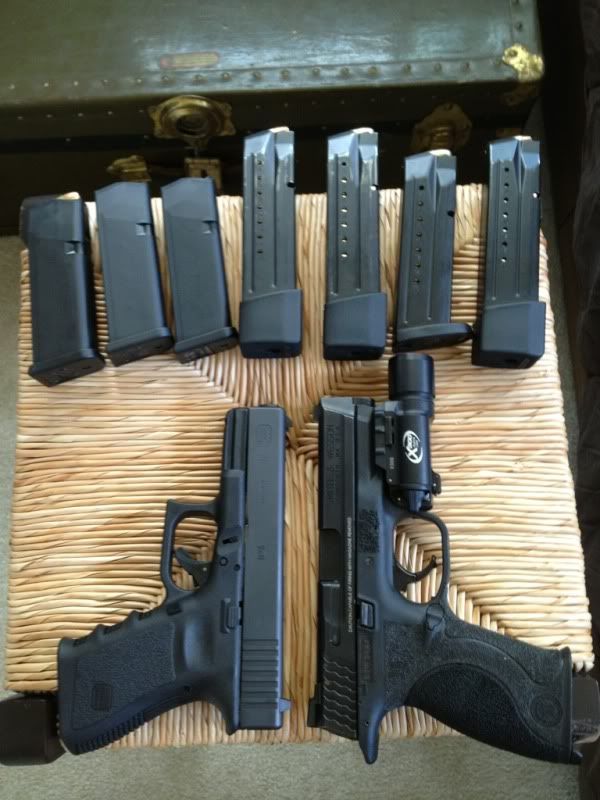
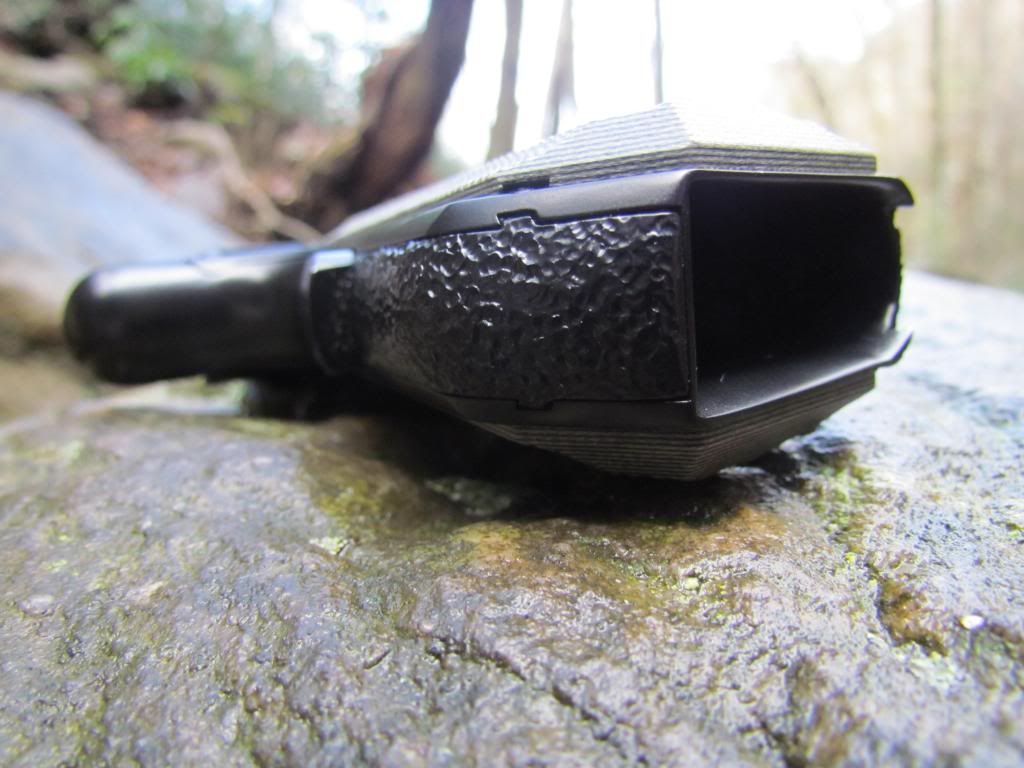
Hi all, I am new to this but here goes. I want to see pics of everybody's stipple jobs. DIYs and Sendouts... I just did my G27 and G23...Here they are...    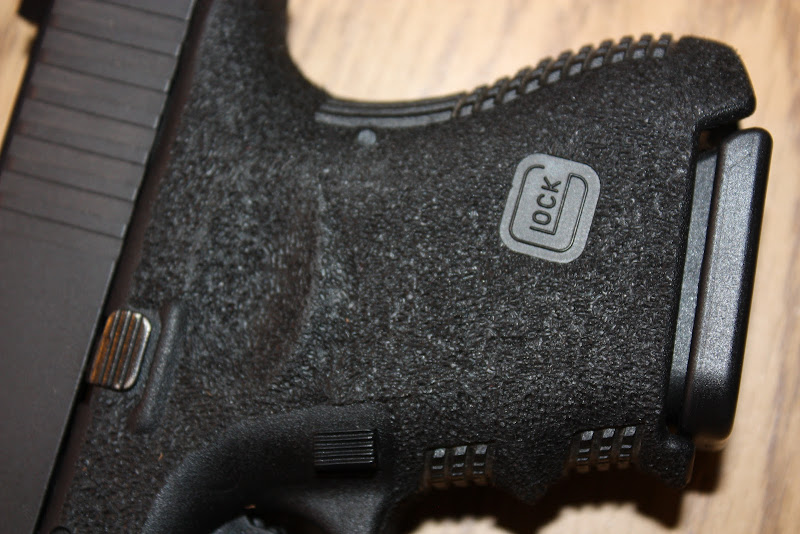  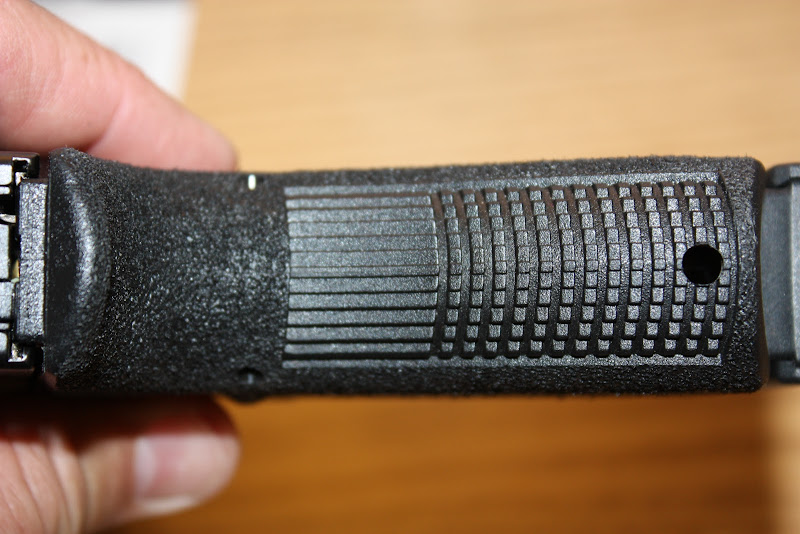  |
|
|
|
[#1]
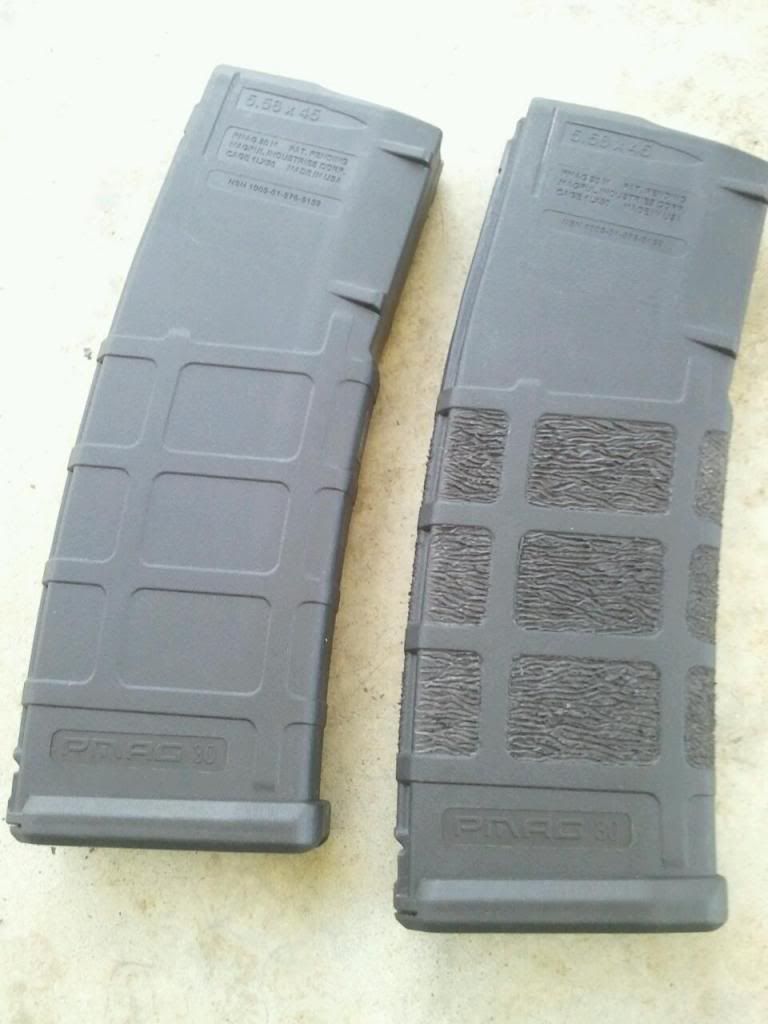
Here are a couple of before and after of Pmags...really does add a significant amount of "Grippyness" to the surface.
    |
|
|
|
[#2]
I made a stupid video of how I stippled an image into a polymer mag loader.
Here it is: https://www.youtube.com/watch?v=Dv70H5_0dX8 |
|
|
|
[#3]
Hey that's a cool idea. I never thought of using a stencil, I was just following the lines of the gun or mag.
|
|
|
|
[#5]
The tip I used is pointed but not real sharp. I hold the iron kind of like a pencil and just lightly tap the tip up and down. I hardly lift it at all, very small movements and very light touch. I also don't have the tip exactly perpendicular to the surface being stippled. Both the object and my stippling hand resting on the table so I can control the small movements and not accidentally touch somewhere I don't want to. Once that iron is hot it only takes the slightest touch to make a mark.
 I hold it like this (only with my right hand)   Hope that helps. By the way, I really like the job you did on the M&P...like how you followed the lines of the gun. Looks good. |
|
|
|
[#6]
Quoted:
The tip I used is pointed but not real sharp. I hold the iron kind of like a pencil and just lightly tap the tip up and down. I hardly lift it at all, very small movements and very light touch. I also don't have the tip exactly perpendicular to the surface being stippled. Both the object and my stippling hand resting on the table so I can control the small movements and not accidentally touch somewhere I don't want to. Once that iron is hot it only takes the slightest touch to make a mark. https://lh3.googleusercontent.com/-aOnqiV6xyNM/UZORq5rMNSI/AAAAAAAAALY/HGzf9h1DJLY/s800/IMG_7404.JPG
I hold it like this (only with my right hand) https://lh5.googleusercontent.com/-u8mU0vAPQxc/UZOSZ6qu1UI/AAAAAAAAAL4/RZHjvCYqV_w/s800/IMG_7406.JPG
https://lh4.googleusercontent.com/-3fgl2YUG5l8/UZOSyrjWIhI/AAAAAAAAAMQ/MeQ31hErVZg/s800/IMG_7408.JPG
Hope that helps. By the way, I really like the job you did on the M&P...like how you followed the lines of the gun. Looks good. Perfect thanks! Is it a 25w iron? |
|
|
|
[#7]
I will have to check on the wattage for the iron when I get home from work. I'll let ya know.
|
|
|
|
[#8]
It is a 30 watt iron. However, I bet just about any one would work just fine. If it is hot enough to melt solder, it is hot enough to melt polymer.
|
|
|
|
[#9]
Here's a PMAG I did
|
|
|
|
[#10]
Man that looks really good! Did you use a pointed tip and drag it like a pen, or did you use a chisel tip? That pattern could look real good on the grip on my AR!
|
|
|
|
[#11]
Yep pointed tip and started with a bunch of 45deg lines in both directions and then did horizontal lines and let the other lines move it.
Hard to explain lol... |
|
|
|
[#12]
Makes perfect sense...like a dirt bike tire following a rut in a trail. Very nice.
|
|
|
|
[#13]
Exactly! I'm glad you got that
|
|
|
|
[#14]
how do you guys get a good finished edge where you stop on the grip of the gun?
|
|
|
|
[#15]
how do you guys get a good finished edge where you stop on the grip of the gun? I was just really careful and went slow around the edges. I tried to follow the natural lines of the frame wherever possible. I have heard of guys using a fine tip sharpy to draw the outline first. I think you could also use masking tape to outline areas that don't have a clear cut edge. Mainly just take your time and don't rush. Like I said earlier, make sure your stippling hand is resting on something steady so you can really control your movements, it only takes the slightest touch of the iron to make a mark so you don't want to have your hand slip at the wrong tiime! |
|
|
|
[#17]
Thanks, ya it is way more "Grippy"...not that it was bad before, but now feels like the gun is locked into my hand...very secure! Like you said..."like skateboard tape." Feels good in my hand, but if I wear it concealed against skin...hmmmm...need an undershirt!
|
|
|
|
[#18]
My old STI IPSC gun. 


|
|
|
|
[#19]
My old STI IPSC gun. Very nice! Looks like lots of time and prep paid off!
|
|
|
|
[#20]
did the backstrap of my M&P9c. haven't gotten my method or style perfected enough to try the whole grip or take a chance on my Shield yet, not sure I even wanna try the whole grip myself yet, this shit it hard, tedious, and time consuming.

|
|
|
|
[#21]
this shit it hard, tedious, and time consuming. Maybe so, but it looks like it paid off for ya! That backstrap looks really good! I'll bet it really changed the way the gun feels in your hand too. |
|
|
|
[#22]
Quoted:
My old STI IPSC gun. <a href="http://smg.photobucket.com/user/derek45/media/1911/IMGP2155.jpg.html" target="_blank">http://img.photobucket.com/albums/v488/derek45/1911/IMGP2155.jpg</a> <a href="http://smg.photobucket.com/user/derek45/media/1911/IMGP2956.jpg.html" target="_blank">http://img.photobucket.com/albums/v488/derek45/1911/IMGP2956.jpg</a> <a href="http://smg.photobucket.com/user/derek45/media/1911/IMGP2961.jpg.html" target="_blank">http://img.photobucket.com/albums/v488/derek45/1911/IMGP2961.jpg</a> <a href="http://smg.photobucket.com/user/derek45/media/1911/IMGP2960.jpg.html" target="_blank">http://img.photobucket.com/albums/v488/derek45/1911/IMGP2960.jpg</a> <a href="http://smg.photobucket.com/user/derek45/media/1911/IMGP4267.jpg.html" target="_blank">http://img.photobucket.com/albums/v488/derek45/1911/IMGP4267.jpg</a> Id like to do the same thing to my 2011. Did u just press strait down with the sodering iron? |
|
|
|
[#23]
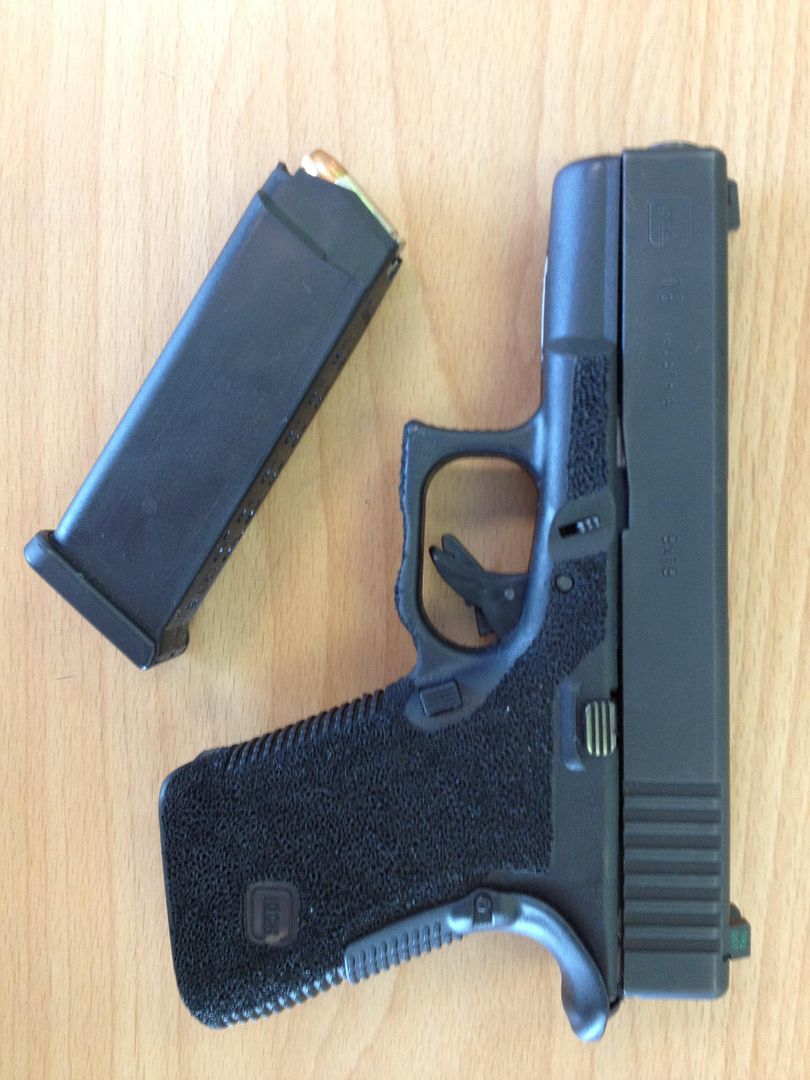
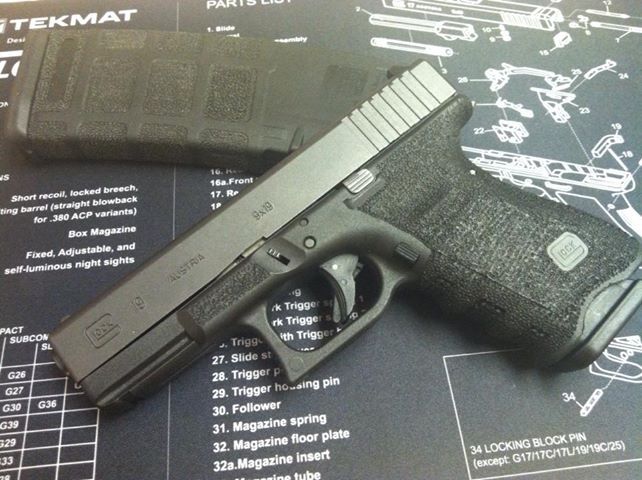 my 19 my 19
|
|
|
|
[#24]
my 19 Looks good...the P-Mag too! |
|
|
|
[#25]
Quoted:
Id like to do the same thing to my 2011. Did u just press strait down with the sodering iron? Well...you don't exactly "press" a gentle touch of the iron results in a small puff of smoke and a stipple get a soldering iron and practice on some plastic. maybe those black plastic trays 100 primers come in or something |
|
|
|
[#26]
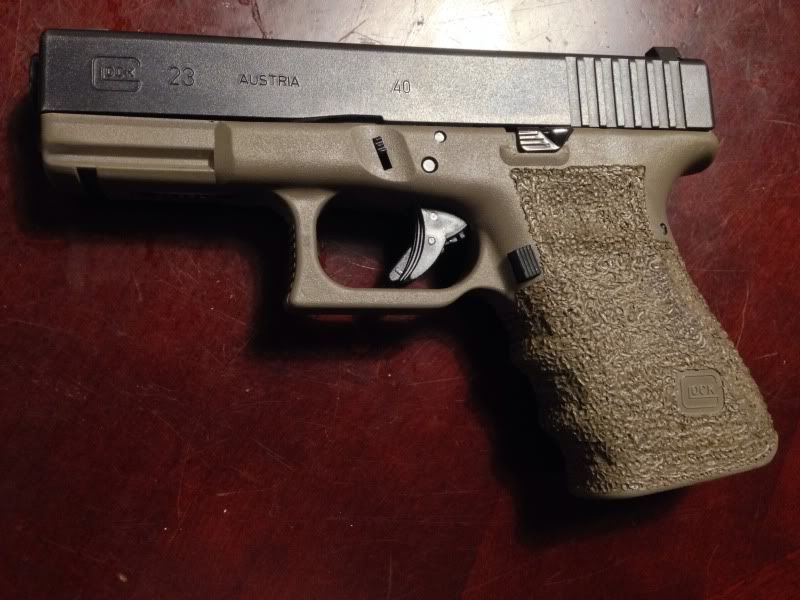
Glock 19 Gen 2 with a Grip Force Adapter added.
|
|
|
|
[#27]
 " /> " /> |
|
|
|
[#28]
Here are some KAC panels I did.

|
|
|
|
[#29]
I'm trying to find the solder attachment that would allow me to do a custom stippling job like this
http://www.tacticalholsters.com/product/INCOG.html |
|
|
|
[#30]
I'm trying to find the solder attachment that would allow me to do a custom stippling job like this http://www.tacticalholsters.com/product/INCOG.html I would try just buying a normal point tip...then grind the point off to where there is no more taper...like if it was the end of a round solid shaft. Grind that end to a 45 degree angle...like if you cut a pipe at a 45... and it should work great. Good luck Darren
|
|
|
|
[#31]
Just finished this G21sf

SurgeryBlank by 4DAIVIPAI2K5, on Flickr 
Twoface by 4DAIVIPAI2K5, on Flickr 
G21sf by 4DAIVIPAI2K5, on Flickr 
G21 by 4DAIVIPAI2K5, on Flickr |
|
|
|
[#32]
Nice work everybody.
I haven't had the stones to try it. |
|
|
|
[#33]
Quoted:
Nice work everybody. I haven't had the stones to try it. Get a couple old A2 grips and practice away. It really isnt to bad just takes time to complete. Just use tape or a pencil and ruler to mark off your edge lines and set the iron down easy for a short amount of time until, you get the desired hole. In mine above there is very little pressure or time when applying the iron. |
|
|
|
[#34]
Finally got the balls to do it. Definitely not a work of art like some of these, but it's damn sure functional.
|
|
|
|
[#35]
Quoted:
Nice work everybody. I haven't had the stones to try it. Yeahhhhhhh me too... I just got my G34 yesterday. |
|
|
|
[#36]
Quoted:
Yeahhhhhhh me too... I just got my G34 yesterday. Quoted:
Quoted:
Nice work everybody. I haven't had the stones to try it. Yeahhhhhhh me too... I just got my G34 yesterday. Both of mine lasted about a week. |
|
|
|
[#37]
I've been putting off doing this for a while because I knew it was going to take a while. First I undercut the rear of the trigger guard to get a higher grip on the weapon. Then I relieved the magwell to ease in clearing type 3 malfunctions. Finally I stippled the grip and side of frame. Oh and I also installed a set of 10-8 performance sights with fiber optic front post.


|
|
|
|
[#38]
   |
|
|
|
[#39]
S Scot...
Wow! That thing is just plain awsome looking! Very nice job! Love the color too.
|
|
|
|
[#40]
Quoted: S Scot... Wow! That thing is just plain awsome looking! Very nice job! Love the color too. |
|
|
|
[#42]
^ Awesome!!!
|
|
|
|
[#43]
Wow...impressive. I am completely ignorant when it comes to 1911s...it looks like you "peened" the frame? Looks awesome but I bet that was scary at first...nice job!
|
|
|
|
[#44]
Quoted:
Wow...impressive. I am completely ignorant when it comes to 1911s...it looks like you "peened" the frame? Looks awesome but I bet that was scary at first...nice job! Quoted:
Wow...impressive. I am completely ignorant when it comes to 1911s...it looks like you "peened" the frame? Looks awesome but I bet that was scary at first...nice job! definitely Scary At First. Done With A Punch And Hammer. Just Be Patient |
|
|
|
[#45]
  |
|
|
|
[#46]
Very nice! Same slide different frame? Very cool, casual or Black Tie!
|
|
|
|
[#47]
Very nice! Same slide different frame? Very cool, casual or Black Tie! I wanted the rail and was not totally happy with the old job so I allowed Glock to destroy my old one and gave them $100 and in a little over a week had a new tie lol. |
|
|
|
[#48]
I wanted the rail and was not totally happy with the old job so I allowed Glock to destroy my old one and gave them $100 and in a little over a week had a new tie lol. Oh I see...I thought you still had both and could just interchange them depending on the occasion. (Perhaps that is not legal? I don't know) I am sorry to hear the lighter color one is no longer with us...I thought it looked damn good! R.I.P. But the one you have now looks really sharp as well! Good Job! |
|
|
|
[#49]
Yea, I wanted to keep it for both and if I pressed the issue they may have sold it to me but the person i spoke with said I have to send my old one in. I bought a viridian light and wanted to use it so I gave in lol.
|
|
|
|
[#50]

|
|
|
 Win a FREE Membership!
Sign up for the ARFCOM weekly newsletter and be entered to win a free ARFCOM membership. One new winner* is announced every week!
You will receive an email every Friday morning featuring the latest chatter from the hottest topics, breaking news surrounding legislation, as well as exclusive deals only available to ARFCOM email subscribers.

AR15.COM is the world's largest firearm community and is a gathering place for firearm enthusiasts of all types.
From hunters and military members, to competition shooters and general firearm enthusiasts, we welcome anyone who values and respects the way of the firearm.

Subscribe to our monthly Newsletter to receive firearm news, product discounts from your favorite Industry Partners, and more.
Copyright © 1996-2024 AR15.COM LLC. All Rights Reserved.
Any use of this content without express written consent is prohibited.
AR15.Com reserves the right to overwrite or replace any affiliate, commercial, or monetizable links, posted by users, with our own.