|
Posted: 9/9/2008 8:52:36 PM EDT
[Last Edit: machinisttx]
thread in progress
Editing to put this here so it doesn't get lost in the archive. I'm getting started on this right now, will update at each step of the process. First things first... Disclaimer–– 1. I am not a gunsmith 2. I am not liable for any modification you perform on your gun. It is your responsibility to verify the safety and/or reliability of your gun after any modifications you perform as a result of this post. 3. I am not liable for any damage you cause to your firearm, or gunsmith fees arising from an inability to reassemble your gun as a result of this post. 4. I am not liable for any damages to people, property, or animals resulting from an unsafe condition created by any modification you perform to your firearm as a result of this post. 5. I am not liable for anything as a result of this post. Tools/supplies required-(I'll try to update with Brownell's part numbers too) Yoke/crane reamer Yoke/crane alignment tool(also used as a liner during peening) Yoke/crane facing tool Cylinder endshake bearings GUNSMITH screwdriver set-preferably S&W specific bits round lead babbit bar small, smooth faced hammer––preferably either lead or brass faces set of calipers leaf type feeler gauge set Extractor rod removal tool or pliers and heavy cloth/leather Possibly required Yoke endshake bearings small "needle" files I may have forgotten something. If so, I'll add it when I update. Getting started... Clean the front cylinder face as well as the barrel breech. Make sure to remove all fouling from these surfaces. It probably wouldn't hurt to remove the cylinder and give the yoke, as well as the inside of the cylinder, a good cleaning. Now, double check that the gun is unloaded and close the cylinder. Cock the hammer(I can't tell that it makes any difference, but it's good practice to always do things the same way. Pick your method and stick to it) and start trying different size leaves from the feeler gauge(in the barrel to cylinder gap). When you find one that slides all the way through with slight drag, try the next size up to make sure you've found the right one. Write the size down for future reference. Next, pull the cylinder to the rear and hold it there. Again, try different size leaves until you find the one that slides through with slight drag. Write down this number too. Be sure do this for every chamber, not just one––-it's possible to have a gun with weird variances. In the case of the gun I'm working on, with the cylinder "at rest" the leaf that fit was .002". 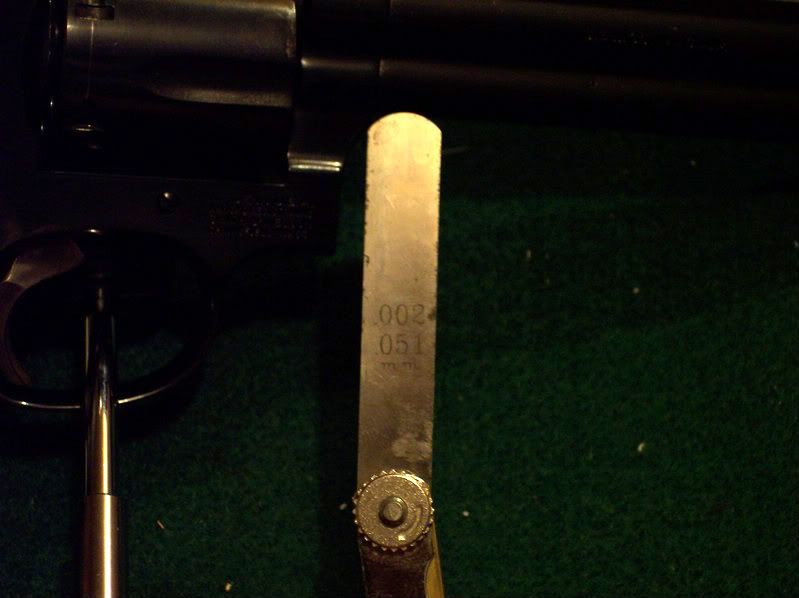
With the cylinder held to the rear, the leaf that fit was .008". 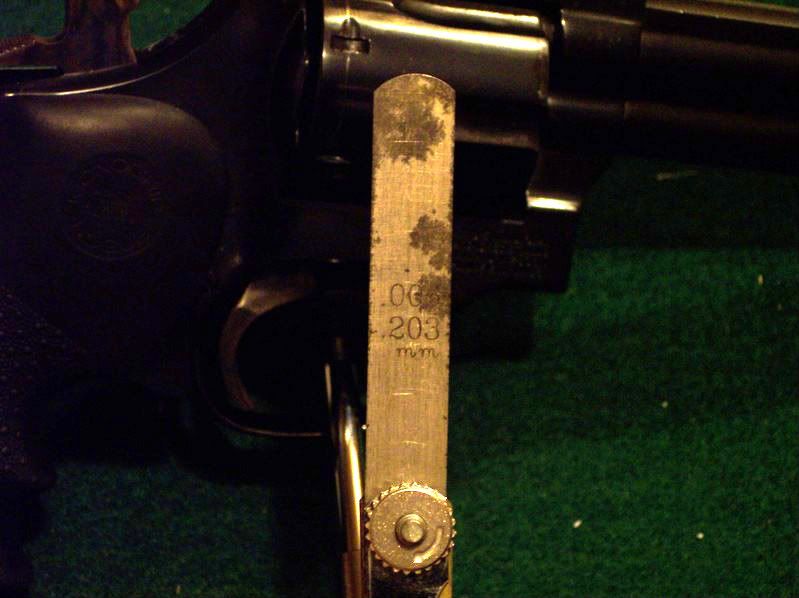
Subtracting the first number from the last gives me .006", which is the amount of cylinderendshake this gun has. That's beyond what most anyone would call acceptable. You really only want about .001" to .002", but up to .004" is ok IMO. I'd start looking at getting it fixed, or fixing it myself if it's over that. Ok, now that I have found the amount of cylinder endshake, I can remove the cylinder and yoke. To do this, remove the sideplate screw located above the trigger. After removing the screw, open the cylinder. Hold the cylinder in place as you slide the yoke out of the front of the frame. Update 1 Set the cylinder to the side and have a look at the yoke. Make sure it's clean. Now slide it back into the frame and reinstall the screw. Move it to the closed position(where it would be if the cylinder was locked in place). Now see if it slides back and forth any at all. If it does, it is yoke endshake and it needs to be corrected before going any further. On my gun, it does, to the tune of .002". You can check this by pushing the yoke toward the muzzle and then trying various feeler gauge leaves between the yoke and frame bearing surfaces. Bearings are available, but they are the one thing I left off my Brownells order, so I'll have to use a different method––peening and/or screw substitution. Note: There will always be a slight degree of movement here. You don't need to eliminate 100% of it, you just want an absolute minimum. This is where I am right now. The yoke has been re installed back into the frame to test for yoke endshake, as detailed above. 
Update 2 Since I have yoke endshake, I need to correct it before addressing the cylinder endshake(you'll see why later on). As I said before, there are several ways to do this-Yoke bearings, peening, and screw substitution. Since the amount of endshake was so slight, and I didn't have any yoke bearings, I chose peening. Here is where the round lead babbit bar and smooth faced hammer come in. Note how to position it on the bar. 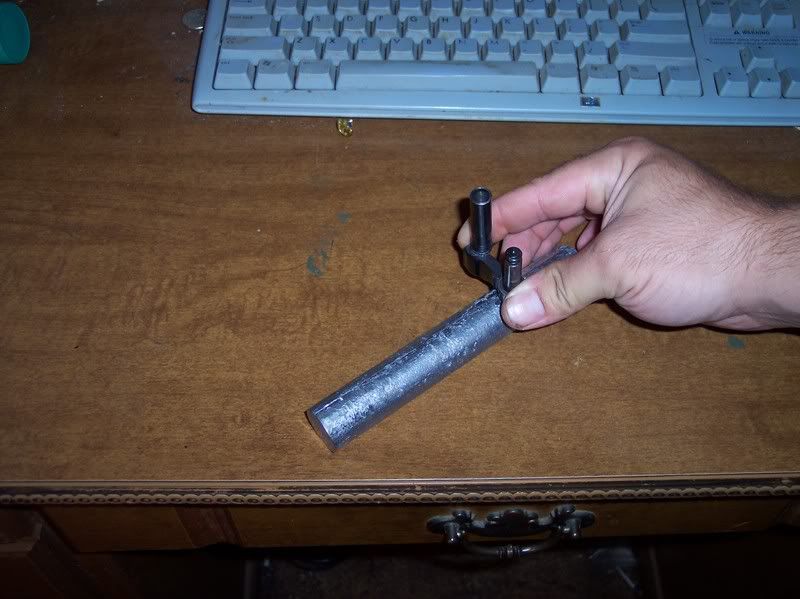
Better view. 
The objective here is to give the "cap" a solid rap or two with the hammer in order to close the gap where the screw rides. You aren't driving nails, so don't beat the hell out of it! You really only need to move metal along the 90 degrees that the screw bears against. Later, you'll need a safe edge needle file to re fit the yoke to the yoke screw. This brings us to checking the fit on the now peened yoke. Slide it back into the frame, move it to the "locked" position(where it would be if the cylinder was locked in place) and slowly tighten the yoke screw. If you peened it too much, the screw may not want to screw all the way in––-if this is the case, back the screw out, remove the yoke, and examine the surface that bears against the screw to see where the material is interfering with the screw. Give it a light stroke or two with the safe edge(the narrow side on a safe edge file doesn't have any teeth, so it won't cut on that edge) needle file and try it again. WORK SLOWLY! This is trial and error hand fitting and it will probably take several tries to get right. If the screw goes all the way in without any problem, try swinging it out. More than likely, you'll find it takes more effort than normal to open it. DON'T FORCE IT! Remove the screw and give the bearing surfaces shown below a stroke or two with the file. Re install it into the frame again and see if it opens with very slight effort. If it doesn't take it out and give it a couple more light strokes with the file. Again, this is trial and error hand fitting, so work slowly. Here are a two pictures for illustration. The surface that will need to be re fitted is circled in blue. The 90 degree arc between the two views is the bearing surface for the yoke screw. Pic 1 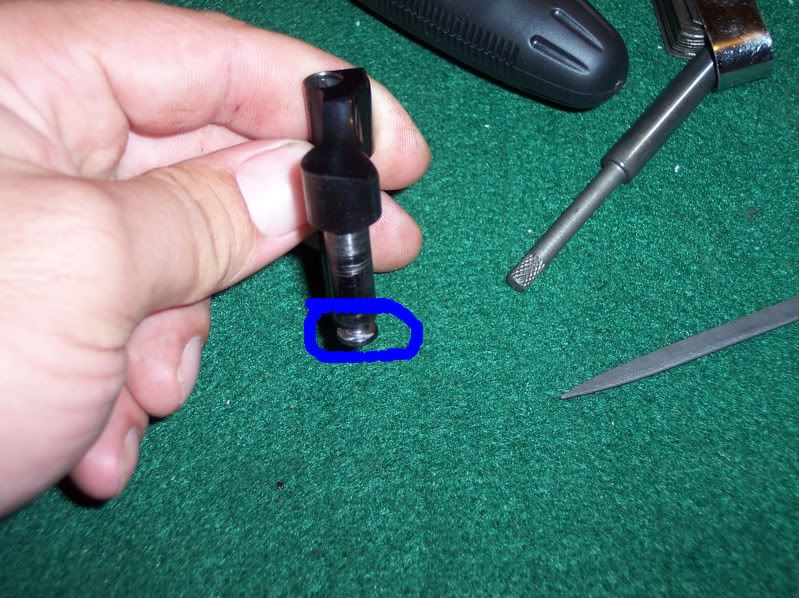
Pic 2 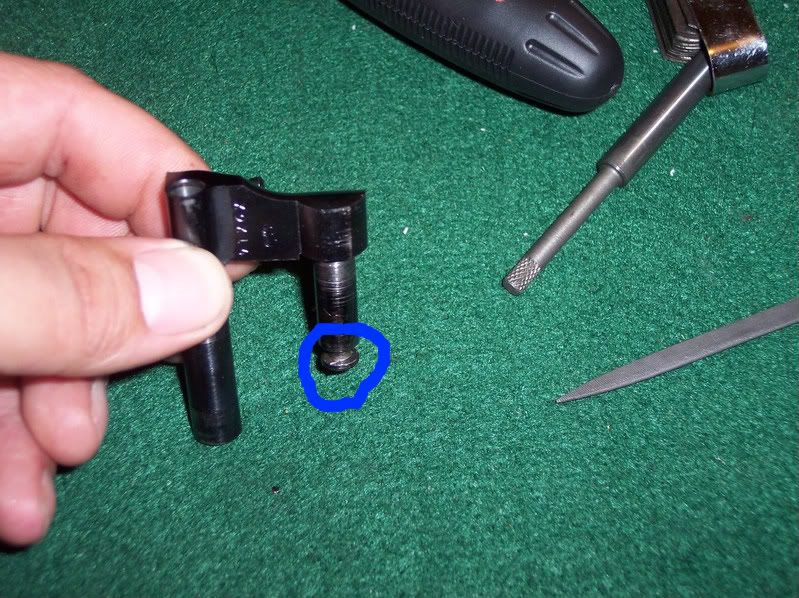
Ok, now that we have eliminated the yoke endshake we need to measure cylinder endshake again, as well as checking the alignment of the yoke in the frame. Since we've already got the cylinder off the yoke, I'll go ahead and check yoke alignment. To do this, you'll need a yoke alignment tool. Yoke alignment tool 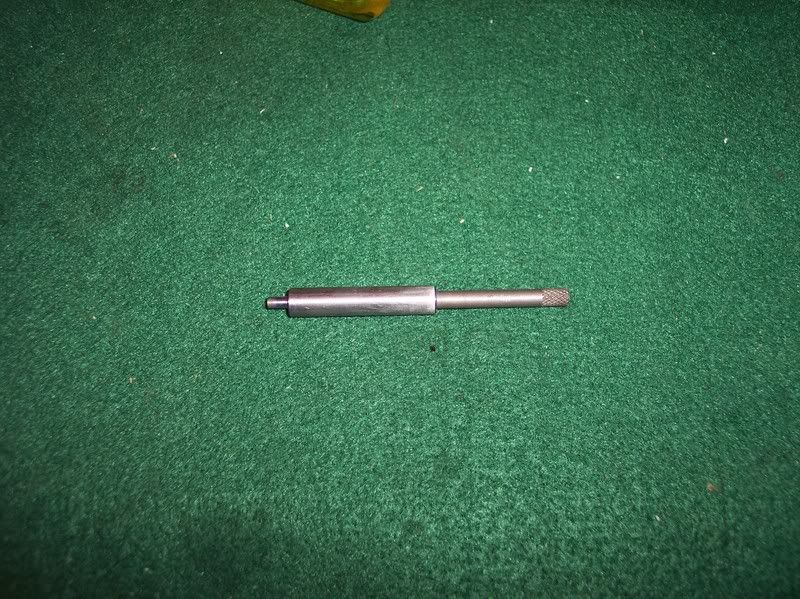
Re install the yoke into the frame and tighten the yoke screw. Insert the yoke alignment tool into the yoke as shown below. 

If the yoke alignment tool will not go into the yoke bore(and it wouldn't on this gun), you'll need to ream it. Be careful when reaming. When you get to the bottom of the yoke bore, the reamer will feel like it's jamming against something, and it is––GO NO FURTHER with the reamer. DO NOT TURN THE REAMER COUNTER CLOCKWISE––-it will dull the cutting edges and ruin it. Picture of the reamer. 
Picture of it bottomed out in the yoke. Yours may or may not go in as far. 
Now, hold the gun with the barrel pointing straight up and the yoke moved slightly away from the locked position. Hold the cylinder release to the rear and slowly move the yoke to the locked position. The instant it hits the locked position, the yoke alignment tool should drop into the plunger hole in the recoil shield. Here is how the gun should be held. I only have two hands, so I can't hold the cylinder release and take pics at the same time. 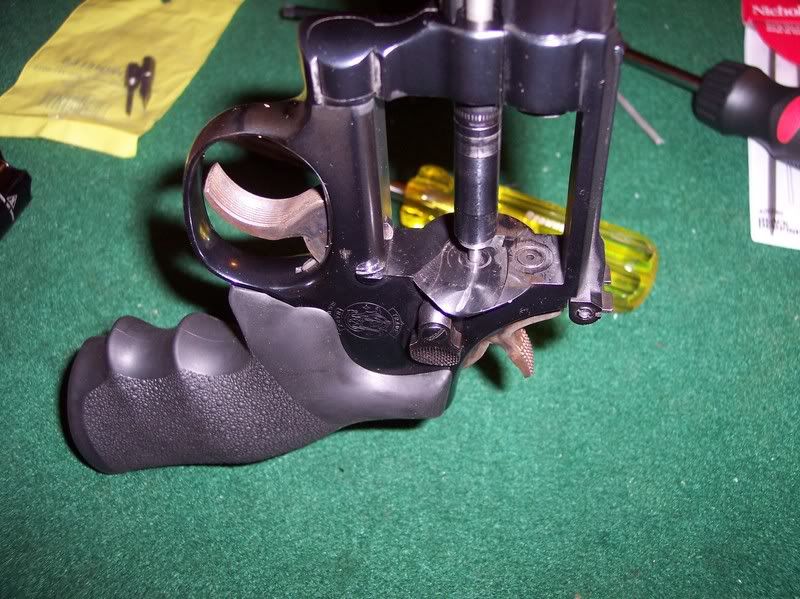
The yoke on this gun is properly aligned, so I don't have to worry about straightening it. If yours isn't, you'll need to straighten it before continuing. With this out of the way, I can reinstall the cylinder and re check the endshake. Remember that earlier I said yoke endshake must be corrected prior to addressing the cylinder endshake? Well, this is the reason––- When I re checked the cylinder gap, and endshake, I found that the barrel to cylinder gap is now at between .005" and .006" when the cylinder is "at rest". With the cylinder held to the rear, the measurement is between .008" and .009". So, just by eliminating the play in the yoke, I've knocked out almost .004" of endshake. This puts me at .002" endshake, which isn't bad at all. Since I have .002" cylinder bearings, I'm going to eliminate that as well. I could simply peen the yoke, but the bearing will give me a longer lasting repair. However, I will show how to peen the yoke in the event you have more than a .002" bearing will take care of. To install the cylinder bearing, I'll need to remove the ejector rod from the cylinder. This can be somewhat tricky since some S&W's have a right hand thread and others have a left hand thread. When in doubt, consult with S&W or a knowledgeable gunsmith. The ejector rod on this particular gun is being a PITA, so I made a tool this morning to help remove it without damage. I'll be back in a bit when I get it loose. Update 3 Ok, I'm back. What a world of difference the proper tool makes. I tried the heavy cloth and pliers method to remove the ejector rod last night and was 100% unsuccessful in removing it. The tool pictured below is available commercially, but Brownells no longer carries it(they do carry a different one though). Being a machinist has it's perks, so I made my own out of some scrap brass. Extractor rod removal tool 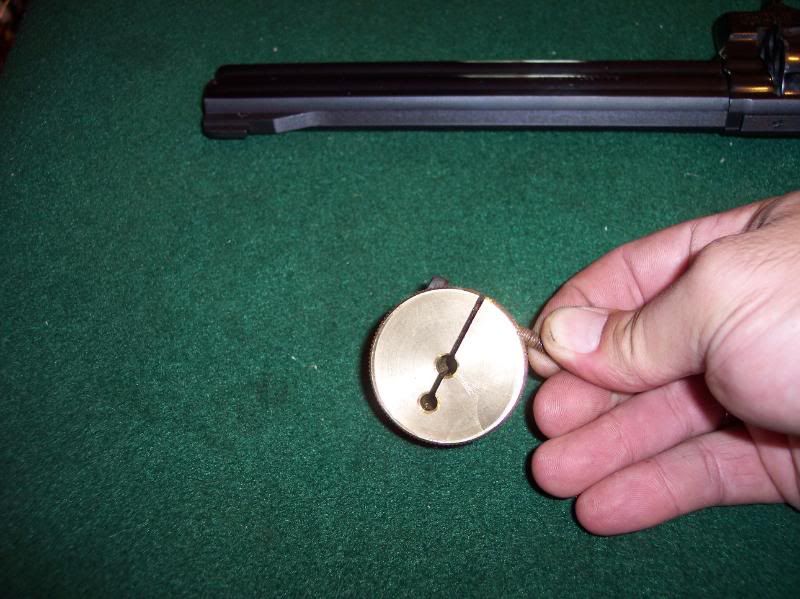
Extractor rod removal tool in place and clamped to remove ejector rod. Be sure to turn the correct direction, and also see below!!!!!!!!! 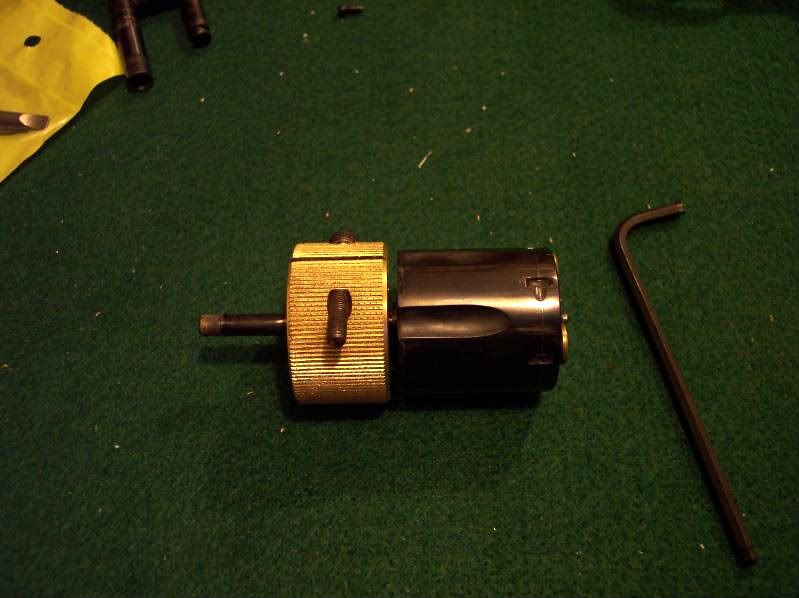
Before unscrewing the extractor rod, insert a fired case in every other chamber of the cylinder. This will prevent damaging the two pins that align the extractor star on older guns, as well as damaging the groove and nub that align it on newer guns. 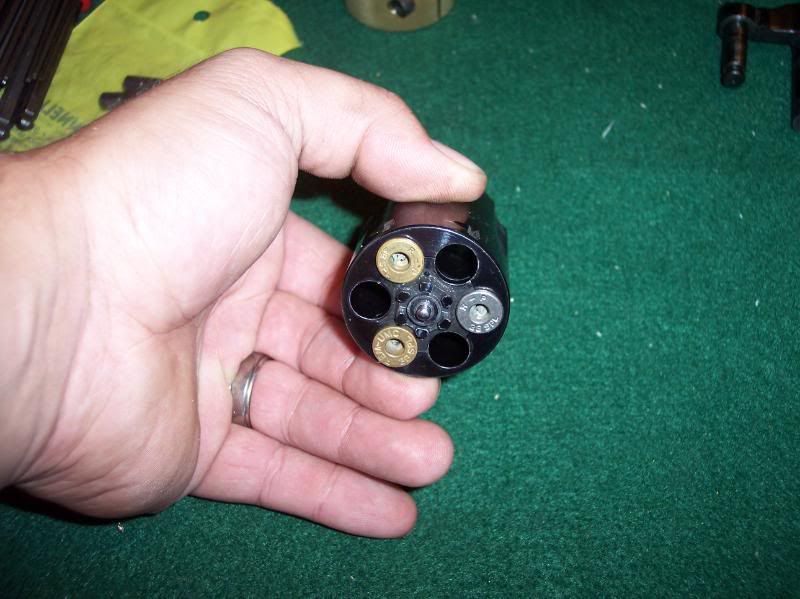
Extractor rod removed 
Time to install the cylinder bearing. I've removed the extractor star, as well as the extractor star spring from the cylinder. Cylinder bearing. 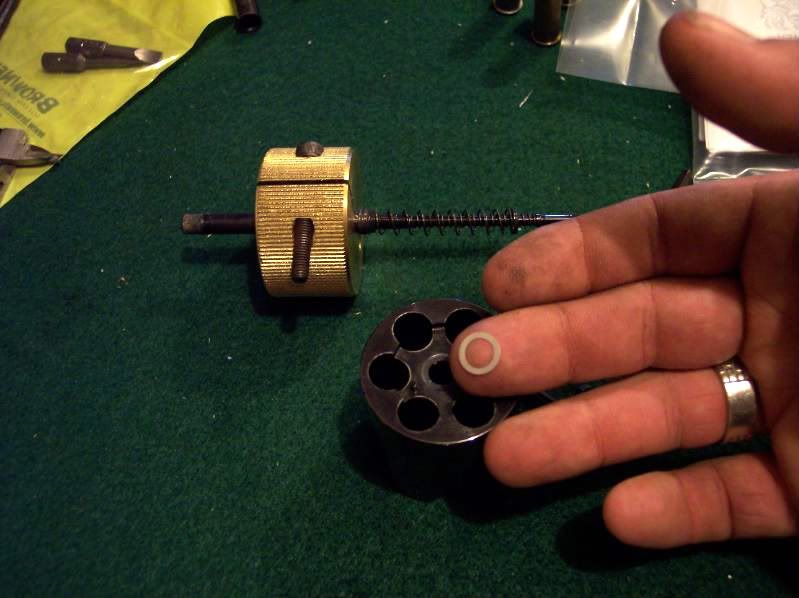
Dropping it in. Be sure that it falls to the bottom and lays flat. You'll also want to add a drop or two of oil to be sure it's well lubricated. 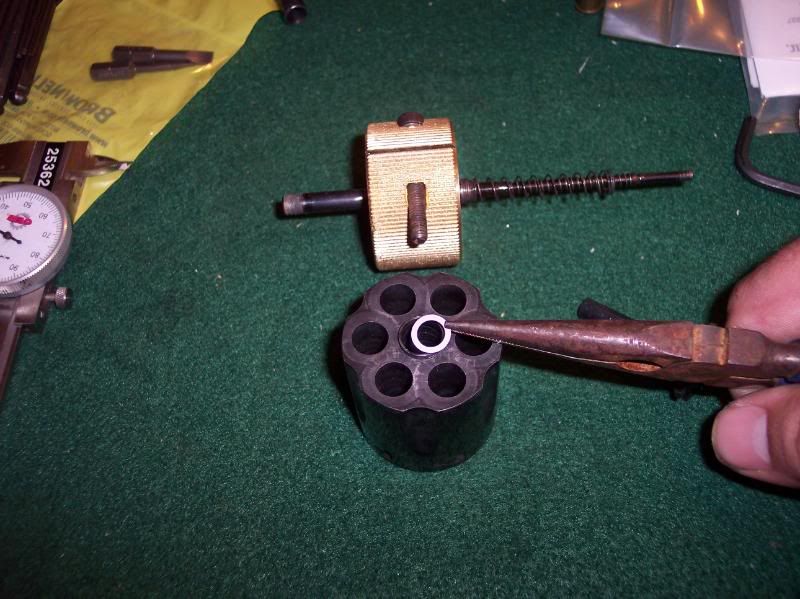
Ok, I'm at the point of reassembling the cylinder, then reinstalling it onto the yoke and into the gun to check how much endshake I have left. Remember to put a fired case in every other chamber before screwing the extractor rod back on. Now, the gun has been reassembled and it's time to check how much endshake remains. In the case of this gun, I still have slightly over .001" left. This is about as close to perfection as one could ask for, but since I have free time and haven't shown how to peen the yoke barrel yet, I'm going to try to eliminate that last .001". Update 4 The machinist is not above admitting it when he screws up....and he's managed a good one. I wasn't having much luck with the method I will show below, so I tried another method and FUBARed the yoke.  This gun will be going back to the factory unless I find somewhere to purchase a new yoke. I should have left it alone with the .001" endshake that was left. Luckily though, I did get pictures of the hammer/lead bar method. This gun will be going back to the factory unless I find somewhere to purchase a new yoke. I should have left it alone with the .001" endshake that was left. Luckily though, I did get pictures of the hammer/lead bar method.
Ok, pay very close attention to the parts in red.... So, we've got the yoke out of the gun and it needs to be peened to increase the length. We want to start by measuring the current length of the yoke, as shown below. Write this measurement down for future reference. 
Now we start peening the yoke, as show below making sure the alignment tool is in place. 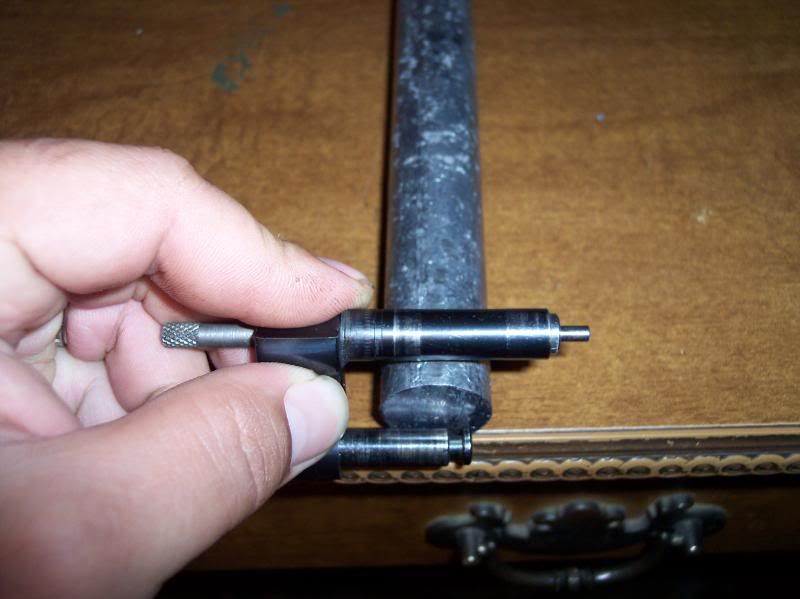

Basically, you'll roll the yoke barrel over the lead bar while tapping the yoke barrel with the alignment tool in place. Do not tap the two larger diameter bearing surfaces, only the smaller diameter area between them!!!!! What happens here is that the metal can't go in, so it has to go outward. This causes the length to increase. Think of it like resizing a piece of fired brass––-brass always "grows" when it is resized. There is a swaging tool available to eliminate the need for the lead bar and hammer. The machinist will be purchasing one of these for any and all future endshake fixing.
Again, work slowly and check your progress frequently. Your objective is only to lengthen the yoke by your endshake measurement, plus another .002"-.003" to allow fitting, and facing the end square with the next tool(pictured below). So, now we've got the yoke peened and the extra length we need to refit it properly. Before starting this though, we need to check yoke alignment one more time to be sure we didn't knock something around the wrong way. Refer back to the previous updates to do this. We'll now face the end of the yoke square using the tool shown below. Do not try to file the end square. Just don't do it. I don't care how good you are with a file. It will come out uneven and probably too short. Buy the tool, use it properly, and you'll probably only have to buy it once. Yoke facing "reamer" 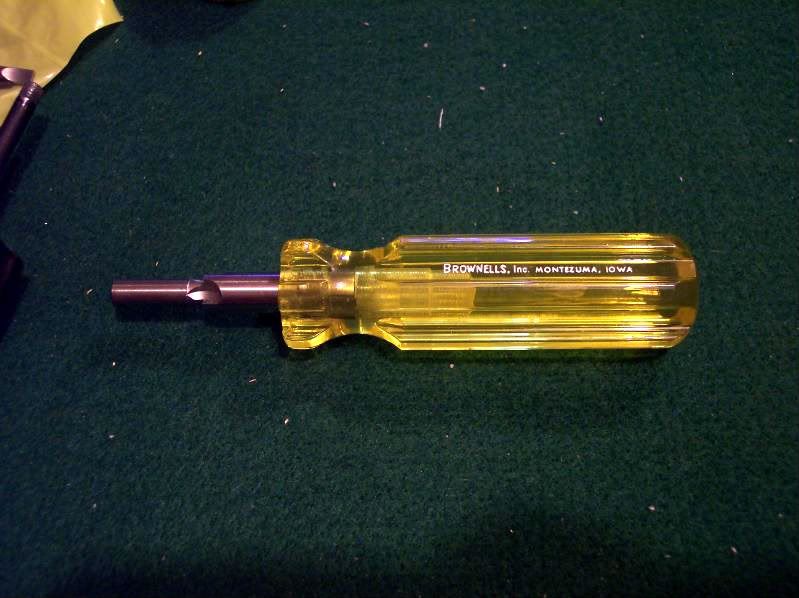
Close up view of the cutting edges. Note that it is piloted to ensure a square cut. 
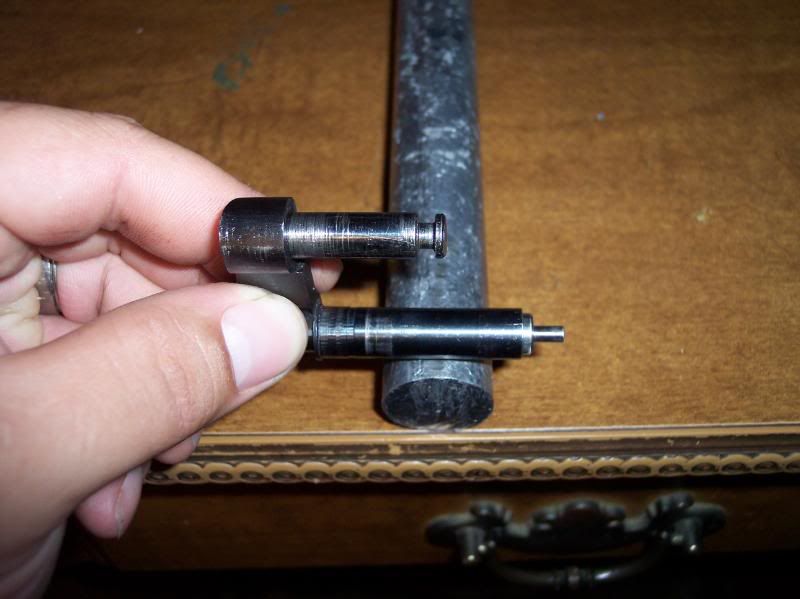
Insert the pilot into the yoke bore as shown below and use light pressure while turning the tool clockwise. You only want to remove enough metal to ensure a clean surface with 100% contact. An easy way to only remove *just enough* is to mark the end with a black marker and turn the tool until the black is gone. 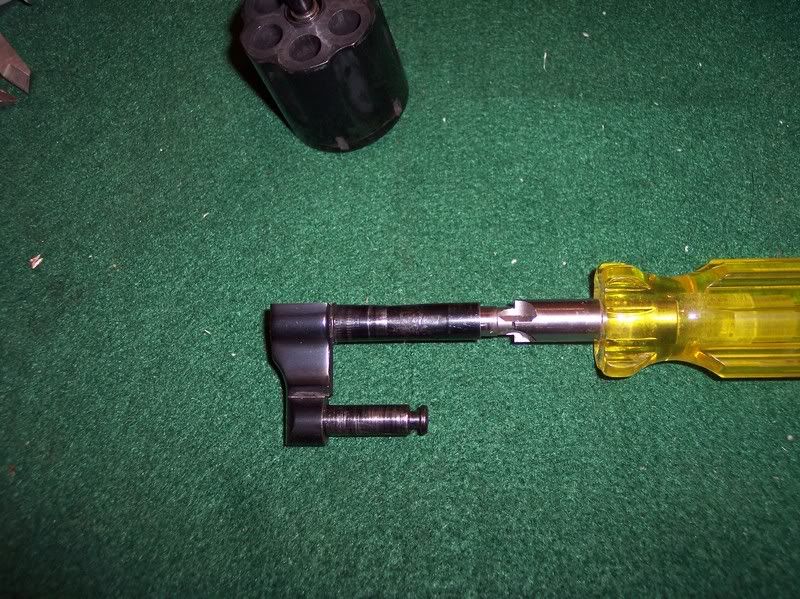
You want to end up with something that looks like this. 
This puts us back to reassembling the gun and trying to close the cylinder. If it closes, measure the endshake. a tiny bit is fine. If it doesn't close, disassemble it and remove just a hair more metal, then try again. Repeat as required. You should now have a revolver with zero or very slight endshake. It will last longer, and you'll likely spend less money at your local gunsmith. You might even start buying(at a reduced price of course Unfortunately, as noted above, this one does not have a happy ending for me. Due to being tired/not paying enough attention, I currently have a 8 3/8" barreled L frame club instead of a functional revolver. So, if you didn't learn anything else, hopefully you did learn to double and even triple check what you're about to do. This gun also needs the cylinder stop refitted to correct the loose lockup. I would guess that S&W will probably fix that when/if I have to send it to them. |
|
|
|
VA, USA
|
[#1]
cool, thanks.
|
|
|
|
[#2]
nice article . I have one of those tools you made if you want dimensions off an original
|
|
|
|
MD, USA
|
[#3]
Did you ever get your "club" back to working firearm status?
|
|
|
MI, USA
|
[#4]
so mote it be
mm b.l. #64 |
|
|
|
[#5]
Originally Posted By Ironnewt: Did you ever get your "club" back to working firearm status? Yes. S&W replaced the yoke, set the barrel back a turn and recut the forcing cone, plus a couple of other little things. Cost me around $140. Lots easier to hit with @ 100 yards than my shorter barreled guns. |
|
|
|
TX, USA
|
[#6]
Good article. Kuhnhausen would be proud of you… except for that alignment tool oops.
Reminds me of the time I tried to stake a Remington 870's shell latch without bothering to put be glasses back on… oops! 
(No, my dear wife, I'm not getting old, it's just that my arms aren't long enough to read with.) |
|
|
NH, USA
|
[#7]
It's interesting to see how to do it the right way. I always just made a little shim/spacer to put under the extractor. This moved the cylinder forward to get a tight barrel/cylinder gap. The case was still held back by the extractor, so it didn't affect the firing pin strike. It looked a little strange to see the extractor a bit proud of the back of the cylinder, but it wasn't usually enough to be noticeable/troublesome, and it worked. I've done that a few times. The shim would look like a donut, of course, and be small enough to not interfere with the pins if the gun was old enough to have them. Not as elegant as what you did, but a lot easier. And less chance of wrecking a part.
|
|
|
TN, USA
|
[#8]
Thanks for the article. I have the exact same revolver. I love shooting it. Accurate and has a sweet trigger break on single action. It's my glovebox gun for my car, along with a few speed loaders.
|
|
|
|
[Last Edit: Thorgrim]
[#9]
Man, you are awesome for giving us this writeup. I'm so sorry about your gun, but it worked out in the end- What was the turnaround time for the work from S&W, as I'm considering sending my 28-2 in for a checkup.
|
|
|
|
TX, USA
|
[#10]
Thanks for the excellent writeup. I used it to fix the endshake on my 1950 by using shims.
|
|
|
 Win a FREE Membership!
Sign up for the ARFCOM weekly newsletter and be entered to win a free ARFCOM membership. One new winner* is announced every week!
You will receive an email every Friday morning featuring the latest chatter from the hottest topics, breaking news surrounding legislation, as well as exclusive deals only available to ARFCOM email subscribers.

AR15.COM is the world's largest firearm community and is a gathering place for firearm enthusiasts of all types.
From hunters and military members, to competition shooters and general firearm enthusiasts, we welcome anyone who values and respects the way of the firearm.

Subscribe to our monthly Newsletter to receive firearm news, product discounts from your favorite Industry Partners, and more.
Copyright © 1996-2024 AR15.COM LLC. All Rights Reserved.
Any use of this content without express written consent is prohibited.
AR15.Com reserves the right to overwrite or replace any affiliate, commercial, or monetizable links, posted by users, with our own.


