VA, USA
|
[#1]
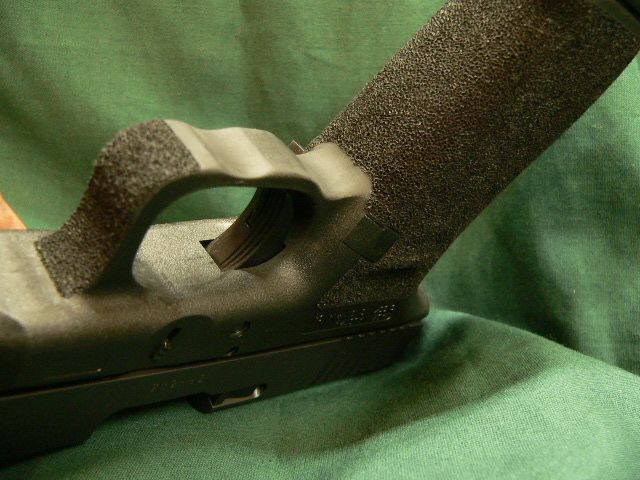
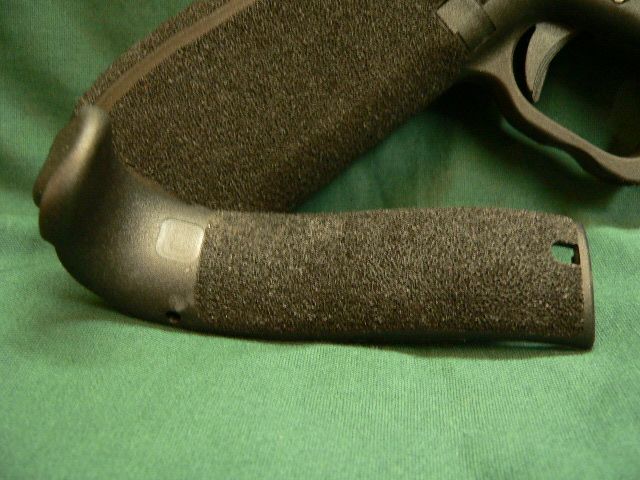
Did some magwell work on the 35 and edc 32
Trimmed out front of magwell a lil bit 32  DSC_2743 by jamiehstanley, on Flickr DSC_2743 by jamiehstanley, on Flickr
Flared the 35 magwell also and trimmed the front a bit also .. I really like this so far.. with 2 other full size frames and the 32 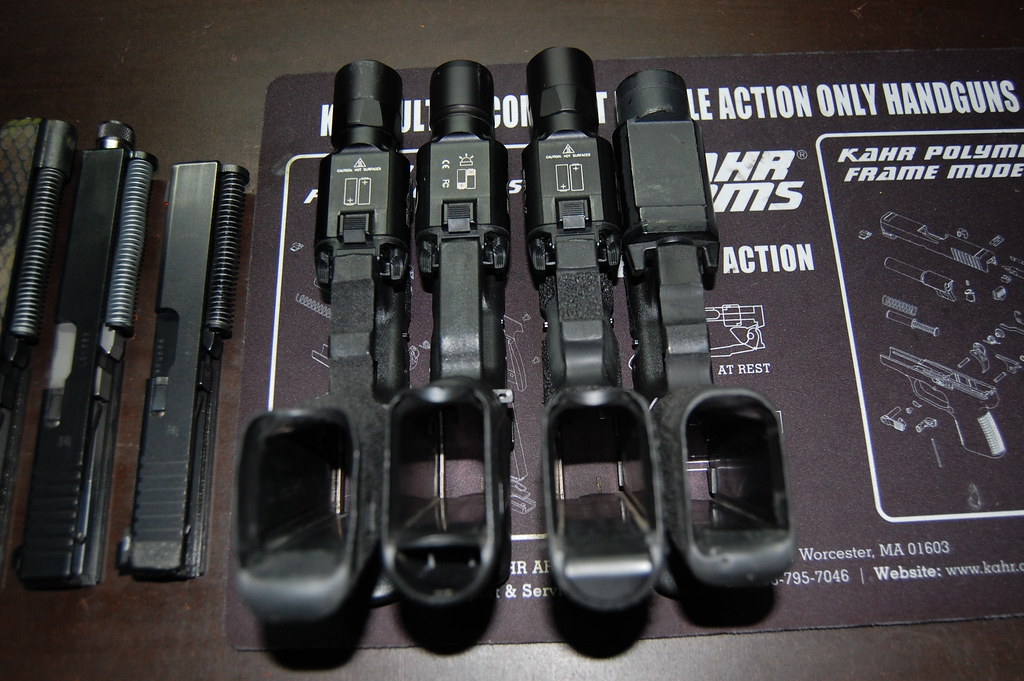 DSC_2731 by jamiehstanley, on Flickr DSC_2731 by jamiehstanley, on Flickr
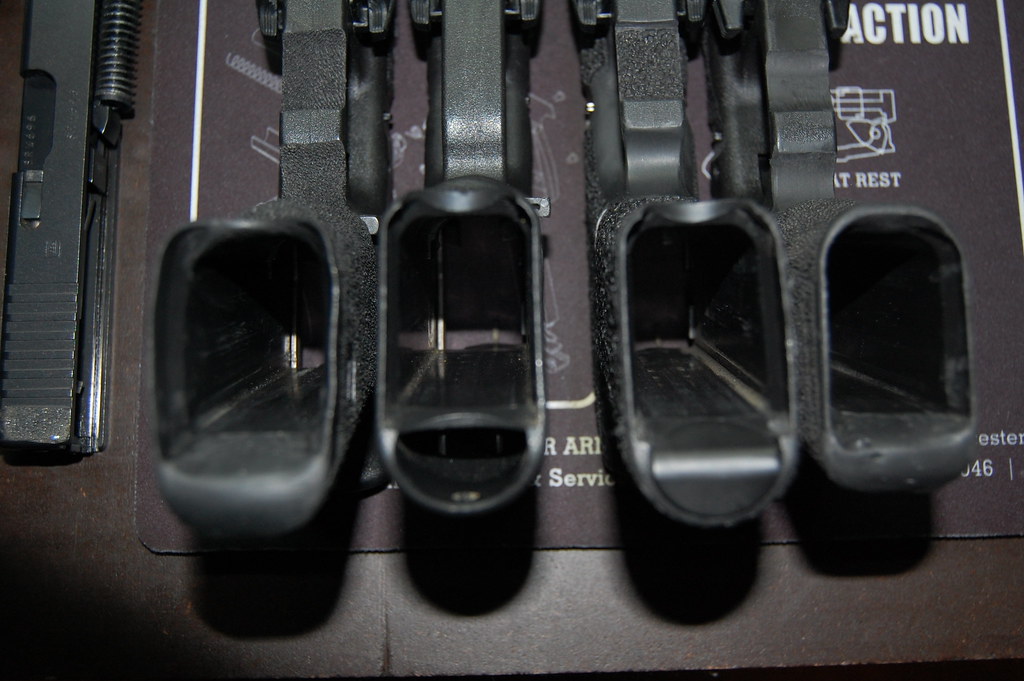 DSC_2730 by jamiehstanley, on Flickr DSC_2730 by jamiehstanley, on Flickr
With unmolested 22 frame 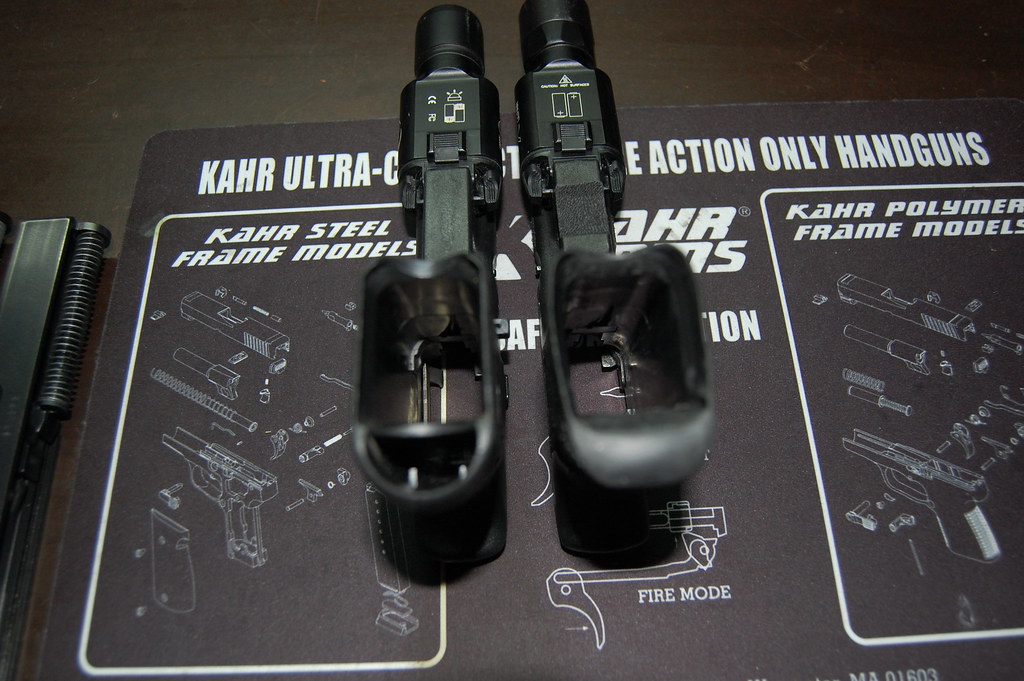 DSC_2732 by jamiehstanley, on Flickr DSC_2732 by jamiehstanley, on Flickr
With factory glock floors and vickers  DSC_2735 by jamiehstanley, on Flickr DSC_2735 by jamiehstanley, on Flickr
 DSC_2736 by jamiehstanley, on Flickr DSC_2736 by jamiehstanley, on Flickr
 DSC_2738 by jamiehstanley, on Flickr DSC_2738 by jamiehstanley, on Flickr
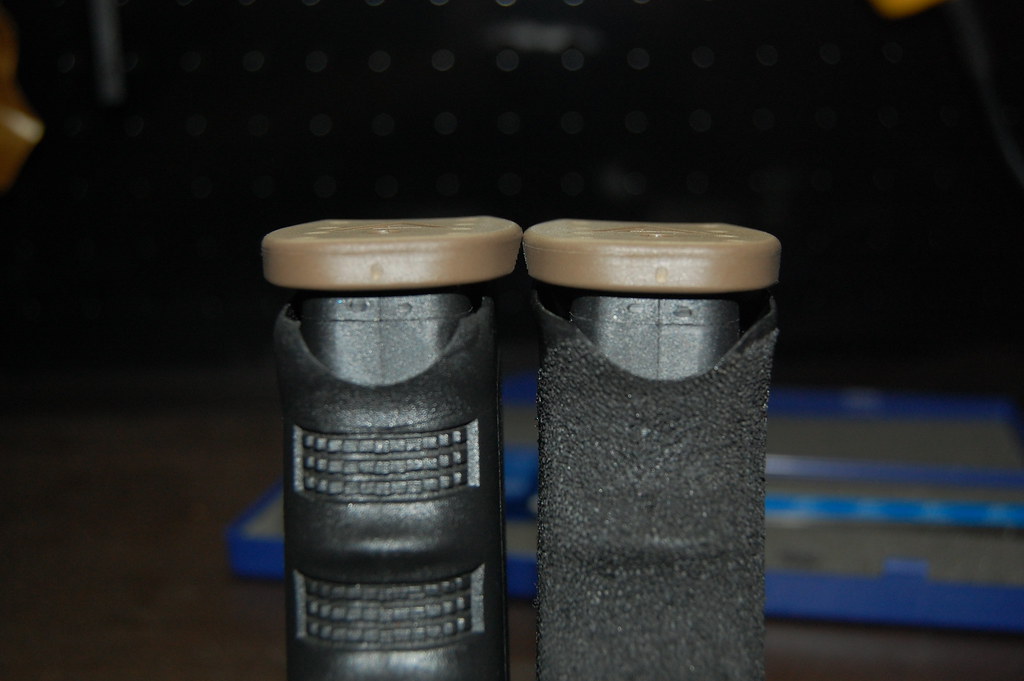
Not to much .. but just enough for me 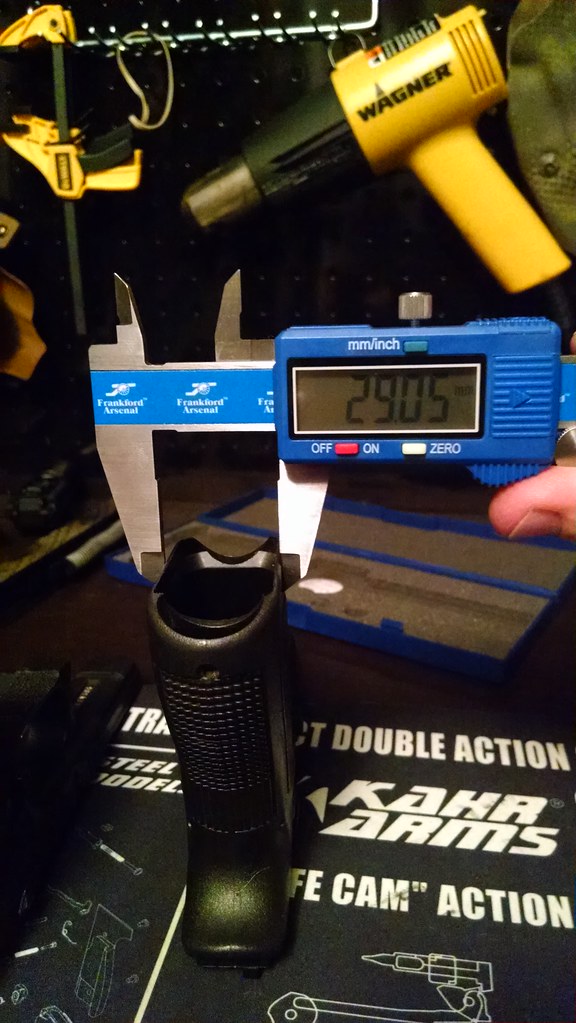 IMG_20151110_164552179 by jamiehstanley, on Flickr IMG_20151110_164552179 by jamiehstanley, on Flickr
 IMG_20151110_164543142 by jamiehstanley, on Flickr IMG_20151110_164543142 by jamiehstanley, on Flickr
|
|
|
KY, USA
|
[#2]
|
|
|
|
[#3]
|
|
|
|
NH, USA
|
[#4]
Did my G40. Removed the finger grooves, double undercut, smooth and contour inside trigger guard, rounded it off, beveled the mag catch cutout. Used a sharp chisel tip on a wood burner iron for the stipple. Also did the beavertail backstrap which still fits perfectly over the frame backstrap stippling.
|
|
|
|
[Last Edit: Alaskacajun]
[#5]
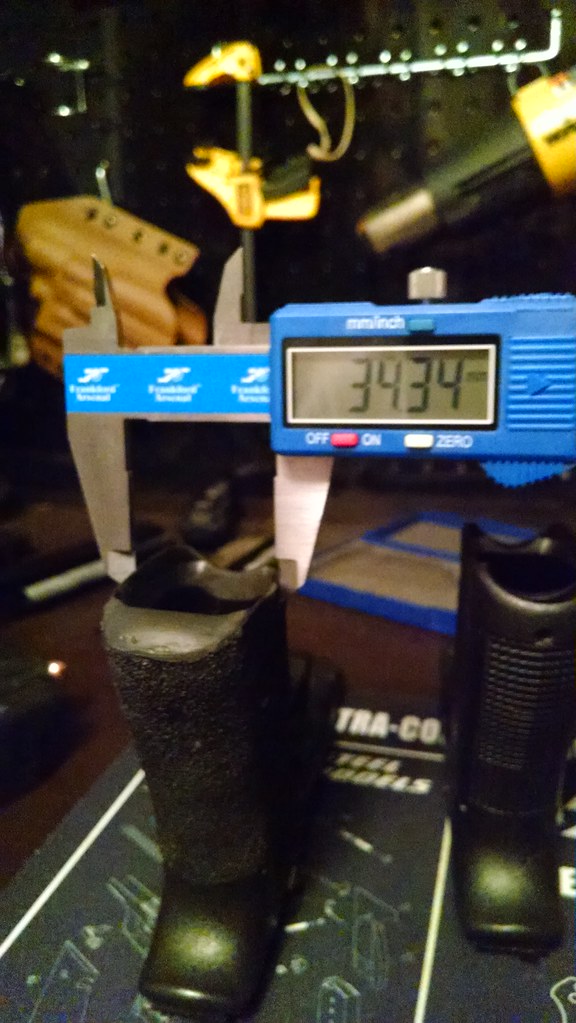
Here's my G19.3

and here is my G17.4 that I chopped down to take G19 mags 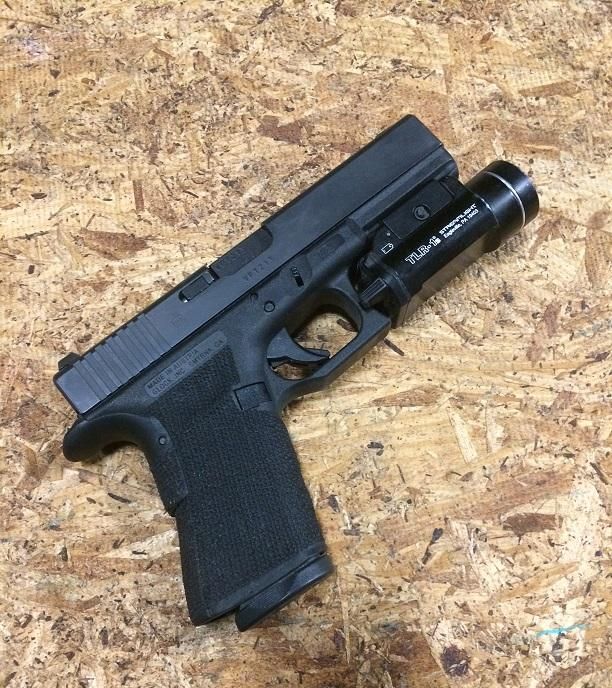
- Clint |
|
|
|
USA
|
[#6]
Originally Posted By 4DAIVIPAI2K5:
Re worked the trigger guard on my G17 <a href="https://flic.kr/p/AFKq3c" target="_blank">https://farm1.staticflickr.com/745/22765944135_a8c93b6acf_c.jpg</a>1 by 4DAIVIPAI2K5, on Flickr Well Done! Looks much better |
|
|
|
[#7]
Originally Posted By M1Riflenut:
Did my G40. Removed the finger grooves, double undercut, smooth and contour inside trigger guard, rounded it off, beveled the mag catch cutout. Used a sharp chisel tip on a wood burner iron for the stipple. Also did the beavertail backstrap which still fits perfectly over the frame backstrap stippling. http://i14.photobucket.com/albums/a305/M1Riflenut/G40/P1180312_zpsydte0xrs.jpg http://i14.photobucket.com/albums/a305/M1Riflenut/G40/P1180314_zpswormu0te.jpg http://i14.photobucket.com/albums/a305/M1Riflenut/G40/P1180315_zps0vo85u5h.jpg http://i14.photobucket.com/albums/a305/M1Riflenut/G40/P1180316_zps30g5khh3.jpg http://i14.photobucket.com/albums/a305/M1Riflenut/G40/P1180317_zpsdvcufc3t.jpg http://i14.photobucket.com/albums/a305/M1Riflenut/G40/P1180318_zpsconoekz4.jpg You exercised patience and attention to detail most home jobs don't have. Well done work. |
|
|
|
USA
|
[Last Edit: Maiden316]
[#8]
|
|
|
|
[#9]
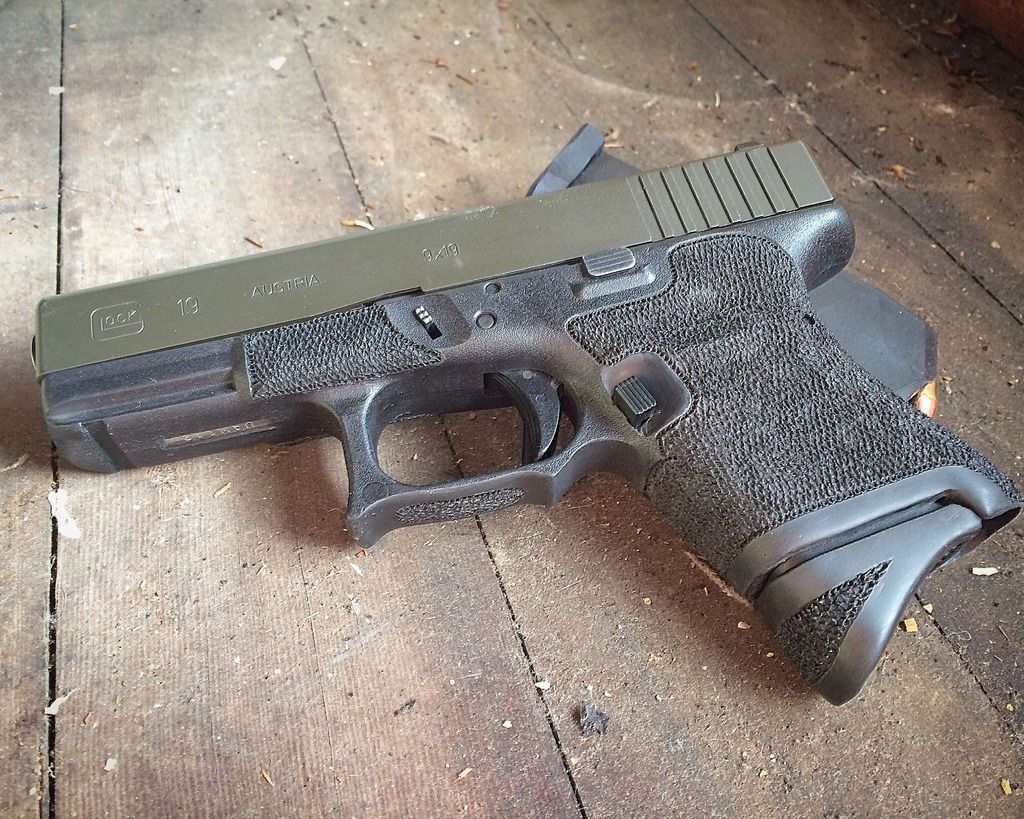
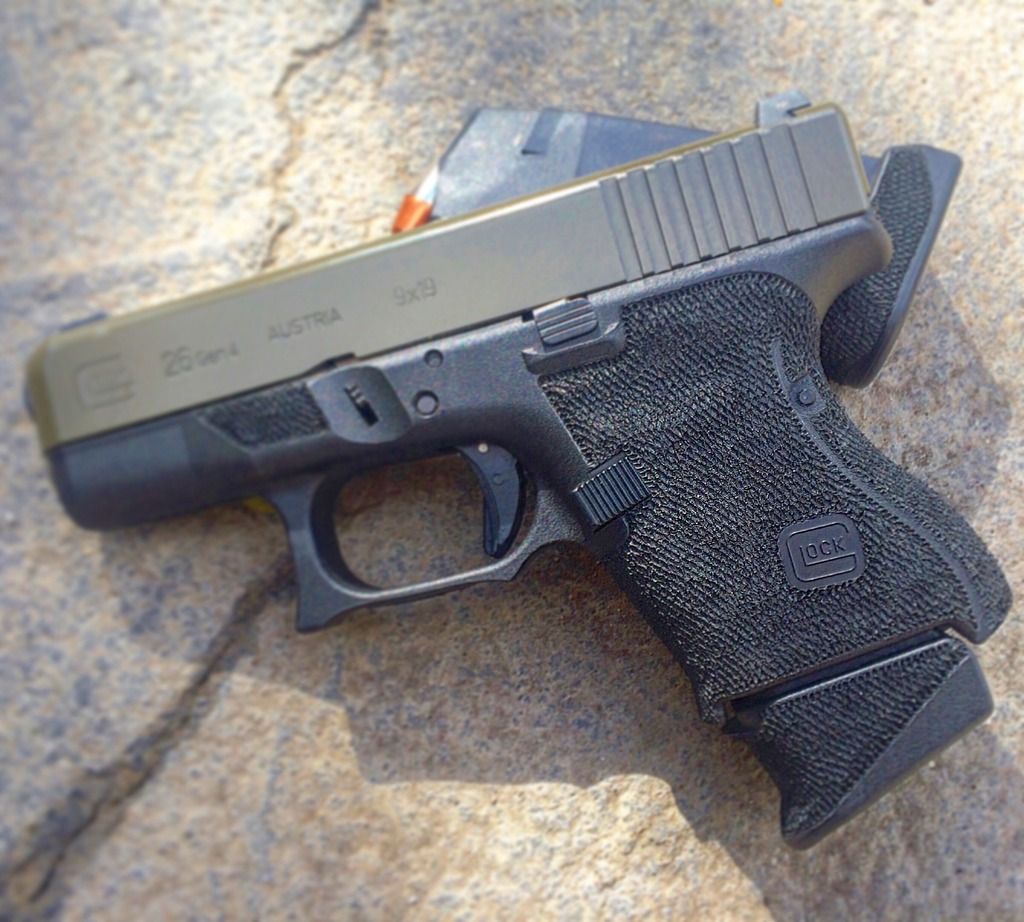
Originally Posted By Maiden316:
19 cut down to accept 26 mags with Pearce grip extension reshaped and re textured <a href="http://s1382.photobucket.com/user/Maiden316/media/Mobile%20Uploads/image_zpszbmkfd38.jpg.html" target="_blank">http://i1382.photobucket.com/albums/ah270/Maiden316/Mobile%20Uploads/image_zpszbmkfd38.jpg</a> Genuine question...what is the advantage of this other than a slight advantage in concealment? I understand the 17 to 19 but not the 19 to 26. |
|
|
|
USA
|
[Last Edit: Maiden316]
[#10]
Originally Posted By gotuonpaper:
Genuine question...what is the advantage of this other than a slight advantage in concealment? I understand the 17 to 19 but not the 19 to 26. Originally Posted By gotuonpaper:
Originally Posted By Maiden316:
19 cut down to accept 26 mags with Pearce grip extension reshaped and re textured <a href="http://s1382.photobucket.com/user/Maiden316/media/Mobile%20Uploads/image_zpszbmkfd38.jpg.html" target="_blank">http://i1382.photobucket.com/albums/ah270/Maiden316/Mobile%20Uploads/image_zpszbmkfd38.jpg</a> Genuine question...what is the advantage of this other than a slight advantage in concealment? I understand the 17 to 19 but not the 19 to 26. Yep advantage in concealment. But for me it's not a just a slight advantage, it is a very noticeable difference. Conceal ability of a 26 with the barrel length and sight radius of a 19. Really the same exact concept as the 17 to 19 chop just different scale. For me, and I'm sure most, will find it much easier to conceal the 26 grip length vs the 19. In my Eidolon holster this thing disappears under a t-shirt |
|
|
|
[#11]
What epoxy are you guys using to fill in part of the backstrap?
|
|
|
|
|
[#12]
Originally Posted By Maiden316:
Yep advantage in concealment. But for me it's not a just a slight advantage, it is a very noticeable difference. Conceal ability of a 26 with the barrel length and sight radius of a 19. Really the same exact concept as the 17 to 19 chop just different scale. For me, and I'm sure most, will find it much easier to conceal the 26 grip length vs the 19. In my Eidolon holster this thing disappears under a t-shirt Originally Posted By Maiden316:
Originally Posted By gotuonpaper:
Originally Posted By Maiden316:
19 cut down to accept 26 mags with Pearce grip extension reshaped and re textured <a href="http://s1382.photobucket.com/user/Maiden316/media/Mobile%20Uploads/image_zpszbmkfd38.jpg.html" target="_blank">http://i1382.photobucket.com/albums/ah270/Maiden316/Mobile%20Uploads/image_zpszbmkfd38.jpg</a> Genuine question...what is the advantage of this other than a slight advantage in concealment? I understand the 17 to 19 but not the 19 to 26. Yep advantage in concealment. But for me it's not a just a slight advantage, it is a very noticeable difference. Conceal ability of a 26 with the barrel length and sight radius of a 19. Really the same exact concept as the 17 to 19 chop just different scale. For me, and I'm sure most, will find it much easier to conceal the 26 grip length vs the 19. In my Eidolon holster this thing disappears under a t-shirt Reason i wonder is with 17 to 19 I would give up 2 rounds but with 19 to 26 its 5. Looks good and I've sen it executed well by several custom companies . Yours looks good. |
|
|
|
USA
|
[#13]
Originally Posted By gotuonpaper:
Reason i wonder is with 17 to 19 I would give up 2 rounds but with 19 to 26 its 5. Looks good and I've sen it executed well by several custom companies . Yours looks good. Originally Posted By gotuonpaper:
Originally Posted By Maiden316:
Originally Posted By gotuonpaper:
Originally Posted By Maiden316:
19 cut down to accept 26 mags with Pearce grip extension reshaped and re textured <a href="http://s1382.photobucket.com/user/Maiden316/media/Mobile%20Uploads/image_zpszbmkfd38.jpg.html" target="_blank">http://i1382.photobucket.com/albums/ah270/Maiden316/Mobile%20Uploads/image_zpszbmkfd38.jpg</a> Genuine question...what is the advantage of this other than a slight advantage in concealment? I understand the 17 to 19 but not the 19 to 26. Yep advantage in concealment. But for me it's not a just a slight advantage, it is a very noticeable difference. Conceal ability of a 26 with the barrel length and sight radius of a 19. Really the same exact concept as the 17 to 19 chop just different scale. For me, and I'm sure most, will find it much easier to conceal the 26 grip length vs the 19. In my Eidolon holster this thing disappears under a t-shirt Reason i wonder is with 17 to 19 I would give up 2 rounds but with 19 to 26 its 5. Looks good and I've sen it executed well by several custom companies . Yours looks good. Thanks. I see what you're saying with the rounds, but for ultimate conceal ability something has to give. You obviously still have the option to carry it with the larger magazines. |
|
|
NC, USA
|
[#14]
Originally Posted By M1Riflenut:
Did my G40. Removed the finger grooves, double undercut, smooth and contour inside trigger guard, rounded it off, beveled the mag catch cutout. Used a sharp chisel tip on a wood burner iron for the stipple. Also did the beavertail backstrap which still fits perfectly over the frame backstrap stippling. http://i14.photobucket.com/albums/a305/M1Riflenut/G40/P1180312_zpsydte0xrs.jpg http://i14.photobucket.com/albums/a305/M1Riflenut/G40/P1180314_zpswormu0te.jpg http://i14.photobucket.com/albums/a305/M1Riflenut/G40/P1180315_zps0vo85u5h.jpg http://i14.photobucket.com/albums/a305/M1Riflenut/G40/P1180316_zps30g5khh3.jpg http://i14.photobucket.com/albums/a305/M1Riflenut/G40/P1180317_zpsdvcufc3t.jpg http://i14.photobucket.com/albums/a305/M1Riflenut/G40/P1180318_zpsconoekz4.jpg Stippling looks fantastic, great job. |
|
|
|
[#15]
+1 I used some epoxy putty that was grey but it hardened much lighter and really stands out on a black frame.
Originally Posted By SuperMoose:
What epoxy are you guys using to fill in part of the backstrap? |
|
|
|
FL, USA
|
[#16]
Got around to stippling my G19 a little last night with my $8 ebay 30w soldering iron. This was my first time, first 5 min was scary then it became kind of fun / challenging. Felt like I was working on an art project or something


|
|
|
|
[#17]
Originally Posted By Maiden316:
19 cut down to accept 26 mags with Pearce grip extension reshaped and re textured <a href="http://s1382.photobucket.com/user/Maiden316/media/Mobile%20Uploads/image_zpszbmkfd38.jpg.html" target="_blank">http://i1382.photobucket.com/albums/ah270/Maiden316/Mobile%20Uploads/image_zpszbmkfd38.jpg</a> Very interested in this, how did you do the cut, it looks like it didn't effect the backstrap or did it? Had you stippled the gun before the cut and resurface the bottom or did you stipple after? |
|
|
|
USA
|
[#18]
Originally Posted By TATBME:
Very interested in this, how did you do the cut, it looks like it didn't effect the backstrap or did it? Had you stippled the gun before the cut and resurface the bottom or did you stipple after? Originally Posted By TATBME:
Originally Posted By Maiden316:
19 cut down to accept 26 mags with Pearce grip extension reshaped and re textured <a href="http://s1382.photobucket.com/user/Maiden316/media/Mobile%20Uploads/image_zpszbmkfd38.jpg.html" target="_blank">http://i1382.photobucket.com/albums/ah270/Maiden316/Mobile%20Uploads/image_zpszbmkfd38.jpg</a> Very interested in this, how did you do the cut, it looks like it didn't effect the backstrap or did it? Had you stippled the gun before the cut and resurface the bottom or did you stipple after? A general rule is always always stipple last. No effect to the blackstrap other than shortening it to accept the 26 mags. |
|
|
FL, USA
|
[#19]
Just banged out my double undercut job. Very pleased with it for never doing it before and just wingning it. Feels AWESOME in my hand.


|
|
|
PA, USA
|
[Last Edit: Caeser2001]
[#20]
Originally Posted By gotuonpaper:
Genuine question...what is the advantage of this other than a slight advantage in concealment? I understand the 17 to 19 but not the 19 to 26. Originally Posted By gotuonpaper:
Originally Posted By Maiden316:
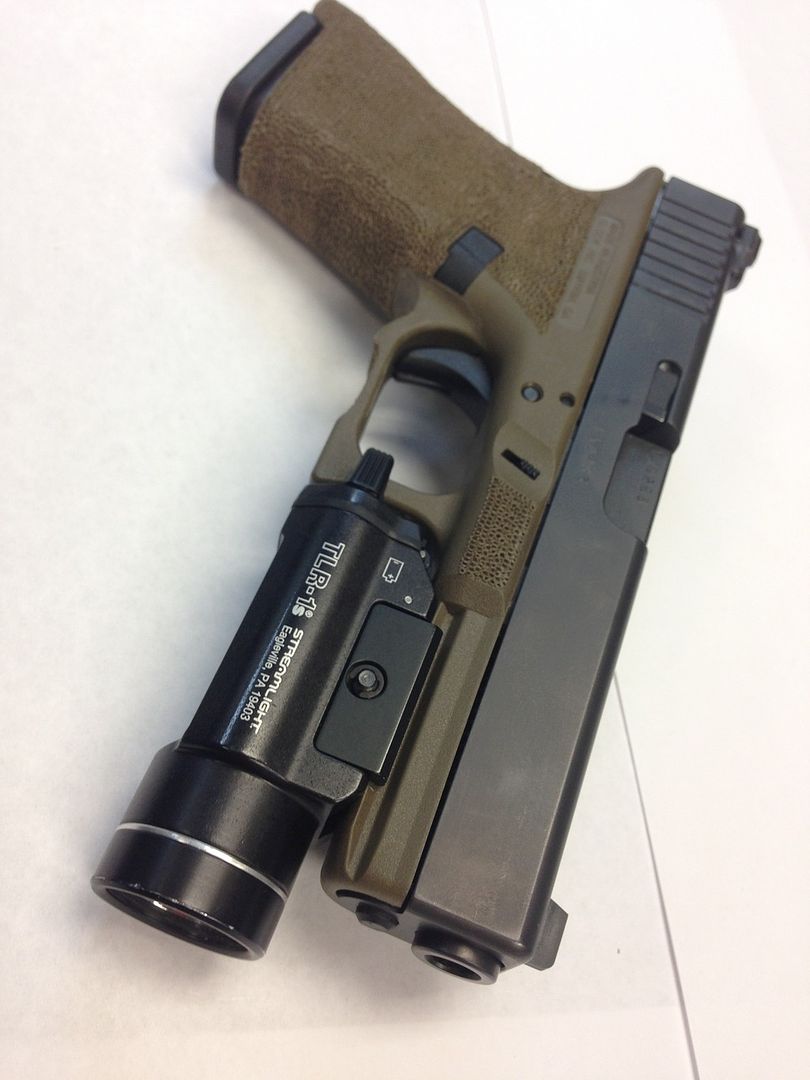
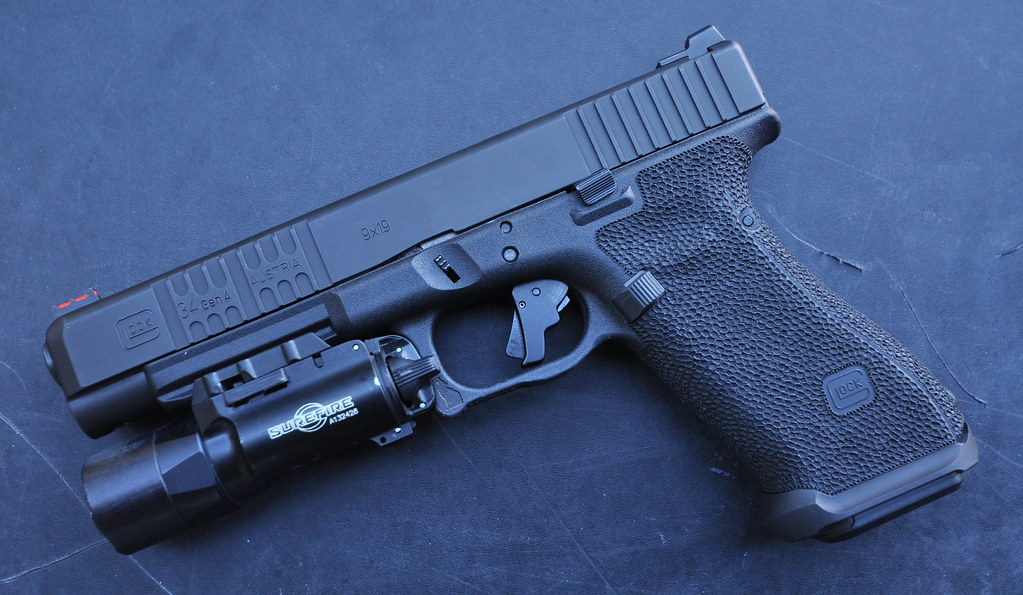
19 cut down to accept 26 mags with Pearce grip extension reshaped and re textured <a href="http://s1382.photobucket.com/user/Maiden316/media/Mobile%20Uploads/image_zpszbmkfd38.jpg.html" target="_blank">http://i1382.photobucket.com/albums/ah270/Maiden316/Mobile%20Uploads/image_zpszbmkfd38.jpg</a> Genuine question...what is the advantage of this other than a slight advantage in concealment? I understand the 17 to 19 but not the 19 to 26. The other advantage would adding a standard light, SF X300, Inforce APL, Streamlight TLR, etc. Definitely on my to do list. |
|
|
USA
|
[#21]
Originally Posted By Caeser2001:
The other advantage would adding a standard light, SF X300, Inforce APL, Streamlight TLR, etc. Definitely on my to do list. Originally Posted By Caeser2001:
Originally Posted By gotuonpaper:
Originally Posted By Maiden316:
19 cut down to accept 26 mags with Pearce grip extension reshaped and re textured <a href="http://s1382.photobucket.com/user/Maiden316/media/Mobile%20Uploads/image_zpszbmkfd38.jpg.html" target="_blank">http://i1382.photobucket.com/albums/ah270/Maiden316/Mobile%20Uploads/image_zpszbmkfd38.jpg</a> Genuine question...what is the advantage of this other than a slight advantage in concealment? I understand the 17 to 19 but not the 19 to 26. The other advantage would adding a standard light, SF X300, Inforce APL, Streamlight TLR, etc. Definitely on my to do list. Good point! |
|
|
|
[Last Edit: SuperMoose]
[#22]
My first run at it. I did copy Agency's design as I lack originality
Didn't practice on anything. Just took the wood burner to the plastic and away I went. I did reduce the backstrap a bit too much as mag won't drop free. I fixed it by boiling the frame and putting a mag in the magwell with duct tape on the spots it was sticking to "stretch' the frame. After stippling its sticky again. Boiling it again now to see if I can fix it. Still have to clean up the sanding marks of a few spots and polish it up. Feedback would be appreciated. 


|
|
|
|
|
[#23]
Originally Posted By SuperMoose:
My first run at it. I did copy Agency's design as I lack originality Didn't practice on anything. Just took the wood burner to the plastic and away I went. I did reduce the backstrap a bit too much as mag won't drop free. I fixed it by boiling the frame and putting a mag in the magwell with duct tape on the spots it was sticking to "stretch' the frame. After stippling its sticky again. Boiling it again now to see if I can fix it. Still have to clean up the sanding marks of a few spots and polish it up. Feedback would be appreciated. Looks perfect to me, better than some who do it alot. Very nice work. |
|
|
|
|
[#24]
Originally Posted By SuperMoose:
My first run at it. I did copy Agency's design as I lack originality Didn't practice on anything. Just took the wood burner to the plastic and away I went. I did reduce the backstrap a bit too much as mag won't drop free. I fixed it by boiling the frame and putting a mag in the magwell with duct tape on the spots it was sticking to "stretch' the frame. After stippling its sticky again. Boiling it again now to see if I can fix it. Still have to clean up the sanding marks of a few spots and polish it up. Feedback would be appreciated. http://i342.photobucket.com/albums/o434/moose00015/20151115_105404_zpsc0rbjcyy.jpg http://i342.photobucket.com/albums/o434/moose00015/20151115_105415_zpsmz3lcshj.jpg http://i342.photobucket.com/albums/o434/moose00015/20151115_105425_zpsul4pkf3n.jpg http://i342.photobucket.com/albums/o434/moose00015/20151115_105444_zpscbvjoqo5.jpg How did you accomplish the gas pedal/accelerator cuts? |
|
|
|
|
[Last Edit: SuperMoose]
[#25]
Originally Posted By TheTacticalCoyote:
How did you accomplish the gas pedal/accelerator cuts? Originally Posted By TheTacticalCoyote:
Originally Posted By SuperMoose:
My first run at it. I did copy Agency's design as I lack originality Didn't practice on anything. Just took the wood burner to the plastic and away I went. I did reduce the backstrap a bit too much as mag won't drop free. I fixed it by boiling the frame and putting a mag in the magwell with duct tape on the spots it was sticking to "stretch' the frame. After stippling its sticky again. Boiling it again now to see if I can fix it. Still have to clean up the sanding marks of a few spots and polish it up. Feedback would be appreciated. http://i342.photobucket.com/albums/o434/moose00015/20151115_105404_zpsc0rbjcyy.jpg http://i342.photobucket.com/albums/o434/moose00015/20151115_105415_zpsmz3lcshj.jpg http://i342.photobucket.com/albums/o434/moose00015/20151115_105425_zpsul4pkf3n.jpg http://i342.photobucket.com/albums/o434/moose00015/20151115_105444_zpscbvjoqo5.jpg How did you accomplish the gas pedal/accelerator cuts? I took a straight edge and drew the dividing line with a pencil. Then I hit the area with a dremel and sanding drum to pull off a good amount of material. Then I followed up with sandpaper over a file to make it even (just because I didn't have a small piece of wood that would work). Did that in varying grits until it got mostly smooth. There are one or two gouges where I hit it a little deep with the initial sand that I'm going to try to touch up. I really just kind of took a stab at it. |
|
|
|
USA
|
[#26]
|
|
|
|
[#27]
|
|
|
|
|
[#28]
|
|
|
|
|
[#29]
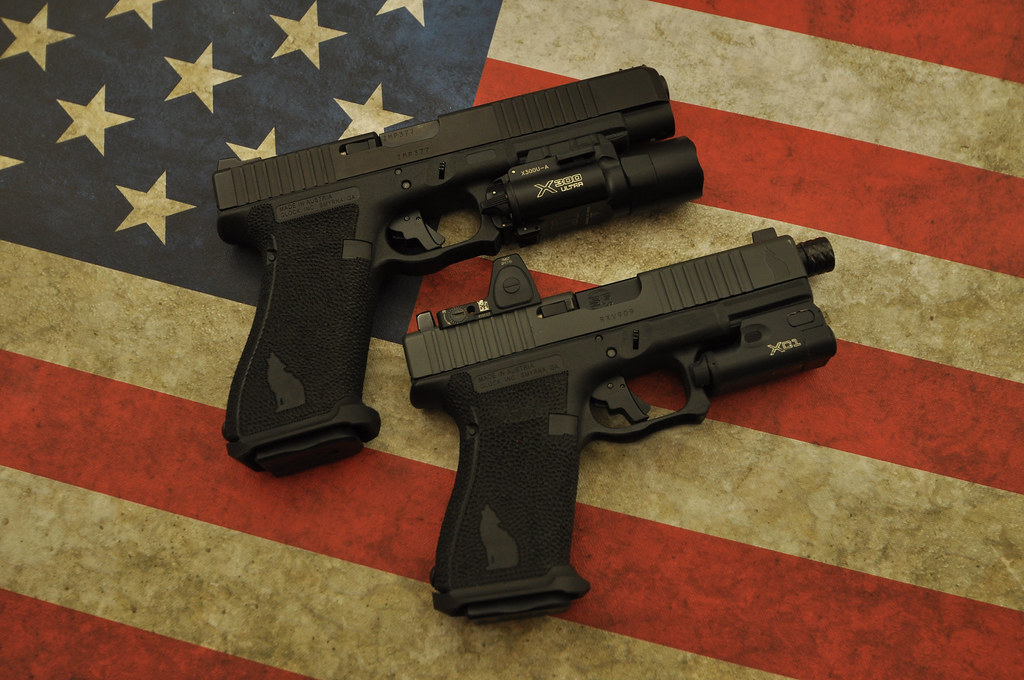
Originally Posted By TheTacticalCoyote:
<a href="https://flic.kr/p/AR5mWT" target="_blank">https://farm1.staticflickr.com/760/22871489327_2de3aacc41_b.jpg</a>Glocks by Two Sierra, on Flickr Damn those are sexy. |
|
|
|
|
[#30]
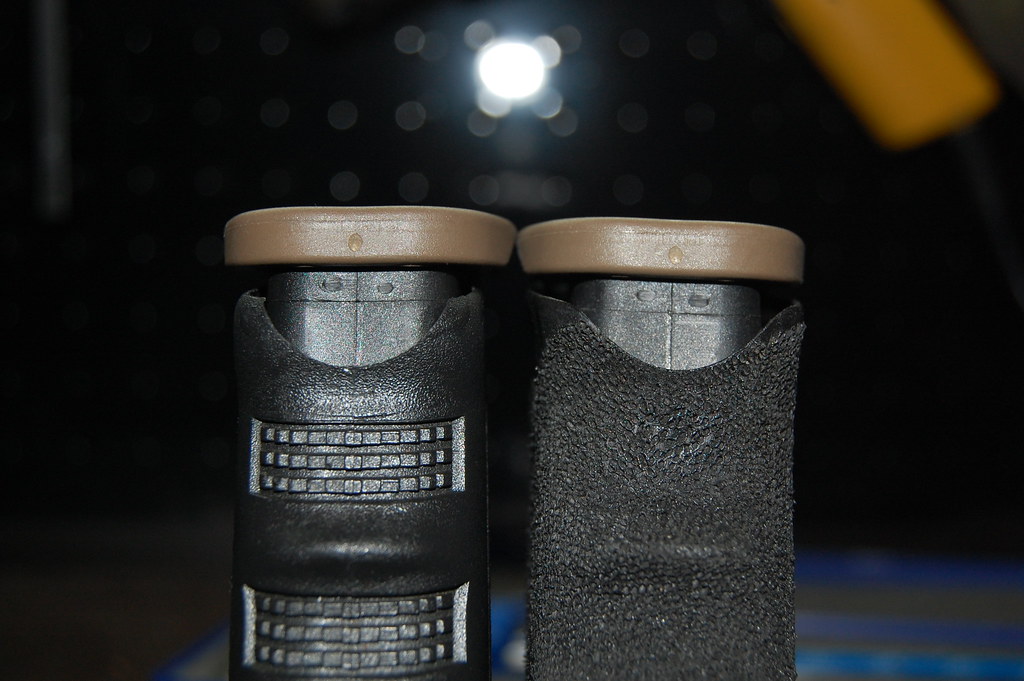
I really like GNP Tactical and Tactical Texture
 |
|
|
|
NC, USA
|
[#31]
Originally Posted By bantis:
I really like GNP Tactical and Tactical Texture <a href="http://s1131.photobucket.com/user/pantis556/media/2573c65f-a784-4961-8dfd-022ea999f417_zpsurqhkbjo.png.html" target="_blank">http://i1131.photobucket.com/albums/m559/pantis556/2573c65f-a784-4961-8dfd-022ea999f417_zpsurqhkbjo.png</a> Looks aggressive, I like it. Wonder how much smoother it gets after the "EDC finish?" |
|
|
|
[#32]
Originally Posted By FullMetalAR: Looks aggressive, I like it. Wonder how much smoother it gets after the "EDC finish?" Originally Posted By FullMetalAR: Originally Posted By bantis: I really like GNP Tactical and Tactical Texture <a href="http://s1131.photobucket.com/user/pantis556/media/2573c65f-a784-4961-8dfd-022ea999f417_zpsurqhkbjo.png.html" target="_blank">http://i1131.photobucket.com/albums/m559/pantis556/2573c65f-a784-4961-8dfd-022ea999f417_zpsurqhkbjo.png</a> Looks aggressive, I like it. Wonder how much smoother it gets after the "EDC finish?" No idea. Their website is not informative at all last time a looked. Started following them on IG |
|
|
|
LA, USA
|
[#33]
Before and after:

Had to strip the spray paint off the frame, milled some slide cuts, added some Dawson Precision sights, then finished in our in-house black phosphate. (Still has heavy oil in the corners and all from after being phosphated.) Some others that got phosphated yesterday. Glock 34 with some major slide lightening and stippled the grip, a Glock 21 we milled for an RMR and added front cocking serrations, and the ugly duck Glock 23 we transformed.: 
|
|
|
USA
|
[#34]
|
|
|
|
[#35]
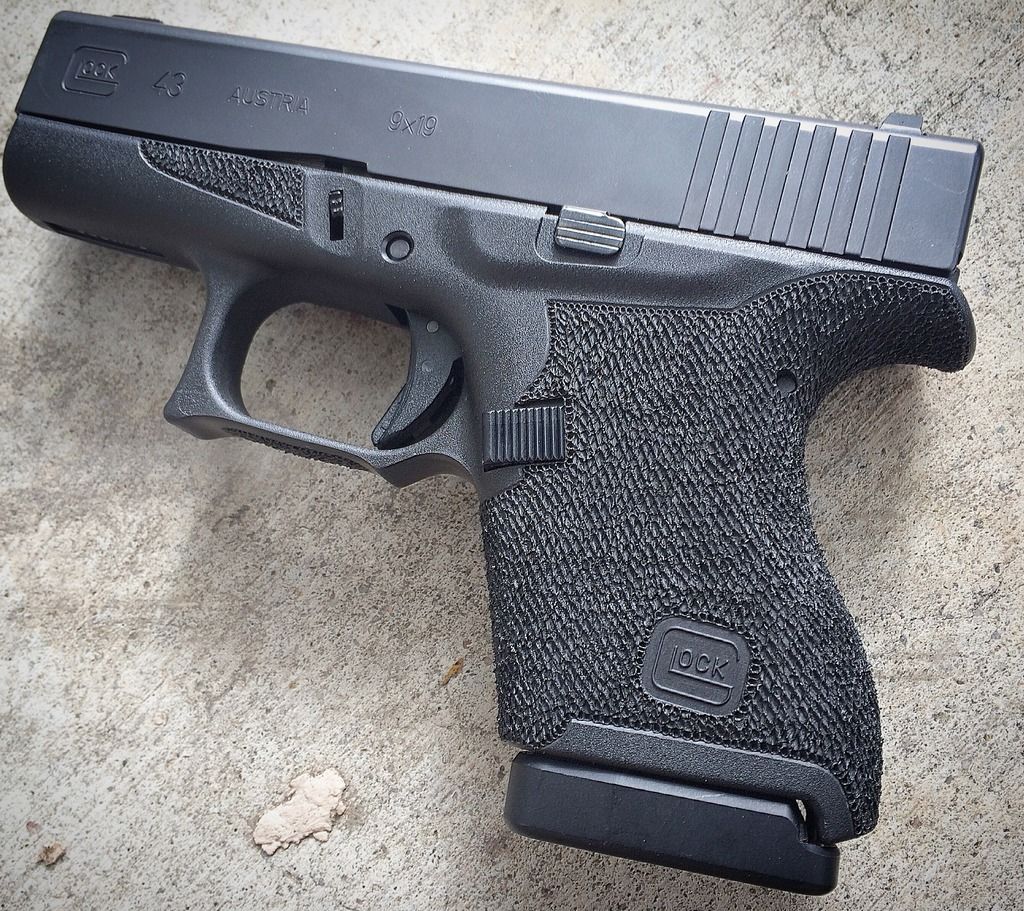
Originally Posted By Maiden316:
Glock 43 just finished up <a href="http://s1382.photobucket.com/user/Maiden316/media/Mobile%20Uploads/image_zpsndmrrcco.jpeg.html" target="_blank">http://i1382.photobucket.com/albums/ah270/Maiden316/Mobile%20Uploads/image_zpsndmrrcco.jpeg</a> How are you getting that hard edge above the small dot border? |
|
|
|
TX, USA
|
[#36]
I came in here expecting to have some laughs but you guys do some clean work! Skills are evident.
|
|
|
|
[#37]
Reformed my stippling a little, 3mm screwdriver tip made a nice, aggressive pattern that doesn't shred my fat belly skin.

|
|
|
|
OR, USA
|
[#38]
I see a lot of people doing some work under the trigger guard on the outside, but has anyone done work inside of the trigger guard to allow for a thicker gloved finger to squeeze in? Just curious as I am finding that to be an issue with the cold weather. If I wear a glove that actually keeps my hand warm, I move the trigger rearward on insertion, not enough to fire, but takes away that sliver of possibly real life trigger safety, or perhaps it's all mental.
|
|
|
|
[#39]
Originally Posted By clee109:
I see a lot of people doing some work under the trigger guard on the outside, but has anyone done work inside of the trigger guard to allow for a thicker gloved finger to squeeze in? Just curious as I am finding that to be an issue with the cold weather. If I wear a glove that actually keeps my hand warm, I move the trigger rearward on insertion, not enough to fire, but takes away that sliver of possibly real life trigger safety, or perhaps it's all mental. I have only done some smoothing of mold lines and the like, nothing crazy. There is some material to remove, obviously, but I don't think you would have enough to meaningfully do the inside and outside, except for opening up the inside along the front and bottom and then the trigger to frame undercut. Could still get rid of the front indexing nubbin if you wanted in pretty much any case. |
|
|
|
|
[#40]
Originally Posted By clee109: I see a lot of people doing some work under the trigger guard on the outside, but has anyone done work inside of the trigger guard to allow for a thicker gloved finger to squeeze in? Just curious as I am finding that to be an issue with the cold weather. If I wear a glove that actually keeps my hand warm, I move the trigger rearward on insertion, not enough to fire, but takes away that sliver of possibly real life trigger safety, or perhaps it's all mental. That's not optimal. |
|
|
|
|
[#41]

No, no it's not. |
|
|
|
ID, USA
|
[Last Edit: SSVi]
[#42]


SSVi Signature Series Glock19 w/RMR. Alright I give up. How the hell do you post an image and have it actually show the IMAGE. |
|
|
USA
|
[#43]
Originally Posted By SSVi:
http://imgur.com/0vQQYWth.jpg http://i.imgur.com/wMsrUd9h.jpg http://i.imgur.com/xFtFXpWh.jpg SSVi Signature Series Glock19 w/RMR. Alright I give up. How the hell do you post an image and have it actually show the IMAGE. Easiest way is to upload to photobucket and copy "web img" link from there and paste it. Otherwise do this (without spaces) [ IMG ] link [ / IMG ] |
|
|
USA
|
[#44]
|
|
|
|
[#45]
Originally Posted By SSVi:
http://imgur.com/0vQQYWth.jpg http://i.imgur.com/wMsrUd9h.jpg http://i.imgur.com/xFtFXpWh.jpg SSVi Signature Series Glock19 w/RMR. Alright I give up. How the hell do you post an image and have it actually show the IMAGE. There he got it. Great work from the master! |
|
|
|
OR, USA
|
[#46]
Originally Posted By Hank:
I have only done some smoothing of mold lines and the like, nothing crazy. There is some material to remove, obviously, but I don't think you would have enough to meaningfully do the inside and outside, except for opening up the inside along the front and bottom and then the trigger to frame undercut. Could still get rid of the front indexing nubbin if you wanted in pretty much any case. Originally Posted By Hank:
Originally Posted By clee109:
I see a lot of people doing some work under the trigger guard on the outside, but has anyone done work inside of the trigger guard to allow for a thicker gloved finger to squeeze in? Just curious as I am finding that to be an issue with the cold weather. If I wear a glove that actually keeps my hand warm, I move the trigger rearward on insertion, not enough to fire, but takes away that sliver of possibly real life trigger safety, or perhaps it's all mental. I have only done some smoothing of mold lines and the like, nothing crazy. There is some material to remove, obviously, but I don't think you would have enough to meaningfully do the inside and outside, except for opening up the inside along the front and bottom and then the trigger to frame undercut. Could still get rid of the front indexing nubbin if you wanted in pretty much any case. 
|
|
|
NC, USA
|
[#47]
Originally Posted By clee109:
not both sides, just do the same relief people are doing for the support hand, but Inside the trigger guard as opposed to outside of it allowing more room for a gloved finger. As to the other comments, it's less than ideal
Originally Posted By clee109:
Originally Posted By Hank:
Originally Posted By clee109:
I see a lot of people doing some work under the trigger guard on the outside, but has anyone done work inside of the trigger guard to allow for a thicker gloved finger to squeeze in? Just curious as I am finding that to be an issue with the cold weather. If I wear a glove that actually keeps my hand warm, I move the trigger rearward on insertion, not enough to fire, but takes away that sliver of possibly real life trigger safety, or perhaps it's all mental. I have only done some smoothing of mold lines and the like, nothing crazy. There is some material to remove, obviously, but I don't think you would have enough to meaningfully do the inside and outside, except for opening up the inside along the front and bottom and then the trigger to frame undercut. Could still get rid of the front indexing nubbin if you wanted in pretty much any case.
Agency takes a little bit of meat out of the inside of their trigger guards I believe, the only ones that I know of. |
|
|
CA, USA
|
[#48]
|
|
|
|
[#49]
I want my 19 cut to use 26 mags.
|
|
|
|
MI, USA
|
[#50]
Originally Posted By clee109:
I see a lot of people doing some work under the trigger guard on the outside, but has anyone done work inside of the trigger guard to allow for a thicker gloved finger to squeeze in? Just curious as I am finding that to be an issue with the cold weather. If I wear a glove that actually keeps my hand warm, I move the trigger rearward on insertion, not enough to fire, but takes away that sliver of possibly real life trigger safety, or perhaps it's all mental. U could grind off the entire guard and rivet on a custom alloy one. Might look cool actually. |
|
|
 Win a FREE Membership!
Sign up for the ARFCOM weekly newsletter and be entered to win a free ARFCOM membership. One new winner* is announced every week!
You will receive an email every Friday morning featuring the latest chatter from the hottest topics, breaking news surrounding legislation, as well as exclusive deals only available to ARFCOM email subscribers.

AR15.COM is the world's largest firearm community and is a gathering place for firearm enthusiasts of all types.
From hunters and military members, to competition shooters and general firearm enthusiasts, we welcome anyone who values and respects the way of the firearm.

Subscribe to our monthly Newsletter to receive firearm news, product discounts from your favorite Industry Partners, and more.
Copyright © 1996-2024 AR15.COM LLC. All Rights Reserved.
Any use of this content without express written consent is prohibited.
AR15.Com reserves the right to overwrite or replace any affiliate, commercial, or monetizable links, posted by users, with our own.