|
[#1]
Originally Posted By edekalil: Thanks, but it sure is mess to clean up. Working on that right now. Thinking of making it a pistol but just got to figure the laws on it here in MS. use a shop vac when milling, there's almost no mess then. |
|
|
|
CA, USA
|
[Last Edit: Baldtrucker]
[#2]
My trigger pocket walls are grainy. Smooth but grainy. Still looks sharp. But is that minor grain to be expected. I didnt use oil or a vacume. I just dumped the dust out occasionally and went slow. It took me iver an hour cause i went so slow.
|
|
|
|
[#3]
When I am milling I always have the shop vac going, keeps the mess pretty much cleaned up and I don't end up with chips on me and on the floor where they end up getting tracked all over the place!
|
|
|
|
MS, USA
|
[Last Edit: edekalil]
[#4]
I'll for sure use a shop vac next time with that copper pipe adaptor. I was just impatient. I had to go slow or cut shallower depths so it took a while. Ya have to make very sure the bit is very tight and your router depth does not creep down or drop. You'll feel it chatter if it does be ready to cut it off and do not remove it before it stops. As well don't be in a hurry unplug the router before checking or doing any adjustments between cuts. BE SAFE!
Anyway thanks it was fun so far. Just wondering what cutting lube you use or not when doing yours. |
|
|
|
[#5]
Originally Posted By edekalil: Just wondering what cutting lube you use or not when doing yours. Don't use any, it's just going to make more of a mess than it's worth if you're using a router. On an actual mill I'd probably do it. |
|
|
|
MS, USA
|
[Last Edit: edekalil]
[#6]
|
|
|
CA, USA
|
[Last Edit: Baldtrucker]
[#7]
That looks to be either the detent hole on safty or the lower reciever. I love that color. Maybe on my 10.5 inch ill go that color.
|
|
|
MS, USA
|
[#8]
Tryed two new safety switches from different psa lpk and it was the same. The lower is an Anderson 80% I bought about a year ago it's still in the white.
|
|
|
TX, USA
|
[#9]
Originally Posted By edekalil:
Tryed two new safety switches from different psa lpk and it was the same. The lower is an Anderson 80% I bought about a year ago it's still in the white. I don't think you did anything wrong at all. I think Anderson drilled the selector detent off a smidge. I've heard that they have had some tolerance issues like that. That said, I wouldn't worry about it too much, it should be 100% functional, |
|
|
|
[#10]
Originally Posted By edekalil:
I'll for sure use a shop vac next time with that copper pipe adaptor. I was just impatient. I had to go slow or cut shallower depths so it took a while. Ya have to make very sure the bit is very tight and your router depth does not creep down or drop. You'll feel it chatter if it does be ready to cut it off and do not remove it before it stops. As well don't be in a hurry unplug the router before checking or doing any adjustments between cuts. BE SAFE! Anyway thanks it was fun so far. Just wondering what cutting lube you use or not when doing yours. I just use a couple of squirts of WD-40 everyonce in a while, works fine. |
|
|
|
TX, USA
|
[#11]
Originally Posted By DaveP1:
I just use a couple of squirts of WD-40 everyonce in a while, works fine. Originally Posted By DaveP1:
Originally Posted By edekalil:
I'll for sure use a shop vac next time with that copper pipe adaptor. I was just impatient. I had to go slow or cut shallower depths so it took a while. Ya have to make very sure the bit is very tight and your router depth does not creep down or drop. You'll feel it chatter if it does be ready to cut it off and do not remove it before it stops. As well don't be in a hurry unplug the router before checking or doing any adjustments between cuts. BE SAFE! Anyway thanks it was fun so far. Just wondering what cutting lube you use or not when doing yours. I just use a couple of squirts of WD-40 everyonce in a while, works fine. WD-40 is probably better than nothing... but it isn't cutting fluid. I have been using CRC cutting fluid you can buy at Harbor Freight. It isn't exactly the right thing either as it is mainly intended for threading but it is probably closer than WD-40. |
|
|
VA, USA
|
[#12]
Originally Posted By SoftwareJanitor:
I don't think you did anything wrong at all. I think Anderson drilled the selector detent off a smidge. I've heard that they have had some tolerance issues like that. That said, I wouldn't worry about it too much, it should be 100% functional, Originally Posted By SoftwareJanitor:
Originally Posted By edekalil:
Tryed two new safety switches from different psa lpk and it was the same. The lower is an Anderson 80% I bought about a year ago it's still in the white. I don't think you did anything wrong at all. I think Anderson drilled the selector detent off a smidge. I've heard that they have had some tolerance issues like that. That said, I wouldn't worry about it too much, it should be 100% functional, Interesting -- my first two lowers had the detent plunger hole offset a similar amount to the other side of the safety hole, such that the Fire position is slightly to the left of vertical (I also tried two different safety levers). I'm not convinced it's the plunger hole being mis-drilled, though, because the milling on most of these lowers appears to be pretty darn precise everywhere else. I'm still working out whether the issue is with the lower, the jig or me. FWIW, Modulus has been very responsive to my notes -- solid customer service experience to date. |
|
|
|
[#13]
Originally Posted By SoftwareJanitor:
WD-40 is probably better than nothing... but it isn't cutting fluid. I have been using CRC cutting fluid you can buy at Harbor Freight. It isn't exactly the right thing either as it is mainly intended for threading but it is probably closer than WD-40. Originally Posted By SoftwareJanitor:
Originally Posted By DaveP1:
Originally Posted By edekalil:
I'll for sure use a shop vac next time with that copper pipe adaptor. I was just impatient. I had to go slow or cut shallower depths so it took a while. Ya have to make very sure the bit is very tight and your router depth does not creep down or drop. You'll feel it chatter if it does be ready to cut it off and do not remove it before it stops. As well don't be in a hurry unplug the router before checking or doing any adjustments between cuts. BE SAFE! Anyway thanks it was fun so far. Just wondering what cutting lube you use or not when doing yours. I just use a couple of squirts of WD-40 everyonce in a while, works fine. WD-40 is probably better than nothing... but it isn't cutting fluid. I have been using CRC cutting fluid you can buy at Harbor Freight. It isn't exactly the right thing either as it is mainly intended for threading but it is probably closer than WD-40. I use cutting fluid when I am milling steel, I really have not found a whole lot of need for cutting fluid where working on an 80% lower, if your mills are sharp, they cut pretty easy, you need to maintain your speeds and feeds correctly, but I figured the WD doesn't hurt anything. I know a lot of guys that are milling aluminum and don't use any fluid, my partner who has one of the largest machine shops in the state of Washington often times just mills without fluid when it is aluminum. |
|
|
|
USA
|
[#14]
I was searching for the proper cutting fluid for aluminum on the net a couple of weeks ago. One site suggested using kerosene, (WD-40) has kerosene in its formulation. Someone else suggested using Ed's Red, which is kerosene, Dexron II, mineral spirits, and acetone.
A search on Amazon: cutting fluid aluminum, shows various fluids: CRC, Tap Magic, etc. I have yet to do my first 80%, but I'm going to try the Ed's Red, since I have a small batch I made years ago. I also have kerosene, that I may try on a later lower. If I remember, I'll post my comments about each fluid at a later date. |
|
|
|
[#15]
Originally Posted By Condition_1:
I was searching for the proper cutting fluid for aluminum on the net a couple of weeks ago. One site suggested using kerosene, (WD-40) has kerosene in its formulation. Someone else suggested using Ed's Red, which is kerosene, Dexron II, mineral spirits, and acetone. A search on Amazon: cutting fluid aluminum, shows various fluids: CRC, Tap Magic, etc. I have yet to do my first 80%, but I'm going to try the Ed's Red, since I have a small batch I made years ago. I also have kerosene, that I may try on a later lower. If I remember, I'll post my comments about each fluid at a later date. From my experience, most anything will work. I don't think you can go wrong. I typically just use WD-40 since it doesn't smell like used rear-end fluid and is always sitting in my garage. |
|
|
|
|
[#16]
So I finished milling out the FCG pocket on my first 80% lower using the Modulus HD jig. I'm not too mechanically inclined so I was kind of worried about this project and how much I'd jack up but it was pretty damn easy. I just followed Modulus' directions and went slow. Really slow going off of the times posted around here. I think I spent a total of 10 hours or so over 2 days.


I do have a question though. What did I do to cause those horizontal lines along the walls of the receiver? Was I just pushing too hard against the sides of the jig? No big deal, especially after I have the lower anodized; I'm just curious. Anyway, I don't know if I'd call this project fun, exactly, but it was much easier than I was anticipating. Props to Modulus for a great jig that even a dummy like me can use. 
|
|
|
|
VA, USA
|
[#17]
Originally Posted By mneblett:
Interesting -- my first two lowers had the detent plunger hole offset a similar amount to the other side of the safety hole, such that the Fire position is slightly to the left of vertical (I also tried two different safety levers). I'm not convinced it's the plunger hole being mis-drilled, though, because the milling on most of these lowers appears to be pretty darn precise everywhere else. I'm still working out whether the issue is with the lower, the jig or me. FWIW, Modulus has been very responsive to my notes -- solid customer service experience to date. Originally Posted By mneblett:
Originally Posted By SoftwareJanitor:
Originally Posted By edekalil:
Tryed two new safety switches from different psa lpk and it was the same. The lower is an Anderson 80% I bought about a year ago it's still in the white. I don't think you did anything wrong at all. I think Anderson drilled the selector detent off a smidge. I've heard that they have had some tolerance issues like that. That said, I wouldn't worry about it too much, it should be 100% functional, Interesting -- my first two lowers had the detent plunger hole offset a similar amount to the other side of the safety hole, such that the Fire position is slightly to the left of vertical (I also tried two different safety levers). I'm not convinced it's the plunger hole being mis-drilled, though, because the milling on most of these lowers appears to be pretty darn precise everywhere else. I'm still working out whether the issue is with the lower, the jig or me. FWIW, Modulus has been very responsive to my notes -- solid customer service experience to date. I should have followed up on this sooner -- the Modulus HD jig is spot-on. The problem was my using too much painter's tape all over the lower -- 2-3 layers of 0.0045" tape adds up to a displaced safety lever hole. My most recent billet lower came out essentially perfect. So, another 100% endorsement of the HD jig! |
|
|
TX, USA
|
[#18]
Originally Posted By mneblett:
I should have followed up on this sooner -- the Modulus HD jig is spot-on. The problem was my using too much painter's tape all over the lower -- 2-3 layers of 0.0045" tape adds up to a displaced safety lever hole. My most recent billet lower came out essentially perfect. So, another 100% endorsement of the HD jig! Originally Posted By mneblett:
Originally Posted By mneblett:
Originally Posted By SoftwareJanitor:
Originally Posted By edekalil:
Tryed two new safety switches from different psa lpk and it was the same. The lower is an Anderson 80% I bought about a year ago it's still in the white. I don't think you did anything wrong at all. I think Anderson drilled the selector detent off a smidge. I've heard that they have had some tolerance issues like that. That said, I wouldn't worry about it too much, it should be 100% functional, Interesting -- my first two lowers had the detent plunger hole offset a similar amount to the other side of the safety hole, such that the Fire position is slightly to the left of vertical (I also tried two different safety levers). I'm not convinced it's the plunger hole being mis-drilled, though, because the milling on most of these lowers appears to be pretty darn precise everywhere else. I'm still working out whether the issue is with the lower, the jig or me. FWIW, Modulus has been very responsive to my notes -- solid customer service experience to date. I should have followed up on this sooner -- the Modulus HD jig is spot-on. The problem was my using too much painter's tape all over the lower -- 2-3 layers of 0.0045" tape adds up to a displaced safety lever hole. My most recent billet lower came out essentially perfect. So, another 100% endorsement of the HD jig! You are not the first person who has run into problems with too much tape. The instructions should probably remind people that just a little tape in critical areas is probably all it takes to prevent scratches. I usually don't use any tape and I haven't had any issues with the jig leaving marks on my lowers. |
|
|
ME, USA
|
[#19]
Originally Posted By mneblett:
I should have followed up on this sooner -- the Modulus HD jig is spot-on. The problem was my using too much painter's tape all over the lower -- 2-3 layers of 0.0045" tape adds up to a displaced safety lever hole. My most recent billet lower came out essentially perfect. So, another 100% endorsement of the HD jig! Thank You. I'm glad that we were able to get you squared away quickly. Regards, Max |
|
|
|
[#20]
I'm finally getting around to using my HD Jig. I started yesterday. The jig with 80% lower is clamped securely in a bench vise on my workbench. I rigged my shop vac like others did in this thread so that it constantly sucks the metal chips out while drilling. I am using a handheld Harbor Freight corded drill for drilling the holes before routering. I started with the 'Speed Drill Kit' and it's 1/4" bit. Those all went well. Next up was the 'B' holes using the 3/8" bit. Seconds after I gently started drilling the first hole the bit suddenly snapped. That was the HSS bit Modulus supplies. I then went to Home Depot and bought two Milwaukee Cobalt 3/8" bits. Within 5 minutes of starting back to drilling again I had snapped both of those bits also. Everything seemed to be going fine, then - wham! the bit just caught and snapped.
Pics: 

I had very little downward pressure on the drill, and I was using slow to moderate speed. I was also using cutting oil and I lifted the drill slightly to suck out the chips about every 7-10 seconds while drilling. What am I doing wrong that I keep snapping these 3/8" bits?? |
|
|
|
|
[#21]
You are drifting just enough to allow the cutting edge on the bit to dig in at a small angle, these are hard bits, which is great for staying sharp, but if they bind, they will break pretty quick, I have broke a lot of them over the years.
|
|
|
|
|
[#22]
Originally Posted By DaveP1: You are drifting just enough to allow the cutting edge on the bit to dig in at a small angle, these are hard bits, which is great for staying sharp, but if they bind, they will break pretty quick, I have broke a lot of them over the years. Yup, If you're going to use a hand drill you really should get the speed drill kit or rig up your own version of it. You can do it without it, but you better make sure your drill is as close to 90 degrees from the deck as possible. Using a combination square sitting next to the drill with the long end up you can drill surprisingly straight free hand. |
|
|
|
ME, USA
|
[#23]
Although a hand drill can be used, We strongly recommend using a drill press. As you have discovered it is difficult to keep a hand drill at exactly 90º.
|
|
|
|
[#24]
Originally Posted By K1rodeoboater:
Yup, If you're going to use a hand drill you really should get the speed drill kit or rig up your own version of it. You can do it without it, but you better make sure your drill is as close to 90 degrees from the deck as possible. Using a combination square sitting next to the drill with the long end up you can drill surprisingly straight free hand. Originally Posted By K1rodeoboater:
Originally Posted By DaveP1:
You are drifting just enough to allow the cutting edge on the bit to dig in at a small angle, these are hard bits, which is great for staying sharp, but if they bind, they will break pretty quick, I have broke a lot of them over the years. Yup, If you're going to use a hand drill you really should get the speed drill kit or rig up your own version of it. You can do it without it, but you better make sure your drill is as close to 90 degrees from the deck as possible. Using a combination square sitting next to the drill with the long end up you can drill surprisingly straight free hand. I was using the Modulus Speed Drill kit. |
|
|
|
|
[#25]
All drill bits can break, and we humans can't hold things 100% steady no matter what we think we can do, they broke because they canted on you, things that are designed to be straight, don't like to be bent, especially under load.
|
|
|
|
|
[#26]
Originally Posted By DaveP1:
All drill bits can break, and we humans can't hold things 100% steady no matter what we think we can do, they broke because they canted on you, things that are designed to be straight, don't like to be bent, especially under load. ^^^ He's right ya know. It could get dangerous fast and it requires a bit of experience to know how fast you can go, but generally going faster will cut smaller chips therefore transferring less torque on the bit. That is provided you are keeping everything as straight as possible. Careful though, the faster you run tools, the faster things go wrong and usually exaggerates the damage. Did I say be careful? |
|
|
|
|
[#27]
I stopped being lazy and got out my drill press that I've had packed away in the corner of my garage. Holy crap, it was so much easier than the hand drill! All the 3/8" holes are drilled in just a couple minutes, like a hot knife through butter. Tomorrow I'll start the routering. Thanks fellas!
|
|
|
|
FL, USA
|
[#28]
Well, I am finally about ready to attempt my first 80% lower but I was wondering if anyone can tell me if the HD Router Jig will work with the Iconic Industries lowers?
http://www.iconicindustriesinc.com/#!15-style-/c1bhd They had ran a sale/special and I grabbed one and want to make sure I'll be able to complete it with the Modulus HD setup. I did some searching and came up with nothing to help so figured since this thread is so active someone in here should be able to help. Any insight is greatly appreciated. Thanks in advance. |
|
|
ME, USA
|
[#29]
Originally Posted By mre1974:
Well, I am finally about ready to attempt my first 80% lower but I was wondering if anyone can tell me if the HD Router Jig will work with the Iconic Industries lowers? Yes it will. The side plates are cut specifically to fit with the oversize magwells on the iconics |
|
|
FL, USA
|
[#30]
Originally Posted By maxxx93:
Yes it will. The side plates are cut specifically to fit with the oversize magwells on the iconics Originally Posted By maxxx93:
Originally Posted By mre1974:
Well, I am finally about ready to attempt my first 80% lower but I was wondering if anyone can tell me if the HD Router Jig will work with the Iconic Industries lowers? Yes it will. The side plates are cut specifically to fit with the oversize magwells on the iconics AWESOME, Thanks for confirming. Placing an order for one and the finishing bits set right now. I have an ares armor billet 80% to practice on before doing the Icon. Pretty excited to do this. |
|
|
MS, USA
|
[#31]
Originally Posted By SoftwareJanitor:
You are not the first person who has run into problems with too much tape. The instructions should probably remind people that just a little tape in critical areas is probably all it takes to prevent scratches. I usually don't use any tape and I haven't had any issues with the jig leaving marks on my lowers. Originally Posted By SoftwareJanitor:
Originally Posted By mneblett:
Originally Posted By mneblett:
Originally Posted By SoftwareJanitor:
Originally Posted By edekalil:
Tryed two new safety switches from different psa lpk and it was the same. The lower is an Anderson 80% I bought about a year ago it's still in the white. I don't think you did anything wrong at all. I think Anderson drilled the selector detent off a smidge. I've heard that they have had some tolerance issues like that. That said, I wouldn't worry about it too much, it should be 100% functional, Interesting -- my first two lowers had the detent plunger hole offset a similar amount to the other side of the safety hole, such that the Fire position is slightly to the left of vertical (I also tried two different safety levers). I'm not convinced it's the plunger hole being mis-drilled, though, because the milling on most of these lowers appears to be pretty darn precise everywhere else. I'm still working out whether the issue is with the lower, the jig or me. FWIW, Modulus has been very responsive to my notes -- solid customer service experience to date. I should have followed up on this sooner -- the Modulus HD jig is spot-on. The problem was my using too much painter's tape all over the lower -- 2-3 layers of 0.0045" tape adds up to a displaced safety lever hole. My most recent billet lower came out essentially perfect. So, another 100% endorsement of the HD jig! You are not the first person who has run into problems with too much tape. The instructions should probably remind people that just a little tape in critical areas is probably all it takes to prevent scratches. I usually don't use any tape and I haven't had any issues with the jig leaving marks on my lowers. Ya I can see using to much tape might be an issue, I used no tape when I did my first one. |
|
|
OR, USA
|
[#32]
Having completed three 80% --> 100% lowers, I have a few suggestions (not previously mentioned in other posts) that might be of use by someone either just beginning one of these jobs or simply contemplating doing so. I also have a few photos that I'd like to include when I make these suggestions but I can't seem to figure out how to post images along with a written message. When I click on the image insertion icon (tool bar below) I'm asked for a URL to the image. Using the Properties of the image I then get the directory info regarding where I have the image stored but when I copy and paste this info into the request box it doesn't appear that the image is being retrieved. I say this because when I do a Preview of my message, no images appear which I can only interpret as the image having not been retrieved. Any assistance you can offer on how to post images to this forum would be greatly appreciated.
sleeper1428 |
|
|
|
[#33]
Originally Posted By sleeper1428:
Having completed three 80% --> 100% lowers, I have a few suggestions (not previously mentioned in other posts) that might be of use by someone either just beginning one of these jobs or simply contemplating doing so. I also have a few photos that I'd like to include when I make these suggestions but I can't seem to figure out how to post images along with a written message. When I click on the image insertion icon (tool bar below) I'm asked for a URL to the image. Using the Properties of the image I then get the directory info regarding where I have the image stored but when I copy and paste this info into the request box it doesn't appear that the image is being retrieved. I say this because when I do a Preview of my message, no images appear which I can only interpret as the image having not been retrieved. Any assistance you can offer on how to post images to this forum would be greatly appreciated. sleeper1428 you need to upload your images to a host site like photobucket first. |
|
|
|
TX, USA
|
[#34]
Originally Posted By brich2929:
you need to upload your images to a host site like photobucket first. Originally Posted By brich2929:
Originally Posted By sleeper1428:
Having completed three 80% --> 100% lowers, I have a few suggestions (not previously mentioned in other posts) that might be of use by someone either just beginning one of these jobs or simply contemplating doing so. I also have a few photos that I'd like to include when I make these suggestions but I can't seem to figure out how to post images along with a written message. When I click on the image insertion icon (tool bar below) I'm asked for a URL to the image. Using the Properties of the image I then get the directory info regarding where I have the image stored but when I copy and paste this info into the request box it doesn't appear that the image is being retrieved. I say this because when I do a Preview of my message, no images appear which I can only interpret as the image having not been retrieved. Any assistance you can offer on how to post images to this forum would be greatly appreciated. sleeper1428 you need to upload your images to a host site like photobucket first. This +1, you can't upload directly from your computer to arfcom because the forum software doesn't have a place to store and serve up the images. Photobucket or similar services will do that for you. |
|
|
|
[#35]
|
|
|
|
|
[#36]
I broke one of the flutes on the end mill when I was milling an 80% this last weekend. I know that Modulus sells spares, but is there another source for the same end mills for trim routers? Amazon, perhaps?
|
|
|
|
|
[#37]
Originally Posted By troy_v: I broke one of the flutes on the end mill when I was milling an 80% this last weekend. I know that Modulus sells spares, but is there another source for the same end mills for trim routers? Amazon, perhaps? It's about 9$ cheaper than the one Modulus sells. I don't know if Modulus recommends 3/4" length of cut or 1", but the one linked to is a 1". I've mentioned this end mill before and I got poo pooed for recommending a product that is not made in America but many cutting tools are not. And honestly, I have not had any better luck with the American made end mills over the foreign made ones. I'm not un-American-it's just my experience. |
|
|
|
|
[#38]
Originally Posted By alpharomeofifteen:
The cheapest place I have been able to find is here: http://www.mscdirect.com/product/details/60056785 It's about 9$ cheaper than the one Modulus sells. I don't know if Modulus recommends 3/4" length of cut or 1", but the one linked to is a 1". I've mentioned this end mill before and I got poo pooed for recommending a product that is not made in America but many cutting tools are not. And honestly, I have not had any better luck with the American made end mills over the foreign made ones. I'm not un-American-it's just my experience. Originally Posted By alpharomeofifteen:
Originally Posted By troy_v:
I broke one of the flutes on the end mill when I was milling an 80% this last weekend. I know that Modulus sells spares, but is there another source for the same end mills for trim routers? Amazon, perhaps? It's about 9$ cheaper than the one Modulus sells. I don't know if Modulus recommends 3/4" length of cut or 1", but the one linked to is a 1". I've mentioned this end mill before and I got poo pooed for recommending a product that is not made in America but many cutting tools are not. And honestly, I have not had any better luck with the American made end mills over the foreign made ones. I'm not un-American-it's just my experience. Thank you! |
|
|
|
AZ, USA
|
[#39]
I've completed 2 AR-15s and 1 308 with the older jigs. They have worked great. I hope they come out with an update kit for the new jig if it is possible. Modulus' customer service is the best I have seen in any industry.
|
|
|
|
[#40]
Originally Posted By troy_v:
Thank you! Originally Posted By troy_v:
Originally Posted By alpharomeofifteen:
Originally Posted By troy_v:
I broke one of the flutes on the end mill when I was milling an 80% this last weekend. I know that Modulus sells spares, but is there another source for the same end mills for trim routers? Amazon, perhaps? It's about 9$ cheaper than the one Modulus sells. I don't know if Modulus recommends 3/4" length of cut or 1", but the one linked to is a 1". I've mentioned this end mill before and I got poo pooed for recommending a product that is not made in America but many cutting tools are not. And honestly, I have not had any better luck with the American made end mills over the foreign made ones. I'm not un-American-it's just my experience. Thank you! The modulus one is 4 flute. The lowest price on the site you listed above for a 4 flute, 1 inch length of cut, 1/4 inch is just over $30 I found this on Amazon and everyone says its the same one Modulus sells and its $24: https://www.amazon.com/dp/B007BTPAZ8/ref=wl_it_dp_o_pC_nS_ttl?_encoding=UTF8&colid=E9QR8HWVTBXT&coliid=I17EDI62OKTS18 |
|
|
|
|
[#41]
Yep, I ordered that one from Amazon a couple weeks ago, and I can confirm it's the same as modulus sells.
|
|
|
|
MN, USA
|
[Last Edit: wtjosaas]
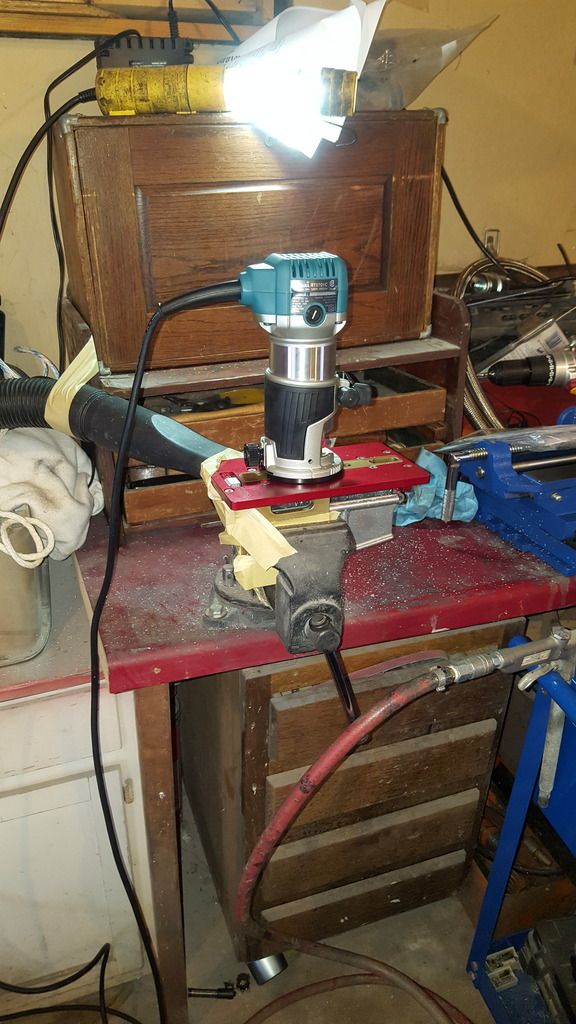
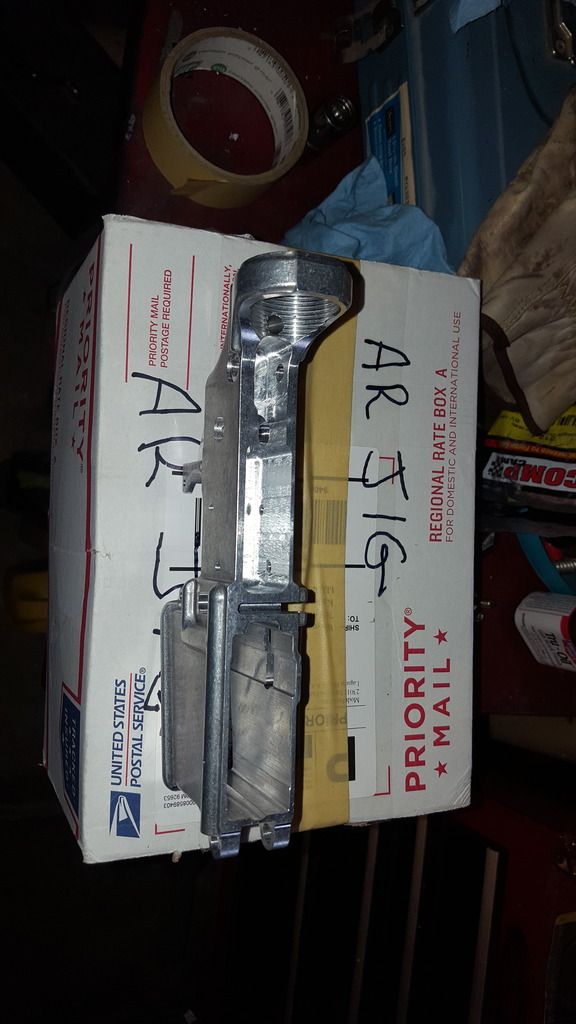
[#42]
My setup. Worked great. Lower looks good. Will put it together soon.
|
|
|
|
[#43]
Did we ever decide on what the best cutting fluid is?
I've looked at some different ones, and I can't decide. I do know that I'm not in favor of WD-40. |
|
|
|
|
[#44]
Originally Posted By rx4spd:
Did we ever decide on what the best cutting fluid is? I've looked at some different ones, and I can't decide. I do know that I'm not in favor of WD-40. This is what I use. It works well: https://www.amazon.com/gp/product/B0013J1UJW/ref=oh_aui_detailpage_o01_s00?ie=UTF8&psc=1 
|
|
|
|
MI, USA
|
[#45]
Just used a Modulus Arms jig to to my first 80% lower. Easy to set up, easy to use, bulletproof instructions on the website. Thanks for a great product, couldn't be happier!
|
|
|
ME, USA
|
[#46]
Originally Posted By AgingPunkRocker:
Just used a Modulus Arms jig to to my first 80% lower. Easy to set up, easy to use, bulletproof instructions on the website. Thanks for a great product, couldn't be happier! I am glad that you are pleased with it. Keep your eyes open for a couple of new items to be released for black friday sale |
|
|
|
[#47]
Originally Posted By maxxx93:
I am glad that you are pleased with it. Keep your eyes open for a couple of new items to be released for black friday sale Where should we be looking for this? Will you put notification on this thread? |
|
|
|
TX, USA
|
[#48]
Originally Posted By Cammer:
Where should we be looking for this? Will you put notification on this thread? Originally Posted By Cammer:
Originally Posted By maxxx93:
I am glad that you are pleased with it. Keep your eyes open for a couple of new items to be released for black friday sale Where should we be looking for this? Will you put notification on this thread? I would expect they'll post some kind of announcement here on this forum... But I'm also checking in frequently at: http://www.modulusarms.com/ |
|
|
|
[#49]
We just released our all new Heavy-Duty Universal AR-308/AR-10 80% Jig and our Billet AR-15 Lower Receiver
We are also having our annual Black Friday Deal! 15% Sitewide  [/CENTER] [/CENTER]
|
|
|
|
|
[#50]
I both love and hate you guys right now....
now I need to convince myself to do a bunch of AR-10s..... |
|
|
|
 Win a FREE Membership!
Sign up for the ARFCOM weekly newsletter and be entered to win a free ARFCOM membership. One new winner* is announced every week!
You will receive an email every Friday morning featuring the latest chatter from the hottest topics, breaking news surrounding legislation, as well as exclusive deals only available to ARFCOM email subscribers.

AR15.COM is the world's largest firearm community and is a gathering place for firearm enthusiasts of all types.
From hunters and military members, to competition shooters and general firearm enthusiasts, we welcome anyone who values and respects the way of the firearm.

Subscribe to our monthly Newsletter to receive firearm news, product discounts from your favorite Industry Partners, and more.
Copyright © 1996-2024 AR15.COM LLC. All Rights Reserved.
Any use of this content without express written consent is prohibited.
AR15.Com reserves the right to overwrite or replace any affiliate, commercial, or monetizable links, posted by users, with our own.


