|
Posted: 6/10/2014 9:29:05 AM EDT
Well as the title suggest's...this will be his first AR-15 lower scratch build:
It starts off as a 7075-T6 Billet 80% Ano. lower. Helped him do all the necessary prep work like: Layout work (using Dykem steel blue layout fluid),Precision adjustable fine beam laser edge/center finder, digital calipers, Starret machinist level, Digital angle finder/level, Depth micrometer, etc. Benchtop Milling Machine (Seig X2L class/LMS High Torque solid colum) with R8 collets...with all the necessary milling cutters (mostly 2 flute, suitable for milling AL and making small plunge cuts), etc. American Cobalt drill bits, etc. AR-15 jig mostly used for work holding and for spot drilling and location work for the hammer, trigger, and safety holes, etc. The JVC's progress pic below (sorry for crappy quality pics, poor lighting) ... 


More pics to follow as work progresses... |
|
|
|
[#1]
Nice! Not a lot of folks post in progress pics, thanks much. Keep 'em coming.
|
|
|
|
[#2]
Tagged so I can view it at home. I've been wanting to buy a small mill. I've got a bunch of 80% lowers laying around and I'm thinking I'll make one for each of my kids and use their names for the serial numbers.
|
|
|
|
[#3]
nice
|
|
|
|
[#4]
Quoted:
Tagged so I can view it at home. I've been wanting to buy a small mill. I've got a bunch of 80% lowers laying around and I'm thinking I'll make one for each of my kids and use their names for the serial numbers. Are you looking to adopt a son? |
|
|
|
[#5]
Way to go o.p.! Make me feel like a bad dad! Why you say? Because I brought my 11yr old a finished stripped lower for his 1st build?
but really nice way for son/dad time. We are atleast making our tool to do the build tho. Keep pics comiing we will be watching |
|
|
|
[#6]
good start! keep us updated!!
|
|
|
|
[#7]
Thanks guys for your Input...He has just turned 18 now, so we figured this will be a cool project for Son and Dad.
No doubt my older and younger daughters will want their own AR's in the colors of their choice (fashion-ista's of course), just because...My older daughter can shot cigarette butts at 25 paces with a rifle ! The younger one is more timid/shy, so a dedicated .22 LR AR would likely be more appropriate... Down the road at some point a 80% 1911 build project will be in the works for my children...(heck, most of them are now legally considered Adults !), man where does the time go...? Also, a AR-308 scratch build will likely be in the works very soon... I guess now is a good time as any to empty the long time AR-15 & AR-308 parts bin...and get everyone outdoors and away from the video games... http://www.youtube.com/watch?v=e1-Eu0YxhH4 I will post more pics as everything progresses along...If any of you guys are building AR 80's or plan on building one and are looking for advise please send me a email/IM or post in this thread, I will glad to help out if at all possible... Thanks. |
|
|
|
[#8]
Someone emailed me requesting Info./suggestions for a quality bench-top light/medium duty milling machine for under $2K delivered...My suggestion was this...
http://www.grizzly.com/products/g0759/images/ Best part is it comes with a nice quality DRO built Into the unit and comes with the stand...This may be my next Bench Top machine as well... While I would love to have a American made (real milling machine) like a Bridgeport or Clausing, they are just to big and heavy for a residential set-up and would normally require a dual phase 208 volt electrical hook-up/conversion, and then the cost even for a high quality used version is very pricey... |
|
|
|
[#9]
Quoted:
Someone emailed me requesting Info./suggestions for a quality bench-top light/medium duty milling machine for under $2K delivered...My suggestion was this... http://www.grizzly.com/products/g0759/images/ Best part is it comes with a nice quality DRO built Into the unit and comes with the stand...This may be my next Bench Top machine as well... While I would love to have a American made (real milling machine) like a Bridgeport or Clausing, they are just to big and heavy for a residential set-up and would normally require a dual phase 208 volt electrical hook-up/conversion, and then the cost even for a high quality used version is very pricey... I found that Grizzly just after I ordered my LMS HiTorque, at the time I almost wished I'd found it first but the additional cost was a considerable factor. I've since put that much or more into additional tooling and still don't have nearly enough. If anyone is on the fence though, the Grizzly is a bit more machine and already setup with the bench and DRO's would be my choice if it were a little closer $$ wise. So I suppose it comes down to that, but make the decision knowing that what ever you spend on the machine is only half the cost at best. Tooling adds up fast!! |
|
|
|
[#10]
I have a grizzly mill and its considered a baby bridgeport. I have a cheap dro for under 80 buck and a Shar's vice. It has been good to me. I also have a rf45 that I love. And a dyna myte cnc mill. Latly I have considered selling the grizzly only because I just need a little more spacecin my shop and since I have slightly more travel with the rf45 I also considered selling the dyna myte after I convert the rf45 to cnc.
Yes tooling adds up but discount machine on ebay has the best prices on very good quality parts I have seen in 22yrs of this trade. And since mscis close by I also buy from them when I gotta have now situation. And I have a collection of cutters I have gathered over the years. I also have a 7x12 mini lathe and a 14x40 lathe. I always had to borrow or ask to use someone else's tooling and machines, nothing like owning your own. imo the lms mill is a very nice mill and way better than a harbor freight mill. Grizzly mills are nice too but remember for the most part they are all made in the same factorys over seas. Op my sons 11yrs old and learning how to make metal chips. My daughter is 4 and last week we made her training wheels for her 1st dirt bike together. When my wife wanted to go shopping my daughter said no I am helping daddy! Lol. She even told grand ma that she was using a drill press and screwed the bolts in. Time does go by fast but enjoy it while we can! At least theirs the grandkids one day lol |
|
|
|
[#11]
Very nice.
|
|
|
|
[#12]
Quoted:
I found that Grizzly just after I ordered my LMS HiTorque, at the time I almost wished I'd found it first but the additional cost was a considerable factor. I've since put that much or more into additional tooling and still don't have nearly enough. If anyone is on the fence though, the Grizzly is a bit more machine and already setup with the bench and DRO's would be my choice if it were a little closer $$ wise. So I suppose it comes down to that, but make the decision knowing that what ever you spend on the machine is only half the cost at best. Tooling adds up fast!! Quoted:
Quoted:
Someone emailed me requesting Info./suggestions for a quality bench-top light/medium duty milling machine for under $2K delivered...My suggestion was this... http://www.grizzly.com/products/g0759/images/ Best part is it comes with a nice quality DRO built Into the unit and comes with the stand...This may be my next Bench Top machine as well... While I would love to have a American made (real milling machine) like a Bridgeport or Clausing, they are just to big and heavy for a residential set-up and would normally require a dual phase 208 volt electrical hook-up/conversion, and then the cost even for a high quality used version is very pricey... I found that Grizzly just after I ordered my LMS HiTorque, at the time I almost wished I'd found it first but the additional cost was a considerable factor. I've since put that much or more into additional tooling and still don't have nearly enough. If anyone is on the fence though, the Grizzly is a bit more machine and already setup with the bench and DRO's would be my choice if it were a little closer $$ wise. So I suppose it comes down to that, but make the decision knowing that what ever you spend on the machine is only half the cost at best. Tooling adds up fast!! It's always the tooling that is the largest chunk of the overall cost in running a milling machine or lathe or precision machine tool...I could not agree more, If let's say you buy a 2K$ milling machine, you can easily spend that much or more on the tooling (cutters, bits, vise, measuring tools of various types, cutting fluid, etc.). Your right on, the Grizzly bench top milling machine is very tempting as it comes with all the basics needed to produce accurately made parts without guessing if you made a reading error on your x, y, or z axis for example and potentially make a critical mistake and ruin your part... One of the biggest problems with the Seig X2/LMS HT mills seems to be the excessive amount of backlash on both the x and y axis, just makes things all that much harder to use...This I am sure goes for many of the Chinese made machines... A little progress was make today on the "lower" build today, not that much but it's getting there...will post some more pics soon/tonight... Thanks. |
|
|
|
[#13]
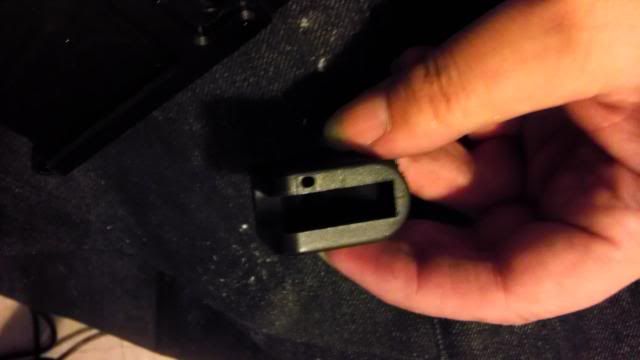
Getting there, FCP almost done...


|
|
|
|
[#14]
Looks nice. Are you going to connect the front and rear pocket, or leave them separate?
|
|
|
|
[#15]
Quoted:
Looks nice. Are you going to connect the front and rear pocket, or leave them separate? Excellent question, It was purposely left separated to add strength to the buffer tower area... Also, The rear lug pocket was milled to a depth of .525", as milling the pocket to .630" depth is absurdly deep and unnecessary...this again just adds additional strength to the buffer tower area... BTW the AR-10/AR-308 has the same lug pocket depth... This is going to be strictly a AR-15 semi-auto only build, so milling it to a mil-spec dims or to M-16 dims is pointless and It will never be used or converted to/for select-fire/full auto use, etc. One of the few places a AR-15/M-16 lower can fail (at least that I know of) is in the buffer tower area... Thanks. |
|
|
|
[#16]
looking very good. I'm officially impressed!
|
|
|
|
[#17]
Quoted:
looking very good. I'm officially impressed! Thanks Bainbridge, All the machine work will probably be done within the next day or two...stay tuned, more pics to follow. |
|
|
|
[#18]
Quoted:
Nice! Not a lot of folks post in progress pics, thanks much. Keep 'em coming. Very nice. |
|
|
|
[#19]
Op have you seen the scratched built upper and lower done? I googled for the ar prints and found the thread. Now thats dedication! And very nicely done! I see the 80% lowers but only raw uppers. Wish the make those with out the need of making special tooling to finish them.
My friend has the lms mill and like any new mill after the setup its soild! He used it for a year then did the cnc conversion. Its a soild machine imo. I was going to buy one but found my grizzly at a nice price. The owner brought it then decided he didnt have the time to learn. So I got a 3700 mill for 800! My rf45 was the same way. That owner brought it for 2900 and found he needed a cnc more so after 4 months and the fact his new mill was on its way I got it for 600 cause he needed the room.My 1st job in my shop paid out 1200 so it paid for its self. I buy tooling as I do jobs to help with costs. If I get a job that rrequires something specific I factor that in the quote. I showed my son this thread, said dad I can do that. Now he wants to save for a lower to do and transfer everything over. Today I got my text ingraving figured out in my mach 3. So I will be engraved his name and 2014 in his lower on the mag release side because he wants to always remember the year we did this. Mybe when we do a 80percenter you can give some advice lol |
|
|
|
[#20]
Quoted:
Op have you seen the scratched built upper and lower done? I googled for the ar prints and found the thread. Now thats dedication! And very nicely done! I see the 80% lowers but only raw uppers. Wish the make those with out the need of making special tooling to finish them. My friend has the lms mill and like any new mill after the setup its soild! He used it for a year then did the cnc conversion. Its a soild machine imo. I was going to buy one but found my grizzly at a nice price. The owner brought it then decided he didnt have the time to learn. So I got a 3700 mill for 800! My rf45 was the same way. That owner brought it for 2900 and found he needed a cnc more so after 4 months and the fact his new mill was on its way I got it for 600 cause he needed the room.My 1st job in my shop paid out 1200 so it paid for its self. I buy tooling as I do jobs to help with costs. If I get a job that rrequires something specific I factor that in the quote. I showed my son this thread, said dad I can do that. Now he wants to save for a lower to do and transfer everything over. Today I got my text ingraving figured out in my mach 3. So I will be engraved his name and 2014 in his lower on the mag release side because he wants to always remember the year we did this. Mybe when we do a 80percenter you can give some advice lol That's great, I bet it will keep both of you close for a long time...You really lucked out getting those machines for such good prices, well done. Wish I had the time and funds to do a CNC conversion or just buy a RTR CNC...How hard was it to learn the Mach 3 programming...? It seems to be one of the most popular CNC programs around... |
|
|
|
[#21]
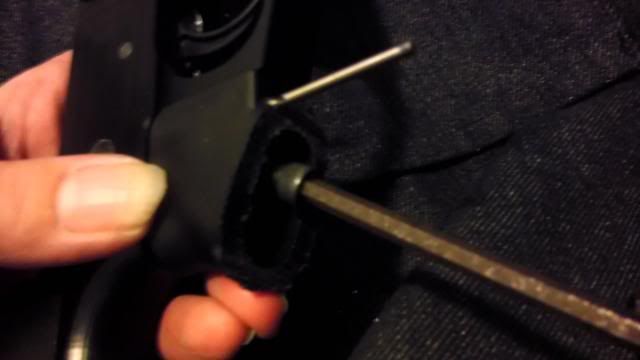
Here is some more pics with continued progress...just a few more operations need to be done:
FCP depth has been verified to measure 1.250/52" (you will need to leave a .001/.002" allowance for your Cerakote finish...) FCP width has been verified to measure .690/.692" wide for the trigger assembly... Drill & Mill the trigger slot/opening. Locate and drill the safety selector detent hole, this is a two step process (I will show how to do this easily and quickly with pics and Instructions). Then due a trigger safety check once the lower is finished and then move on to full assembly, etc. 


For those with good eyes, yes there are some small relief cuts that were made in some critical area's of the FCP... |
|
|
|
[#22]
One other note I wanted to add, we will be using a number 23 twist drill bit Instead of the normal or more common 5/32 drill bit...This
of course will be for the hammer and trigger pin holes (the #23 twist drill bit has a nominal hole diameter of .1540" vs. a 5/32 bit which has a nominal hole size/diameter of .1563"). This of course will lead to a much tighter fit and will help avoid the trigger and hammer from"walking" or coming loose under fire/recoil... and will help to attain a better trigger feel overall... Thanks. |
|
|
|
[#23]
FCP (fire control pocket) is now completed (pictures will be added tonight).
We will be moving on to the safety selector detent hole for marking and then the two step process of drilling (we will also show a quick and easy way (pretty much foolproof) to mark and spot drill this essential location (you will need a 7/64 drill bit [.1094"] for this operation). We will show pics of how to do this... The safety detent hole will require a two step process, a 1/8 drill bit (.125" diameter) through hole, and then a 5/32 drill bit (or a #23 drill bit depending on the size of your detent pin/or how tight you want your hole) then go .188" deep from the top surface (with the lower turned up side down of course). Thanks. |
|
|
|
[#24]
great!
|
|
|
|
[#25]
Ok, now we are completely done machining the FCP, moving on to drilling the holes for the safety selector, hammer pin and trigger pin...and
drilling and cutting the trigger slot... 
Also did some test fitting with the lower and upper receiver (the stripped upper is a Aero Precision shop beater, but it does the job...). Fitment was very tight between both, no play in any direction whatsoever, there was maybe .001"/.002" between the seams... 
Next will be marking, spot drilling and then drilling the safety selector detent hole...You will also see how to do this operation quickly and Inexpensively.... |
|
|
|
[#26]
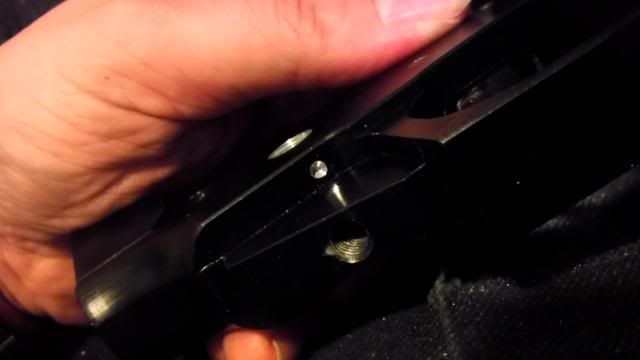
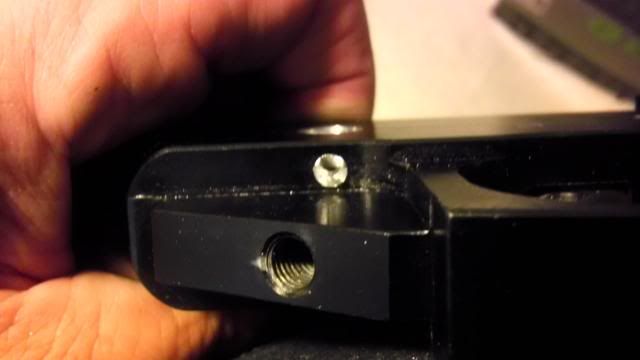
OK, now the fun part, you will need to find a spare Mil-Spec. AR-15 pistol grip and pistol grip screw (1/4-28 TPI), It will serve as your hole guide hole guide...
The pistol grip ( a $4.00 Item, new) will need to be cut (you can use a hacksaw or jig saw) near the lower trigger guard area (see pics)... 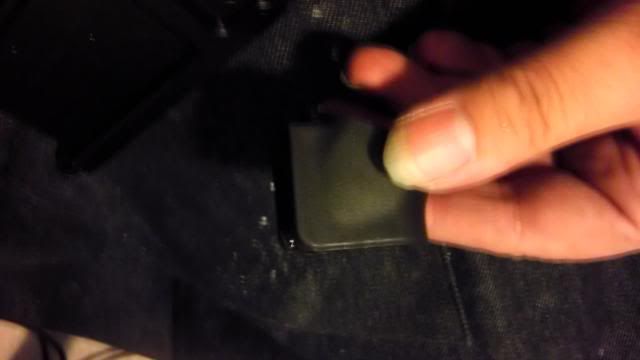
Now take your 7/64 drill bit and drill through the existing dentent spring hole on your pistol grip, take it slow, it will only take a minute... 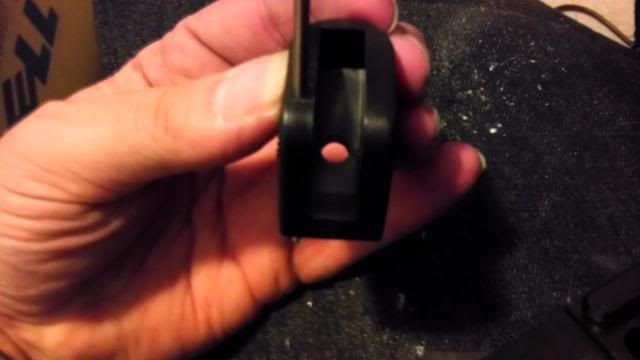
Now your ready to mark and/or spot drill your detent hole location to you lower receiver using your drill bit and hand or drill press...but first tighten down your pistol grip guide nice and good... 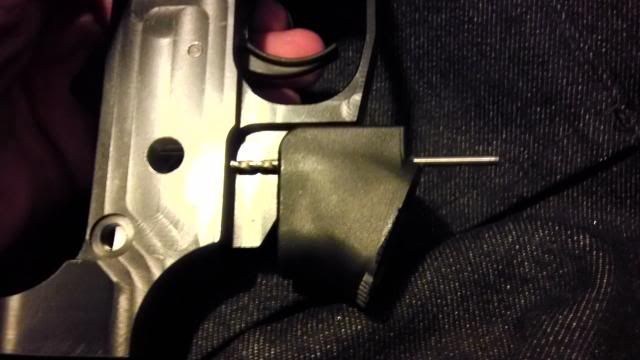
Now you can set up your lower on your milling machine, drill press, or if careful with your hand drill... 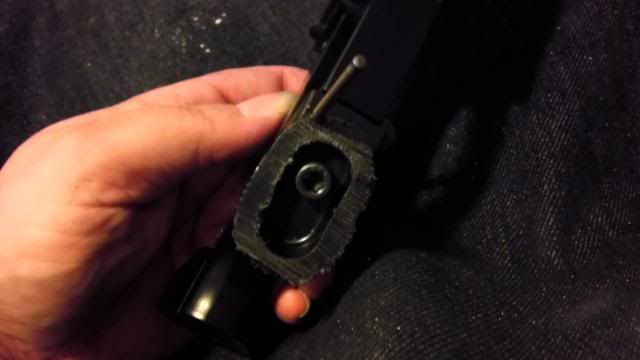
|
|
|
|
[#27]
Brilliant! Even an Aggie can follow that! |
|
|
|
[#28]
Function and Safety check has been done, and it passed (Stag LPK)...
We will then move on to the engraving stages and engrave all the need Info. on the new lower receiver...the ATF guidelines call for a minimum .003" engraving depth for the lettering (you can also leave the lower blank, but I would not recommend that) and at least 1/16 high lettering/numbering, etc... Then we will move on to the prepping, de-greasing, and then Cerakoting/Alumnahyding the bare area's that were machined... Happy fathers day weekend... |
|
|
|
[#29]
Total machine and build/fitting/test time so far is approx. 24 hours...Engraving and refinishing should add another 4-5 hours to the total...
|
|
|
|
[#30]
Why are you engraving anything on your lower? You making an SBR?
|
|
|
|
[#31]
Quoted:
Why are you engraving anything on your lower? You making an SBR? No, not planing to make into a SBR, plan to engrave it for many reasons... We want to make it "fully legal" (most rank and file Cops DO NOT KNOW the laws regarding non marked firearms) In case there is a traffic stop and they spot a unmarked rifle/weapon...well you know how that can go... If the rifle is ever lost or stolen, It can be recovered and returned to the owner...of course it must be reported in such a case... It is going to be a plinker, shooter, and hunting rifle... Then of course (most Importantly) It is a keepsake for my son... |
|
|
|
[#32]
No, that's good, just wanted to make sure you knew you didn't have to.
|
|
|
|
[#33]
We will be moving on to the AR-308 [DPMS/SR-25 Pattern] project very soon...as a matter of fact, we may start the AR-308 build project this week
(Fathers day week/weekend) and once completed we will then refinish and engrave the area's that need to be done on both the AR-15 and AR-308 lowers...Stay tuned for more pics/details... It will start off as something like this with a matte black finish... Thanks. |
|
|
|
[#34]
OK, so the process starts/continues with the large frame AR-308...Rear lug pocket is done...The center-line is marked over the Dykem steel blue
surface treatment (marking) as is the line for the end of the forward FCP near the bolt catch slot... 
|
|
|
|
[#35]
Made some more progress today...rear lug pocket is complete, we got most of the drilling done for the FCP as well.

|
|
|
|
[#36]
We also got some of the milling work done...We did not have to much time today/tonight to dedicate to the AR-308 lower per se...but it's getting there.

|
|
|
|
[#37]
We got some work done today, finish the "driver side" FCP wall and then moved on to the other...also finished the depth and trigger pocket on
the AR-308 build so far... 

Thanks fellas... |
|
|
|
[#38]
One thing I wanted to note is that when your drilling the holes for your trigger slot [I forgot to remind my Son about this when he was drilling] you will
likely get some drill "walking", there are a few ways to help avoid this...One is use a spot drill, stubby drill, or use a undersized drill [in this case a 1/4" drill bit] then use your 5/16" drill bit or milling cutter [2 or 3 flute] that is capable of making plunge cuts... |
|
|
|
[#39]
Recent Complete Upper Build in 6.5mm PCC:
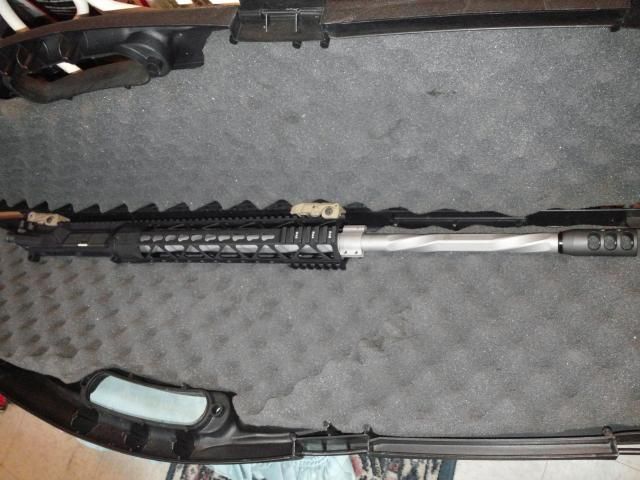
Billet Flattop Upper w/ M4 feedramps Magpul Gen II Front and Rear Flip-Up Sights BTE Clamp-On Matte SS Low-Pro Gas Block Melonite Coated Gas Tube HPI/MPI BCG, USM4 Key-Mod Ultra Light Quad Rail 22" Fluted BHW SS 416R, Poly 3G, 1:8 Twist Barrel, Matte Finish Miculek, Multiport Comp/Brake We will update thread with some more pics, as both the AR-15 & AR-308 lowers get near full completion...We are waiting on new air compressor and blasting cabinet ( damn another Five large to Invest  , hope wife does , hope wife does
not find out)... |
|
|
 Win a FREE Membership!
Sign up for the ARFCOM weekly newsletter and be entered to win a free ARFCOM membership. One new winner* is announced every week!
You will receive an email every Friday morning featuring the latest chatter from the hottest topics, breaking news surrounding legislation, as well as exclusive deals only available to ARFCOM email subscribers.

AR15.COM is the world's largest firearm community and is a gathering place for firearm enthusiasts of all types.
From hunters and military members, to competition shooters and general firearm enthusiasts, we welcome anyone who values and respects the way of the firearm.

Subscribe to our monthly Newsletter to receive firearm news, product discounts from your favorite Industry Partners, and more.
Copyright © 1996-2024 AR15.COM LLC. All Rights Reserved.
Any use of this content without express written consent is prohibited.
AR15.Com reserves the right to overwrite or replace any affiliate, commercial, or monetizable links, posted by users, with our own.


