OH, USA
|
[#1]
I want to thank all the posters for their assistance. I've done (4) builds and I reference these instructions each time. On the most recent build; everything was so easy except for the front takedown pin detent. I followed all of the tips and couldn't get it to go together. I'm no idiot either, I'm a trained machinist. When the spring was inserted into the hole with the pin, fully compressed it still was above where the diameter of the pin needed to be. I kick myself for wasting so much time prior to checking that. Finally ground (3) coils off the spring and it went together easy just like its supposed to. It seems that Armalite did not drill the hole deep enough in this lower. Probably why I got it so cheap!
|
|
|
OK, USA
|
[#2]
Thank you for this post. Helped in assembling my first lower. Went smoothly.
|
|
|
MI, USA
|
[#3]
Thanks for the post
I used this today. Tapped my wrench and still managed to put small scratch in trigger guard tower. Any suggestion? Thanks |
|
|
|
[#4]
Birchwood casey alumi-black or alum-hyde. Or ignore it. Or use a sharpie.
|
|
|
|
|
[#5]
Originally Posted By wildcatgt6:
Thanks for the post I used this today. Tapped my wrench and still managed to put small scratch in trigger guard tower. Any suggestion? Thanks Buy a bunch of ammo, get some serious training. If you're doing it right, a little scratch on trigger gaurd will be the most unnoticeable mark on the carbine |
|
|
|
WI, USA
|
[#6]
Great thread, really great. I'm a former farm-boy that just can't stand having other people do work for me unless it's way out of my comfort/skill zone. I've always wanted to build (more like assemble) my own AR15 and after reading thru this, feel pretty confidant that I'll be able to do it without launching too many tools across the room in frustration. Thanks!! Now comes the fun part, making up my mind on what to build and then doing the research to find the right manufacturer and kit for me. I'd say "best", but I can't seem to find three people who can agree on that one.
|
|
|
WI, USA
|
[#7]
I just built my first lower today and i wanted to say thanks this was a huge help!
|
|
|
DE, USA
|
[Last Edit: brzusa]
[#8]
Removed by member, found my answer
|
|
|
FL, USA
|
[#9]
Gonna tackle my first build soon, but your thread gave me alot of insight. Thanks Op, and everyone else.
|
|
|
MI, USA
|
[#10]
Yet another sincere thank you for this article.
I put together my first last night. The hardest part was trying to identify which springs were which. The high resolution pop-up picture helped immensely with that. The only real bugger was differentiating the spring for the trigger from the "other" one. I spent about ten minutes on that part alone! I think I must have got lucky with the front pivot detent, I drove it home on the first try by simply using the pivot to hold it back while I pushed it in. Something tells me that will probably never go that smooth again! My only real hitch was when I took my new toy out to show off to a buddy down the street. Not having a buttstock to assemble, and having an empty upper, I clipped the upper on but left the spring and detent out of the take down pivot. Yea, I have to order another takedown pivot now! :( Being with very little knowledge of this rifle having never been able to play with one, I too was hoping desperately for an upper assembly guide. I spent about two hours reading through all these pages versus the 30 minutes putting the lower together! It might be helpful to show the link from page 22 in one of your reserved spots. You have certainly done a great service here (As the nearly TWO million view now attests to!) and no need to reinvent the wheel. Besides, it doesn't look like anyone is taking you up on your offer of free assembly! |
|
|
|
[Last Edit: Garoden75]
[#11]
Great Thread!! I just built my first Lower ever and using this guide and watching the video made it even easier. The masking tape and electrical tape was a brilliant idea, I didn't leave any marks on my lower receiver.
My tools were not state of the art. I used a 20oz framing hammer, Painters Blue tape, Electrical tape, a set of Craftsman steel punches and a couple of made in china needle nose and bent needle nose pliers for the whole build. Here is a picture. 
My Sig P220 in Holster for added pizzazz. I got tired of waiting for a Spike's Mid-Length or any Spikes for that matter to be in stock!! I went with a BCM-URG-MID16-SS410, in English a Bravo Company Mfg. Upper Receiver Group, Mid-Length 16" Stainless Steel 410 Barrel with a 1/8 Twist. Here are a couple of Pics. This was my first build ever. 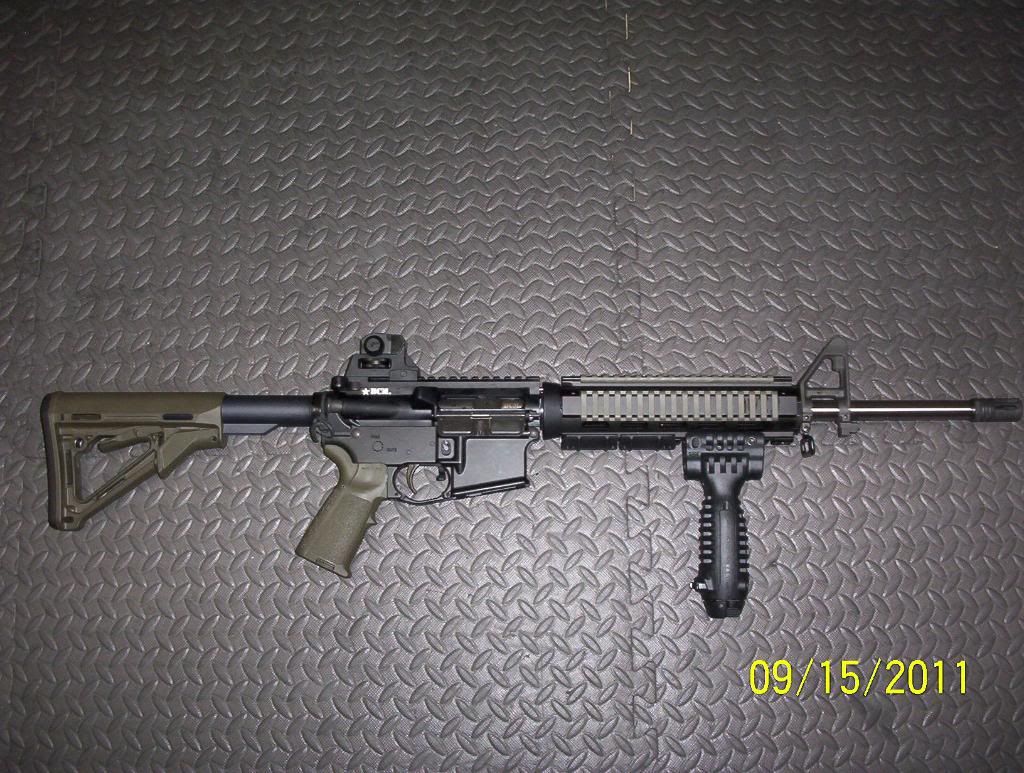
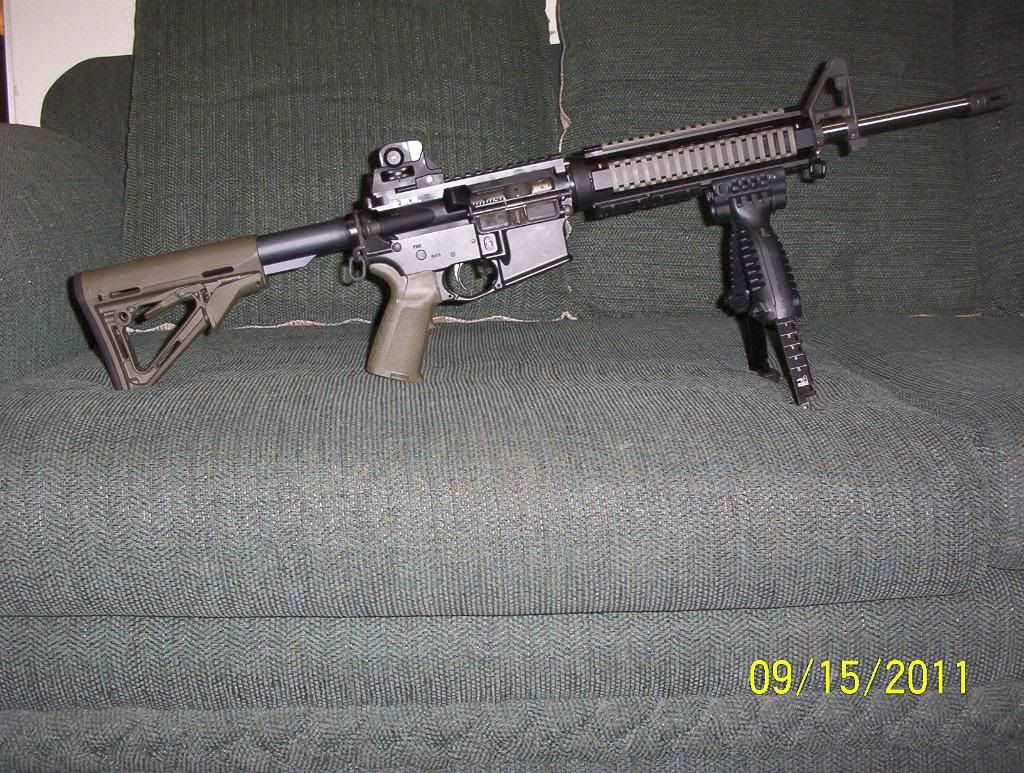
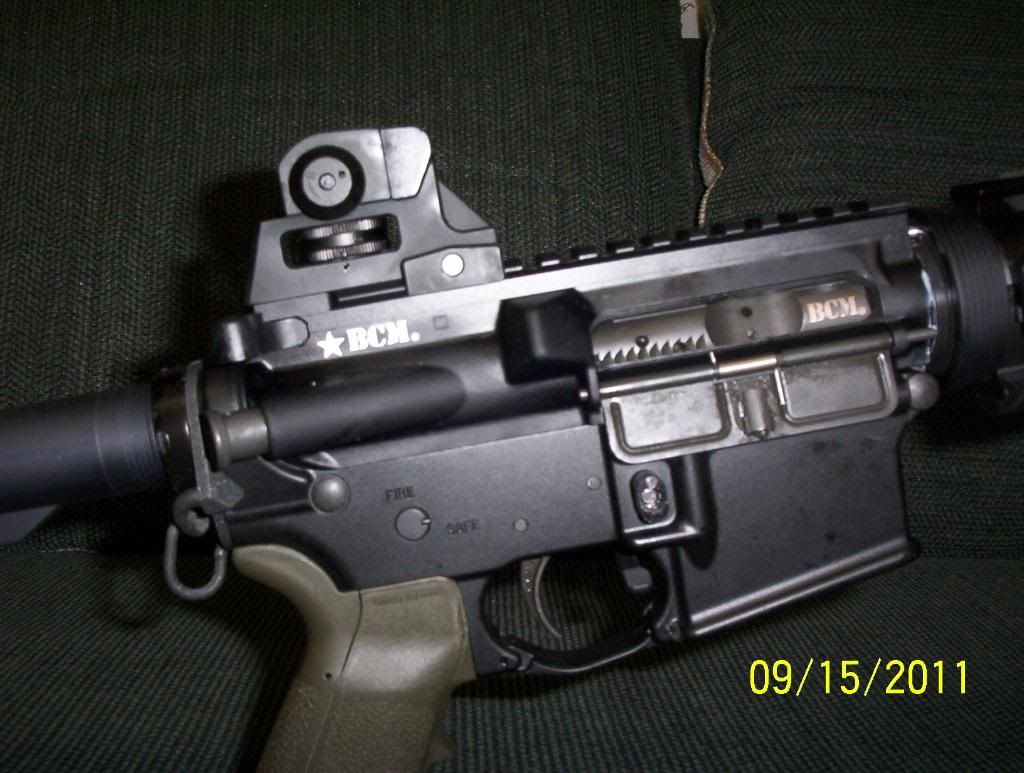
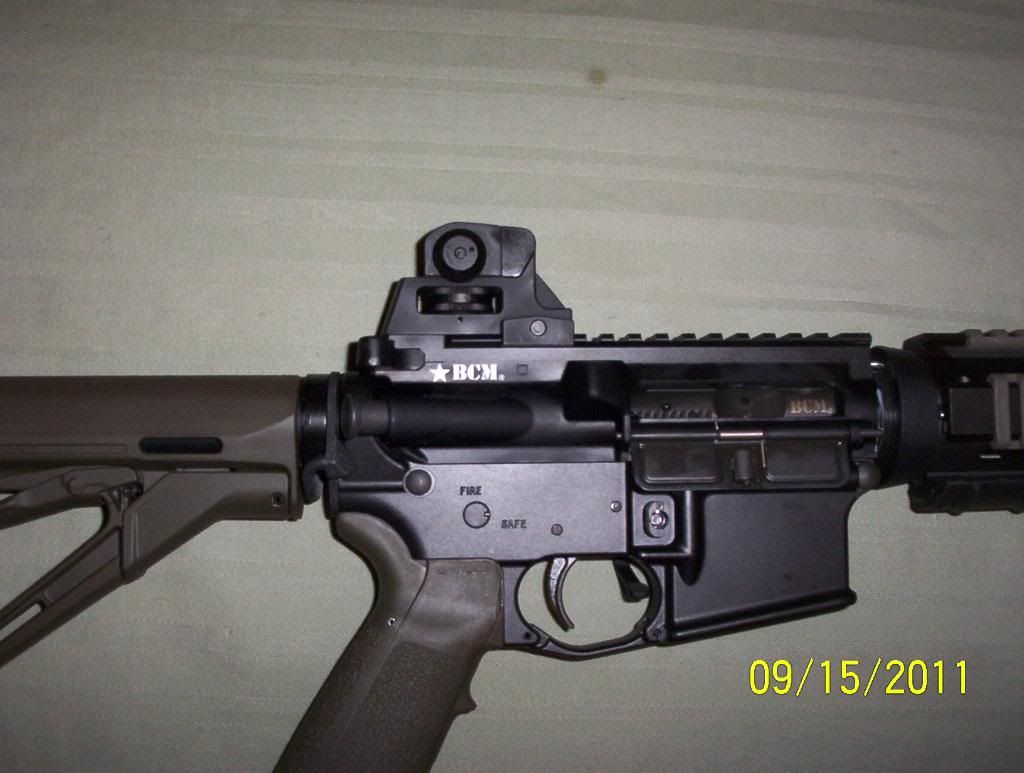
Thanks to this forum and all the contributors, I am now a Black Gun Owner. Well almost all black! Garoden75 NRA Member Lifetime Member CRPA Lifetime Member DAV's Member American Legion 
|
|
|
|
|
[#12]
This thread has to hold some kind of record for user's first post on the board.
|
|
|
|
NE, USA
|
[Last Edit: majorpandemic]
[#13]
For those that hate to read here is my HOW TO BUILD AN AR 15 FROM PARTS VIDEO
It isn't perfect but it will get the rifle assembled. Total elapsed assembly time was about 90 minutes. [youtube]http://youtu.be/3P2SEdRkb5U[/youtube] http://youtu.be/3P2SEdRkb5U |
|
|
|
[#14]


My SBR Lower, thanks for all the tips, Next is the upper when my Form 1 comes home |
|
|
|
NY, USA
|
[#15]
Originally Posted By FALARAK:
This thread has to hold some kind of record for user's first post on the board. You can add me to that list of first time Poster/builder. Thank you FALARAK and everyone else on here for a really Excellent " Walkthrough" on how to build my first rifle. I got my 2lb hammer, cold chisel and pipe wrench sitting on my pickup bumper with some bungie cords ready to git her done 
Here's the bottom bit the mail man's bringing today. http://i51.tinypic.com/8wmf7s.jpg |
|
|
CO, USA
|
[Last Edit: Ruzhye]
[#16]
I used this thread a couple years ago when I did my first build, I've since added my own Bolt Carrier disassembly video to Youtube:
Bolt Carrier Disassembly |
|
|
|
[Last Edit: Lancelot]
[#17]
Originally Posted By Desert_AIP:
How to install the front pivot pin using a $1 clevis pin: Since my original post went to the Archive, I'll repost it here to the sticky thread: –––––––––––––––––––––––––––––––––––––––––––––––––––––––––––––––––––––––––– There have been several questions in threads recently asking about the need for buying the $15 front pivot pin install tool to install the Pivot Pin. If you are only doing one build, it's hard to justify spending money on a single use tool, if you're building 100 the technique below works equally well. Many here have talked about using a 1/4" clevis pin to install the Pivot Pin but there are always follow up questions as to the technique. Below is a step by step procedure to install the Pivot Pin using a clevis pin, this takes 10 times longer to describe than to actually perform and costs nearly nothing. Got to your local hardware store and buy a 1/4" clevis pin. Get the kind with at least one hole through it not the kind with a captured ball bearing on the end. You should find them in the specialty hardware area with the setscrews, thread inserts and the like. I use a 2" long pin which reaches completely across the front of the lower. Get one at least this long. I paid 65¢ for mine. http://i175.photobucket.com/albums/w135/Desert_AIP/Pivot_Pin_Install_02a.jpg Insert the clevis pin through the pivot pin holes in the front of the lower from the left side. Align the hole (or one of the holes) in the clevis pin with the pivot pin detent channel in the lower. http://i175.photobucket.com/albums/w135/Desert_AIP/Pivot_Pin_Install_03.jpg Insert the pivot pin detent spring through the hole and into the channel in the lower. http://i175.photobucket.com/albums/w135/Desert_AIP/Pivot_Pin_Install_04.jpg Insert the pivot pin detent through the hole. The spring will not let it go in very far without pressure. http://i175.photobucket.com/albums/w135/Desert_AIP/Pivot_Pin_Install_05.jpg I perform the next three steps inside a 2 gallon zip-loc bag so I don't lose the detent or spring in case it gets away from me. With a punch or other suitable tool (like an allen wrench) push the detent through the hole in the clevis pin and into the lower while compressing the spring. The detent and spring are now inside the lower and clear of the clevis pin. The only thing holding them in place is pressure on the punch. http://i175.photobucket.com/albums/w135/Desert_AIP/Pivot_Pin_Install_06.jpg Turn the punch or allen wrench 90 degrees counter-clockwise so the hole is now at the top of the clevis pin. This will capture the detent and spring along the side of the clevis pin. http://i175.photobucket.com/albums/w135/Desert_AIP/Pivot_Pin_Install_07.jpg Remove the punch. You can see the detent poking out of the hole. http://i175.photobucket.com/albums/w135/Desert_AIP/Pivot_Pin_Install_08.jpg Start the pivot pin into the lower from the right side. Make sure the groove in the pivot pin is at the top. http://i175.photobucket.com/albums/w135/Desert_AIP/Pivot_Pin_Install_09.jpg As you push the clevis pin out of the hole, keep sideways pressure on the detent until it is captured by the pivot pin. http://i175.photobucket.com/albums/w135/Desert_AIP/Pivot_Pin_Install_10.jpg Keep pushing the pivot pin though the right side pivot hole. Once it is in the hole and won't fly out under spring pressure, remove the clevis pin. http://i175.photobucket.com/albums/w135/Desert_AIP/Pivot_Pin_Install_11.jpg Rotate the pivot pin 90 degrees counter-clockwise until the groove in the pivot pin captures the detent. http://i175.photobucket.com/albums/w135/Desert_AIP/Pivot_Pin_Install_12.jpg You are finished! http://i175.photobucket.com/albums/w135/Desert_AIP/Pivot_Pin_Install_13.jpg At Lowe's At Home Depot |
|
|
|
FL, USA
|
[#18]
Fantastic thread! I have a post ban Bushmaster with the welded on muzzle break. If I'm careful, is it possible to successfully modify the FSP to accommodate a YHM Diamond Specter length FF rail while it's on the gun? The instructions I see require taking off the post, but with my break having been welded on and so forth, it seems like it would be far easier to leave it as is and modify the FSP while mounted onto the upper.
|
|
|
|
[#19]
|
|
|
|
|
[#20]
Yep. Just picked one up on sunday!
But the folks at Home Depot were very helpful and nice! |
|
|
|
CA, USA
|
[#21]
FALARAK, How did this Kreiger barreled AR shoot? Didn't see the reviiew.
|
|
|
NC, USA
|
[#22]
Okay I got a question, got my 20" upper from Del-Ton and it had a YHM free float and a YHM low profile gas block. I want to put a standard f marked sight block on it. what all is involved? I'm wondering if the barrel has the tapper grooves already in it or not.
thanks |
|
|
|
[#23]
Originally Posted By Lancelot:
Originally Posted By Desert_AIP:
How to install the front pivot pin using a $1 clevis pin: Since my original post went to the Archive, I'll repost it here to the sticky thread: –––––––––––––––––––––––––––––––––––––––––––––––––––––––––––––––––––––––––– There have been several questions in threads recently asking about the need for buying the $15 front pivot pin install tool to install the Pivot Pin. If you are only doing one build, it's hard to justify spending money on a single use tool, if you're building 100 the technique below works equally well. Many here have talked about using a 1/4" clevis pin to install the Pivot Pin but there are always follow up questions as to the technique. Below is a step by step procedure to install the Pivot Pin using a clevis pin, this takes 10 times longer to describe than to actually perform and costs nearly nothing. Got to your local hardware store and buy a 1/4" clevis pin. Get the kind with at least one hole through it not the kind with a captured ball bearing on the end. You should find them in the specialty hardware area with the setscrews, thread inserts and the like. I use a 2" long pin which reaches completely across the front of the lower. Get one at least this long. I paid 65¢ for mine. http://i175.photobucket.com/albums/w135/Desert_AIP/Pivot_Pin_Install_02a.jpg Insert the clevis pin through the pivot pin holes in the front of the lower from the left side. Align the hole (or one of the holes) in the clevis pin with the pivot pin detent channel in the lower. http://i175.photobucket.com/albums/w135/Desert_AIP/Pivot_Pin_Install_03.jpg Insert the pivot pin detent spring through the hole and into the channel in the lower. http://i175.photobucket.com/albums/w135/Desert_AIP/Pivot_Pin_Install_04.jpg Insert the pivot pin detent through the hole. The spring will not let it go in very far without pressure. http://i175.photobucket.com/albums/w135/Desert_AIP/Pivot_Pin_Install_05.jpg I perform the next three steps inside a 2 gallon zip-loc bag so I don't lose the detent or spring in case it gets away from me. With a punch or other suitable tool (like an allen wrench) push the detent through the hole in the clevis pin and into the lower while compressing the spring. The detent and spring are now inside the lower and clear of the clevis pin. The only thing holding them in place is pressure on the punch. http://i175.photobucket.com/albums/w135/Desert_AIP/Pivot_Pin_Install_06.jpg Turn the punch or allen wrench 90 degrees counter-clockwise so the hole is now at the top of the clevis pin. This will capture the detent and spring along the side of the clevis pin. http://i175.photobucket.com/albums/w135/Desert_AIP/Pivot_Pin_Install_07.jpg Remove the punch. You can see the detent poking out of the hole. http://i175.photobucket.com/albums/w135/Desert_AIP/Pivot_Pin_Install_08.jpg Start the pivot pin into the lower from the right side. Make sure the groove in the pivot pin is at the top. http://i175.photobucket.com/albums/w135/Desert_AIP/Pivot_Pin_Install_09.jpg As you push the clevis pin out of the hole, keep sideways pressure on the detent until it is captured by the pivot pin. http://i175.photobucket.com/albums/w135/Desert_AIP/Pivot_Pin_Install_10.jpg Keep pushing the pivot pin though the right side pivot hole. Once it is in the hole and won't fly out under spring pressure, remove the clevis pin. http://i175.photobucket.com/albums/w135/Desert_AIP/Pivot_Pin_Install_11.jpg Rotate the pivot pin 90 degrees counter-clockwise until the groove in the pivot pin captures the detent. http://i175.photobucket.com/albums/w135/Desert_AIP/Pivot_Pin_Install_12.jpg You are finished! http://i175.photobucket.com/albums/w135/Desert_AIP/Pivot_Pin_Install_13.jpg At Lowe's At Home Depot wow....stunningly simple!!! Thanks i sent my pin fling last nite.....lucked out and found it but it should have been gone for good!!! |
|
|
|
|
[#24]
Thanks for this guide. I put my Doublestar stripped lower, Del-Ton LPK, and Ace ARFX stock together this afternoon here at my computer desk.
The vice grips as an arbor press was a neat trick that worked with the roll pins pretty nicely. Only hiccup was putting the disco spring in flare-side up. Easy fix after a youtube consultation. That, and the Ace neoprene tube on the buffer stock was a pain, but all it takes is persistence and a bit of water. Thanks again. Best, JBR |
|
|
|
CA, USA
|
[#25]
I'm new to this building and wanted to give a SUPER Thank You to all who have taken the time to make this all possible. I just finished my lower and will be attempting the upper soon.
ALL of your diagrams and tips ARE INVALUABLE to those of us just starting out. After owning and shooting my first AR for more than 18 years, I have assembled the beginning of my second AR The AR-15 Board is SUPER and ALL of the contributors make it this way!!! Thank You Everyone ! Jim B. |
|
|
TX, USA
|
[#26]
Add me to the list of first time build-and-post-a-thank-you
Great thread, thanks so much for taking the time to post such a detailed how-to! My first build went very smoothly, the vise-grip trick worked perfectly. Built my wife a nice lightweight carbine with a Spikes lower and parts kit and a Stag 3H upper. http://oi42.tinypic.com/9u2814.jpg |
|
|
OK, USA
|
[Last Edit: Hwhiskey82]
[#27]
|
|
|
NE, USA
|
[#28]
Pure genius. Made one one of these tools out of some scrap 1/4" delrin. No spring chasing... Perfect
|
|
|
NY, USA
|
[#29]
Originally Posted By FALARAK:
Install your own free-float rail system, step by step: LaRue 7.0 step by step: This section specifically relates to installing a LaRue Tactical 7.0 float tube. Thus far, this is one of the finest float tubes on the market. It covers everything you need in a float tube, and is priced right for the quality of manufacturing. A couple points..... it has an indexing (anti-rotation) device that located on the upper receiver, and will not allow the tube to spin. It also is not as "fat" as some of the other tubes, which provides a better grip with rail panels installed. I REALLY like this rail system! As a new addition - LaRue has also added a quick release sling mount near the receiver, compatible with Vltor quick release sling attachments. It also has an anti-rotation device to keep your sling from getting twisted. This guide will cover installing a LaRue 7.0 lightweight carbine float tube, from LaRue Tactical. http://www.kevinholman.com/byor/float/larue/1larue7.jpg Ok, lets cover the necessary tools. What you need: Since this procedure requires removal of the barrel/barrel nut, you will need many of the same tools as listed in the Step by step guide to building a complete upper, above. See the above post... but to sum it up, you will need a good action block, armorers wrench, 1/16" punch, snap ring pliers, moly-grease, and a vise. You will also need a couple punches. You just need a good sized (1/4") soft brass punch and a steel 1/8" punch. (allen wrench and blue loctite supplied with tube!) That’s it for tools! Now here are the step-by-step instructions: 1. Remove the upper from the rifle. Remove the handguards. Remove the muzzle device. Remove the front sight base. Unscrew the factory barrel nut and remove the nut, and delta ring assembly (we wont be needing these)] Is it necessary to remove the muzzle device and FSB? What if you have a pinned/welded muzzle device? Can you install this FF rail (or another one) by removing the barrel from the upper receiver? |
|
|
|
[#30]
I just wanted to stop by and say thank you for the great thread and pictures! Between this thread and the guide I managed to get my lower together, took a little time but I worked slow at it to make sure I didn't miss anything. Very simple by following the pictures and directions.
Here is a picture of what I just finished, now going to wait a few weeks to get an upper-probably going to be a Spike's because that is what my local gun shop carries. 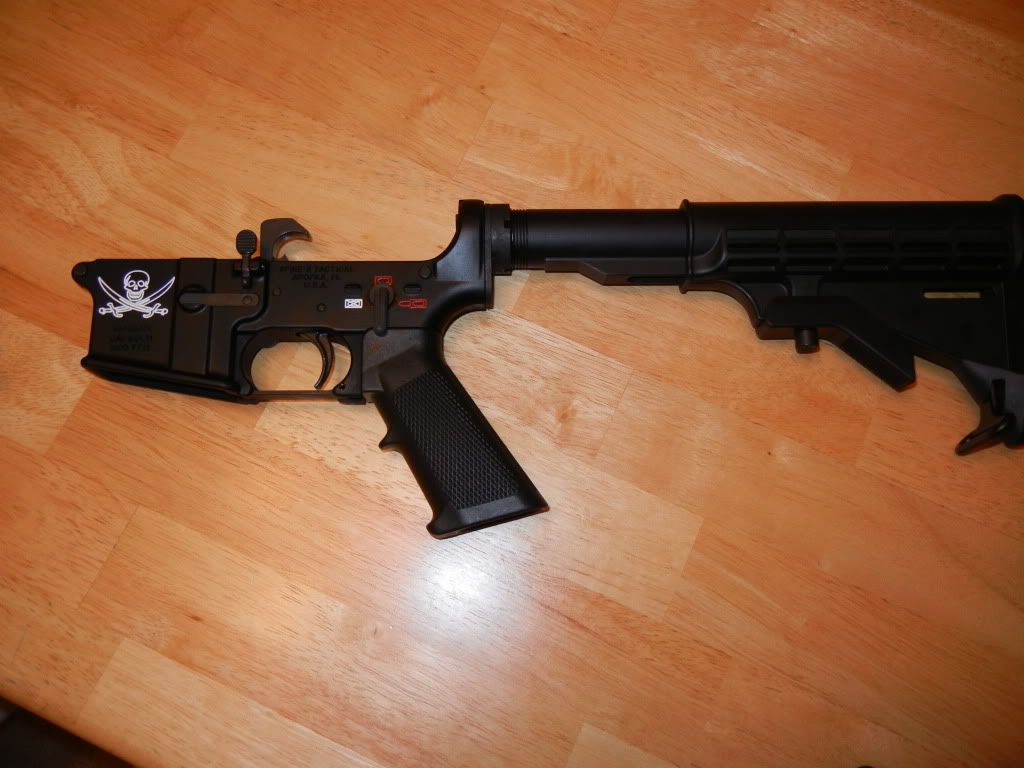
|
|
|
|
|
[#31]
Originally Posted By Shqype: Is it necessary to remove the muzzle device and FSB? What if you have a pinned/welded muzzle device? Can you install this FF rail (or another one) by removing the barrel from the upper receiver? In order to install a typical free float rail, yes - because this requires removal of the old barrel nut. If you have a pinned/welded muzzle device - that makes it a big PITA. That's one reason I hate any barrel shorter than 16" due to current law. It limits your options. There are two piece FF railed handguards that can be installed on the existing barrel nut, without removing the FSB and muzzle device. Shop around. |
|
|
|
NY, USA
|
[#32]
Originally Posted By FALARAK:
Originally Posted By Shqype:
Is it necessary to remove the muzzle device and FSB? What if you have a pinned/welded muzzle device? Can you install this FF rail (or another one) by removing the barrel from the upper receiver? In order to install a typical free float rail, yes - because this requires removal of the old barrel nut. If you have a pinned/welded muzzle device - that makes it a big PITA. That's one reason I hate any barrel shorter than 16" due to current law. It limits your options. There are two piece FF railed handguards that can be installed on the existing barrel nut, without removing the FSB and muzzle device. Shop around. Thanks for the reply. Does this apply to something like the Troy Alpha rail as well? And does this mean that you can't install a barrel nut from the other end, ie bypassing the muzzle end? |
|
|
MN, USA
|
[#33]
just got mine built this morning. had a bit of an issue with the disconnector spring but once that got squared away, was a quick and painless project. Thanks for the step by steps!
|
|
|
|
[Last Edit: gjg]
[#34]
Originally Posted By Shqype: Originally Posted By FALARAK: Originally Posted By Shqype: Is it necessary to remove the muzzle device and FSB? What if you have a pinned/welded muzzle device? Can you install this FF rail (or another one) by removing the barrel from the upper receiver? In order to install a typical free float rail, yes - because this requires removal of the old barrel nut. If you have a pinned/welded muzzle device - that makes it a big PITA. That's one reason I hate any barrel shorter than 16" due to current law. It limits your options. There are two piece FF railed handguards that can be installed on the existing barrel nut, without removing the FSB and muzzle device. Shop around. Thanks for the reply. Does this apply to something like the Troy Alpha rail as well? And does this mean that you can't install a barrel nut from the other end, ie bypassing the muzzle end? the barrel nut must go on from the muzzle end and before a FSB or gas block is installed. the alpha must do the same, after the low profile gas block and tube are installed but it does utilize the original barrel nut which does not have to be removed if your adding the alpha to an existing setup. it is not hard....i just built my first upper and it is so simple it hurts. |
|
|
|
SC, USA
|
[#35]
Originally Posted By babob:
Originally Posted By sch40:
I have a question about torquing any of these parts. I have a barrel/castle/armorer's wrench, and I have a torque wrench. Am I missing something? Do you use them together, like put the square ratcheting lug of the torque wrench in the armourers wrench? Wouldn't that throw off the torque scale? Any info would be helpful. Thanks, sch40 I'm not a physics expert but I didn't see a problem connecting the torque wrench and armourers tool to make sure of the final torque. (see pic below ) When I did my first install, the one item that I was unclear on was what the hell did everyone mean by "snug it up" two to three times and then line up the next gas tube holes. It became obvious when I went to tighten the barrel nut and there was NO way the gas tube holes we're going to align without loosening and "snugging it up again". Make sure to clean the threads and then apply a small amout of Moly grease before doing the snug up procedure. I'd also like to add that when doing the "snug it" procedure it's a good idea to check the torque but I'm pretty sure it will be tight enough. Minimum torque is 31 ftlb. You'll get that and then some when doing the procedure and aligning the next gas tube holes. I checked mine with the torque wrench and it clicked right away. http://img.photobucket.com/albums/v639/babob/LaRue70003.jpg Hope this helps. There is some fancy math involved to get the correct torque but to make things simple keep the TQW and AT 90 degrees out. |
|
|
USA
|
[#36]
hi everyone. I have a 16" carbine length AR15 set up with the Magpul Handguard. Lately I've been wanting to change out the handguard to something metal. I have saw a few carbine drop in quad rail but I think they're a bit too short for me. My AR has the A2 FSP so I don't know what route to go as I have no tool to properly remove the barrel. Thought about going to a gun smith but they charge too much for that job. Saw the stuff about cutting off the FSP but that still requires to take the barrel off. Is there an easier way to change from the drop in handguard system to a free float?
|
|
|
|
[#37]
|
|
|
|
USA
|
[#38]
May be I wasn't clear enough. I don't want a carbine lenght handguard anymore. I like something a bit longer than 7" because it doesn't give me much room. May be like 9"-10". I know if I can get it convert it to a free float that would be no problem since I can just put in a low profile gas block. Time to befriend a gunsmith lol. |
|
|
|
[Last Edit: 67Firebird]
[#39]
I just built my first lower, which is also my first AR pistol, and there's no way I would have attempted it without your instructions. I still had trouble with a couple things, like how the hammer and trigger springs go in, but I looked in my Bushmaster and got it that way. Then I found the directions, in the safety check link after you're finished.
 Thanks for posting this; I'd have had no clue without it.   Edit: I finished my pistol a while back, but only recently got a bag to carry it (using a suggestion from someone else).  Here's the bag I got. It's a tennis racquet bag, that cost me $15 at Walmart.    http://www.walmart.com/ip/Wilson-Racquet-Tennis-Bag/13032442 |
|
|
|
|
[#40]
Only took me about 3 or 4 years but I finally assembled the the lower for this gun today.
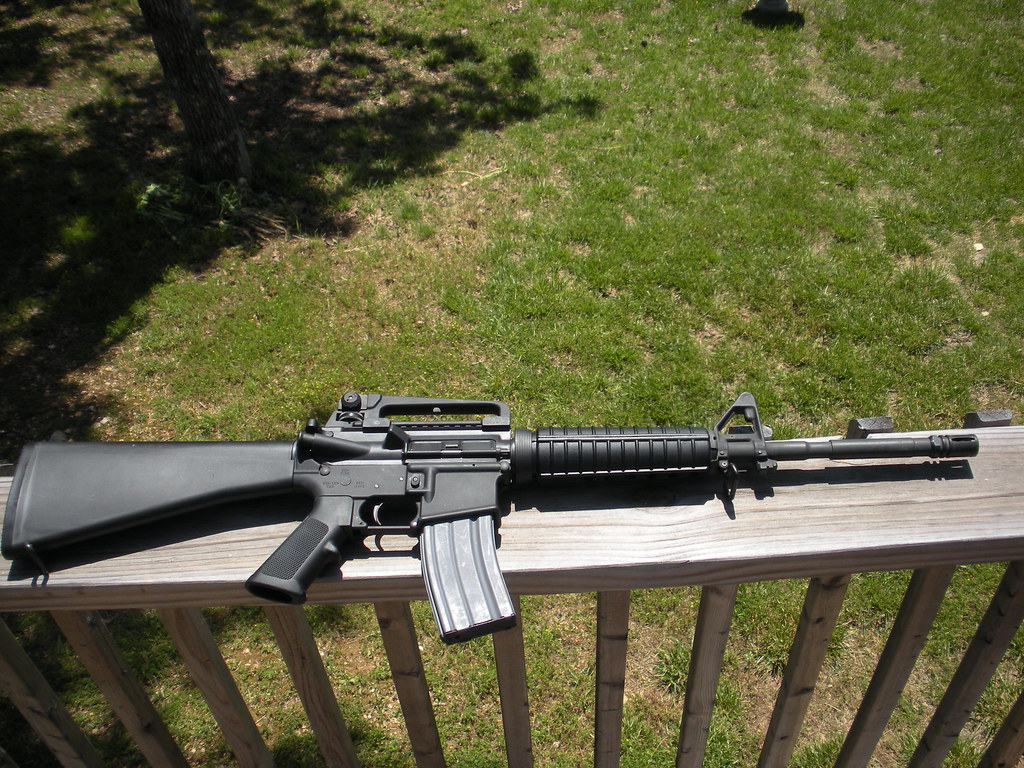
Learned something assembling the lower. Have handled cheap feeling AR's like Olympic Plinkers way back when. Always noticed that the selector levers were loose causing the gun to feel cheap. In building this I trial fitted the selector lever and used the wrong spring. I used a take down detent spring which resulted in a sloppy selector. Realize what I did and replaced it with the correct spring. The correct spring solves that wobbly lever issue. Thanks again for the step by step guide! |
|
|
|
TX, USA
|
[#41]
This thread has been an incredible source of knowledge in helping with my first build.
Kudos to the OP for a very imformative tutorial. |
|
|
PA, USA
|
[#42]
Thanks so much for the great information. This is my first build and it's going great. Thanks again. Mike
|
|
|
CT, USA
|
[#43]
Thank you for all the information, and knowledge!!! This is extremely helpful with my first build!
|
|
|
CA, USA
|
[#44]
This guide helped me out so much! I'm so glad for this walk through thanks a million. I built my first ar and will post pics of the lower later thanks again!
|
|
|
CA, USA
|
[Last Edit: Chrismang85]
[#45]
Here is the picture with a DSA lower and DSA parts kit =) love it! Thanks again http://i198.photobucket.com/albums/aa236/chrismang85/2012-05-11_11-05-53_493.jpg
|
|
|
CA, USA
|
[#46]
Oh this is exactly what I am looking for!! This forum is the best!! So glad I found it!!
|
|
|
TX, USA
|
[#47]
wow, thanks for this thread!
|
|
|
MD, USA
|
[#48]

First lower assembled. |
|
|
|
[#49]
Great thread!! Just finished printing the whole dang thing out to put in a binder.
|
|
|
|
|
[#50]
Originally Posted By Trueweltall:
http://s10.postimage.org/njqkyhzu1/DSCN0939.jpg First lower assembled. Excellent choice on a rifle stock - I really like that one. |
|
|
|
 Win a FREE Membership!
Sign up for the ARFCOM weekly newsletter and be entered to win a free ARFCOM membership. One new winner* is announced every week!
You will receive an email every Friday morning featuring the latest chatter from the hottest topics, breaking news surrounding legislation, as well as exclusive deals only available to ARFCOM email subscribers.

AR15.COM is the world's largest firearm community and is a gathering place for firearm enthusiasts of all types.
From hunters and military members, to competition shooters and general firearm enthusiasts, we welcome anyone who values and respects the way of the firearm.

Subscribe to our monthly Newsletter to receive firearm news, product discounts from your favorite Industry Partners, and more.
Copyright © 1996-2024 AR15.COM LLC. All Rights Reserved.
Any use of this content without express written consent is prohibited.
AR15.Com reserves the right to overwrite or replace any affiliate, commercial, or monetizable links, posted by users, with our own.


