|
[#1]
Quoted:
Quoted:
This thread is now useless without pictures. Thanks for the youtube link. That'll have to do. I saw this sticky when I was going to ask about bipods and though, "I love DIY projects and a cheap sling would be perfect for my first build!".... too bad :\ Is there anywhere else where I can find a write-up like this? I'm better with reading and pics vs videos.. I have all of the steps documented. I'll try this weekend to build another one and take some pictures. I'll host them here on arfcom so they can't disappear. |
|
|
|
[#2]
Quoted:
I have all of the steps documented. I'll try this weekend to build another one and take some pictures. I'll host them here on arfcom so they can't disappear. Awesome! I look forward to seeing it when you get the time. |
|
|
|
[#3]
I built two of the homemade VTAC...had to get my Alice buckles off of eBay...bought 2 Alice pack tie downs with them on it. Love the damn slings! On 1 I used one HK hook and 1 quick disconnect. So to make it Be able to go to a one point, I added a 1" d ring in between the 2 slides at the quick disconnect end. Works slicker than snot!
|
|
|
|
[#4]
What happened to the pics :(
|
|
|
|
[#5]
Quoted:
I was bored today so I took some time to figure this out so here it is, build you own tactical sling STEP BY STEP with pictures. Here's what you're going to build... http://www.montanafungun.com/sling11.jpg Best thing, its the same type of sling that can cost as much as 40 bucks, you'll build it for under $11! here we go Step 1: gather all parts needed for the build they are: 7.5 feet of 1.5" wide nylon web 5 inch piece of 1.5" wide nylon web <-------I'm getting feedback that this piece works much better 7 inches long. To each his own, assembly is easier with the longer piece. Two 15 inch pieces of 1" wide nylon web Two 1.5" wide buckles Three 1.5" wide slide locks Two 1" wide slide locks Tape measure Scissors to make the 5" piece and the two 15 inchers Lighter to seal the ends of the nylon web All the parts needed to make the sling can be found at ACE hardware for $10.08 http://www.montanafungun.com/sling1.jpg Step 2: Slide a female buckle end onto the 1.5" web and then put a slide lock on the tail of the web itself. Paying attention to the direction of the slide and female end in the picture http://www.montanafungun.com/sling2.jpg Step 3: Loop the web back and through the slide lock installed in the 2nd step, make your loop 27 inches long. Paying attention to the direction of the slide and female end as before, use the picture if it helps. http://www.montanafungun.com/sling3.jpg Step 4: Slide a 1.5" slide lock on to the web, note that you will leave an open end of the new slide lock pointing out, this will now be the "outside" of the sling. Follow picture. http://www.montanafungun.com/sling4.jpg Step 5: Assemble this piece using the 5" long piece of 1.5" wide web and one female and one male end of 1.5" buckles. This step would be hard to describe use the picture for the details, but pay close attention to the way the web is routed and the direction of the buckles. http://www.montanafungun.com/sling5.jpg Step 6: Slide the assembly you made in step 5 onto the sling as shown in the picture. http://www.montanafungun.com/sling6.jpg Step 7: Assemble this mess on the open end of the sling using the last male buckle and a slide stop. I left the web loose in this picture to illustrate the way to route the sling through all the parts. Note that the tail of the web is on the outside of the sling, as described in step 4 http://www.montanafungun.com/sling7.jpg Step 8: Tighten step 7 down to look like this, only leave 1/4-1/2 inch of web past the slide lock http://www.montanafungun.com/sling8.jpg Step 9: Using the two 15" pieces of 1" wide web and the two 1" wide slide locks pass them through like shown in the picture. This is where you will use the open end of the 1.5" lock left over from step 4. The 1" web passes through the outside of the male buckle installed in step 7 and 8 http://www.montanafungun.com/sling9.jpg Step 10: Tighten everything down good, and snap all the buckles, you'll have something that looks like this when your done! http://www.montanafungun.com/sling11.jpg and here it is on an AR using GG&G sling things http://www.montanafungun.com/sling10.jpg I hope you found this useful. If your not up to building one yourself I can make it for you for 20 dollars shipped just IM me. Thanks for looking! Matt 
I've been getting requests on how to use the sling.....Its completely understandable that some don't know how to use the sling/for that reason I offer you: SLING USE Carry in the front, pay attention to how the sling loops over the left shoulder and under the right arm. http://www.montanafungun.com/1frontsidecarry.jpg Carry on the right side, works well for most applications, can also be modified to sling weapon behind back by just sliding the gun further behind. http://www.montanafungun.com/1right.jpg Left side carry, excellent for transition drills, when the gun is dropped it will naturally slide to this position clearing the way for holster use on right thigh or hip. http://www.montanafungun.com/1leftsidecarry.jpg Backpack carry, by splitting the sling straps one for left and one for right shoulder, the weapon can be carried like a backpack for a very comfortable long term carry, a hike for instance, in the sand, carrying a log of fire wood, uphill, both ways http://www.montanafungun.com/1back.jpg Ready for use, presenting the weapon from the left side carry position, when finished drop gun and it will naturally return to left side carry, smooth! http://www.montanafungun.com/1right.jpg Transitioning the weapon from right to left shoulder with the sling is as easy as uncoupling the foreward-most buckle. This adds a foot or so to the sling length and makes it possible to shoot left handed while slung for a right handed shooter. Vice Versa for lefty's! http://www.montanafungun.com/1left.jpg Hope this helps all! Matt Also interested in seeing some pictures. |
|
|
|
[#6]
Step 1: Find your range bag.
Step 2: Remove sling from range bag. Step 3: Attach removed sling to rifle of choice. Step 4: Use money you saved to buy ammunition. Step 5: Go out and train with the ammunition that you bought with your rifle sling money. |
|
|
|
[#7]
Ok folks, I just got most of my supplies to make the homemade VTAC sling. Went to Jontay.com and they now sell the metal cam buckles in a minimum of a 50 piece bag for about $110 bucks. What the hell am I going to do now? The military backpack shoulder straps and quick release portions of the straps sold on Ebay will have me paying way to much to just get the buckles off of them. Anybody got suggestions?
It's after business hours here so have not contacted any military surplus stores yet to see if they carry them in stock. I've called several local surplus stores. No one sells the metal spring loaded cam buckles. |
|
|
|
[#8]
Thread is now EIGHT YEARS old. Good on yer, OP!
|
|
|
|
[#9]
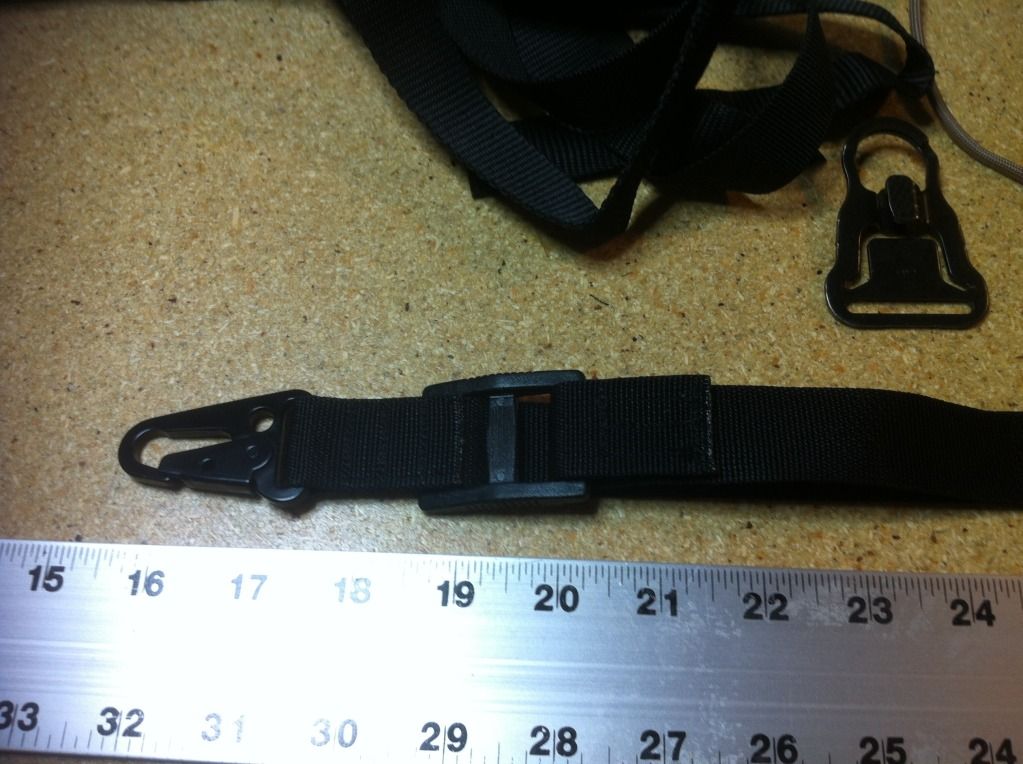
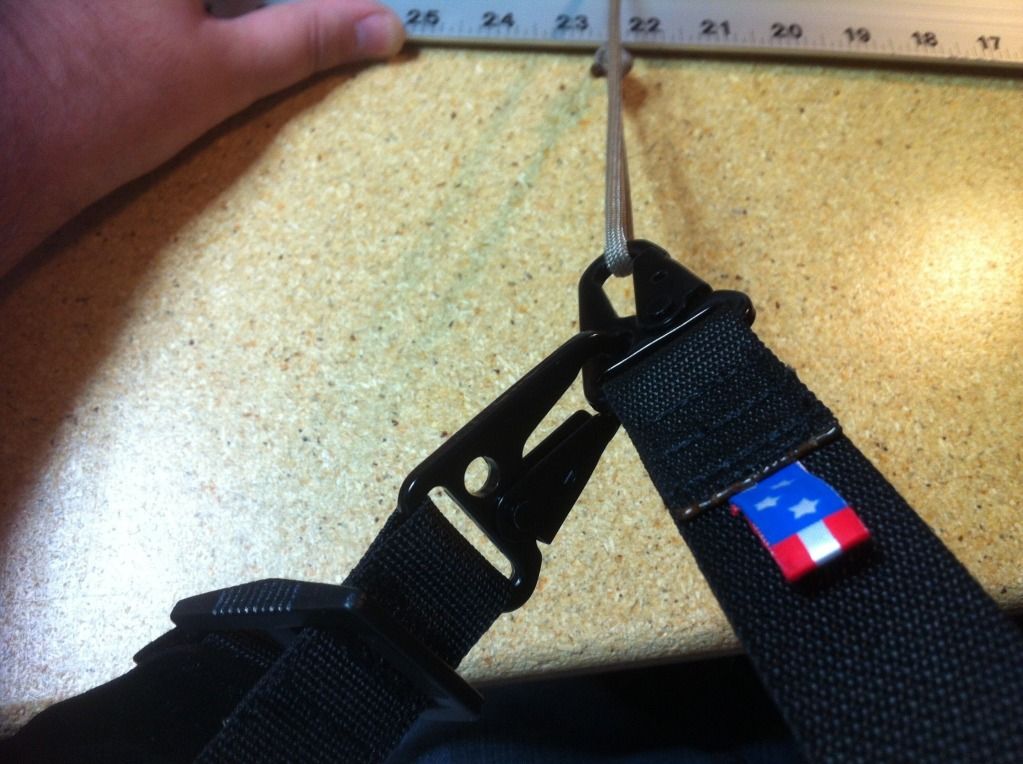
Pulled the trigger today on an order from jontay. 4 of my buddies and I will have modified Vtac "style" slings in 15 days or less! Pics to follow. We went with HK hooks and I'm doing a captured type tag end for the adjuster side.
ETA: Done!!! (Mental note first time using sewing machine, need moar practice.) 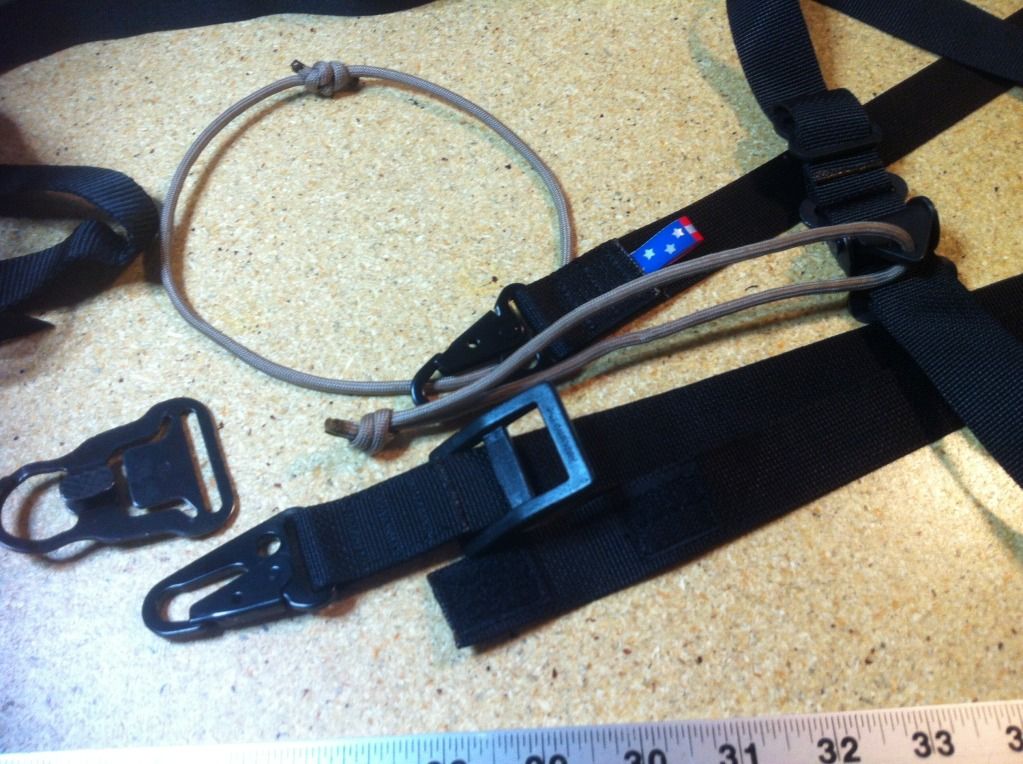

|
|
|
|
[#10]
tag
|
|
|
|
[#11]
I'm new to this site. I can't see the pictures of the Sling. What am I doing wrong?
Thanks |
|
|
|
[#12]
In order to get my spring loaded cam buckles I bought the lower half of Alice pack shoulder straps from Boomer Surplus off of Ebay. Had to pay right at $7 for each set of two plus shipping.
Supplies for three slings to my door from Jontay about $48 Cost of buckles for three slings $14 So it cost me about $21 per sling total because I could not find spring loaded cam buckles locally for a cheap price. |
|
|
|
[#13]
I just purchased the parts I need to make my slings. Going to be a VTAC with the TRIGLIDE attachment to allow it to be a 1 point or a 2 point. I am also going to have my wife sew a wide pad for the neck shoulder area as i went with the 1" webbing for the sling itself.
|
|
|
|
[#14]
Quoted:
I have all of the steps documented. I'll try this weekend to build another one and take some pictures. I'll host them here on arfcom so they can't disappear. Quoted:
Quoted:
Quoted:
This thread is now useless without pictures. Thanks for the youtube link. That'll have to do. I saw this sticky when I was going to ask about bipods and though, "I love DIY projects and a cheap sling would be perfect for my first build!".... too bad :\ Is there anywhere else where I can find a write-up like this? I'm better with reading and pics vs videos.. I have all of the steps documented. I'll try this weekend to build another one and take some pictures. I'll host them here on arfcom so they can't disappear. Is this still able to happen? Looking for some nice pics to follow along... |
|
|
|
[#15]
Quoted:
Is this still able to happen? Looking for some nice pics to follow along... Quoted:
Quoted:
Quoted:
Quoted:
This thread is now useless without pictures. Thanks for the youtube link. That'll have to do. I saw this sticky when I was going to ask about bipods and though, "I love DIY projects and a cheap sling would be perfect for my first build!".... too bad :\ Is there anywhere else where I can find a write-up like this? I'm better with reading and pics vs videos.. I have all of the steps documented. I'll try this weekend to build another one and take some pictures. I'll host them here on arfcom so they can't disappear. Is this still able to happen? Looking for some nice pics to follow along... It's on my to-do list. Six more weeks until I finish my Masters degree. |
|
|
|
[#16]
This is the video I used for instructions. I discovered that you may not need to have two sliders at every end of strap it seems to hold ok with one. I made one with only one slider at each end of strap. In may in fact have a stronger hold with two, I don't know.
https://www.youtube.com/watch?v=5hPu9L4tWJg I am finding that I need a way to control the free end of strap that hangs down when you tighten up the sling to use it as a single point sling. It seems to almost hang to the ground. |
|
|
|
[#17]
Typically, I would only use my powers only for evil. But, today, I think I will use them to repost the original instructions, with the original photos. You are most welcome.
---------------------------------------------------------- Credit goes to ggllggll ---------------------------------------------------------- I was bored today so I took some time to figure this out so here it is, build you own tactical sling STEP BY STEP with pictures. Here's what you're going to build... 
Best thing, its the same type of sling that can cost as much as 40 bucks, you'll build it for under $11! here we go Step 1: gather all parts needed for the build they are: 7.5 feet of 1.5" wide nylon web 5 inch piece of 1.5" wide nylon web <-------I'm getting feedback that this piece works much better 7 inches long. To each his own, assembly is easier with the longer piece. Two 15 inch pieces of 1" wide nylon web Two 1.5" wide buckles Three 1.5" wide slide locks Two 1" wide slide locks Tape measure Scissors to make the 5" piece and the two 15 inchers Lighter to seal the ends of the nylon web All the parts needed to make the sling can be found at ACE hardware for $10.08 
Step 2: Slide a female buckle end onto the 1.5" web and then put a slide lock on the tail of the web itself. Paying attention to the direction of the slide and female end in the picture 
Step 3: Loop the web back and through the slide lock installed in the 2nd step, make your loop 27 inches long. Paying attention to the direction of the slide and female end as before, use the picture if it helps. 
Step 4: Slide a 1.5" slide lock on to the web, note that you will leave an open end of the new slide lock pointing out, this will now be the "outside" of the sling. Follow picture. 
Step 5: Assemble this piece using the 5" long piece of 1.5" wide web and one female and one male end of 1.5" buckles. This step would be hard to describe use the picture for the details, but pay close attention to the way the web is routed and the direction of the buckles. 
Step 6: Slide the assembly you made in step 5 onto the sling as shown in the picture. 
Step 7: Assemble this mess on the open end of the sling using the last male buckle and a slide stop. I left the web loose in this picture to illustrate the way to route the sling through all the parts. Note that the tail of the web is on the outside of the sling, as described in step 4 
Step 8: Tighten step 7 down to look like this, only leave 1/4-1/2 inch of web past the slide lock 
Step 9: Using the two 15" pieces of 1" wide web and the two 1" wide slide locks pass them through like shown in the picture. This is where you will use the open end of the 1.5" lock left over from step 4. The 1" web passes through the outside of the male buckle installed in step 7 and 8 
Step 10: Tighten everything down good, and snap all the buckles, you'll have something that looks like this when your done! 
and here it is on an AR using GG&G sling things 
I hope you found this useful. If your not up to building one yourself I can make it for you for 20 dollars shipped just IM me. Thanks for looking! Matt I've been getting requests on how to use the sling.....Its completely understandable that some don't know how to use the sling/for that reason I offer you: SLING USE Carry in the front, pay attention to how the sling loops over the left shoulder and under the right arm. 
Carry on the right side, works well for most applications, can also be modified to sling weapon behind back by just sliding the gun further behind. 
Left side carry, excellent for transition drills, when the gun is dropped it will naturally slide to this position clearing the way for holster use on right thigh or hip. 
Backpack carry, by splitting the sling straps one for left and one for right shoulder, the weapon can be carried like a backpack for a very comfortable long term carry, a hike for instance, in the sand, carrying a log of fire wood, uphill, both ways 
Ready for use, presenting the weapon from the left side carry position, when finished drop gun and it will naturally return to left side carry, smooth! 
Transitioning the weapon from right to left shoulder with the sling is as easy as uncoupling the foreward-most buckle. This adds a foot or so to the sling length and makes it possible to shoot left handed while slung for a right handed shooter. Vice Versa for lefty's! 
Hope this helps all! Matt |
|
|
|
[#18]
Thanks baron66

|
|
|
|
[#19]
Quoted:
Thanks baron66 Indeed!!!  
|
|
|
|
[#20]
why is it i cant see any of the pic's
|
|
|
|
[#21]
Subscribed! Thanks for the info!
|
|
|
|
[#22]
Quoted:
Ok folks, I just got most of my supplies to make the homemade VTAC sling. Went to Jontay.com and they now sell the metal cam buckles in a minimum of a 50 piece bag for about $110 bucks. What the hell am I going to do now? The military backpack shoulder straps and quick release portions of the straps sold on Ebay will have me paying way to much to just get the buckles off of them. Anybody got suggestions? It's after business hours here so have not contacted any military surplus stores yet to see if they carry them in stock. I've called several local surplus stores. No one sells the metal spring loaded cam buckles. http://www.strapworks.com ETA: Aaaaaaang on a minnit... isn't this just a three point sling? Like this one http://youtu.be/qVGbYG2_u4I, only with an extra loop of webbing and a side-release buckle instead of the cam buckle? |
|
|
|
[#23]
nice
|
|
|
|
[#24]
nice
|
|
|
|
[#25]
That's awesome - tagged. Thanks, baron66, for reposting the pics and instructions.
|
|
|
|
[#26]
Quoted:
I have all of the steps documented. I'll try this weekend to build another one and take some pictures. I'll host them here on arfcom so they can't disappear. Quoted:
Quoted:
Quoted:
This thread is now useless without pictures. Thanks for the youtube link. That'll have to do. I saw this sticky when I was going to ask about bipods and though, "I love DIY projects and a cheap sling would be perfect for my first build!".... too bad :\ Is there anywhere else where I can find a write-up like this? I'm better with reading and pics vs videos.. I have all of the steps documented. I'll try this weekend to build another one and take some pictures. I'll host them here on arfcom so they can't disappear. That would be greatly appreciated, I'd like to give this project a go. |
|
|
|
[#27]
Cost me $19 at ace hardware.
|
|
|
|
[#28]
too bad the pictures arent still around
|
|
|
|
[#29]
Quoted:
too bad the pictures arent still around They're back one page: http://www.ar15.com/forums/t_3_19/252462_Make_your_own_TAC_SLING_for_10_bucks___Pics_and_detailed_instructions_inside__56k_warning.html&page=29#i6228014 |
|
|
|
[#30]
Great info. Thanks for sharing!
|
|
|
|
[#31]
all the pics are borked.
|
|
|
|
[#32]
Quoted:
all the pics are borked. See my post two up. |
|
|
|
[#33]
Finally ordered materials from strapworks.com.
Interestingly, they carry kits for this sling build and their .PDF directions are basically a one-page version of ggllggll's originals. Pictures are the same, just with the backgrounds and stuff like the Ace tags on the hardware deleted. I ordered materials not in a kit format to make a tan/coyote sling, and I ordered one of their polyester kits in "quadra camouflage" - similar to Multicam. We'll see how that turns out. |
|
|
|
[#34]
How did your sling turn out? Interested to hear pros and cons.
|
|
|
|
[#35]
Just ordered everything from strapworks. Nice little discount using the AR15 promo code! Woohoo!
I'll post updates once I get the stuff in and get it all together. |
|
|
|
[#36]
What's the point of the step 5 piece? I'm still trying to figure out what purpose it has on the sling. Any help?
|
|
|
|
[#37]
Quoted:
What's the point of the step 5 piece? I'm still trying to figure out what purpose it has on the sling. Any help? When the sling is in use & you want to transition from your right shoulder to the left shoulder without removing the sling from your body - you can disconnect the forward buckle (of the #5 piece) to gain an additional foot of space to make the transition. Once you are finished firing in the left transitional stance, you would reconnect the buckles to resume normal sling use. The other side of the #5 piece becomes the quick release buckle (to quickly remove the entire sling from your body in the event it may become entangled on an obstacle.) So in essence - The #5 piece is kind of what makes the whole 3-point sling system work. |
|
|
|
[#38]
Quoted:
When the sling is in use & you want to transition from your right shoulder to the left shoulder without removing the sling from your body - you can disconnect the forward buckle (of the #5 piece) to gain an additional foot of space to make the transition. Once you are finished firing in the left transitional stance, you would reconnect the buckles to resume normal sling use. The other side of the #5 piece becomes the quick release buckle (to quickly remove the entire sling from your body in the event it may become entangled on an obstacle.) So in essence - The #5 piece is kind of what makes the whole 3-point sling system work. Quoted:
Quoted:
What's the point of the step 5 piece? I'm still trying to figure out what purpose it has on the sling. Any help? When the sling is in use & you want to transition from your right shoulder to the left shoulder without removing the sling from your body - you can disconnect the forward buckle (of the #5 piece) to gain an additional foot of space to make the transition. Once you are finished firing in the left transitional stance, you would reconnect the buckles to resume normal sling use. The other side of the #5 piece becomes the quick release buckle (to quickly remove the entire sling from your body in the event it may become entangled on an obstacle.) So in essence - The #5 piece is kind of what makes the whole 3-point sling system work. Awesome thanks! This post helped me a ton! |
|
|
|
[#39]
Wonder why I can't see the pictures?
|
|
|
|
[#40]
|
|
|
|
[#41]
The pictures are gone on this but this is on pdf Here if you would like to see it again.
|
|
|
|
[#42]
Quoted:
Just ordered everything from strapworks. Nice little discount using the AR15 promo code! Woohoo! . Where would that code be located? Or, could you post the code? Thanks. |
|
|
|
[#43]
Quoted: Where would that code be located? Or, could you post the code? Thanks. Quoted: Quoted: Just ordered everything from strapworks. Nice little discount using the AR15 promo code! Woohoo! . Where would that code be located? Or, could you post the code? Thanks. |
|
|
|
[#44]
Quoted: Very cool thread - thanks for sharing. I hate when I find one of these and then go back and find that the pictures are gone, so when I find one that I like I try to save a copy. I've made a copy of the tutorial and a couple additions from the thread. You can download a Word copy of it or .PDF copy of it: Word: http://www.box.net/shared/038c5b8yt8 PDF: http://www.box.net/shared/f620igchk4 Thanks. |
|
|
|
[#45]
I made one of these a while back. Thanks for bumping it up. I just ordered a couple more kits.
|
|
|
|
[#46]
Wow, its nice to see that this thread is still around.
Thanks to everyone who helped keep it alive by hosting my original pictures, my website went offline a couple years ago. I haven't seen this thread, or these pictures either, for ten years. Its great to be back! Matt |
|
|
|
[#47]
Just to update this thread, the ar15 promo code still works at strapworks.com. Everything was $15.xx shipped. Should be here tomorrow
|
|
|
|
[#48]
Dang, what happened to the solid color polyester kits?
|
|
|
|
[#49]
Can you use the tubular nylon webbing on this or is it to thick?
|
|
|
|
[#50]
LOL man I just went and tried the "sling off of range bag"!!!!!!!!!! good for me
|
|
|
 Win a FREE Membership!
Sign up for the ARFCOM weekly newsletter and be entered to win a free ARFCOM membership. One new winner* is announced every week!
You will receive an email every Friday morning featuring the latest chatter from the hottest topics, breaking news surrounding legislation, as well as exclusive deals only available to ARFCOM email subscribers.

AR15.COM is the world's largest firearm community and is a gathering place for firearm enthusiasts of all types.
From hunters and military members, to competition shooters and general firearm enthusiasts, we welcome anyone who values and respects the way of the firearm.

Subscribe to our monthly Newsletter to receive firearm news, product discounts from your favorite Industry Partners, and more.
Copyright © 1996-2024 AR15.COM LLC. All Rights Reserved.
Any use of this content without express written consent is prohibited.
AR15.Com reserves the right to overwrite or replace any affiliate, commercial, or monetizable links, posted by users, with our own.


