|
[Last Edit: williewvr]
[#1]
Originally Posted By tweeter:
Short answer? it depends. There is always a noticeable effect, but let me explain: We're gonna do a little audience participation here, please bear with me. Sit down at a desk (you're probably at a desk or table right now anyway) and we're gonna simulate two positions, standing and prone. We're gonna need a plastic cup or tumbler, something nearby that can closely match the diameter of your handguards. A thick magic marker or the spine of a book will do if you have nothing else. Let's go over the basic hand position first. Go ahead and rest your support elbow on the desk and turn your support hand to face your body. Let your whole hand totally rest, your thumb should form a shape like a "J" off the side of your hand. Go ahead and make sure you don't have any coffee in your coffee cup before you do this next step. Take your stand-in "hand guard" object (coffee travel tumbler in my case) and press it downward to simulate the weight of your rifle. You're trying to make it feel like the weight of your rifle. I want you to pay attention to where it rests on your thumb. It will most likely be naturally resting the majority of your "rifle "weight" in that space between your first and second knuckles on your thumb. Note: If you're interested in how to enhance this effect in the prone with a sling, check out Highpower/CMP prone positions on youtube, it's illuminating stuff for new shooters. Anyway, that pulse you were worried about?... it resides primarily in the base of your thumb, closer to the heel of your palm. We simply move the handgaurd to a location where it's less likely to be effected by the pulse, away from muscles. Try it again without your elbow supported, see what changes. Here's something else you can do without your elbow supported. Keeping your hand in the same position as before (make that "J") I want you to bend your hand (palm facing you, remember?) back towards your body. Your wrist will naturally reach a point where it can no longer bend. It simply wasn't meant to move that far. Use it. Wanna try it standing now? Awesome, let's do it. Keep your hand in that same idiot-savant position and just stand up. "Well shit, where do I put my elbow at now?" Psst, gently tip your upper body rearward and simply lay your support tricep across your chest. Now turn your whole body (not just your upper body) to face your target. If you have your rifle handy, go ahead and clear it and try it with an empty weapon. Your wife, girlfriend, kids, dog will think you're a retard, but it's actually pretty good practice for building a good position. I know what you're thinking, "why did he mention the prone position if I'm standing?" Here's why: because you can use the same technique prone. In fact, you probably should. At least give it a try. Most shooters use the drill sergeant instructed "lay it across the top of your palm and hold the front hand guard". I wouldn't. Your forward support hand should be completely relaxed. It reduces the amount of pulse felt through the rifle. Muscular action demands blood flow, that leads to muscular fatigue, which leads to inconsistent pressures. Your muscles weaken and adjust in a position, your bones do not. Whenever possible: Just use your muscles to move your bones into position to support the weapon in a firing position. Besides this, your grasp of the front of the weapon is not humanly consistent, so let's go ahead and decrease that grasping action and make things more consistent. As far as mitigating the pulse in your thumb goes, it's the same as your normal pulse, it's nothing special. The only difference is that your thumb's pulse is in your thumb... in the end it doesn't matter unless you're operating past a normal plateau of performance. I could continue on that line of thought, but then I'd start talking about nearing diminishing returns in performance. I'm trying to keep this in context since this is the beginner sub-forum. The very small pulse in a thumb? a beginning shooter is probably not going to feel that in a position unless they're almost asleep on the gun. Back on track. I'm more worried about my total pulse, my felt heart rate translated through my weapon and noticed in my sights. No fancy tricks I can think of except to increase structural contact and decrease muscular contact. roll the weapon towards those two knuckles on your thumb. It's probably not going to get there perfectly, but it will probably help mitigate (but probably not totally eliminate) felt pulse in your support hand. This action will also have a great side-effect of relaxing your hand. With an extended thumb it's difficult to involuntarily grasp the weapon during the natural jump in free recoil of the weapon. If you have any questions please ask. I hope this helps you. Originally Posted By tweeter:
Originally Posted By williewvr:
Originally Posted By tweeter:
Originally Posted By dangerdan:...
I found this stance to serve me better, except I kept my fingers closed http://media.dma.mil/2013/Oct/25/2000716495/640/360/0/131007-M-SG512-126.JPG Awesome standing position. My thumb can't bend backwards any further, so it's a great piece of real estate to use for support. It's just uncomfortable. Still, one of my favorite ways to find support for standing. Since the thumb has a pulse does it have a noticeable effect? Short answer? it depends. There is always a noticeable effect, but let me explain: We're gonna do a little audience participation here, please bear with me. Sit down at a desk (you're probably at a desk or table right now anyway) and we're gonna simulate two positions, standing and prone. We're gonna need a plastic cup or tumbler, something nearby that can closely match the diameter of your handguards. A thick magic marker or the spine of a book will do if you have nothing else. Let's go over the basic hand position first. Go ahead and rest your support elbow on the desk and turn your support hand to face your body. Let your whole hand totally rest, your thumb should form a shape like a "J" off the side of your hand. Go ahead and make sure you don't have any coffee in your coffee cup before you do this next step. Take your stand-in "hand guard" object (coffee travel tumbler in my case) and press it downward to simulate the weight of your rifle. You're trying to make it feel like the weight of your rifle. I want you to pay attention to where it rests on your thumb. It will most likely be naturally resting the majority of your "rifle "weight" in that space between your first and second knuckles on your thumb. Note: If you're interested in how to enhance this effect in the prone with a sling, check out Highpower/CMP prone positions on youtube, it's illuminating stuff for new shooters. Anyway, that pulse you were worried about?... it resides primarily in the base of your thumb, closer to the heel of your palm. We simply move the handgaurd to a location where it's less likely to be effected by the pulse, away from muscles. Try it again without your elbow supported, see what changes. Here's something else you can do without your elbow supported. Keeping your hand in the same position as before (make that "J") I want you to bend your hand (palm facing you, remember?) back towards your body. Your wrist will naturally reach a point where it can no longer bend. It simply wasn't meant to move that far. Use it. Wanna try it standing now? Awesome, let's do it. Keep your hand in that same idiot-savant position and just stand up. "Well shit, where do I put my elbow at now?" Psst, gently tip your upper body rearward and simply lay your support tricep across your chest. Now turn your whole body (not just your upper body) to face your target. If you have your rifle handy, go ahead and clear it and try it with an empty weapon. Your wife, girlfriend, kids, dog will think you're a retard, but it's actually pretty good practice for building a good position. I know what you're thinking, "why did he mention the prone position if I'm standing?" Here's why: because you can use the same technique prone. In fact, you probably should. At least give it a try. Most shooters use the drill sergeant instructed "lay it across the top of your palm and hold the front hand guard". I wouldn't. Your forward support hand should be completely relaxed. It reduces the amount of pulse felt through the rifle. Muscular action demands blood flow, that leads to muscular fatigue, which leads to inconsistent pressures. Your muscles weaken and adjust in a position, your bones do not. Whenever possible: Just use your muscles to move your bones into position to support the weapon in a firing position. Besides this, your grasp of the front of the weapon is not humanly consistent, so let's go ahead and decrease that grasping action and make things more consistent. As far as mitigating the pulse in your thumb goes, it's the same as your normal pulse, it's nothing special. The only difference is that your thumb's pulse is in your thumb... in the end it doesn't matter unless you're operating past a normal plateau of performance. I could continue on that line of thought, but then I'd start talking about nearing diminishing returns in performance. I'm trying to keep this in context since this is the beginner sub-forum. The very small pulse in a thumb? a beginning shooter is probably not going to feel that in a position unless they're almost asleep on the gun. Back on track. I'm more worried about my total pulse, my felt heart rate translated through my weapon and noticed in my sights. No fancy tricks I can think of except to increase structural contact and decrease muscular contact. roll the weapon towards those two knuckles on your thumb. It's probably not going to get there perfectly, but it will probably help mitigate (but probably not totally eliminate) felt pulse in your support hand. This action will also have a great side-effect of relaxing your hand. With an extended thumb it's difficult to involuntarily grasp the weapon during the natural jump in free recoil of the weapon. If you have any questions please ask. I hope this helps you. |
|
|
|
|
[#2]
Originally Posted By williewvr:
...ive never tried it just interested. I shoot off the heal of my open hand. Had hell in basic because the drills felt I wasn't trying to use the official system even though I was near the top of my class on the range. They made me reshoot a prone supported target because they thought the bullet was starting to tumble and that three holes in a perfectly straight row wasnt possible. Dad would of reamed me about my trigger control. Next time my breathing was a little off and the center round wasn't on the same line. The only stage I had issues with was standing. The AR has never felt right from standing for me. I'm too tall to be comfortable with an A1. I "graduated" before the A2s came out, so I missed the longer stocks. If you want to shoot standing with the heel of your hand on the weapon, hell yeah. When I teach a long-time shooter new techniques, I try not to interfere with what's already working for them. The active words in that sentence: what's working. If someone has been successfully been using a technique and they're rockin' it. No problem. Besides, the techniques I described are just that... techniques. It's not gospel. People are all different and as a result, they all don't all perform the same actions successfully in the same manner. I know several very good shooters who like to rest the front of the weapon on the back of their ring finger and middle finger. I know another dude that rests the entire gun on his fist with with just his pinky finger raised. You know why I don't make fun of it? It fucking works. For him. As far as being uncomfortable shooting while standing... I don't know many shooters that are completely at home in the standing position. It offers the least amount of stability and is open to numerous variables that are difficult to account for. In regard to stock length while standing and shooting at distant targets: the length isn't that much of an issue actually. Most shooters that stand and shoot at distant targets are willing to sacrifice a good buttstock-to-shoulder weld in trade for a better stable position and natural point of aim. If you google "CMP standing positions" you'll see a lot of service rifle shooters shooting with barely any measure of contact with their stock, and they still get good results. |
|
|
|
|
[#3]
Originally Posted By tweeter:
If you want to shoot standing with the heel of your hand on the weapon, hell yeah. When I teach a long-time shooter new techniques, I try not to interfere with what's already working for them. The active words in that sentence: what's working. If someone has been successfully been using a technique and they're rockin' it. No problem. Besides, the techniques I described are just that... techniques. It's not gospel. People are all different and as a result, they all don't all perform the same actions successfully in the same manner. I know several very good shooters who like to rest the front of the weapon on the back of their ring finger and middle finger. I know another dude that rests the entire gun on his fist with with just his pinky finger raised. You know why I don't make fun of it? It fucking works. For him. As far as being uncomfortable shooting while standing... I don't know many shooters that are completely at home in the standing position. It offers the least amount of stability and is open to numerous variables that are difficult to account for. In regard to stock length while standing and shooting at distant targets: the length isn't that much of an issue actually. Most shooters that stand and shoot at distant targets are willing to sacrifice a good buttstock-to-shoulder weld in trade for a better stable position and natural point of aim. If you google "CMP standing positions" you'll see a lot of service rifle shooters shooting with barely any measure of contact with their stock, and they still get good results. Originally Posted By tweeter:
Originally Posted By williewvr:
...ive never tried it just interested. I shoot off the heal of my open hand. Had hell in basic because the drills felt I wasn't trying to use the official system even though I was near the top of my class on the range. They made me reshoot a prone supported target because they thought the bullet was starting to tumble and that three holes in a perfectly straight row wasnt possible. Dad would of reamed me about my trigger control. Next time my breathing was a little off and the center round wasn't on the same line. The only stage I had issues with was standing. The AR has never felt right from standing for me. I'm too tall to be comfortable with an A1. I "graduated" before the A2s came out, so I missed the longer stocks. If you want to shoot standing with the heel of your hand on the weapon, hell yeah. When I teach a long-time shooter new techniques, I try not to interfere with what's already working for them. The active words in that sentence: what's working. If someone has been successfully been using a technique and they're rockin' it. No problem. Besides, the techniques I described are just that... techniques. It's not gospel. People are all different and as a result, they all don't all perform the same actions successfully in the same manner. I know several very good shooters who like to rest the front of the weapon on the back of their ring finger and middle finger. I know another dude that rests the entire gun on his fist with with just his pinky finger raised. You know why I don't make fun of it? It fucking works. For him. As far as being uncomfortable shooting while standing... I don't know many shooters that are completely at home in the standing position. It offers the least amount of stability and is open to numerous variables that are difficult to account for. In regard to stock length while standing and shooting at distant targets: the length isn't that much of an issue actually. Most shooters that stand and shoot at distant targets are willing to sacrifice a good buttstock-to-shoulder weld in trade for a better stable position and natural point of aim. If you google "CMP standing positions" you'll see a lot of service rifle shooters shooting with barely any measure of contact with their stock, and they still get good results. I use a rifle with a 15 3/4 LOP so A1s are really short. The only way it works for me is to put the toe of the stock high in the pocket, this lets me keep my head more upright while still getting a good cheek weld. I'm Working on shooting the AR more, the HBAR and a decent trigger are helping. I still miss the wood though. |
|
|
|
|
[#4]
Originally Posted By williewvr:...I still miss the wood though.
Add lead weights. 
|
|
|
|
|
[#5]
Originally Posted By williewvr: Since the thumb has a pulse does it have a noticeable effect? Originally Posted By williewvr: Originally Posted By tweeter: Originally Posted By dangerdan:... I found this stance to serve me better, except I kept my fingers closed http://media.dma.mil/2013/Oct/25/2000716495/640/360/0/131007-M-SG512-126.JPG Awesome standing position. My thumb can't bend backwards any further, so it's a great piece of real estate to use for support. It's just uncomfortable. Still, one of my favorite ways to find support for standing. Since the thumb has a pulse does it have a noticeable effect? No. Your body's movement far exceeds the avg 120mmHG of pressure pumping through your arteries. There is also the reverse C-clamp, which looks exactly the opposite. Some say you "pinch" the delta ring, but I just let the rifle rest. Pinching causes muscle spasms. |
|
|
|
|
[Last Edit: MILSPEC556]
[#6]
Originally Posted By dangerdan:
No. Your body's movement far exceeds the avg 120mmHG of pressure pumping through your arteries. There is also the reverse C-clamp, which looks exactly the opposite. Some say you "pinch" the delta ring, but I just let the rifle rest. Pinching causes muscle spasms. Originally Posted By dangerdan:
Originally Posted By williewvr:
Originally Posted By tweeter:
Originally Posted By dangerdan:...
I found this stance to serve me better, except I kept my fingers closed http://media.dma.mil/2013/Oct/25/2000716495/640/360/0/131007-M-SG512-126.JPG Awesome standing position. My thumb can't bend backwards any further, so it's a great piece of real estate to use for support. It's just uncomfortable. Still, one of my favorite ways to find support for standing. Since the thumb has a pulse does it have a noticeable effect? No. Your body's movement far exceeds the avg 120mmHG of pressure pumping through your arteries. There is also the reverse C-clamp, which looks exactly the opposite. Some say you "pinch" the delta ring, but I just let the rifle rest. Pinching causes muscle spasms. The reverse c-clamp has always worked well for me. I let it rest with no pinch. I still use it once in a blue moon just for Shits and gigs. |
|
|
|
|
[#7]
Bump for prosperity
|
|
|
|
CA, USA
|
[#8]
Thanks for this! Great job
|
|
|
|
[#9]
Originally Posted By Climbhigher23:
Thanks for this! Great job 
|
|
|
|
|
[#10]
Thank you all for sharing this. I suck at standing up and shooting but do alright with the other positions. lol
|
|
|
|
|
[#11]
Billy, I've found a lot of really new shooters have trouble identifying the "pocket" of the shoulder. I think that this is an even more important basic point than cheek weld, since you can't keep a consistent cheek weld if you can't consistently shoulder the rifle. Can you post something as well written as your first writeup on that? My explanations turn out lousy for various reasons...
On the subject of breathing, I have a sort of hybrid breathing technique. The "half breath hold" is what I was taught in (USAF) Basic, but it wasn't really something we got any practice in (USAF appears to be afraid of guns that aren't mounted on airplanes). Later, I had the opportunity to try it with some supervision, and I got better at it. Since then, I have sort of adjusted it to fit my body and how I'm comfortable with breath control. If I'm in a really well supported, bench rested position, I tend to squeeze starting as I'm exhaling past half-way. This tends to make my squeeze smooth with a well broken-in GI-type trigger, with the weapon firing at about the "empty lung" point, without either being uncomfortable or requiring much concentration on breathing. With a 2-stage trigger, even in the same bench position, I focus more on the classic "half breath hold" technique, but only after the take-up phase of trigger movement. My 20" rifle has a Geissele SSA-E trigger, so there's only about 1 pound of pull left, which makes it important to be extra stable as that last bit of pressure is applied. |
|
|
|
|
[Last Edit: Knife_Sniper]
[#12]
Why don't we talk about sights too?
Contribution: When shooting any small peep aperture, the focus should be on the front sight. The front sight should be crystal clear and the target slightly fuzzy. When shooting the large peep, the focus should be on a crystal clear target with a fuzzy front sight as the large peep is designed for low light and speed up close. The small peep does two awesome things that most shooters are unaware of: it increases depth of field and reduces parallax error. In a practical sense, this means that when you focus on the front sight your target will be slightly out of focus... But flip up your large peep and focus on the front sight and the target will be *very* out of focus. With the large peep you have lost the depth of field effect that the small peep provides. Furthermore, the small peep reduces parallax error so its alignment in the dead center of the ghosted rear peep is not as essential for defensive shooting as has been reported. A mild drift of the head position / eye position to push the front sight a bit off center will largely be without consequence with most shooting at say man sized targets or defensive targets. Implication is the new shooter can instead negate worrying or focusing on aligning the front sight post dead center and instead just keep the front sight post in the rough center of his / her visual field. By skipping the rear peep "perfect" alignment, the new shooter can instead focus on maintaining that crystal clear front sight and keeping it aligned with the target...no need to worry about also aligning the peep "dead center" and they will still get positive shooting results. I used this method to coach a new shooter (first time behind a center fire rifle) to 300 yards in his first magazine. The key was how simplified you can make it for the new shooter and taking the rear peep out of the equation / discussion about alignment made a huge difference. This also reduces a variable from a coaching perspective, particularly an obtuse one... If your student is failing to maintain standards of accuracy at least you can mark out sight alignment as a major factor and instead focus on other variables and keep sight alignment at the rear instead of wasting your time coaching them on an aspect that matters very little vs breath control, trigger squeeze, flinching, etc. It may have helped that he has a masters in aeronautics so likely he understood everything the first time I said it.
|
|
|
|
|
[#13]
Originally Posted By Climbhigher23: Thanks for this! Great job indeed! at the last shooting match I caught myself doing everything wrong. lots of good info here that I hope people are taking advantage of. shooting dirt and rivers is for shitbirds! |
|
|
|
TN, USA
|
[#14]
This thread delivers. Well done. |
|
|
|
[Last Edit: Knife_Sniper]
[#15]
Double tap
|
|
|
|
|
[#16]
Here is my small contribution to the shooting community. 25 to 300: Covers sighting in at 25 and moving right to the 300 yard line and finalizing your sight in at extended range as well as shooting tips. |
|
|
|
|
[#17]
|
|
|
|
USA
|
[#18]
Originally Posted By BillyDoubleU:
Basic Shooting Positions Ok so some how I got roped into adding to this. Right off the bat, this is going to be very, very basic. I will be doing my very best Cory Hhhhggggnnnnrrr impersonation and regurgitating a lot of what you can easily find all over the internet with a simple search. But since you probably didn’t know you were even looking for it, here it is, just marinating for you. So after you read the following you can go and practice it and wow your friends and colleagues with your amazing jump in basic marksmanship. So before you go and drop some serious money to make your new AR-15 as accurate as possible why not first work on making yourself as accurate as possible? Before we get into shooting positions we need to talk just a touch about a few other aspects what goes into the basics. Which will be just as brief, breathing and trigger control. Breathing If you are not set up in a good shooting position then breathing is going to create a lot of movement and depending on the position may not even be comfortable enough maintain. Breathing should create only one movement pattern. Up and down. That’s it. So if you are not seeing your sights move up and down when in position, stop and find what you need to do to correct your position so your sights are moving up and down with each breath. There are a few different techniques but they all follow the same basic principle. Breath so your sights are moving up and down and when you are ready, hold your breath for just a few seconds and pull the trigger. The goal is to do this while in a natural respiratory pause. If you start chicken necking then you took too long. You get roughly a 10 second window. Empty Lung- in-out, at the end out breathing out a natural respiratory pause will occur and you hold that pause bring your sights still and steady on your target and you pull the trigger straight back and BLAM. <a href="https://flic.kr/p/qyWw2q" target="_blank">https://farm9.staticflickr.com/8579/16125327354_e563a745a3.jpg</a>image by BillyDoubleU, on Flickr Half Full- in-out, in-hold half way through your breath and create a natural respiratory pause and steady your sight and pull the trigger straight back. <a href="https://flic.kr/p/remJYf" target="_blank">https://farm9.staticflickr.com/8673/16560080438_2d354e94e9.jpg</a>image by BillyDoubleU, on Flickr Three Quarter Full- this should be pretty self explanatory at this point right? Breath in just a bit more than the Half Full method and follow the same procedure. <a href="https://flic.kr/p/qyWvKy" target="_blank">https://farm9.staticflickr.com/8581/16125326434_2065e36f99.jpg</a>image by BillyDoubleU, on Flickr Now of course you can modify these techniques any way you like as long as you create that respiratory pause and steady your rifle just prior to pulling the trigger. But understand that the more air you have in your lungs, the more like a ballon your torso will be. I prefer less air but find what works well for you. Trigger Control Trigger control, more important than you think it is? If you are not working your trigger just right then you are sabotaging anything and everything you did up to that point. The basics of trigger control is placing your finger correctly on the trigger. You do NOT hook the trigger in the crease of your second joint. You want to place your trigger finger to contact the trigger somewhere between that second joint and the tip of the finger. Where is up to the shooter depending on hand size, rifle grip etc. The trigger finger should not rest against the side of the stock or grip. Their should be a space between the trigger finger and the stock/grip to avoid the tendency to push against the rifle and therefore the trigger. The goal is a perfect, repeatable trigger pull, straight back to the rear of the rifle. If while in the trigger pulling process you see your sights moving, stop, correct and continue in that 10 second window. This is where your Dry Fire practice is going to pay off the most. This leads us right into Follow Through but proper follow through can not be achieved unless proper shooting position has been achieved. The WRONG Way <a href="https://flic.kr/p/qz7Hgt" target="_blank">https://farm9.staticflickr.com/8576/16127316293_8a03bbd18d.jpg</a>Improper Trigger Finger by BillyDoubleU, on Flickr <a href="https://flic.kr/p/rvU3kt" target="_blank">https://farm9.staticflickr.com/8635/16747251265_3dbe133e6e.jpg</a>Improper Trigger Finger 2 by BillyDoubleU, on Flickr The CORRECT Way <a href="https://flic.kr/p/qz6LWg" target="_blank">https://farm8.staticflickr.com/7627/16127133523_bde17b1f60.jpg</a>Proper Trigger Finger by BillyDoubleU, on Flickr <a href="https://flic.kr/p/reiRKs" target="_blank">https://farm9.staticflickr.com/8616/16559517908_912560b515.jpg</a>Proper Trigger Finger 2 by BillyDoubleU, on Flickr Finally Back to Basic Shooting Positions Prone, sitting, standing and that’s it. All of these have variations but here we are only going to focus on the most basic fundamentals. There are plenty of people here that have way more experience than me when it comes to shooting with bipods etc. and most basic AR-15 will not have bipods. Oh and a quick rule to follow, always make your contacts Hard to Soft, I will expand on this just slightly in describing the shooting positions. Some of what makes up a good shooting Bone Support- What does that mean? Well quite simply it means if your bones don’t conform to the position then it’s not a good position. You can’t muscle yourself into a good position. Being in a good shooting position means relying and taking advantage of the body’s natural ability to absorb recoil. Just look at the collar bone, go a head and feel it, where it connects at the shoulder it creates a natural cup which just happens to be perfect for a rifle stock. In every position this pocket will present itself. Muscle Relaxation- Simple, relax. If you have gotten the bone support correct then you will not have to muscle yourself to hold your rifle where you want it. If you find yourself having to flex and strain to hold your sights where you want them, you need to stop and identify why you are not utilizing correct bone support. Natural Point of Aim- And all of the that leads right into the Natural Point of Aim! After you have corrected the bone support and muscular relaxation aspects of your positions foundation you can test the natural point of aim. What is this? This when you can breath easy, fully relaxed and your sights move up and down on you intended target, exactly where you want to shoot. If you are not, you adjust your position ever so slightly until your sight meets the above requirements. Close your eyes, breath, open them, are you still tracking vertically exactly where you want to hit? If yes, you have achieved a Natural Point of Aim. If not, repeat the steps until you have. Prone The Prone position is the most basic and has the most potential for accurate shooting. You have the supported and unsupported positions and the basic flat legs straight back, what I call the Jack Knife and a modified Jack Knife. First we will cover the Supported vs. Unsupported. Supported- This is basically that the front of your rifle is resting nicely on a solid yet soft object, ie. Your ruck, forearm, hat, sandbag etc. This will help steady the rifle and absorb recoil, just like a hard rifle stock against your muscle. <a href="https://flic.kr/p/rvTFgK" target="_blank">https://farm9.staticflickr.com/8676/16747180405_8543a8834f.jpg</a>Prone Supported by BillyDoubleU, on Flickr Unsupported- Everything else, using your hand or your sling or any combination thereof. <a href="https://flic.kr/p/rvTwKM" target="_blank">https://farm8.staticflickr.com/7606/16747151755_0540247657.jpg</a>Prone Unsupported by BillyDoubleU, on Flickr Obviously these two methods apply to all shooting position. Straight Prone- This is my preferred method. Laying flat on the ground, STRAIGHT BEHIND your rifle creating a parallel set of lines with your rifle and your spine. Hips follow inline and you legs kick out even creating a triangle, toes pointing out so the feet are flat on the ground. That’s it. This position will allow for the most solid foundation to absorb recoil. Do not cant your body to the rifle. <a href="https://flic.kr/p/rvN2D7" target="_blank">https://farm9.staticflickr.com/8638/16746078252_11443a9135.jpg</a>Prone Unsupported 1 by BillyDoubleU, on Flickr <a href="https://flic.kr/p/rtAEHh" target="_blank">https://farm9.staticflickr.com/8673/16721228626_161d781170.jpg</a>Prone Unsupported Forward Hand by BillyDoubleU, on Flickr Chest is lower in the Straight Prone: <a href="https://flic.kr/p/qyUe4b" target="_blank">https://farm9.staticflickr.com/8655/16124880044_f64ebc1953.jpg</a>Prone Chest by BillyDoubleU, on Flickr Jack Knife- I personally do not like this position and feel it does not allow for proper recoil in large caliber rifles. But here it is, you lay flat on the ground behind your rifle just as before. If you are right handed you bring your right leg up and out to the side. Your foot should be around the level of your knee creating a triangle. This position may help your ability to breath but if you are not tracking your sight straight up and down, you need to adjust until you are. <a href="https://flic.kr/p/rtBhz7" target="_blank">https://farm9.staticflickr.com/8632/16721349256_73921180da.jpg</a>Jack Knife by BillyDoubleU, on Flickr If you can see it, the chest is raised slightly more off the ground: <a href="https://flic.kr/p/rvNuoj" target="_blank">https://farm9.staticflickr.com/8639/16746168222_72db48b8ae.jpg</a>Jack Knife Chest by BillyDoubleU, on Flickr Modifed Jack Knife- Set up the same ways as above but instead of the foot resting against the leg it is crossed over the back. It will still relieve any breathing issues you maybe struggling with in the Straight Prone but won’t raise you off the ground as much as the Jack Knife <a href="https://flic.kr/p/res2Rz" target="_blank">https://farm8.staticflickr.com/7287/16561112799_acee5be467.jpg</a>Modified Jack Knife by BillyDoubleU, on Flickr All of these supported prone positions can be aided buy using your non-support hand to brace the stock of your rifle and help apply a steady rear pressure into your shoulder pocket. <a href="https://flic.kr/p/reiwNu" target="_blank">https://farm8.staticflickr.com/7643/16559454168_d5b343d6cc.jpg</a>Support Hand Supported by BillyDoubleU, on Flickr <a href="https://flic.kr/p/rtARSm" target="_blank">https://farm8.staticflickr.com/7606/16721266156_67ece2c99b.jpg</a>Prone Supported 2 by BillyDoubleU, on Flickr <a href="https://flic.kr/p/rvMB9K" target="_blank">https://farm9.staticflickr.com/8646/16745995871_f6bdcf285a.jpg</a>Prone Supported 1 by BillyDoubleU, on Flickr Sitting Sitting comes in two basic forms, Cross Legged and Opened Legged. I prefer cross legged as I feel that it is a more solid method as opposed to open legged. Each has their place terrain depending and ability of the shooter. Cross Legged- Exactly what you think it is, just like when you were a kid. Sit on the ground, cross your legs. Do not sit with your torso directly facing your target. You want to be at around 30-60 degree angle depending on what is most natural for you. Not straight on and not a full 90 degrees. Remember the Hard to Soft deal I mentioned? Still applies here. Hard? Knees and elbows. I prefer hard elbow into the inner soft portion of the thighs around the knee. You can reverse that if that is more comfortable to you but the point remains, Hard to Soft contacts. Adjusting the height of your sights is as simple as crossing your legs more or less. An important fact to remember, Natural Point of Aim applies to all shooting position as well as all the steps that lead up to achieving it. <a href="https://flic.kr/p/qz6jtr" target="_blank">https://farm9.staticflickr.com/8653/16127044503_fa516c57b4.jpg</a>Crosslegged by BillyDoubleU, on Flickr [email=mailto:https://www.flickr.com/photos/128204570@N08/16560878289/]https://farm9.staticflickr.com/8608/16560878289_7479f49c9a.jpg[/email] Crosslegged 1 by BillyDoubleU, on Flickr Opened Legged- Sitting and again, do not sit with your torso facing straight at the target. You will want the target off about 30-60 degrees just as before. Knees up, elbows (hard) to the inside of the knees (soft). To adjust the height of your sights you either raise or lower your knees. You’ve maintained your Natural Point of Aim right? <a href="https://flic.kr/p/rerZ9k" target="_blank">https://farm8.staticflickr.com/7622/16561103679_06e9d7e7a2.jpg</a>OpenLegged by BillyDoubleU, on Flickr <a href="https://flic.kr/p/rvMKaV" target="_blank">https://farm9.staticflickr.com/8604/16746022851_8648a536b3.jpg</a>Openlegged 1 by BillyDoubleU, on Flickr Kneeling Now I am not a huge fan of kneeling only because I feel it is typically reserved for a quick stop, pop off a shot and run. It is often barely more stable then standing and fatigue usually sets in faster. I come from more of a competition setting where kneeling was required in a brief moment to either fire under a high barricade, over a low barricade or around the side of a barricade. Kneeling in a combat setting will obviously allow the shooter to immediately present a smaller target and allow that shooter to get back up and running faster then going prone, so it obviously has it's merits. Though the combat vets here will have to relay their experiences with kneeling in that setting. I will describe 2 versions on the kneeling. What I consider the Proper Kneeling and the Improper Kneeling. Proper Kneeling- Usually from the same stance as standing, depending on how wide your stance is the shooter can either bend at the knees until the rear knee comes into contact with ground. Or the shooter can begin to kneel and bring the rear leg back and down until the knee touches the ground. In both applications the forward leg forms to create a 90 degree bend in the knee. At that point the forward support arm is bending at the elbow and just like with sitting, creating a Hard to soft contact with the forward knee. The rear leg can be used to support the shooters weight be more or less, sitting down on it. You can lay your foot flat on the ground for more stability but I feel the terrain and situation should dictate your foot placement. For me, I usually don't lay my foot flat unless I need to get lower under a barricade. Often I like to keep my foot up as it allows me to get back up and running faster. But if your goal is stability, a flat foot that you are sitting on may be best. <a href="https://flic.kr/p/qz6SpF" target="_blank">https://farm8.staticflickr.com/7610/16127151933_1a1e4db4c1.jpg</a>Proper Kneeling 2 by BillyDoubleU, on Flickr <a href="https://flic.kr/p/rvMQwY" target="_blank">https://farm8.staticflickr.com/7287/16746040892_72a0ce2013.jpg</a>Proper Kneeling 1 by BillyDoubleU, on Flickr <a href="https://flic.kr/p/qyTRa1" target="_blank">https://farm9.staticflickr.com/8636/16124806374_92dff10aee.jpg</a>Proper Kneeling by BillyDoubleU, on Flickr Improper Kneeling- Again, I may cause a stir but I don't feel this way of kneeling is as effective for nothing more then if you ever find yourself getting shot at, your leg will be hanging out in the wind... In this method the rear leg is the leg that forms the 90 degree angle and the rear arm creates the hard to soft contact on that rear legs. To illustrate why this method should simply be avoided (which is nothing more then my opinion) these picture should help. <a href="https://flic.kr/p/qyUJCG" target="_blank">https://farm9.staticflickr.com/8607/16124979544_0bd8e9b744.jpg</a>Improper Kneeling by BillyDoubleU, on Flickr The Difference when behind a barricade: <a href="https://flic.kr/p/rekvCS" target="_blank">https://farm9.staticflickr.com/8581/16559840470_d800cf2796.jpg</a>Kneeling Barracade by BillyDoubleU, on Flickr <a href="https://flic.kr/p/qyUCY5" target="_blank">https://farm9.staticflickr.com/8634/16124960484_79ed58b0a1.jpg</a>Improper Kneeling Barracade 1 by BillyDoubleU, on Flickr Standing The hardest and least accurate of all the shooting positions. There are many different approaches to shooting while standing and the distance involved should guide your position. This write up is on basics and this series is on accuracy, so we will stay with that. The basic standing position can be broke down to each area contacting the rifle and body. The Body- Tall and straight and just like sitting, you do not face the target straight on, we are not doing Magpul CQB gun driving. That has a place and is a great method but that is not what we are learning right now. Keep that 30-60 degree angle to the target, which ever works for you. Legs spread, a nice fighting stance? Straight legs? More weight front or back leg? As long as you are balanced and comfortable and achieving your Natural Point of Aim don’t over think it. <a href="https://flic.kr/p/rcyHhg" target="_blank">https://farm8.staticflickr.com/7587/16539783107_1f2522e824.jpg</a>Standing 3 by BillyDoubleU, on Flickr The Support Hand- The hand will be in contact with the rifle around the sling swivel or as far as can be comfortably reached. Fingers pointing towards the muzzle (but can and should be relaxed) with the heel of the hand supporting forearm of the rifle. <a href="https://flic.kr/p/qz6Pw6" target="_blank">https://farm9.staticflickr.com/8616/16127142213_949de3cc50.jpg</a>Proper Standing Forward Hand Closer by BillyDoubleU, on Flickr The Support Elbow- Will be straight down and directly under neither the rifle creating a triangle. The arm will be in contact with the torso and resting against it. Remember the rule of using the bones to create a solid shooting position? Yep, it still applies and is just as important and more so when standing. Having this correct will help ensure that your sights are tracking your target as vertical as possible with each breath. This obviously becomes more difficult with standing. <a href="https://flic.kr/p/rvLYni" target="_blank">https://farm9.staticflickr.com/8661/16745872131_44e144f78e.jpg</a>Standing 2 by BillyDoubleU, on Flickr The Action Hand- Will be holding the grip firm but will not be white knuckling the grip. It will be providing some rear-ward pressure into that very nice pocket the shoulder/collar bone create. But just like before he trigger finger will NOT be pressing against the stock of the rifle and will work independently to pull the trigger straight back to the rear of the rifle. Rear Elbow- Will balance out the position to help create that Natural Point of Aim <a href="https://flic.kr/p/rcyEPv" target="_blank">https://farm9.staticflickr.com/8666/16539774827_26d33dcbde.jpg</a>Standing 4 by BillyDoubleU, on Flickr <a href="https://flic.kr/p/qyTxhN" target="_blank">https://farm8.staticflickr.com/7635/16124746274_a1b3044535.jpg</a>Standing 1 by BillyDoubleU, on Flickr And their you have it, the standing shooting position in it’s most basic form. As you progress you can modify it to meet your needs and shooting scenario. At this point I will mention a few things of note. Slings- You can use a sling in just about every position to help your stability and lock into it. Cheek Weld- The more consistent this is, the more consistent your sight picture will be. This will lead to a more repeatable results with all else being equal. Follow Through- I almost forgot Follow Through! Just as important to building a solid shooting position is the follow through. If you have done everything else correct then the follow through is just a natural conclusion to the trigger pull. This is the act of staying relaxed through out the recoil of the rifle and your body absorbing it. You will know a perfect shooting position if your follow through lands your sights directly back to the sight picture you had just prior the trigger pull. Again, this is a break down of basic position in the most basic form. It’s up to the shooter to apply the basic fundamentals and the best way to do so is with dry fire practice. And as always, nothing beats seeking out proper in person professional instruction. And remember, their will always be variations based off of all of these and that is where the discussion ensues! this is all great stuff. Appleseed teaches all of this as well. Great program. |
|
|
OK, USA
|
[Last Edit: henschman]
[#19]
Great post... I'm bumping it up. this stuff is essential for beginners, and a great place to start, but even us old hands need a refresher in the fundamentals from time to time... and a reminder that there is more than one way to skin a cat. Just because one technique isn't the best for a given situation doesn't mean it is wrong, period. The chicken wing in standing/kneeling is a good example.
I have long preached the continuum between precise shooting and dynamic shooting. I completely agree that new shooters should ideally start with the fundamentals of precision shooting first, and then add the dynamic techniques later on, so they know how much precision they are giving up in order to gain more speed and ease of movement. Like with pistol shooting, you start with the fundamentals, and THEN pour on the speed. The knowledge of when to give one up to gain the other, and how much, comes with experience. The positions taught are as good a place as any to start learning the fundamentals, and will get you good results on the range if you apply them diligently. If I have anything to add, it is that, at least the way it was taught to me, the "jack knife prone" is a technique for unsupported and sling supported shooting (mainly seen in sling supported positional competition, but useful in the field as well), and it is different in that you do not get your body directly behind the rifle, as in the posted pics, but take your position so that your spine is pointing approximately 30 degrees off target toward the trigger side. The drawn-up trigger side knee is to support your body with a more rolled-over torso, laying more on your support side. The goal of all this is to be able to get your elbow directly under the rifle. The point of doing this is that the weight of the rifle presses straight down on your arm, so you don't have to use any muscle to keep it from falling over like you do if your elbow is off to one side. Like so: 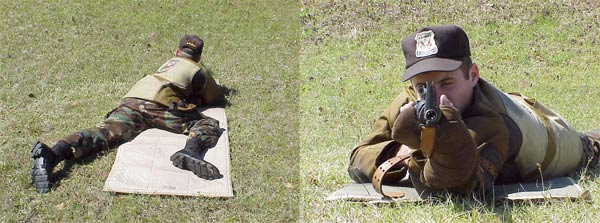
Obviously this position doesn't absorb recoil as well as a squared-up position, but the idea is that you're sacrificing follow-up shot speed to gain a little more precision. A shooting sling really helps lock you into this position, and mitigates recoil issues too. When you are using a solid rest (including "monopodding"), you don't need your arm to support the rifle, so it is best to get your body directly behind the rifle so as to be able to absorb recoil better, as you do a good job of pointing out. Just my $0.02. Others have mentioned it, but if you want to learn to be proficient with sling-supported shooting and learn some really solid fundamentals of marksmanship, Project Appleseed is a fantastic program. It expands a good bit on many of the fundamentals that are touched on here. It is highly recommended for everyone, not just beginners. Even the most experienced shooters will get a few more tools for their toolboxes out of the program, and can benefit from a tune-up in the fundamentals. It isn't tactical "cool kid" stuff, but it WILL make you a better rifle shooter. Also, being an all-volunteer organization, it is super cheap to attend compared to other types of training. $60 for a weekend class is the going rate. Best baing-for-your-buck training ANYWHERE. www.appleseedinfo.org |
|
|
|
[Last Edit: BillyDoubleU]
[#20]
Originally Posted By henschman:
Great post... I'm bumping it up. this stuff is essential for beginners, and a great place to start, but even us old hands need a refresher in the fundamentals from time to time... and a reminder that there is more than one way to skin a cat. Just because one technique isn't the best for a given situation doesn't mean it is wrong, period. The chicken wing in standing/kneeling is a good example. I have long preached the continuum between precise shooting and dynamic shooting. I completely agree that new shooters should ideally start with the fundamentals of precision shooting first, and then add the dynamic techniques later on, so they know how much precision they are giving up in order to gain more speed and ease of movement. Like with pistol shooting, you start with the fundamentals, and THEN pour on the speed. The knowledge of when to give one up to gain the other, and how much, comes with experience. The positions taught are as good a place as any to start learning the fundamentals, and will get you good results on the range if you apply them diligently. If I have anything to add, it is that, at least the way it was taught to me, the "jack knife prone" is a technique for unsupported and sling supported shooting (mainly seen in sling supported positional competition, but useful in the field as well), and it is different in that you do not get your body directly behind the rifle, as in the posted pics, but take your position so that your spine is pointing approximately 30 degrees off target toward the trigger side. The drawn-up trigger side knee is to support your body with a more rolled-over torso, laying more on your support side. The goal of all this is to be able to get your elbow directly under the rifle. The point of doing this is that the weight of the rifle presses straight down on your arm, so you don't have to use any muscle to keep it from falling over like you do if your elbow is off to one side. Like so: http://www.odcmp.org/0208/images/USAMU_Prone1Img/Bent.jpg Obviously this position doesn't absorb recoil as well as a squared-up position, but the idea is that you're sacrificing follow-up shot speed to gain a little more precision. A shooting sling really helps lock you into this position, and mitigates recoil issues too. When you are using a solid rest (including "monopodding"), you don't need your arm to support the rifle, so it is best to get your body directly behind the rifle so as to be able to absorb recoil better, as you do a good job of pointing out. Just my $0.02. Others have mentioned it, but if you want to learn to be proficient with sling-supported shooting and learn some really solid fundamentals of marksmanship, Project Appleseed is a fantastic program. It expands a good bit on many of the fundamentals that are touched on here. It is highly recommended for everyone, not just beginners. Even the most experienced shooters will get a few more tools for their toolboxes out of the program, and can benefit from a tune-up in the fundamentals. It isn't tactical "cool kid" stuff, but it WILL make you a better rifle shooter. Also, being an all-volunteer organization, it is super cheap to attend compared to other types of training. $60 for a weekend class is the going rate. Best baing-for-your-buck training ANYWHERE. www.appleseedinfo.org Agreed and thanks for adding your insight! The more discussion the better
I got an Appleseed shoot later this year I am finally gonna do. Was suppose to do it a few years ago then 'life' got in the way... Looking forward to it and I am glad I waited. Now they have a local venue as opposed to the 2-4 hour drive I was gonna have to make. |
|
|
|
|
[#21]
Originally Posted By BillyDoubleU: This series of threads should just be made from going to archive. Like Nick said before, tacked threaded usually get ignored. I think as long as they stay current and out of archive then they will continue to be added too and discussed. Maybe down the line they can be formed into a large Tacked all in one thread. But I agree, tacking is cool and all but they do often get over looked. Originally Posted By BillyDoubleU: Originally Posted By tweeter: Originally Posted By NCHornet: Tack it!!!!!!! No. Talk about it. This series of threads should just be made from going to archive. Like Nick said before, tacked threaded usually get ignored. I think as long as they stay current and out of archive then they will continue to be added too and discussed. Maybe down the line they can be formed into a large Tacked all in one thread. But I agree, tacking is cool and all but they do often get over looked. It will not go to archive, I'm going to have it highlighted in blue so it sticks out Tacked threads tend to sit at the top of the page and no one pays attention to them Thanks for taking the time to post this up |
|
|
|
|
[#22]
Originally Posted By dpmmn:
It will not go to archive, I'm going to have it highlighted in blue so it sticks out Tacked threads tend to sit at the top of the page and no one pays attention to them Thanks for taking the time to post this up
Originally Posted By dpmmn:
Originally Posted By BillyDoubleU:
Originally Posted By tweeter:
Originally Posted By NCHornet:
Tack it!!!!!!! No. Talk about it. This series of threads should just be made from going to archive. Like Nick said before, tacked threaded usually get ignored. I think as long as they stay current and out of archive then they will continue to be added too and discussed. Maybe down the line they can be formed into a large Tacked all in one thread. But I agree, tacking is cool and all but they do often get over looked. It will not go to archive, I'm going to have it highlighted in blue so it sticks out Tacked threads tend to sit at the top of the page and no one pays attention to them Thanks for taking the time to post this up
My pleasure |
|
|
|
|
[#23]
bump. How about an inside-the-car position?
|
|
|
|
|
[Last Edit: BillyDoubleU]
[#24]
Originally Posted By MRW:
bump. How about an inside-the-car position? I'm not sure the "Heat" method is a basic position
I have been thinking about adding a few that have come up with the hook grip standing and kneeling. That and some dry fire routines. |
|
|
|
|
[Last Edit: LRRPF52]
[#25]
The kneeling position you ID as "improper" is actually really good for barricade shooting, and doesn't leave your knee out flapping if you use foot position to control exposure. It does a lot to control the tail end of the gun from throwing your vertical off, and is as close as you're going to get to having a rear bag without one.

One thing you will start to see when you actually start studying, and I mean studying the positions physically over and over, day after day, is that your hip position is huge in determining Natural Point of Aim. If you train going from a standing, react to contact scenario, then quickly getting into position over and over, you will pay more attention to hip placement and details about the position you would have never realized. |
|
|
|
|
[#26]
Originally Posted By LRRPF52: The kneeling position you ID as "improper" is actually really good for barricade shooting, and doesn't leave your knee out flapping if you use foot position to control exposure. It does a lot to control the tail end of the gun from throwing your vertical off, and is as close as you're going to get to having a rear bag without one. http://www.americanrifleman.org/wp-content/uploads/2014/12/AR101_part_3_kneeling_supported.jpg One thing you will start to see when you actually start studying, and I mean studying the positions physically over and over, day after day, is that your hip position is huge in determining Natural Point of Aim. If you train going from a standing, react to contact scenario, then quickly getting into position over and over, you will pay more attention to hip placement and details about the position you would have never realized. All add to LRRPF52's comments with mine. Engage a steel target at 50+ yards with each the kneeling positions you posted as fast as you can, you will notice a HUGE difference in speed and accuracy with trigger arm elbow tucked inside the knee. I've been trained to use both, after using the above I'll never consider doing it differently again. With a little bit of training you'll be just as good with both hands. Here is the left hand example. You can really pound hard with this position. 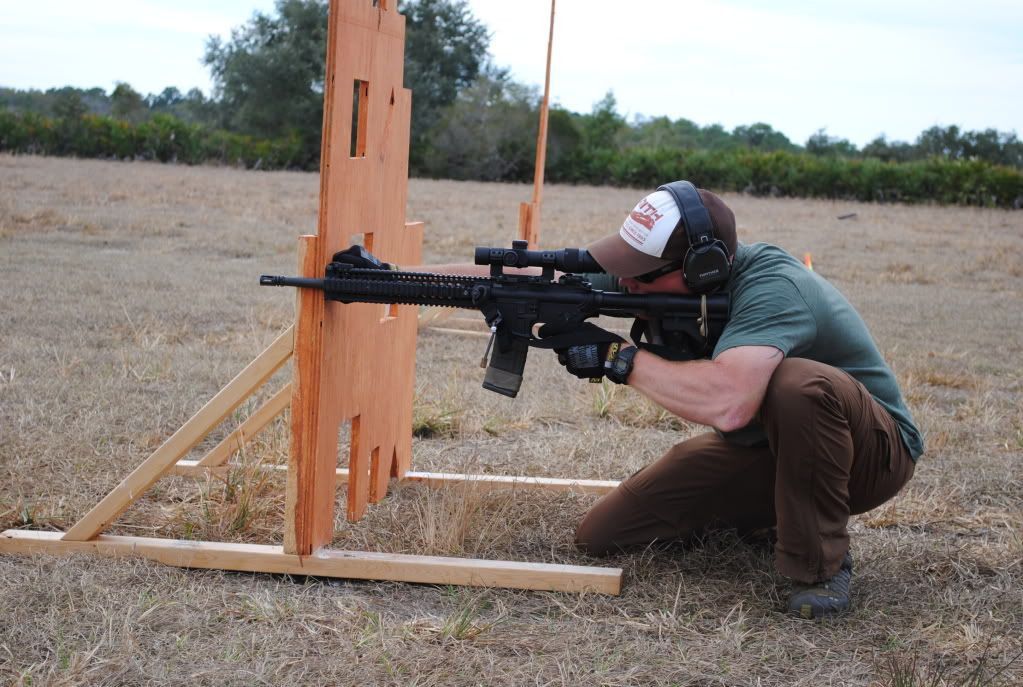 |
|
|
|
|
[#27]
Originally Posted By LRRPF52:
The kneeling position you ID as "improper" is actually really good for barricade shooting, and doesn't leave your knee out flapping if you use foot position to control exposure. It does a lot to control the tail end of the gun from throwing your vertical off, and is as close as you're going to get to having a rear bag without one. http://www.americanrifleman.org/wp-content/uploads/2014/12/AR101_part_3_kneeling_supported.jpg One thing you will start to see when you actually start studying, and I mean studying the positions physically over and over, day after day, is that your hip position is huge in determining Natural Point of Aim. If you train going from a standing, react to contact scenario, then quickly getting into position over and over, you will pay more attention to hip placement and details about the position you would have never realized. Awesome, keep it coming. My OP was just a starting place for people new to shooting. This was suppose to be more of a discussion then any kind of be all end all. I get what you are saying and agree with you. I think kneeling is one of the more situational dependent positions. Both methods have their place, depending on what cover you may or may not have. I find for myself, I'll let too much knee hang out if my rear knee is up behind a barricade. I find I get more support from my forward arm being braced in my knee over my rear, unless I have a barricade to support the front of the rifle. But to keep things simple, especially for new shooters I say do knee down and keep it simple. With more experience they can decide which way suits them more. IIRC a Navy school I went to that taught ship board/room clearing/defending prefered the knee down. But honestly it was a long time ago and may be off on that. More so I found it a quicker method that suited me more in a competition setting when shooting kneeling in the open and or any kind of barricades. It became my preferred method. But that by no means makes it the only method. Please add to this. I know you instruct long range shooting. Please add your knowledge, this is the place! Especially on stances not covered, methods not covered, items that help like sling use etc. It would be very much appreciated. |
|
|
|
|
[#28]
Yes, when you get on the timer, especially against others, and are pushed to the edge, it will surprise you what that position can do.
Another is standing supported, which you will find a lot of opportunities to use in both urban and wooded areas. 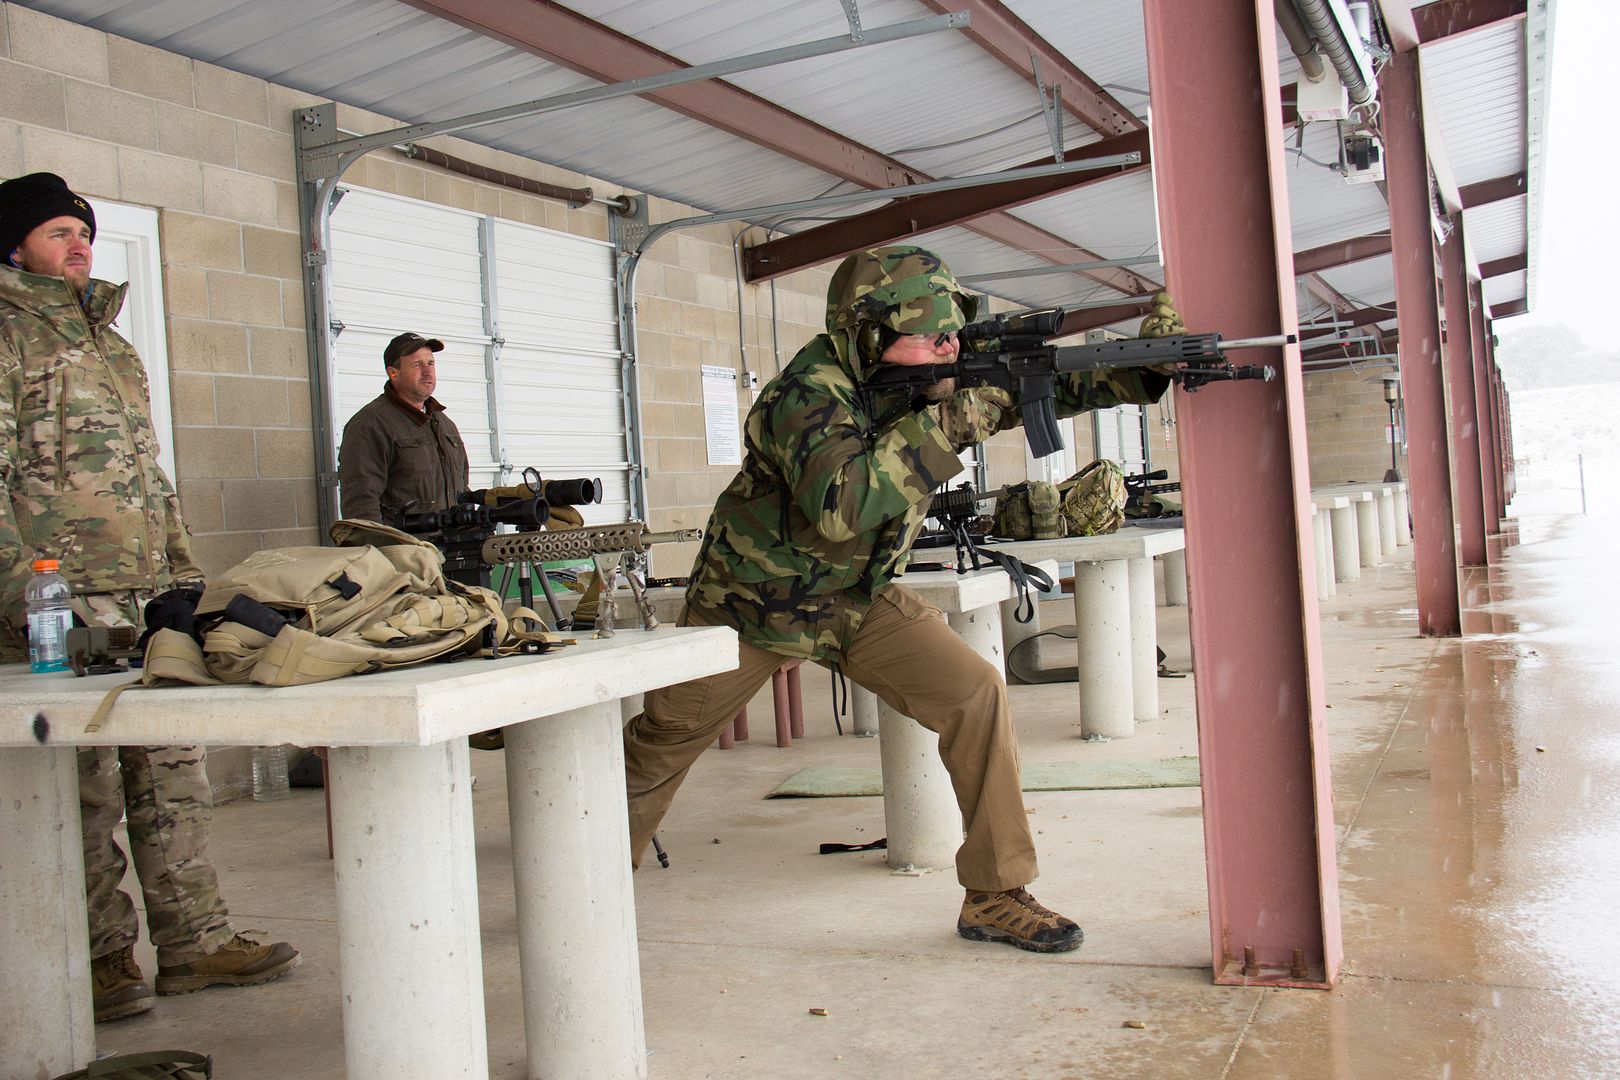
And also kneeling supported: 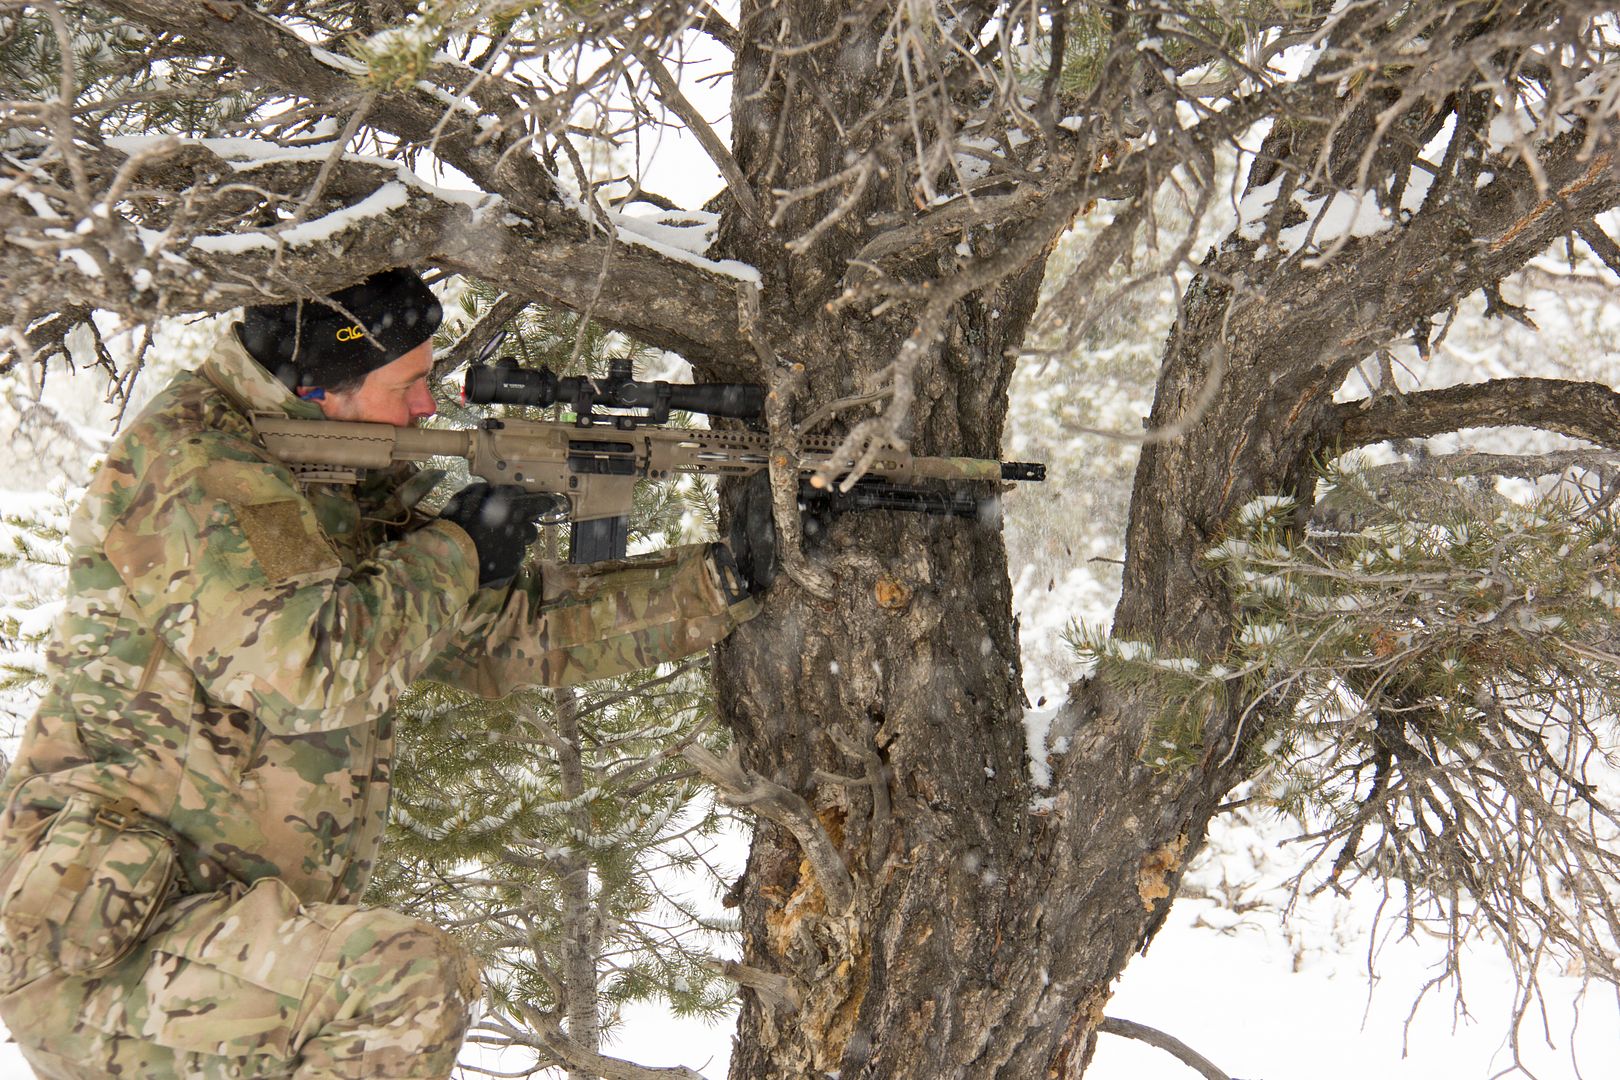
And one of the most difficult, but stable kneeling positions to master: The Combat Kneeling 
I heard and felt something pop in my knee when I first started working with combat kneeling, so I recommend stretching if you're one of the 50% of those people like me who are not naturally flexible. Even with my heavy-barreled .260 Remington AR, I can hold very steady with the combat kneeling when wedging my knee in between the magazine and my fire control hand. It works especially well in mountainous terrain looking down on your prey, or if you have something for your lead foot to elevate off of when shooting across a level surface, or uphill. The benefits are being able to make yourself small, while having a very steady position to get into, that is quick to get in and out of. The standard kneeling positions are very easy to get into, but suck for stability. The combat kneeling is a bit harder to get into, but very steady, and easy to get out of if you're in half decent shape. You do need to be in good physical shape to use practical shooting positions. What you'll see is that if you have any type of a gut, it will fight for space with your hear, lungs, stomach, intestines, and other abdominal cavity organs, and increase your blood pressure substantially. You will feel the added pressure to your upper body and head, and it can get very uncomfortable fast, especially with kit on. Being in excellent physical shape plays a huge role in being a practical shooter, whereas the big guys make really good prone and bench shooters because they can lay a lot of mass behind the gun and have good NPOA and recovery. Once it is time to start turning and burning though, it all falls apart. There's a reason why practical positions are on the trail least traveled, and prone and bench are preferred by so many. In reality, you rarely ever get opportunities to shoot from the prone, so I make sure that prone shooting is shunned as much as possible in my courses. We only use it to prove the capabilities of the system on Day 1, morning 1, of a DM or Precision Rifle Course. It is mostly abandoned after that. |
|
|
|
|
[#29]
Originally Posted By LRRPF52:
The kneeling position you ID as "improper" is actually really good for barricade shooting, and doesn't leave your knee out flapping if you use foot position to control exposure. It does a lot to control the tail end of the gun from throwing your vertical off, and is as close as you're going to get to having a rear bag without one. http://www.americanrifleman.org/wp-content/uploads/2014/12/AR101_part_3_kneeling_supported.jpg One thing you will start to see when you actually start studying, and I mean studying the positions physically over and over, day after day, is that your hip position is huge in determining Natural Point of Aim. If you train going from a standing, react to contact scenario, then quickly getting into position over and over, you will pay more attention to hip placement and details about the position you would have never realized. One comment on this barricade position: I was taught to put my hand ON the barricade and rest the rifle in the web of the hand (between the thumb and the hand). That works with standard plastic handguards, but not always with a rail - it depends on the surface of the barricade and the rail. If possible and practical, this web support gives you an almost "natural" guide for the handguard or rail, and lets you brace your weight on the barricade as well. This is where those smoother rail covers can help a lot, as opposed to rail ladders or "nothing." Side note: dress your rail to fit how you might need to shoot, such as barricades, supported kneeling, etc. |
|
|
|
|
[#30]
Bump for any updates. Great thread.
|
|
|
|
|
[#31]
bump
|
|
|
|
|
[#32]
Originally Posted By Rossi:
Bump for any updates. Great thread. I'm working on revising this with the input I've received in this thread. |
|
|
|
|
[#33]
Originally Posted By BillyDoubleU:
I'm working on revising this with the input I've received in this thread. Originally Posted By BillyDoubleU:
Originally Posted By Rossi:
Bump for any updates. Great thread. I'm working on revising this with the input I've received in this thread. Good one of the best threads on the forum. I'm gonna read it again Saturday night and try to shoot well in some off positions Sunday. |
|
|
|
|
[#34]
Major revamp in OP.
|
|
|
|
|
[#35]
Great stuff in the revamped OP. I have a couple of things to add (I hope usefully).
When practicing any of the prone, kneeling or sitting positions, it helps to have something like a shooting mat. That keeps the surface you're on from distracting you, especially when you're learning the position. Once these positions are mastered by themselves, you can move on to assuming them without a mat. Or with a smaller mat or knee protectors, or whatever. Also, not everyone's knees "like" some of the sitting or kneeling positions. You need enough range of motion and sustained strength to get the knee in the proper position and stay there while paying attention to handling, aiming, and firing the rifle. Don't assume that you should be able to pop into a position that requires kneeling or leaning on a bent knee - if you haven't been working on both range and strength, it might not be possible at first. You can develop the strength and work on range of motion to make these positions doable. It takes practice and more practice, but it's not terribly challenging. Of course some of us have busted up knees that don't adapt no matter what. For us, we'd need to select the shooting positions that are the least annoying. Not because it should always be cushy and comfy to shoot, but because the fewer distractions you have from your body complaining about your position, the easier it is to concentrate on shooting. |
|
|
|
|
[#36]
Originally Posted By BillyDoubleU:
Major revamp in OP. Great thread. I buy "Art of the Rifle" for every young man I can. If you guys don't have it, buy it, read it, pass it on. Follow up with "Ride, Shoot Straight, and Speak the Truth", if the kid shows an interest. |
|
|
|
|
[#37]
Originally Posted By GHPorter:
Great stuff in the revamped OP. I have a couple of things to add (I hope usefully). When practicing any of the prone, kneeling or sitting positions, it helps to have something like a shooting mat. That keeps the surface you're on from distracting you, especially when you're learning the position. Once these positions are mastered by themselves, you can move on to assuming them without a mat. Or with a smaller mat or knee protectors, or whatever. Also, not everyone's knees "like" some of the sitting or kneeling positions. You need enough range of motion and sustained strength to get the knee in the proper position and stay there while paying attention to handling, aiming, and firing the rifle. Don't assume that you should be able to pop into a position that requires kneeling or leaning on a bent knee - if you haven't been working on both range and strength, it might not be possible at first. You can develop the strength and work on range of motion to make these positions doable. It takes practice and more practice, but it's not terribly challenging. Of course some of us have busted up knees that don't adapt no matter what. For us, we'd need to select the shooting positions that are the least annoying. Not because it should always be cushy and comfy to shoot, but because the fewer distractions you have from your body complaining about your position, the easier it is to concentrate on shooting. All very true! Thanks for adding that |
|
|
|
|
[#38]
Originally Posted By 30calTBLkid:
Great thread. I buy "Art of the Rifle" for every young man I can. If you guys don't have it, buy it, read it, pass it on. Follow up with "Ride, Shoot Straight, and Speak the Truth", if the kid shows an interest. Originally Posted By 30calTBLkid:
Originally Posted By BillyDoubleU:
Major revamp in OP. Great thread. I buy "Art of the Rifle" for every young man I can. If you guys don't have it, buy it, read it, pass it on. Follow up with "Ride, Shoot Straight, and Speak the Truth", if the kid shows an interest. I still need "Ride, Shoot Straight and Speak the Truth". Next Amazon order. |
|
|
|
|
[#39]
Tagged for plagiarism.
|
|
|
|
|
[Last Edit: BillyDoubleU]
[#40]
Originally Posted By elcope:
Tagged for plagiarism. 
I'm flattered Have at it though |
|
|
|
|
[#41]
Great Thread!
|
|
|
|
|
[#42]
Originally Posted By BillyDoubleU:
I'm flattered Have at it though Seriously (only half joking) If I can figure out how to format this for easy printing, this would be a great flyer / pamphlet for BRM / PMI classes. |
|
|
|
|
[#43]
Another update!?!
Yep, I add a dry fire section and added for few other items. |
|
|
|
|
[#44]
I plan on adding a video portion at somepoint in the future.
Explaining each position with a demonstration and live fire at some steel 100-200 yards out. |
|
|
|
|
[#45]
Originally Posted By elcope:
Seriously (only half joking) If I can figure out how to format this for easy printing, this would be a great flyer / pamphlet for BRM / PMI classes. Originally Posted By elcope:
Originally Posted By BillyDoubleU:
I'm flattered Have at it though Seriously (only half joking) If I can figure out how to format this for easy printing, this would be a great flyer / pamphlet for BRM / PMI classes. A booklet based on this stuff is a great idea. Credit BillyDoubleU and ARFCOM (there, somebody said it, even though I'm sure it wasn't necessary) for all of it, of course. Formatting the contents of Billy's posts isn't as hard as you might think. Hit the "Quote" button, mark everything (CTL-A), then copy it (CTL-C) and paste into a Word document (CTL-V). Except for the tags, it's just text, with all the line breaks preserved. You just have to go through and tinker with eliminating those tags and formatting the text to fit your pages - a bit of a chore but no big challenge. Pictures are going to be a bigger challenge, but collaborating with Billy will make that stuff easier. |
|
|
|
|
[#46]
Wow. Very nicely done. This is very useful for new shooters IMHO.
Did it take you as long to upload the photos as it did to get in position? |
|
|
|
|
[#47]
Originally Posted By MedicBob:
Wow. Very nicely done. This is very useful for new shooters IMHO. Did it take you as long to upload the photos as it did to get in position? Lol man, it took a day to upload all those to flicker haha. Seriously. A whole day! |
|
|
|
|
[#48]
TAG excellent thread
|
|
|
|
|
[#49]
Added more resource links etc etc
|
|
|
|
|
[#50]
Originally Posted By elcope: Seriously (only half joking) If I can figure out how to format this for easy printing, this would be a great flyer / pamphlet for BRM / PMI classes. Originally Posted By elcope: Originally Posted By BillyDoubleU: I'm flattered Have at it though Seriously (only half joking) If I can figure out how to format this for easy printing, this would be a great flyer / pamphlet for BRM / PMI classes. |
|
|
|
 Win a FREE Membership!
Sign up for the ARFCOM weekly newsletter and be entered to win a free ARFCOM membership. One new winner* is announced every week!
You will receive an email every Friday morning featuring the latest chatter from the hottest topics, breaking news surrounding legislation, as well as exclusive deals only available to ARFCOM email subscribers.

AR15.COM is the world's largest firearm community and is a gathering place for firearm enthusiasts of all types.
From hunters and military members, to competition shooters and general firearm enthusiasts, we welcome anyone who values and respects the way of the firearm.

Subscribe to our monthly Newsletter to receive firearm news, product discounts from your favorite Industry Partners, and more.
Copyright © 1996-2024 AR15.COM LLC. All Rights Reserved.
Any use of this content without express written consent is prohibited.
AR15.Com reserves the right to overwrite or replace any affiliate, commercial, or monetizable links, posted by users, with our own.


