|
[#1]
ETA: I own 4.
How does it look with a normal upper mounted on it? Maybe add some aircraft machine gunner sights for BUIS? |
|
|
|
[#2]
|
|
|
|
[#3]
In case you need measurements for it

|
|
|
|
[#4]
|
|
|
|
[#5]
Quoted:
Ummmmm yes yes yes anddddd yes. I think this is the plan now
The DPMS thick wall slick side that I have is PERFECT for this. I can easily get it milled "square" and even use aluminium square tubing and weld directly to each other ETA: I forgot 7000 series aluminum is unweldable You guys are the bomb Oh and pics of everything welded up, rough ground "smooth", and completed grip coming up. Probably all that's getting done today but I'd call it successful Quoted:
Quoted:
Quoted:
I wish that place had an option for the upper. I cant wait to see what you come up with. I would be tempted to fit some square tube over a real upper zip off the top rail, cut the sides flat ish, etc. Mount it to the lower so it's attached properly and bed to the steel shell. Could always just build a slightly oversized housing with a cheapo set of rail adapters inside to lock to the upper. Might be taller, but with a good shroud over the upper, nobody could tell. Something like this, then cut off the rails, tap the top for screws, then just screw the shell over the upper. http://yhm.net/media/catalog/product/cache/1/image/750x/040ec09b1e35df139433887a97daa66f/Y/H/YHM-227A_3.jpg
The DPMS thick wall slick side that I have is PERFECT for this. I can easily get it milled "square" and even use aluminium square tubing and weld directly to each other ETA: I forgot 7000 series aluminum is unweldable You guys are the bomb Oh and pics of everything welded up, rough ground "smooth", and completed grip coming up. Probably all that's getting done today but I'd call it successful IMO I'd rough both opposing faces up, then use a good 2 part epoxy or putty to hold them together. Get some in the screw holes (not clear through the receiver) then attach with screws. When it sets up, it'll be damn near indestructable. Downside is it'll never come apart either. Basically treat the receiver like an action you are bedding inside of the housing. |
|
|
|
[#6]
Quoted:
ETA: I own 4. How does it look with a normal upper mounted on it? Maybe add some aircraft machine gunner sights for BUIS? https://www.centerfiresystems.com/p-5438-ati-gsg-ak-47-rebel-edition-22-lr-with-16-barrel-and-wood-stock.aspx?keyword=gsg%20ak Got any examples of what you have in mind? The pic you've got there doesn't seem to fit
|
|
|
|
[#7]
|
|
|
|
[#8]
Holy crap, dude.
I cannot wait to see this thing when it's done! |
|
|
|
[#9]
I would think that a few short bolts would hold square tube on the upper fine if there is enough meat on the upper
|
|
|
|
[#10]
Quoted:
If it comes down to get, get some nylon headed screws and just tension fit the shell around it. Hit em with some blue loctite or something and they won't budge. Well, provided you have a proper place for the screws to rest against. IMO I'd rough both opposing faces up, then use a good 2 part epoxy to hold them together. Get some in the screw holes (not clear through the receiver) then attach with screws. When it sets up, it'll be damn near indestructable. Quoted:
Quoted:
Quoted:
Quoted:
I wish that place had an option for the upper. I cant wait to see what you come up with. I would be tempted to fit some square tube over a real upper zip off the top rail, cut the sides flat ish, etc. Mount it to the lower so it's attached properly and bed to the steel shell. Could always just build a slightly oversized housing with a cheapo set of rail adapters inside to lock to the upper. Might be taller, but with a good shroud over the upper, nobody could tell. Something like this, then cut off the rails, tap the top for screws, then just screw the shell over the upper. http://yhm.net/media/catalog/product/cache/1/image/750x/040ec09b1e35df139433887a97daa66f/Y/H/YHM-227A_3.jpg
The DPMS thick wall slick side that I have is PERFECT for this. I can easily get it milled "square" and even use aluminium square tubing and weld directly to each other ETA: I forgot 7000 series aluminum is unweldable You guys are the bomb Oh and pics of everything welded up, rough ground "smooth", and completed grip coming up. Probably all that's getting done today but I'd call it successful IMO I'd rough both opposing faces up, then use a good 2 part epoxy to hold them together. Get some in the screw holes (not clear through the receiver) then attach with screws. When it sets up, it'll be damn near indestructable. Now I know I am retarded but would you mind linking me the screws you have in mind I'm having trouble finding what I think you're talking about
|
|
|
|
[#11]
|
|
|
|
[#12]
|
|
|
|
[#13]
Quoted:
Give me a few and I'll get you some pics. Got any examples of what you have in mind? The pic you've got there doesn't seem to fit 
|
|
|
|
[#14]
Quoted:
Linky no worky Link doesn't seem to work... 
|
|
|
|
[#15]
Quoted:
Thats not a bad idea at all.....I don't see why that wouldn't work provided I use something that isn't all too susceptible to heat Now I know I am retarded but would you mind linking me the screws you have in mind I'm having trouble finding what I think you're talking about Quoted:
Quoted:
Quoted:
Quoted:
Quoted:
I wish that place had an option for the upper. I cant wait to see what you come up with. I would be tempted to fit some square tube over a real upper zip off the top rail, cut the sides flat ish, etc. Mount it to the lower so it's attached properly and bed to the steel shell. Could always just build a slightly oversized housing with a cheapo set of rail adapters inside to lock to the upper. Might be taller, but with a good shroud over the upper, nobody could tell. Something like this, then cut off the rails, tap the top for screws, then just screw the shell over the upper. http://yhm.net/media/catalog/product/cache/1/image/750x/040ec09b1e35df139433887a97daa66f/Y/H/YHM-227A_3.jpg
The DPMS thick wall slick side that I have is PERFECT for this. I can easily get it milled "square" and even use aluminium square tubing and weld directly to each other ETA: I forgot 7000 series aluminum is unweldable You guys are the bomb Oh and pics of everything welded up, rough ground "smooth", and completed grip coming up. Probably all that's getting done today but I'd call it successful IMO I'd rough both opposing faces up, then use a good 2 part epoxy to hold them together. Get some in the screw holes (not clear through the receiver) then attach with screws. When it sets up, it'll be damn near indestructable. Now I know I am retarded but would you mind linking me the screws you have in mind I'm having trouble finding what I think you're talking about They also do brass tipped. In socket cap or set screws. IMO if you wanted to go 100% never come apart, I'd go with set screws, get epoxy on the threads, and cap the screw in epoxy to seal it in. That said the big socket head screws would be kinda awesome. Especially if you could get them to rust or fake it. So you have "rust" weeping down the side of the rifle, despite the screw body being sealed in epoxy. If you don't want to risk damage, just some brown and red acrylic model paint watered down really well will do the trick. 
|
|
|
|
[#16]
ebay has a steel 8.5 inch pic rail but the site converts the url to garbage
ebay.com/itm/steel-rifle-scope-rail-universal-1913-picatinny-8-long-1-2-tall-/172355268978 |
|
|
|
[#17]
Quoted:
McMaster Carr nylon tipped screws They also do brass tipped. In socket cap or set screws. IMO if you wanted to go 100% never come apart, I'd go with set screws, get epoxy on the threads, and cap the screw in epoxy to seal it in. That said the big socket head screws would be kinda awesome. Especially if you could get them to rust or fake it. So you have "rust" weeping down the side of the rifle, despite the screw body being sealed in epoxy. If you don't want to risk damage, just some brown and red acrylic model paint watered down really well will do the trick. https://images-na.ssl-images-amazon.com/images/I/31gfnLw6Q3L.jpg |
|
|
|
[#18]
Quoted:
ebay has a steel 8.5 inch pic rail but the site converts the url to garbage ebay.com/itm/steel-rifle-scope-rail-universal-1913-picatinny-8-long-1-2-tall-/172355268978 
|
|
|
|
[#19]
Can't wait to see the finished product, OP.
|
|
|
|
[#20]
Quoted:
Dont see the point for this I think I would want it actually bolted to the upper not just pinching it Quoted:
Quoted:
McMaster Carr nylon tipped screws They also do brass tipped. In socket cap or set screws. IMO if you wanted to go 100% never come apart, I'd go with set screws, get epoxy on the threads, and cap the screw in epoxy to seal it in. That said the big socket head screws would be kinda awesome. Especially if you could get them to rust or fake it. So you have "rust" weeping down the side of the rifle, despite the screw body being sealed in epoxy. If you don't want to risk damage, just some brown and red acrylic model paint watered down really well will do the trick. https://images-na.ssl-images-amazon.com/images/I/31gfnLw6Q3L.jpg
I'm honestly not sure how much metal is between the bottom of the rail and top of the internal space on an upper, so there might not be enough metal to secure it without a ton of screws. Could potentially bind up the CH if one goes slightly too deep. Now if OP oversizes it a bit by using a replaceable rail section that he can put a reinforcement under, it'll work awesome. Could just have two or four small holes to adjust the screws for the mount. Personally I'd start by bending some flat steel into a U shape with the same external dimensions as the lower to know what kind of internal volume there is to work with. Barring that, hog off a side of square stock the same ish dimensions and hit with a rough belt sander to get it 'sorta kinda' right. |
|
|
|
[#21]

Mo betta |
|
|
|
[#22]
Quoted:
Dont see the point for this I think I would want it actually bolted to the upper not just pinching it Quoted:
Quoted:
McMaster Carr nylon tipped screws They also do brass tipped. In socket cap or set screws. IMO if you wanted to go 100% never come apart, I'd go with set screws, get epoxy on the threads, and cap the screw in epoxy to seal it in. That said the big socket head screws would be kinda awesome. Especially if you could get them to rust or fake it. So you have "rust" weeping down the side of the rifle, despite the screw body being sealed in epoxy. If you don't want to risk damage, just some brown and red acrylic model paint watered down really well will do the trick. https://images-na.ssl-images-amazon.com/images/I/31gfnLw6Q3L.jpg On top of that I can use picatinny blanks that everyone keeps linking that arf fucks up, good find there guys! |
|
|
|
[#23]
Shame it's not a side charger. I'd say to get one of the nastiest corroded cases you can find (308 or the like), fill it with epoxy, and slip over the side charger handle.
But you can probably tell I love stuff like this.
|
|
|
|
[#24]
Pic of it with the upper I have for it
Sorry I don't have one of my full upper, I only have my one SBR so I don't want to risk my peepee getting a good slappin by Mr ATF Man |
|
|
|
[#25]
Quoted:
Shame it's not a side charger. I'd say to get one of the nastiest corroded cases you can find (308 or the like), fill it with epoxy, and slip over the side charger handle. But you can probably tell I love stuff like this. I mean I already am covering it with tubing
|
|
|
|
[#26]
So that's pretty close dimensionally already. I assume it locks to the lower fairly good? May have to make the shell out of thinner gauge steel and use the epoxy as reinforcement to keep it from flexing. Should be solid as hell after setup though. Too bad the milspec trigger is a hardened part. I'd zip it off at the base and use a bolt wrapped in heat shrink or e tape or something as the trigger.
Man, I'd consider hitting all the metal parts with a wire wheel, then a salt and vinegar wash to force a patina on it. It's going to be a horrific beauty when done. Shame is I'll be away from my desk for the next week. Edit: That does give me an idea for the safety though. Get a cheap ambi safety with removable levers. Build up a little metal on it, then thread for a wing nut
|
|
|
|
[#27]
It would be cool if the charging handle were a rusty link of chain.
|
|
|
|
[#28]

|
|
|
|
[#29]
Mutagenic.
|
|
|
|
[#30]
So much this
|
|
|
|
[#31]
Quoted:
So that's pretty close dimensionally already. I assume it locks to the lower fairly good? May have to make the shell out of thinner gauge steel and use the epoxy as reinforcement to keep it from flexing. Should be solid as hell after setup though. Quoted:
So that's pretty close dimensionally already. I assume it locks to the lower fairly good? May have to make the shell out of thinner gauge steel and use the epoxy as reinforcement to keep it from flexing. Should be solid as hell after setup though. guess I got it a bit too how and it warped ever so slightly
Too bad the milspec trigger is a hardened part. I'd zip it off at the base and use a bolt wrapped in heat shrink or e tape or something as the trigger. Man, I'd consider hitting all the metal parts with a wire wheel, then a salt and vinegar wash to force a patina on it. It's going to be a horrific beauty when done. Shame is I'll be away from my desk for the next week. Edit: That does give me an idea for the safety though. Get a cheap ambi safety with removable levers. Build up a little metal on it, then thread for a wing nut 
I never actually drilled a hole for the detent.....so I have to fill that gaping hole still
|
|
|
|
[#32]
|
|
|
|
[#33]
Quoted:
I have been wanting a welder so I started looking for used ones. Arf making me spend money again |
|
|
|
[#34]
Quoted:
So much this Quoted:
I think I can incorporate it into the forend and even use the male shelf brackets to attach something
|
|
|
|
[#35]
Quoted:
I've been contemplating how to make a pipe rifle from the old Hi Point 995 kicking around in my safe, this thread isn't helping. I love Fallout inspired or related stuff. Quoted:
Quoted:
I have been wanting a welder so I started looking for used ones. Arf making me spend money again |
|
|
|
[#36]
ETA: Good find! I may just try that or just use vinegar, don't want it to go too far Quoted:
Quoted:
Give me a few and I'll get you some pics. Got any examples of what you have in mind? The pic you've got there doesn't seem to fit |
|
|
|
[#37]
Quoted:
I was going to make one out of a STEN.......but $$
|
|
|
|
[#38]
If I had more money than brains I would put a NDS-15U upper on there.
|
|
|
|
[#39]
Quoted:
If I had more money than brains I would put a NDS-15U upper on there. 
|
|
|
|
[#40]
Quoted:
I'm not using it, and I have a ton of scrap wood and metal floating around the shop, but I sort of put the idea on the back burner with all my other bad ideas. At least until I get some gas for the welder. Quoted:
Quoted:
I was going to make one out of a STEN.......but $ |
|
|
|
[#41]
|
|
|
|
[#42]
Maybe if this was a post apocalyptic M1919 or some shit
|
|
|
|
[#43]
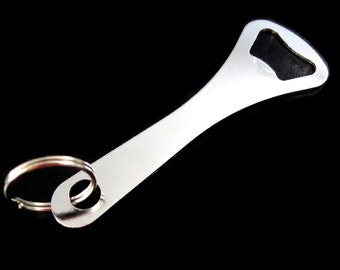
If you put the bottleopener on the left side of the gun, you can still hold it in your right hand and pop the cap on the bottle in your left
|
|
|
|
[#44]
Quoted:
If you put the bottleopener on the left side of the gun, you can still hold it in your right hand and pop the cap on the bottle in your left EDIT> I am picturing one of these LOL  
|
|
|
|
[#45]
Quoted:
Quoted:
If you put the bottleopener on the left side of the gun, you can still hold it in your right hand and pop the cap on the bottle in your left EDIT> I am picturing one of these LOL www.amazon.com/dp/B01DELW1RG
The reason I'm thinking right is just so I can have it centered but after holding one up to it I could fit one on the left |
|
|
|
[#46]
Quoted:
It'll be this style, one of the wall mounts would be a bit too much
https://img1.etsystatic.com/070/0/5239925/il_340x270.820772051_q0sm.jpg The reason I'm thinking right is just so I can have it centered but after holding one up to it I could fit one on the left |
|
|
|
[#47]
Quoted:
Maybe if this was a post apocalyptic M1919 or some shit 


|
|
|
|
[#48]
Do you just use a regular 1919 rear sight with that orrrr? |
|
|
|
[#49]
Hand forge the barrel and use one of those long threaded rods from Home Depot for the rifling.
Also while you're at HD pick up a firing pin. |
|
|
|
[#50]
Quoted:
Do you just use a regular 1919 rear sight with that orrrr? Linky Here is a guy who bought the sight a few years ago. The spider sight is the "rear" sight and the metal pole is the "front sight." It appears that both come in the kit you buy from IMA. 
|
|
|
 Win a FREE Membership!
Sign up for the ARFCOM weekly newsletter and be entered to win a free ARFCOM membership. One new winner* is announced every week!
You will receive an email every Friday morning featuring the latest chatter from the hottest topics, breaking news surrounding legislation, as well as exclusive deals only available to ARFCOM email subscribers.

AR15.COM is the world's largest firearm community and is a gathering place for firearm enthusiasts of all types.
From hunters and military members, to competition shooters and general firearm enthusiasts, we welcome anyone who values and respects the way of the firearm.

Subscribe to our monthly Newsletter to receive firearm news, product discounts from your favorite Industry Partners, and more.
Copyright © 1996-2024 AR15.COM LLC. All Rights Reserved.
Any use of this content without express written consent is prohibited.
AR15.Com reserves the right to overwrite or replace any affiliate, commercial, or monetizable links, posted by users, with our own.


