|
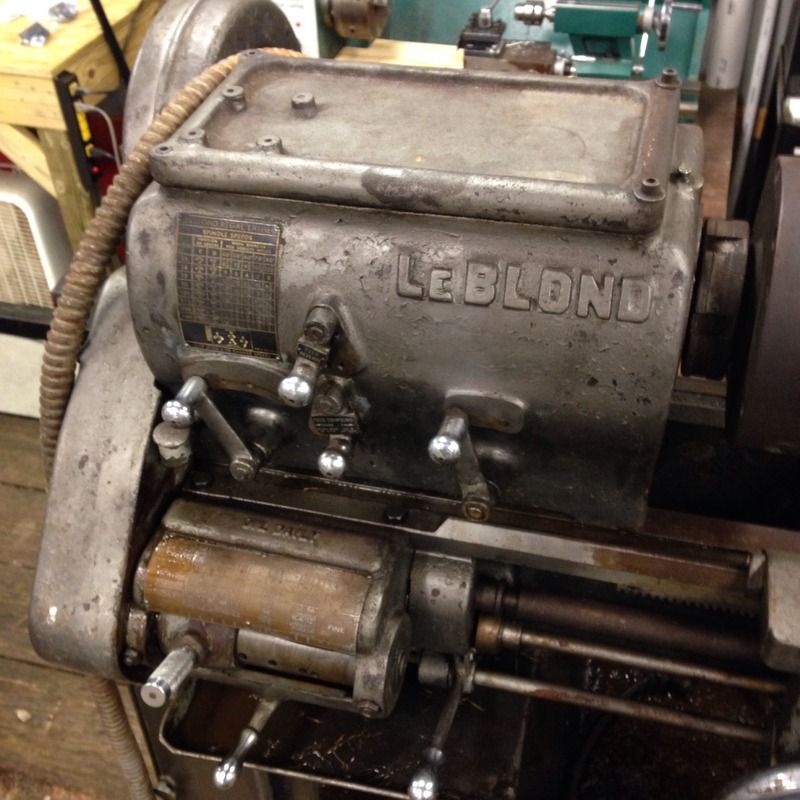
[#1]
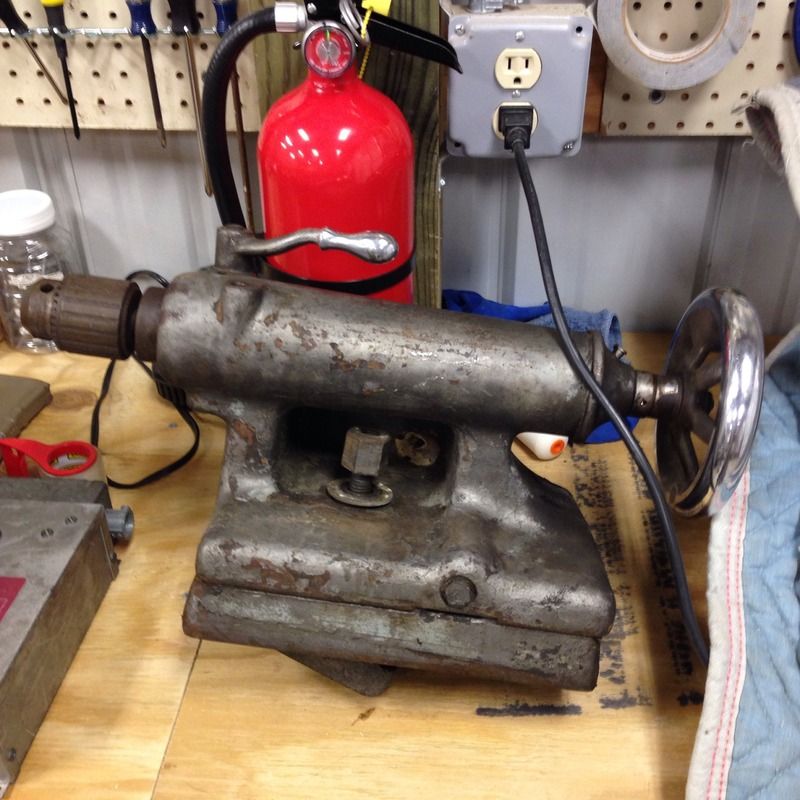
Nice score. LeBlond makes a very nice lathe for general purposes. I wish I could run into a deal like that. Judging from the pictures, I don't think it will take much more than cleaning up to make hobbyist quality things. Check to make sure rats haven't chewed the insulation off of the wiring.
|
|
|
|
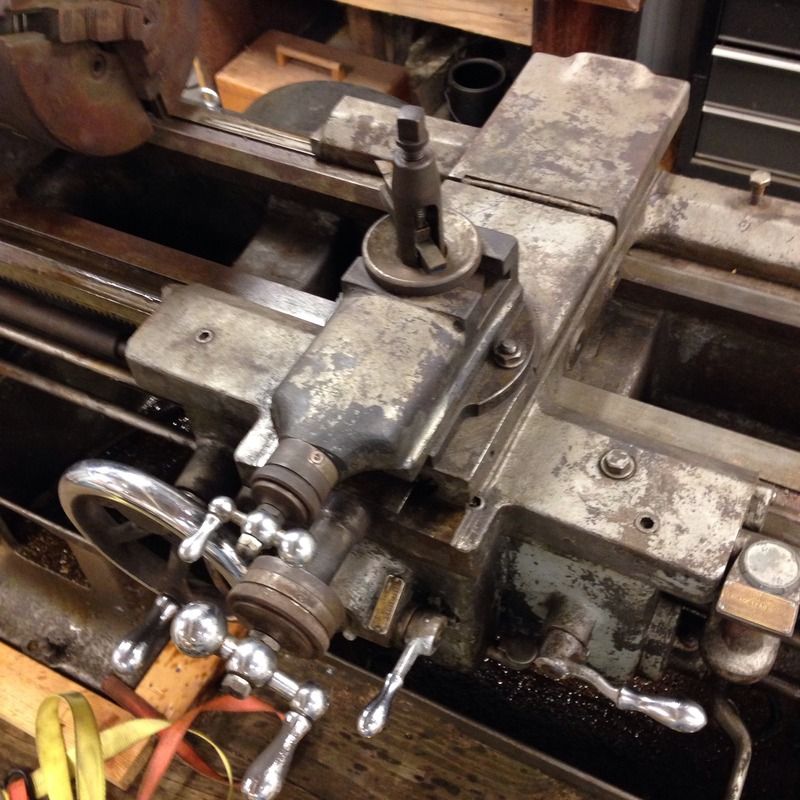
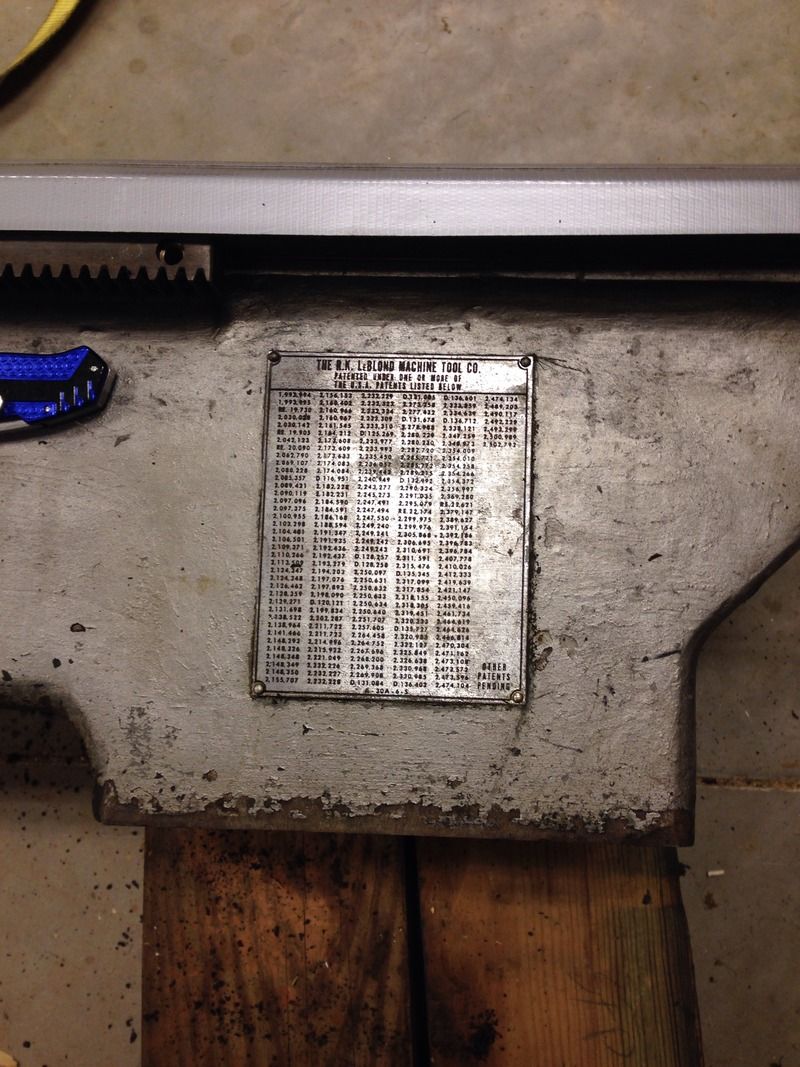
[#2]
Protect the name plates/speed charts, careful what you use to clean them, WD40 works good. I have done a few that were in worse shape. that is a good lathe and will clean up nice.
ETA. you can find the missing door handle on ebay |
|
|
|
[#3]
Quoted:
ETA. you can find the missing door handle on ebay If you know of something I don't, please let me know! I don't see one on eBay. |
|
|
|
[#4]
That's a nice find! Yahoo has some great groups for lathe restoration. I'm partial to Southbend but I'm sure LeBlond has as good or better groups. Take photos of EVERY assembly as you dismantle it, if you go that far. These projects tend to be put on the back burner for years.
With a background in auto body, I went a bit overboard with a Southbend 16". Sandblasted everything, epoxy primed, filler, sanded, more epoxy then some PPG epoxy paint. Some areas are so smooth and shiny they look like plastic. I need to snap some clearer photos... How it arrived 
In progress 
|
|
|
|
[#5]
Check the ways for wear.
Tighten them up slightly at one end and see iff they feed smoothly for their length. That one is worth a lot of work. |
|
|
|
[#6]
Quoted:
That's a nice find! Yahoo has some great groups for lathe restoration. I'm partial to Southbend but I'm sure LeBlond has as good or better groups. Take photos of EVERY assembly as you dismantle it, if you go that far. These projects tend to be put on the back burner for years. With a background in auto body, I went a bit overboard with a Southbend 16". Sandblasted everything, epoxy primed, filler, sanded, more epoxy then some PPG epoxy paint. Some areas are so smooth and shiny they look like plastic. I need to snap some clearer photos... How it arrived http://i34.photobucket.com/albums/d149/rothroq/n_a_zps5608bafa.jpg In progress http://i34.photobucket.com/albums/d149/rothroq/n_a1_zpse55dc673.jpg If you'd be willing to share your primer and paint that would be great. I'm wading through lots of restoration threads on PM and everybody has a different opinion. Some say prime, some say you get less paint chip with no primer, etc. |
|
|
|
[#7]
Quoted:
If you'd be willing to share your primer and paint that would be great. I'm wading through lots of restoration threads on PM and everybody has a different opinion. Some say prime, some say you get less paint chip with no primer, etc. Quoted:
Quoted:...
With a background in auto body, I went a bit overboard with a Southbend 16". Sandblasted everything, epoxy primed, filler, sanded, more epoxy then some PPG epoxy paint. Some areas are so smooth and shiny they look like plastic. ... In progress http://i34.photobucket.com/albums/d149/rothroq/n_a1_zpse55dc673.jpg If you'd be willing to share your primer and paint that would be great. I'm wading through lots of restoration threads on PM and everybody has a different opinion. Some say prime, some say you get less paint chip with no primer, etc. I used PPG DP40 epoxy primer with PPG Delstar/Delthane Ultra DAR/DRX80 Hardener, I used some K36 Prima Urethane surfacer/sealer as well. I'm not sure if they still manufacture the Delstar/Delthane line. Without a fresh air supplied respirator, basically you were going to die using this stuff. Next project, a Bridgeport mill, I'll probably use epoxy primer and some cheap farm implement paint. |
|
|
|
[#8]
The better paints need a frwech air respirator.
There is no filter for them. If you make a mistake you die. Think Bhopal, India. DuPont has a whole line of them sold as automotive paints.. Isocyanate Unless you goop on primer it is worth a thin coat. |
|
|
|
[#9]
First thing I would do is have someone check the headstock bearings and see if the ways are true to the spindle. Check to see if the tailstock taper is beat up and clear of rust, how much slack is in the leadscrews, etc. If you do plan on running it on 2-phase, I would scrap the static converter and run the motor on a digital VFD.
Old lathes look awesome in battleship/machinist grey. |
|
|
|
[#10]
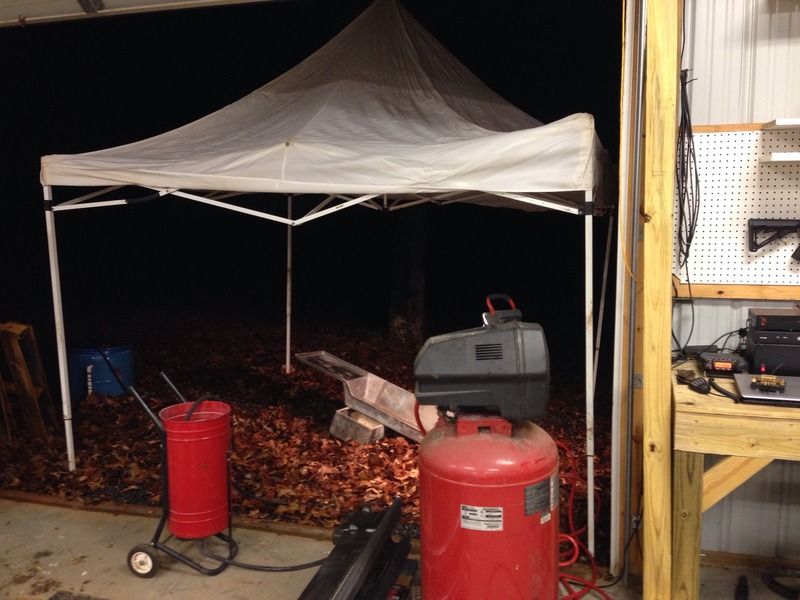
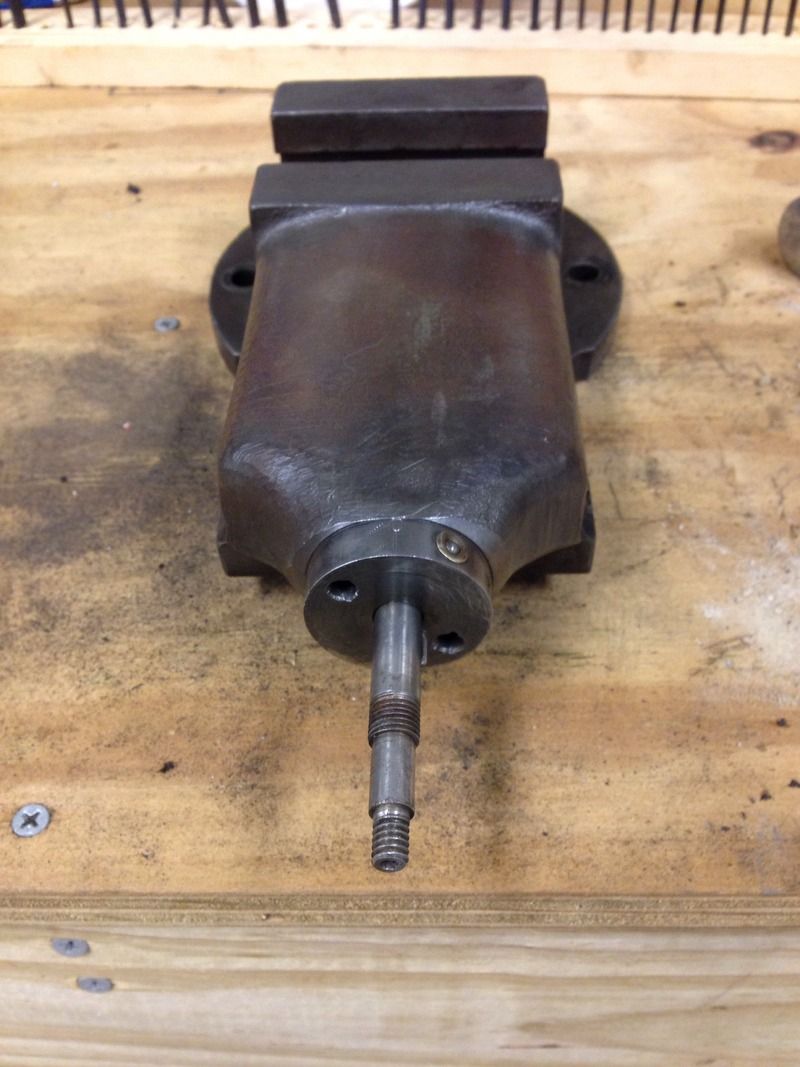
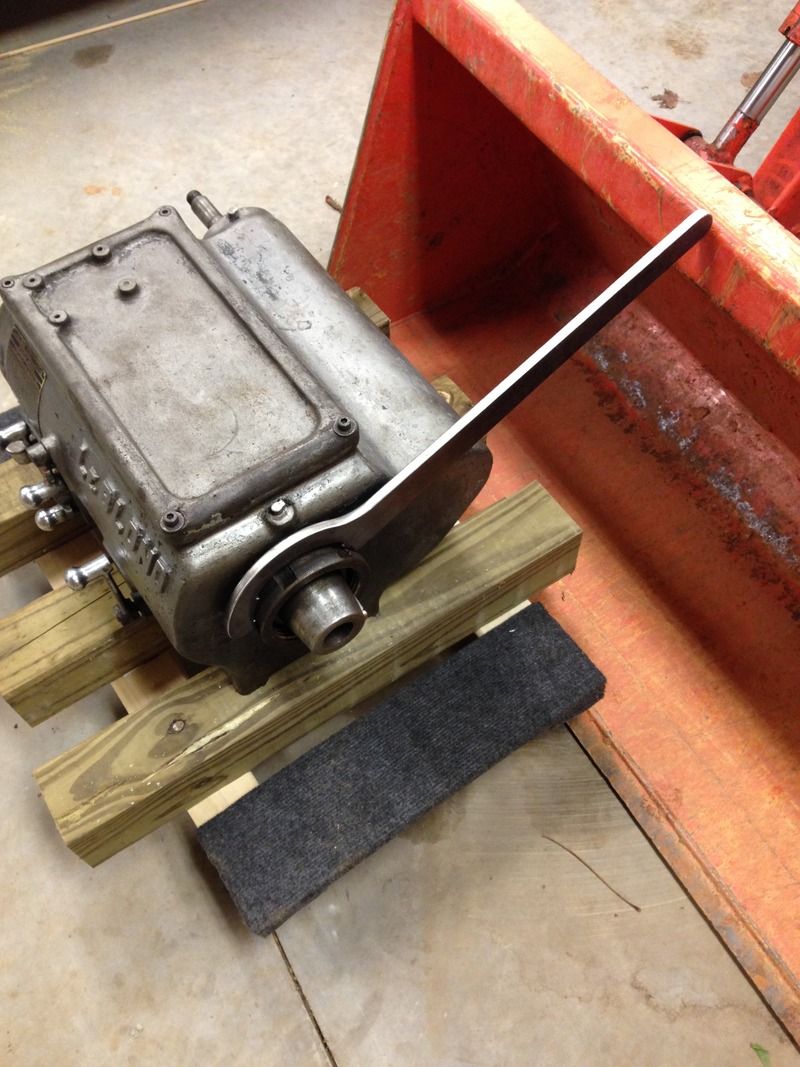
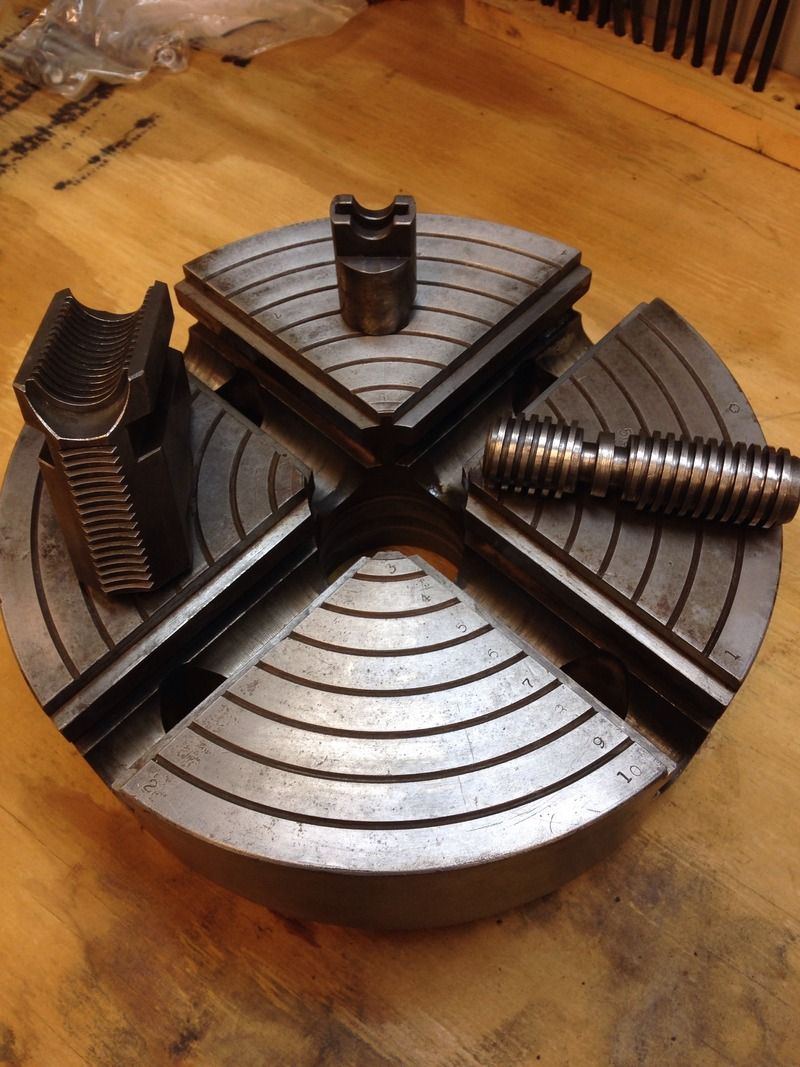
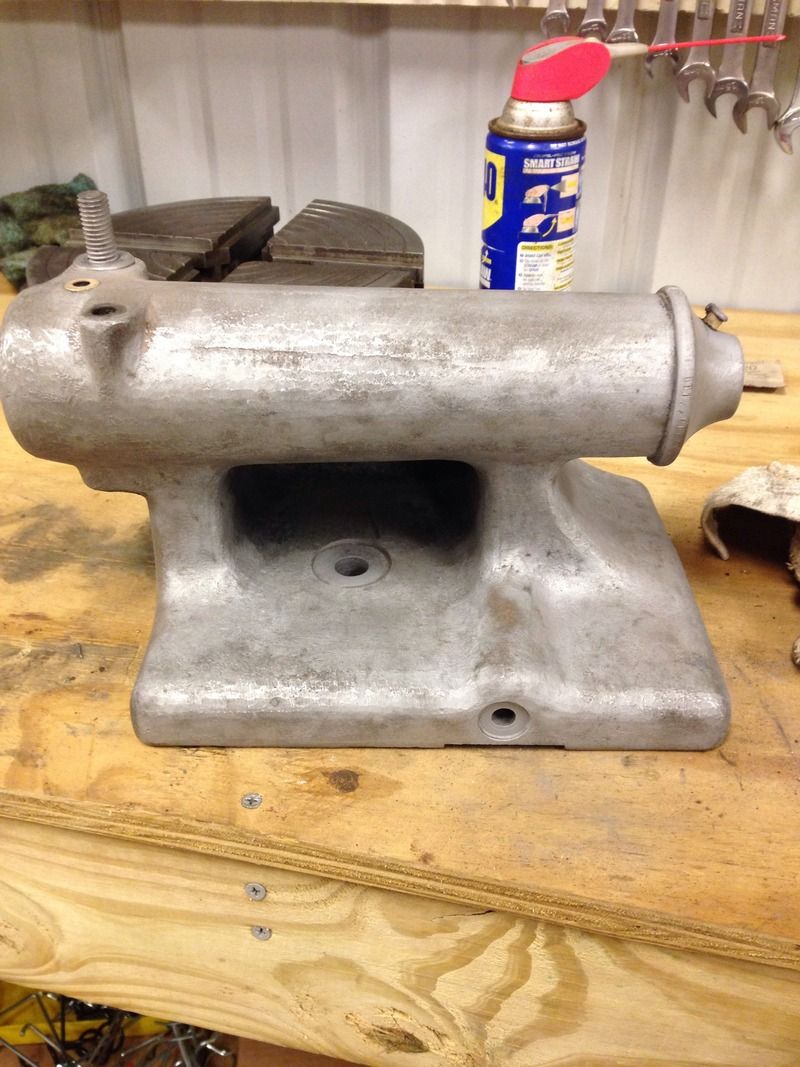
Tailstock and steady rest weren't really worth mentioning, but they are off.
I got the motor control lever off also. I had to drill the taper pin out of the collar on the end so it would slide through the apron. 
The pins that hold the lead screw and feed rod to the QCGB are also stuck. I didn't like hammering while on the lathe, so I slid the assembly out of the apron whole. When the time comes I can put adequate support near where I'm putting pressure so nothing bends. I don't have anyone to help me most of the time, so there's some improvising going on. 
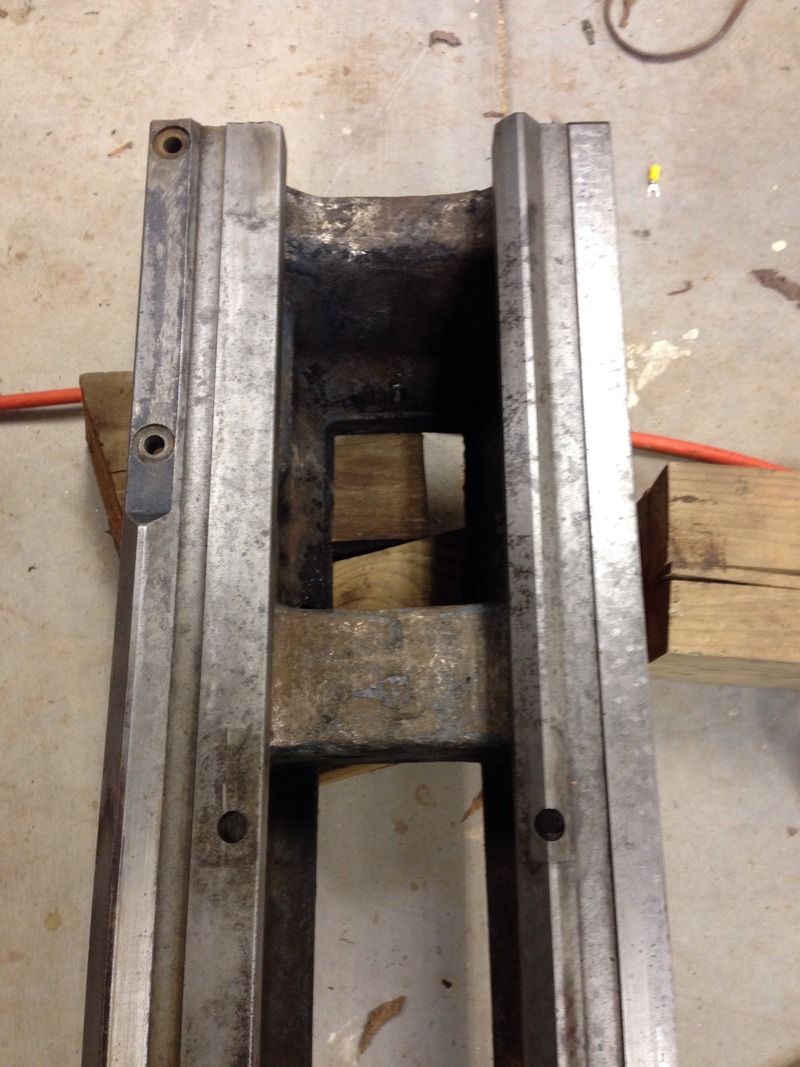
Once all that was out of the way it was time to slide the saddle off after the apron had been dropped. Somewhere along the way someone welded a support for a shop light on the end of the ways. 
|
|
|
|
[#11]
Nice progress.
|
|
|
|
[#12]
Before you get too far in, consider this-
You don't know if it runs. A lathe has a ton of mechanical stuff that can go wrong, most of which you'll not be able to see without an indicator or some run time, probably both. Having a beautiful machine is certainly nice, but for all the effort involved I'd want to be damn sure it didn't have any skeletons in the closet. As an old iron lover I strongly suggest you reevaluate your plan. One quick check is to mic the flatways to gage wear. Start on the tailstock end and measure their thickness at set intervals over the bed's length. Do the vees too if you have a block that will allow it. You'll also want to see what condition the tailstock is in, how it faces, etc. Posted Via AR15.Com Mobile |
|
|
|
[#13]
Quoted:
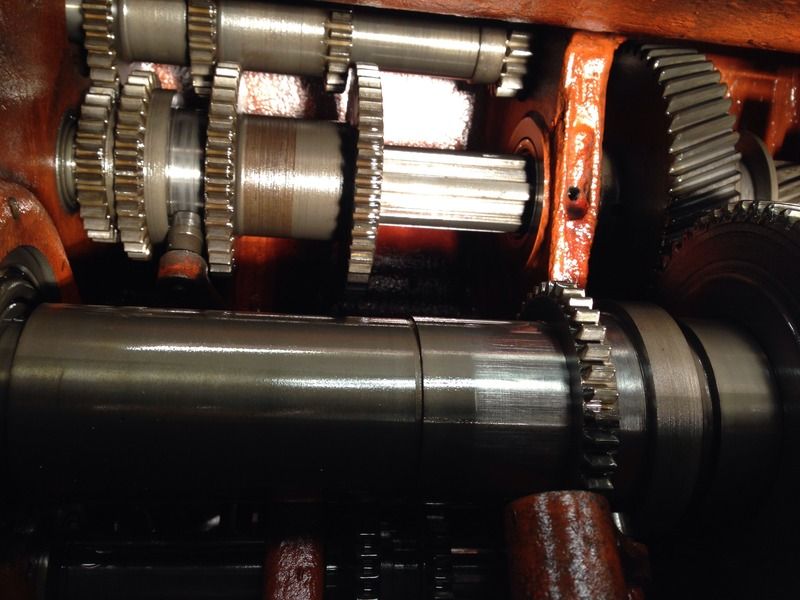
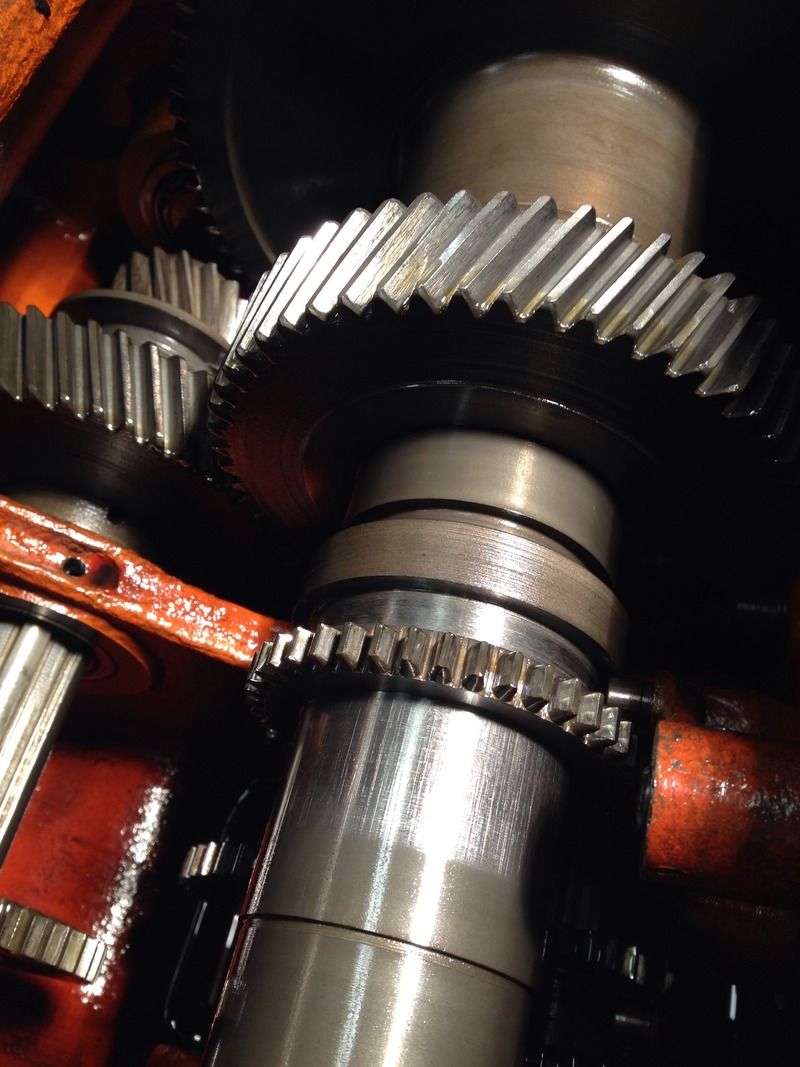
Before you get too far in, consider this- You don't know if it runs. A lathe has a ton of mechanical stuff that can go wrong, most of which you'll not be able to see without an indicator or some run time, probably both. Having a beautiful machine is certainly nice, but for all the effort involved I'd want to be damn sure it didn't have any skeletons in the closet. As an old iron lover I strongly suggest you reevaluate your plan. One quick check is to mic the flatways to gage wear. Start on the tailstock end and measure their thickness at set intervals over the bed's length. Do the vees too if you have a block that will allow it. You'll also want to see what condition the tailstock is in, how it faces, etc. Posted Via AR15.Com Mobile Read and acknowledged. I'm not disagreeing with you at all, but my motivation is different than most. I need a project right now and this fell in my lap. It's fun and stress relieving for me to go out in the shop at night and keep busy for an hour or two. I'm leaning a little bit and if stuff goes sour I can part it out or probably even get my money back as is. If at the end of this something is terribly wrong with the machine I give you full permission to laugh, point, and say I told you so. But back to the topic, I do know it runs, but didn't do any precision measuring on test pieces. I wired up the 3 phase converter and it goes (well it went, before I tore it apart) forward and reverse in all gears and the automatic feeds work. It does have some backlash in the cross-slide but nothing I would consider outrageous. I popped the headstock cover off and removed most of the oil and inspected every tooth I can see. Not a chip or even visible wear anywhere. It has at least been kept well oiled and not shoved into gear while still turning.  There is a .0015" deviation on the flatways from headstock to tailstock. .878" at both ends and .8765" near the middle across the front way. Is that considered bad wear? I can see a grind pattern most everywhere on the ways that I assume is either factory or a professional regrind. There is a .0015" deviation on the flatways from headstock to tailstock. .878" at both ends and .8765" near the middle across the front way. Is that considered bad wear? I can see a grind pattern most everywhere on the ways that I assume is either factory or a professional regrind.
The tailstock is already torn apart so I guess it's too late to check that. |
|
|
|
[#14]
Mrpete222. Lots of good youtube learning and some paid programming on how to use your new lathe.
|
|
|
|
[#15]
Quoted:
Read and acknowledged. I'm not disagreeing with you at all, but my motivation is different than most. I need a project right now and this fell in my lap. It's fun and stress relieving for me to go out in the shop at night and keep busy for an hour or two. I'm leaning a little bit and if stuff goes sour I can part it out or probably even get my money back as is. If at the end of this something is terribly wrong with the machine I give you full permission to laugh, point, and say I told you so. But back to the topic, I do know it runs, but didn't do any precision measuring on test pieces. I wired up the 3 phase converter and it goes (well it went, before I tore it apart) forward and reverse in all gears and the automatic feeds work. It does have some backlash in the cross-slide but nothing I would consider outrageous. I popped the headstock cover off and removed most of the oil and inspected every tooth I can see. Not a chip or even visible wear anywhere. It has at least been kept well oiled and not shoved into gear while still turning. There is a .0015" deviation on the flatways from headstock to tailstock. .878" at both ends and .8765" near the middle across the front way. Is that considered bad wear? I can see a grind pattern most everywhere on the ways that I assume is either factory or a professional regrind.
The tailstock is already torn apart so I guess it's too late to check that. Good deal! 0.0015" deviation isn't bad, my Monarch was significantly more, 0.004" IIRC. However where I ran into trouble was near the chuck (duh), the vee geometry was worn a bit. Enjoy! Posted Via AR15.Com Mobile |
|
|
|
[#17]
Made a little progress over the weekend.

|
|
|
|
[#18]
Moving right along! I share shop time with my 5yo, so my projects take much more time.
He's a great helper.CHRIS |
|
|
|
[#19]
Quoted:
Moving right along! I share shop time with my 5yo, so my projects take much more time. He's a great helper.
CHRIS My daughter is two months old and I very much look forward to her being old enough to come outside and help me with stuff, but that'll be a long time. I don't know a lot but I want to teach her to be able to do more shop stuff than the average teenage girl. I'd be light-years ahead in progress but the evenings she's awake and in a decent mood I hang out with her and mommy. |
|
|
|
[#21]
Quoted:
Heading right into winter isn't good, it will really limit my ability to paint with the lower temperatures. My shop isn't heated or insulated. Smaller pieces can be done in the basement, but ventilation is bad and I can't get the larger pieces in the house. Quoted:
Heading right into winter isn't good, it will really limit my ability to paint with the lower temperatures. My shop isn't heated or insulated. Smaller pieces can be done in the basement, but ventilation is bad and I can't get the larger pieces in the house. Drape plastic sheeting down in the paint area and run a portable heater (LP is better for fumes and soot) like a salamander etc inside the plastic sheeted "paint area". You would be surprised just how warm that area can get when it's located inside of a structure like the pole-barn/shop you have. Growing up on the farm we had a 30 X 50 area that was sheeted in with heavy plastic and we ran a single salamander type heater in the winter when working on farm equipment. It would provide a 10-20 degree temp rise easy. If you sheet in a smaller area you could get a real nice temp rise for painting and the sheets will act to help contain the paint spray (if you're spraying) Quoted:
It's the Tractor Supply house brand of alkd enamel. Its called Ford Grey, but it turned out way too white for me. Did that cure for you? I bought some TSC alkyd paint a bit over a year ago. Not only was the color WAY WAY off what it was supposed to be but I mixed according to directions, sprayed it and it was still tacky 1 week later (temps were 70 plus). I returned what was left for a full refund and decided I will never again touch an enamel/alkyd paint product that doesn't have "Rust-O-Leum" on the can. It costs a bit more but it's completely worth every penny saved in stripping and repainting because of wrong color or not curing right. |
|
|
|
[#22]
I'm very pleased with how it cured in just 48 hours. In time it should continue to get harder and then be extremely coolant/grease/oil resistant. I may try to tint it darker and give it another go. If it still isn't right I will just go to Benjamin Moore and have them match a panel.
Tonight I lost two hours dinking around with our old sandblaster. The sand I'm using must be too large and it keeps plugging up the hose between the media tank and the gun, over and over. I sifted it, so it's not clogging with debris or from moisture. I'm not even fooling with it this weekend, I need to put a deer in the freezer instead. |
|
|
|
[#23]
Looks like a big shop OP, why not build a temporary paint booth? Project looks great.
|
|
|
|
[#25]
OST
|
|
|
|
[#26]
I found a guy local to me who has an industrial sandblaster. For some drinking money he's happy to blast big and small parts for me
Also, I made a different type pick up for my small desktop sandblaster. Might be worth looking into changing how yours feeds |
|
|
|
[#28]
Got a TIG welder?
I've gotten parts that size out with an AC flux wire but TIG is going to be way easier. |
|
|
|
[#29]
Quoted:
Got a TIG welder? I've gotten parts that size out with an AC flux wire but TIG is going to be way easier. No TIG. We've got an old stick welder and a little MIG. I didn't really think to try that. I forgot to mention I tried an easy out but it wouldn't bite. Now its really in there because I'm sure I botched all the threads. |
|
|
|
[#30]
Mag drill fit in there?
Posted Via AR15.Com Mobile |
|
|
|
[#32]
The molasses worked well before. You could just dunk everything in there in a mesh bag... That might be nicer to the surface finish of the machined parts than a blasting cabinet. I've never cared for the finish of glass beaded bolts and threads after beading.
I kinda want to try the molasses on some of my old car parts. |
|
|
|
[#33]
This is what I used on old axe heads and whatnot. Works really well. You want to hit the part with a wire brush when done to knock off any scale that usually wipes/brushes off.
It can't replace metal that has rusted away but it can absolutely remove 100% of rust. rust removal |
|
|
|
[#34]
Quoted: No one I know has a mag drill. If I had a full size mill instead of a bench top I would mill it out. Still might try an endmill in a drill. It can wait though. The holes can always be filled and move the tag a little to the left or right and drill and tap new ones. I ordered some polishing and buffing wheels of different varieties and I've been playing with different compounds trying to make dull parts shiny again. So far the results are acceptable but not in the "wow" category. Im dropping hints like crazy for Christmas presents got this project. A real buffer, a blasting cabinet, etc. If anyone has a partial method, wheel or compound they recommend, I'm all ears. Quoted: Quoted: Mag drill fit in there? Posted Via AR15.Com Mobile No one I know has a mag drill. If I had a full size mill instead of a bench top I would mill it out. Still might try an endmill in a drill. It can wait though. The holes can always be filled and move the tag a little to the left or right and drill and tap new ones. I ordered some polishing and buffing wheels of different varieties and I've been playing with different compounds trying to make dull parts shiny again. So far the results are acceptable but not in the "wow" category. Im dropping hints like crazy for Christmas presents got this project. A real buffer, a blasting cabinet, etc. If anyone has a partial method, wheel or compound they recommend, I'm all ears. You should be lapping the flat stuff if possible, especially if it appears to have been ground in the past, such as that tool post spacer. You're making much better progress than I would by now! |
|
|
|
[#35]
Quoted:
No TIG. We've got an old stick welder and a little MIG. I didn't really think to try that. I forgot to mention I tried an easy out but it wouldn't bite. Now its really in there because I'm sure I botched all the threads. Quoted:
Quoted:
Got a TIG welder? I've gotten parts that size out with an AC flux wire but TIG is going to be way easier. No TIG. We've got an old stick welder and a little MIG. I didn't really think to try that. I forgot to mention I tried an easy out but it wouldn't bite. Now its really in there because I'm sure I botched all the threads. It's not threaded, its a drive screw. I've gotten tiny taps out of stainless with my shitty HF flux wire by welding a nut to the broken off tap. I'd be somewhat cautious about applying lots localized heat to cast iron so my suggestion would be to preheat to ~200-300 degrees, cover everything to avoid spatter, and see if you can get lucky with the MIG and an appropriate sized nut. I'd use a slide hammer to try a straight pull vs. trying to "unscrew" things. Prior to pulling you might try heating things up again and flow in some beeswax just to give yourself as much help as you can. |
|
|
|
[#37]
Nice. I redid a SouthBend that was my Grandfathers. I took it completely apart, cleaned, primed and repainted it. I didn't sandblast as there was no rust. Google is your friend, there are a ton of lathe restos online.
Good find and have fun! |
|
|
|
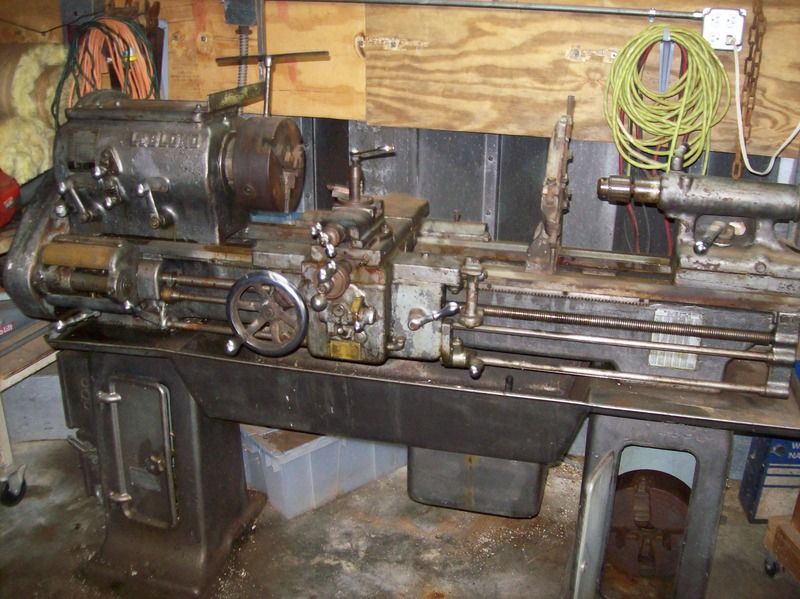
[#38]
A pic from under the hood of mine-
 Posted Via AR15.Com Mobile |
|
|
|
[#39]
Quoted:
Nice. I redid a SouthBend that was my Grandfathers. I took it completely apart, cleaned, primed and repainted it. I didn't sandblast as there was no rust. Google is your friend, there are a ton of lathe restos online. Good find and have fun! Quoted:
Nice. I redid a SouthBend that was my Grandfathers. I took it completely apart, cleaned, primed and repainted it. I didn't sandblast as there was no rust. Google is your friend, there are a ton of lathe restos online. Good find and have fun! We'd love to see some pictures if you have any. The more the merrier. It's extra cool that it was your grandfathers. I was hoping this one would be a '44 when I found it, the year my dad was born, but it's a '50. Quoted:
A pic from under the hood of mine- <a href="http://s1151.photobucket.com/user/Cole2534/media/IMAG0334_zpsu3wgdl98.jpg.html" target="_blank">http://i1151.photobucket.com/albums/o639/Cole2534/IMAG0334_zpsu3wgdl98.jpg</a> Posted Via AR15.Com Mobile It looks good too. Did you say you had a Monarch or a Sheldon, or something different? I can't remember. Feel free to post up full pics. |
|
|
|
[#40]
I didn't take pics, it was over 10 years ago, I don't think I even had a camera.
My Gramps was a machinist and during WWII he was on the outer edge of age+machinist so he stayed home and built stuff. He had the lathe in his basement workshop and made extra money making parts for the war effort in the evening and whenever he was off work. He also built a live steam engine, about 7 feet long, had tracks in the backyard. |
|
|
|
[#41]
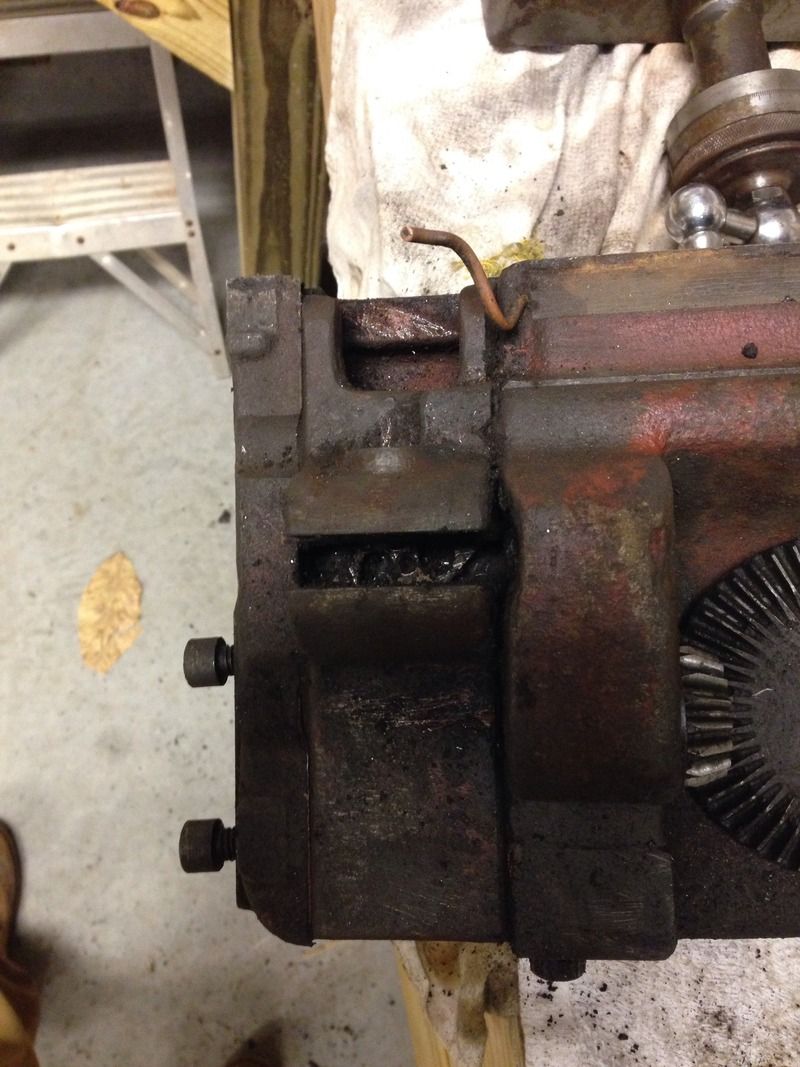
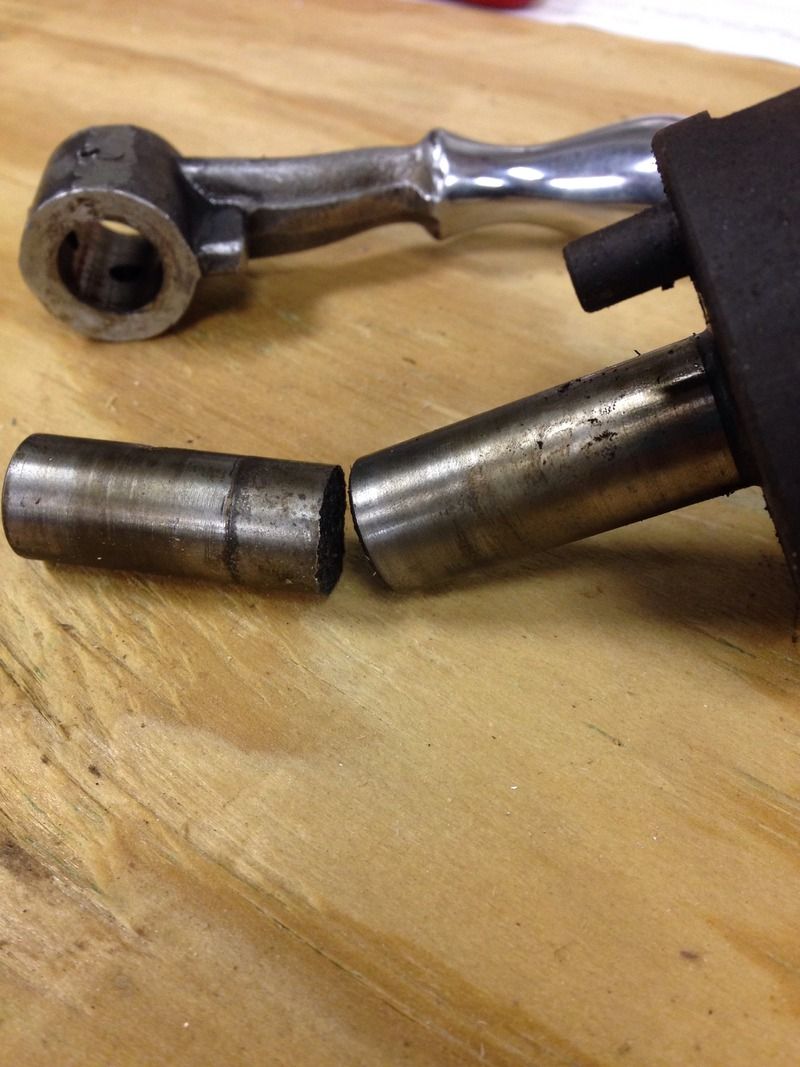
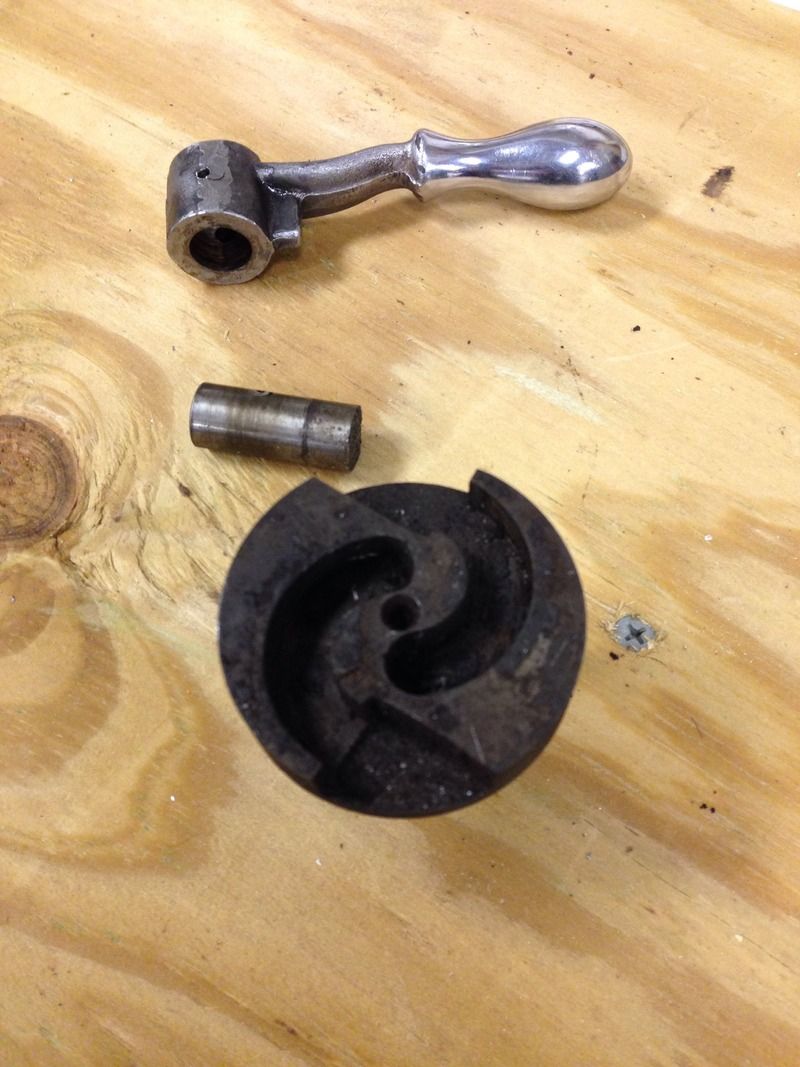
Well, consider this thread, and project, done.
I was removing the handle on the half nut shaft (hammering out a taper pin) and broke the shaft, which is an all-in-one shaft and cam for the two half nuts. A replacement from LeBlond is $919. Yes, $919. I will watch eBay and the PM board for a while to see if I can find an apron, but the chances are slim as there really aren't many of these left. I'll probably part this out and find another project. |
|
|
|
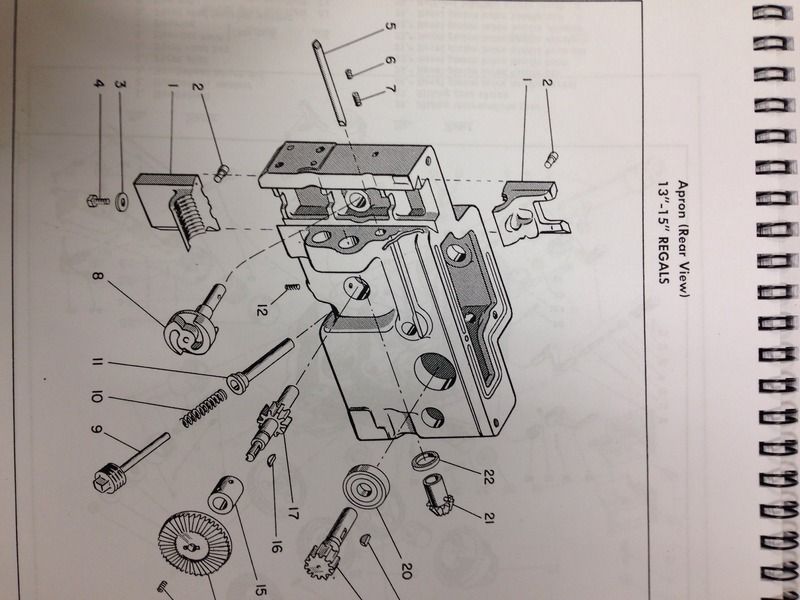
[#42]
Can you post pics of the break and shaft?
|
|
|
|
[#44]
If it is a steel shaft... Could it be very carefully tig welded in a fixture then re profiled by hand or on a lathe? For 900 bucks I'd be tempted to try it, at least if you can figure out how to get it out.
|
|
|
|
[#45]
Thats probably fixable.
Be a shame to part out a lathe in such good condition. ETA: You can access enough of the back side of cam to make a tool to rotate it. Once you get it all out, drill, pin and weld it back up. |
|
|
|
[#46]
Quoted:
Thats probably fixable. Be a shame to part out a lathe in such good condition. This. Machines are almost like living things. It would be a shame to let it die when it can be saved. |
|
|
|
[#47]
Quoted:
It looks good too. Did you say you had a Monarch or a Sheldon, or something different? I can't remember. Feel free to post up full pics. Quoted:
Quoted:
A pic from under the hood of mine- <a href="http://s1151.photobucket.com/user/Cole2534/media/IMAG0334_zpsu3wgdl98.jpg.html" target="_blank">http://i1151.photobucket.com/albums/o639/Cole2534/IMAG0334_zpsu3wgdl98.jpg</a> Posted Via AR15.Com Mobile It looks good too. Did you say you had a Monarch or a Sheldon, or something different? I can't remember. Feel free to post up full pics. 1944 Monarch 12CK Posted Via AR15.Com Mobile |
|
|
|
[#48]
|
|
|
|
[#49]
Put some of the lathe back together and turn a new one?
Posted Via AR15.Com Mobile |
|
|
|
[#50]
Quoted:
Put some of the lathe back together and turn a new one? Posted Via AR15.Com Mobile I have another lathe. How the heck do you cut the cam "channels" with a lathe? You wanna cut me one? |
|
|
 Win a FREE Membership!
Sign up for the ARFCOM weekly newsletter and be entered to win a free ARFCOM membership. One new winner* is announced every week!
You will receive an email every Friday morning featuring the latest chatter from the hottest topics, breaking news surrounding legislation, as well as exclusive deals only available to ARFCOM email subscribers.

AR15.COM is the world's largest firearm community and is a gathering place for firearm enthusiasts of all types.
From hunters and military members, to competition shooters and general firearm enthusiasts, we welcome anyone who values and respects the way of the firearm.

Subscribe to our monthly Newsletter to receive firearm news, product discounts from your favorite Industry Partners, and more.
Copyright © 1996-2024 AR15.COM LLC. All Rights Reserved.
Any use of this content without express written consent is prohibited.
AR15.Com reserves the right to overwrite or replace any affiliate, commercial, or monetizable links, posted by users, with our own.


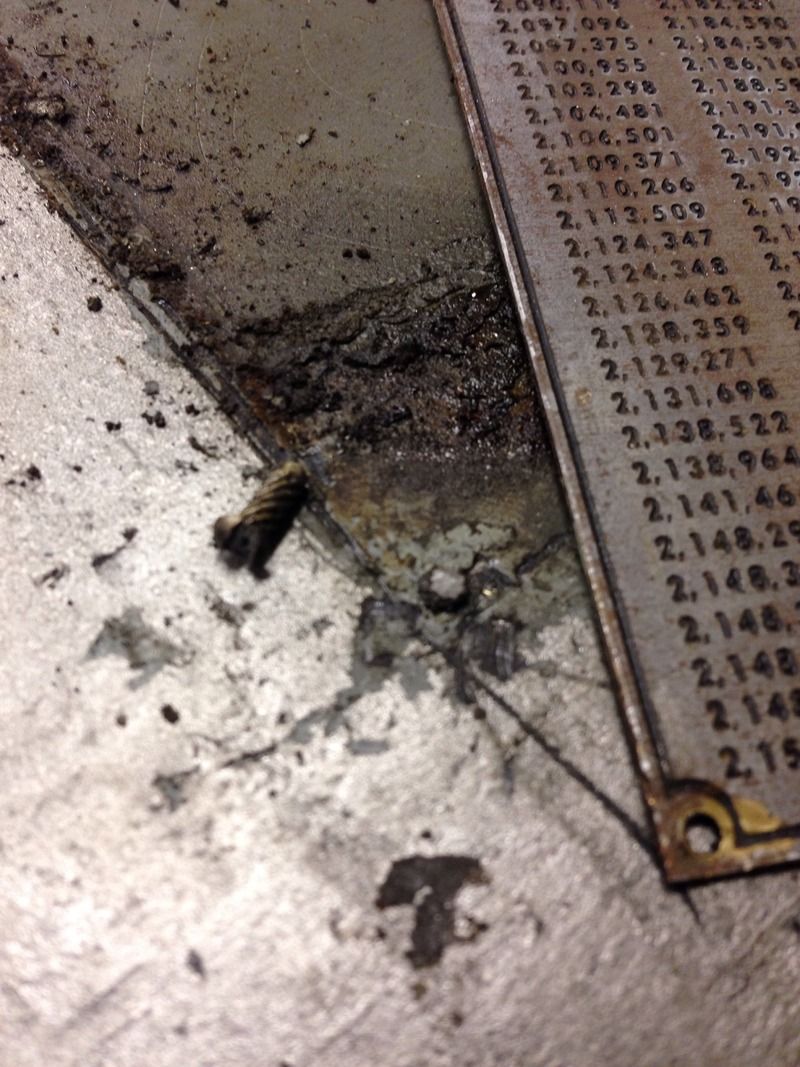
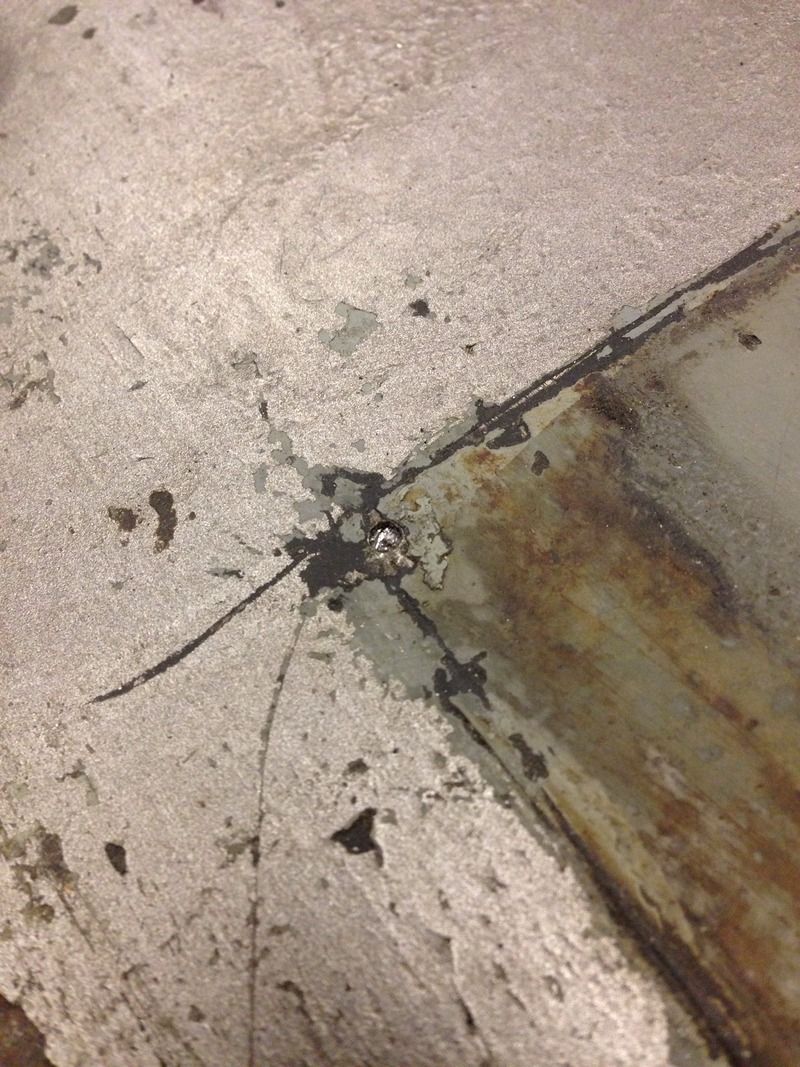
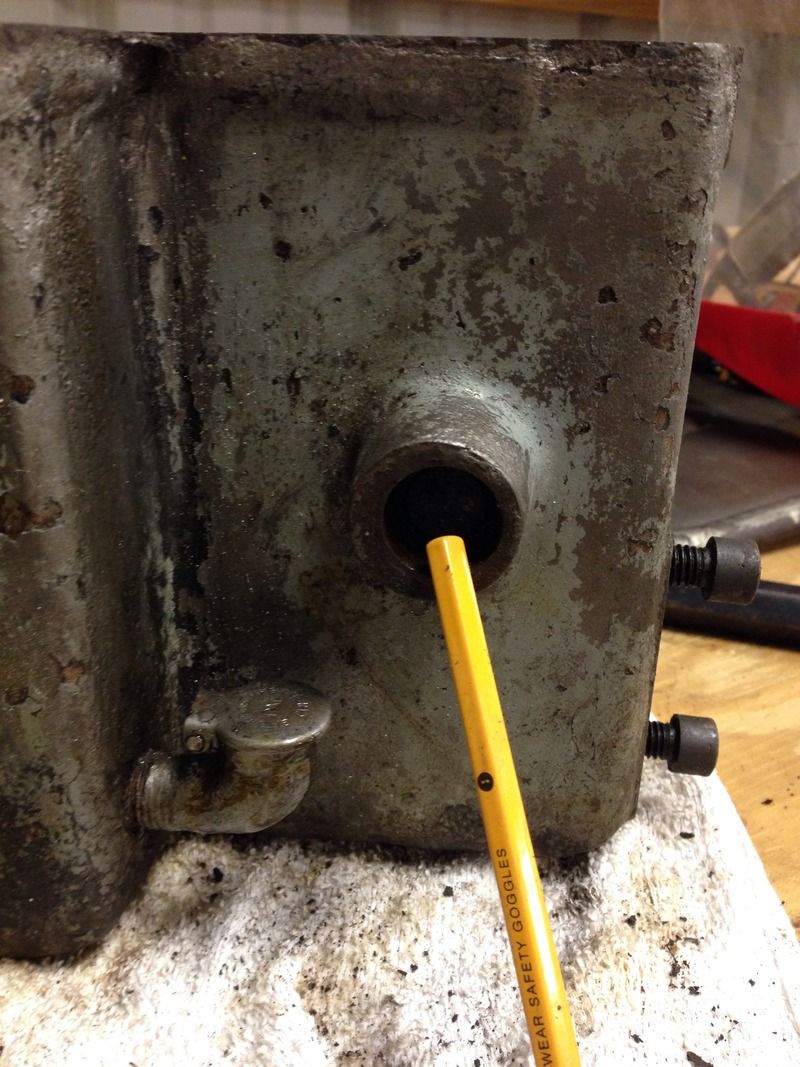
 I ground it off as carefully as I could and slipped the tag up over the rivet. I thought I would drill it out but the drill kept slipping off the crown, so I got a little punch to center-punch it and it when I hit it, it drove the (I late found out) screw further down into a blind hole. Double crap.