|
[#1]
The space...
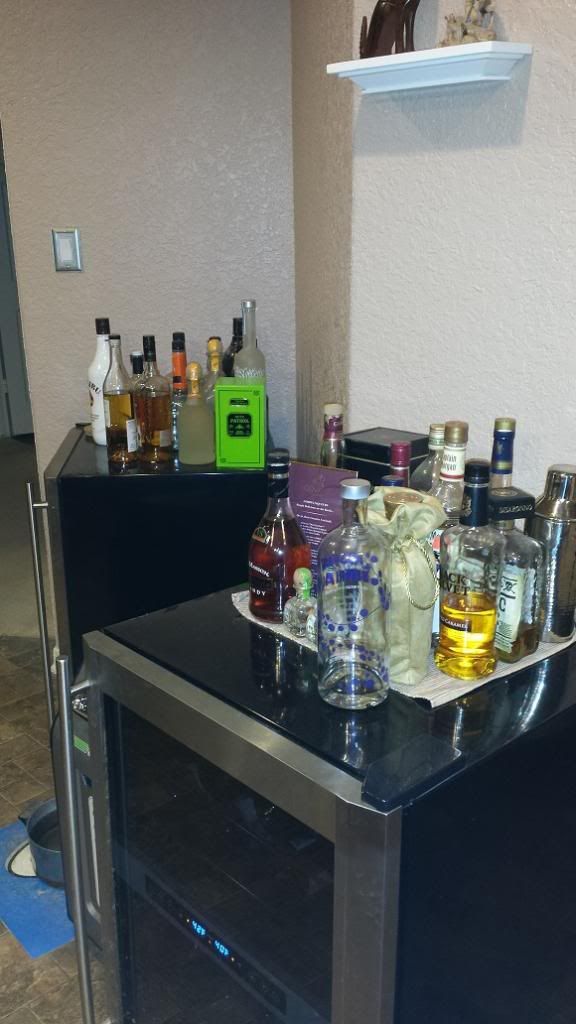
This is a really odd corner and we have too many bottles and I just don't like them sitting on the fridges. Hers in the wine fridge in the foreground and mine in the "beverage" fridge in the background. It is frequently loaded up with tasty carbonated beverages that end in IPA. These are the cabinets we ended up deciding on, everything apparently in now made in China... They are maple and they are actually made of plywood and solid wood versus that particle board so many of the other you see around. 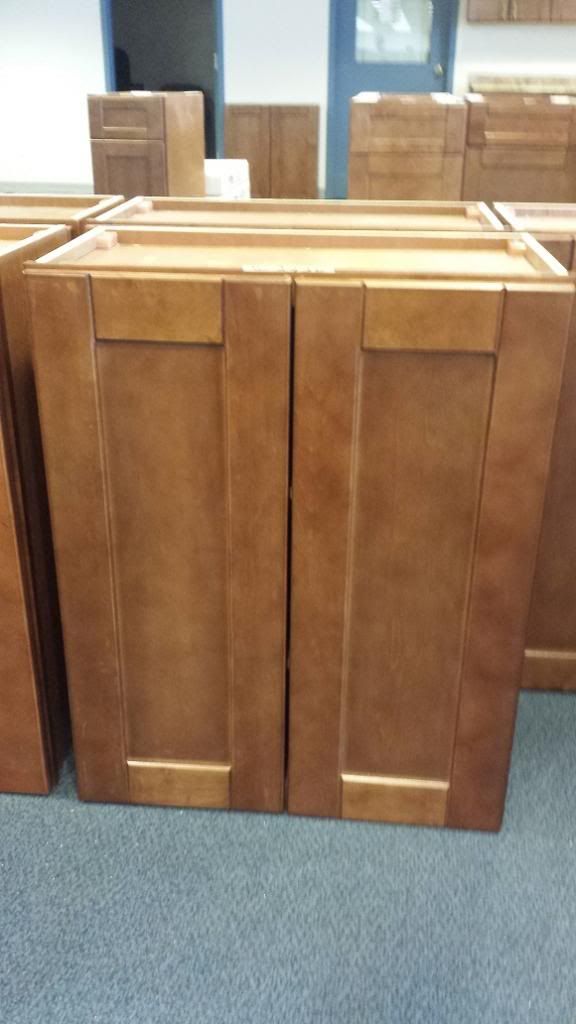
|
|
|
|
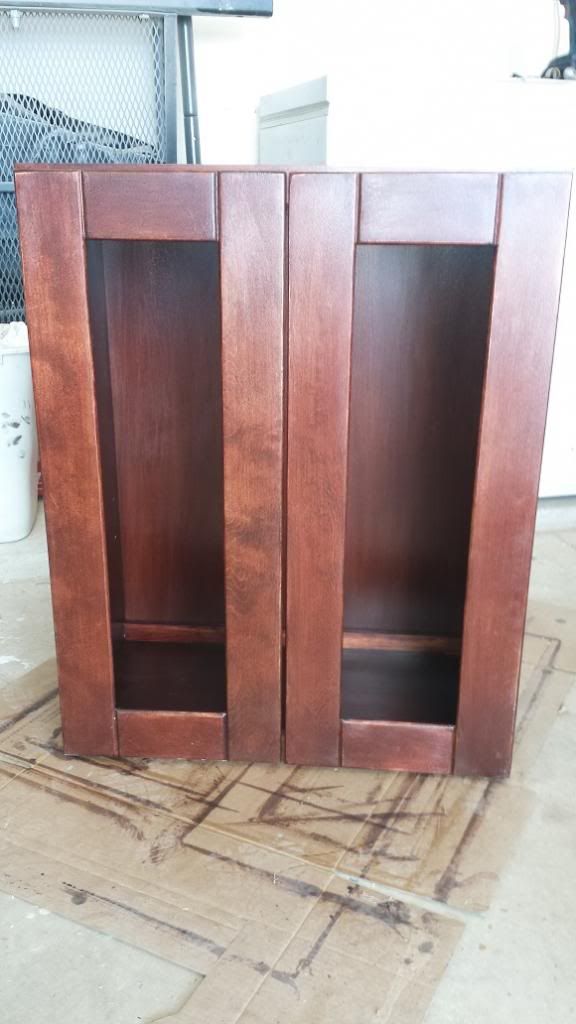
[#2]
The cabinets weren't assembled which was better for me, I had to take them apart anyways to strip and restain them. We also decided to take the shakers out of the doors and replace them with glass.
The first one was a pain in the ass because I wasn't sure how wide the shakers were so I took a guess and measured. 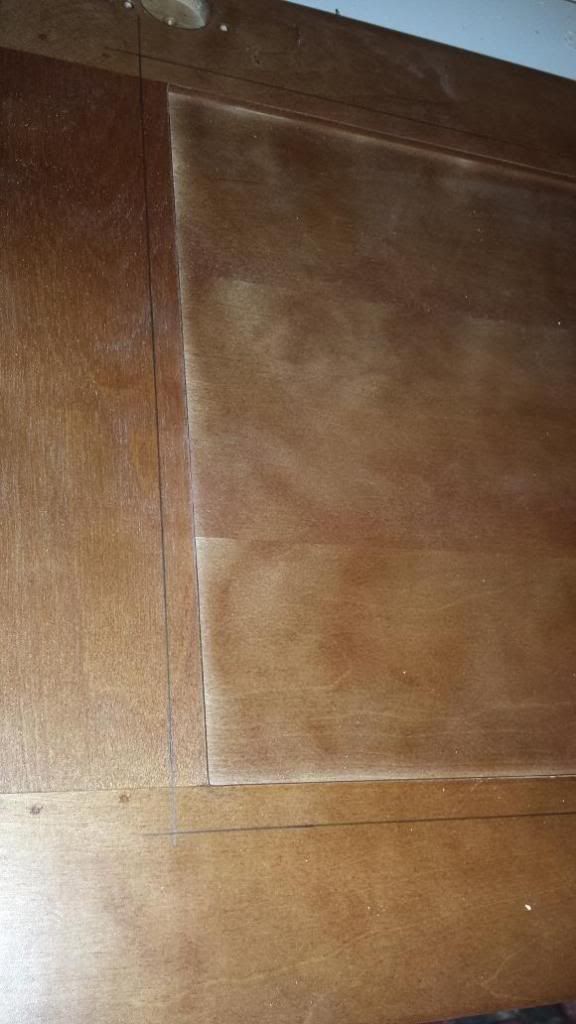
I really hate using a circular saw for precision work without a fence but managed to freehand these pretty good for the most part. 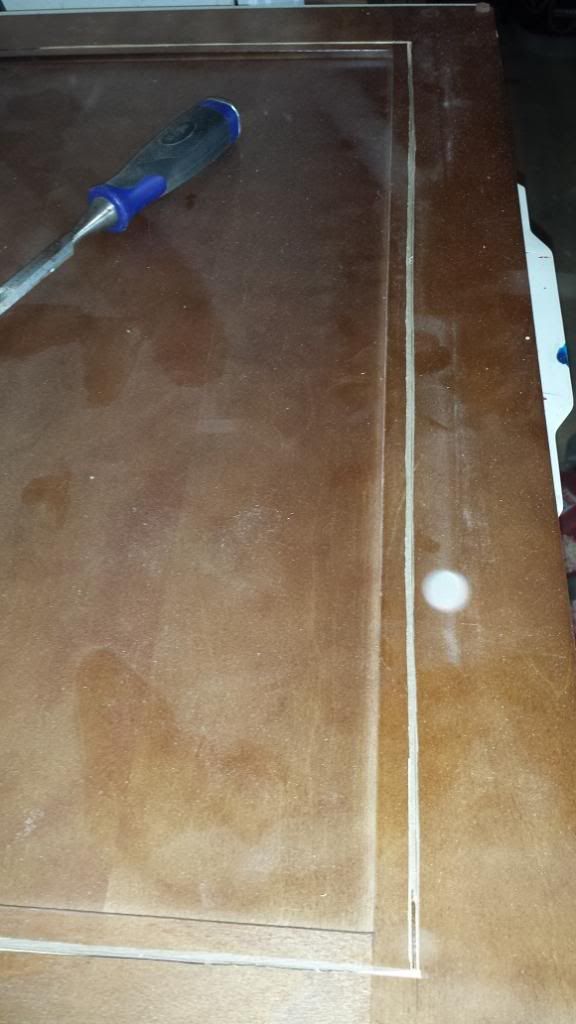
Dremeling the corners out wasn't too bad, I didn't have the best bit for it. 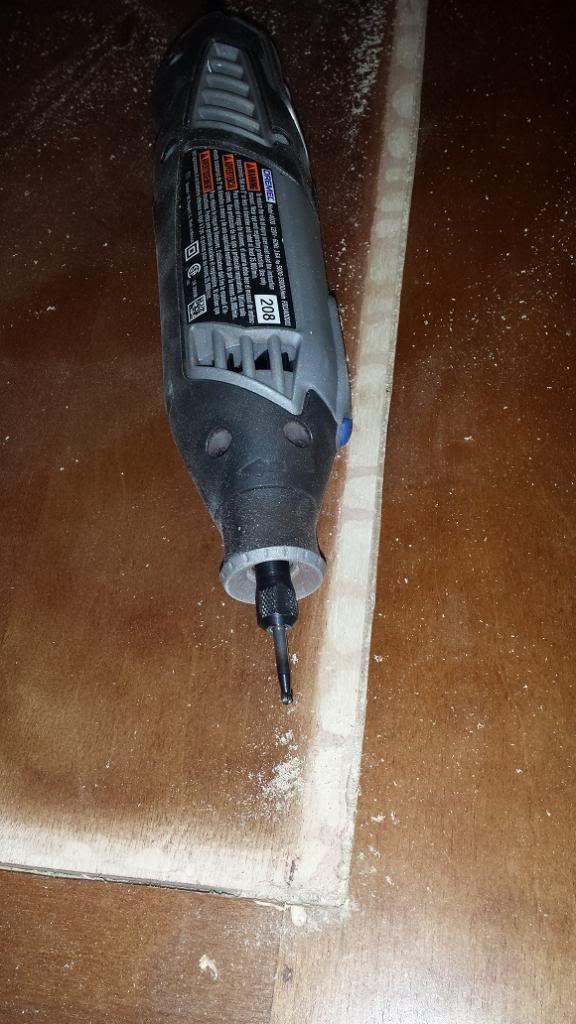
They all popped out pretty easy in the end... 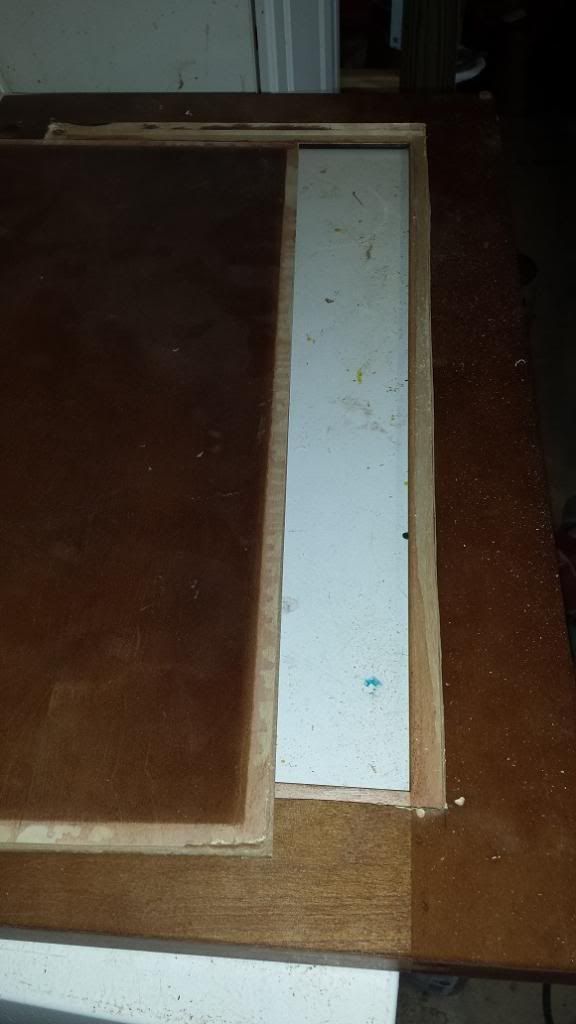
|
|
|
|
[#3]
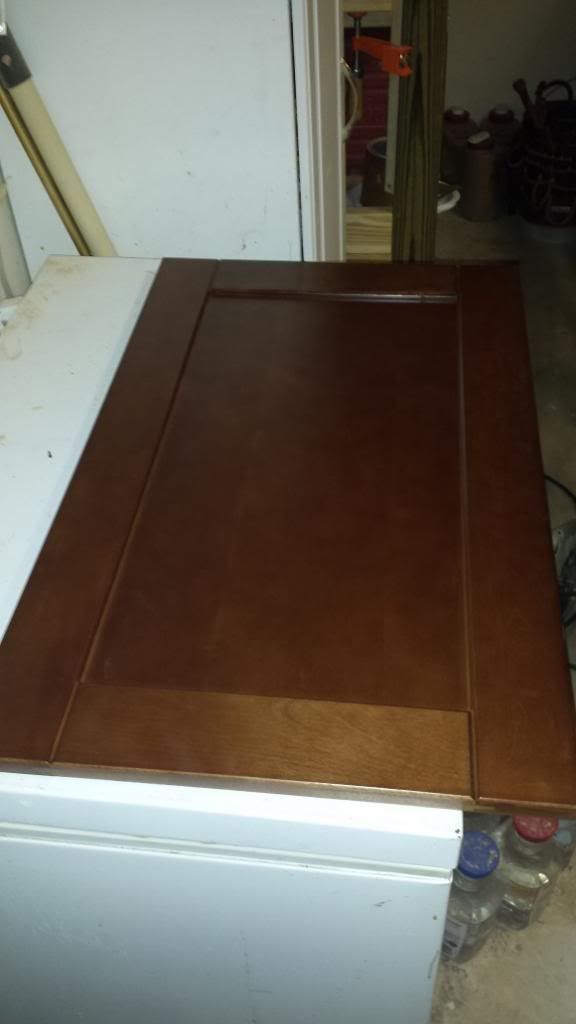
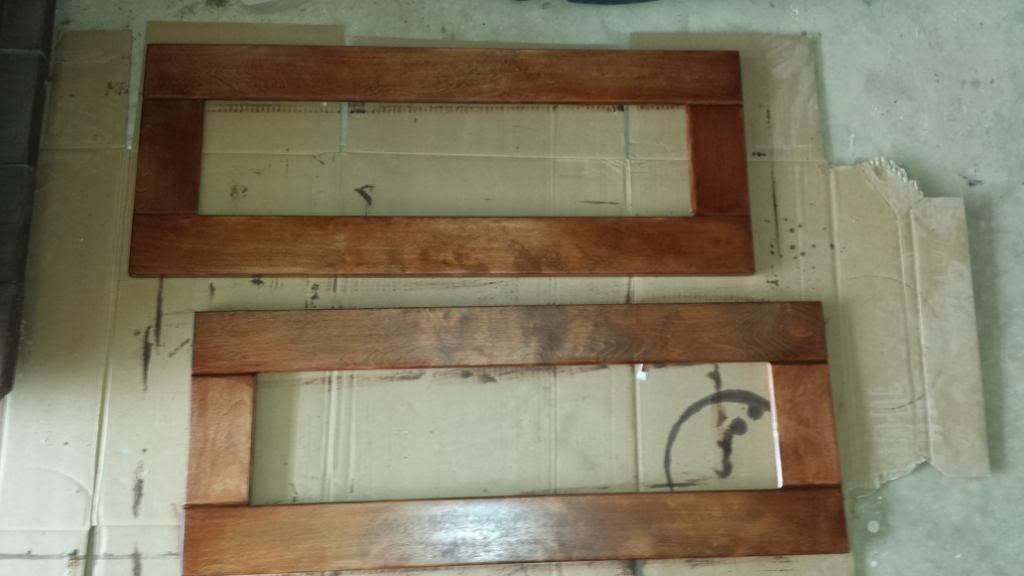
Everything had to be sanded down and they laid the varnish/poly on really thick. I hate to think of the carcinogens in the dust from the sanding...
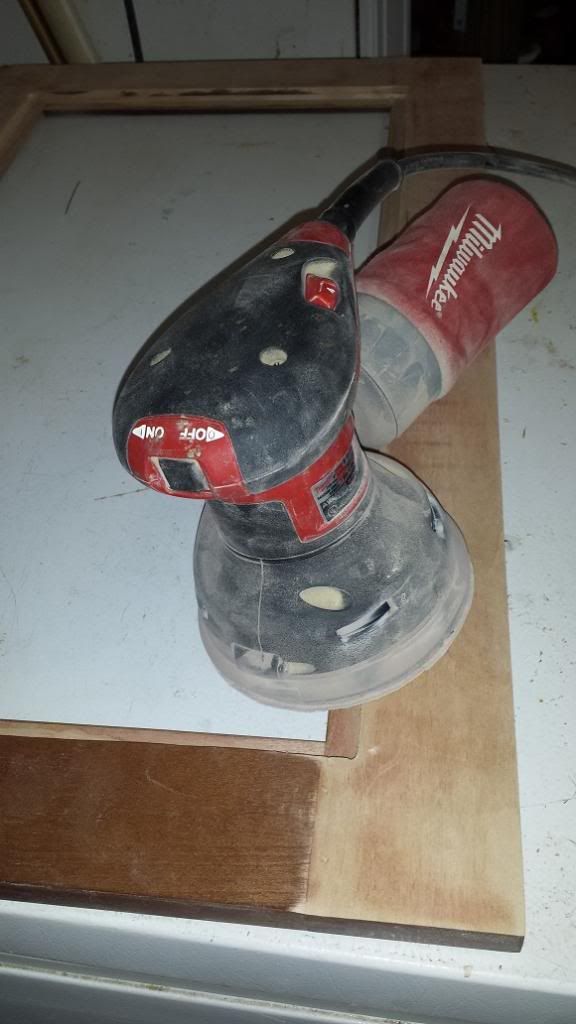
The first half of this door is now done.... 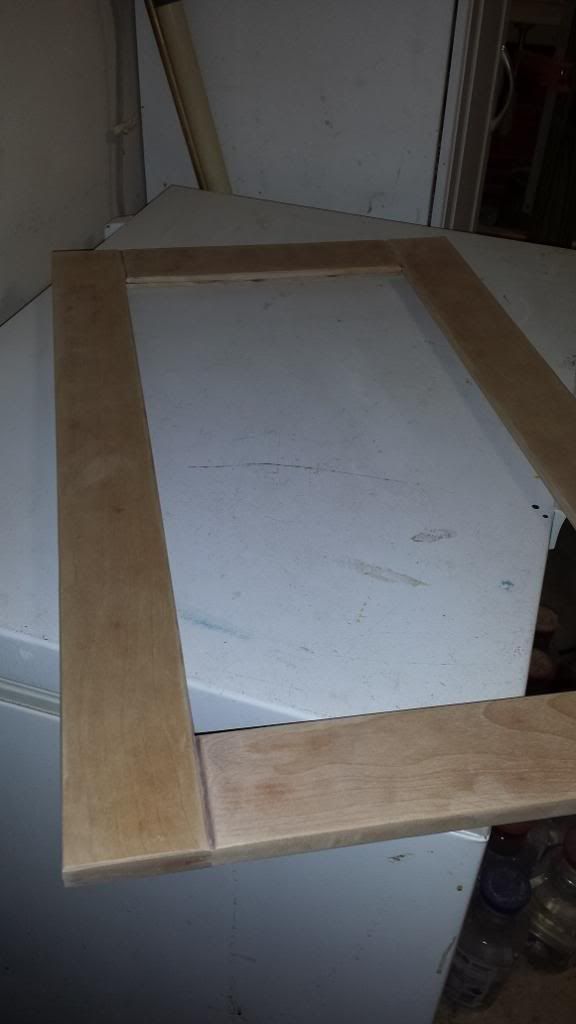
There was lots of sanding and I only took a few pictures of it since it all looks the same. One door in particular though was especially difficult, 80 grit with the belt sander still took about 45 minutes to get it cleaned off. I was surprised in the end I didn't ruin that door. |
|
|
|
[#4]
I did each cabinet separately but they may be intermixed a bit in the thread. I completely finished the base cabinet before I moved on to any others but only got some pictures of it finished. So, here is what the first coat of stain looks like on the cabinets.
Now here is the base cabinet completely stained and assembled. 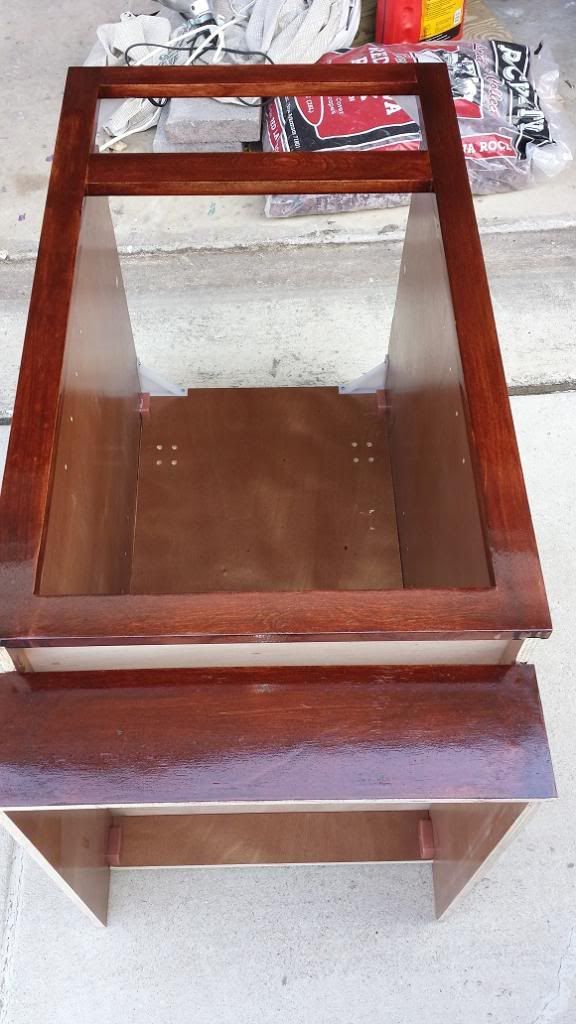
After a couple coats of poly it got mocked up to include the cut outs for the electric and plumbing. Currently we are only planning on using a hot water tap there with a cold line coming off of it. We have 2 holes in the sink but we are going to use the second for a soap dispenser for the time being. 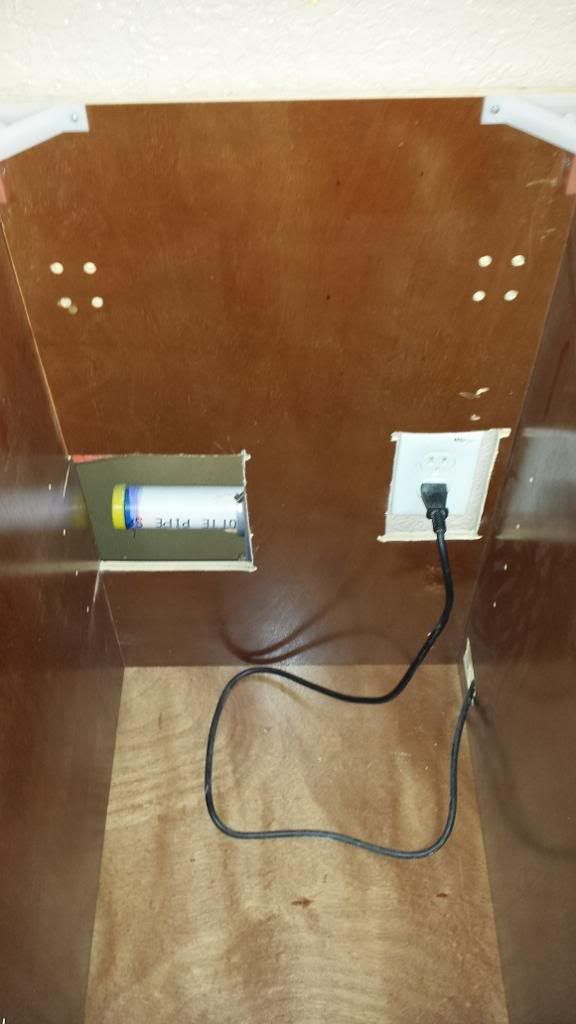
|
|
|
|
[#5]
So here is the smaller wall cabinet stained and put together. They didn't require any glue but I applied some anyways just as some added insurance. I also put some brad nails in the back so it wouldn't bow at all.
And up. It looks a little lonely and out of place by itself on the wall though. 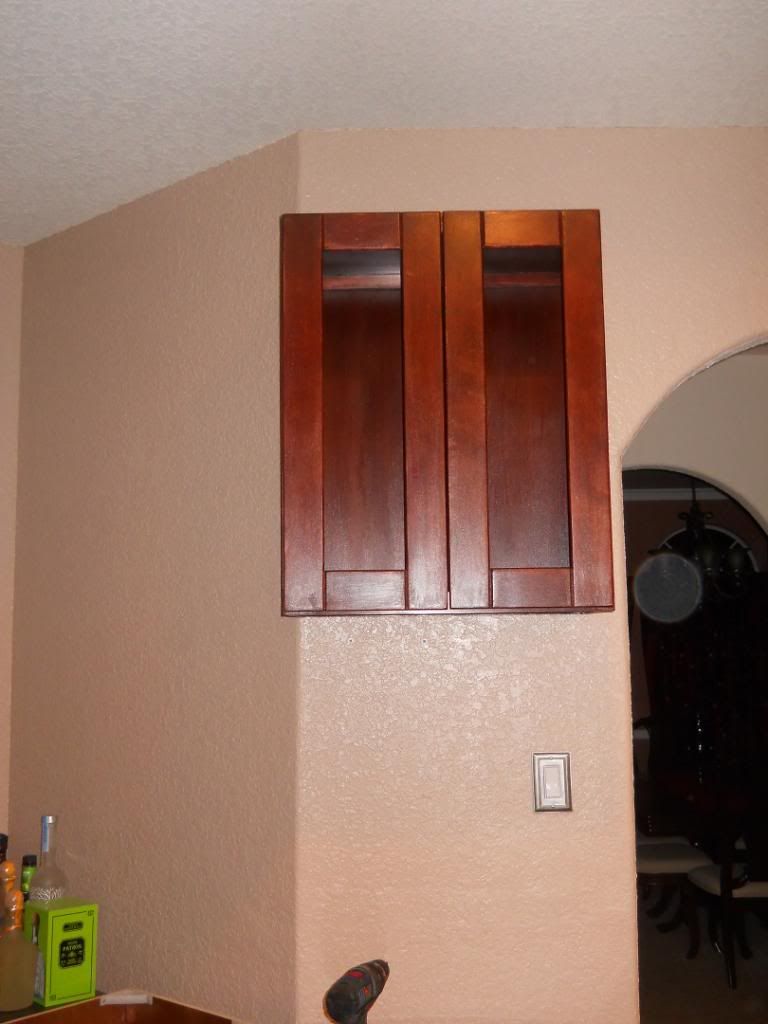
|
|
|
|
[#6]
Here is the last wall cabinet still in pieces as I was staining it. This was the last one to be done.

As I was getting to put the large one together the glass came in for both of them. I anticipated the glass to be a little on the pricey side and I have to give my wife credit even though she wanted the heavy seeded glass she opted for the grey at 1/3 of the price and it still looks pretty good. 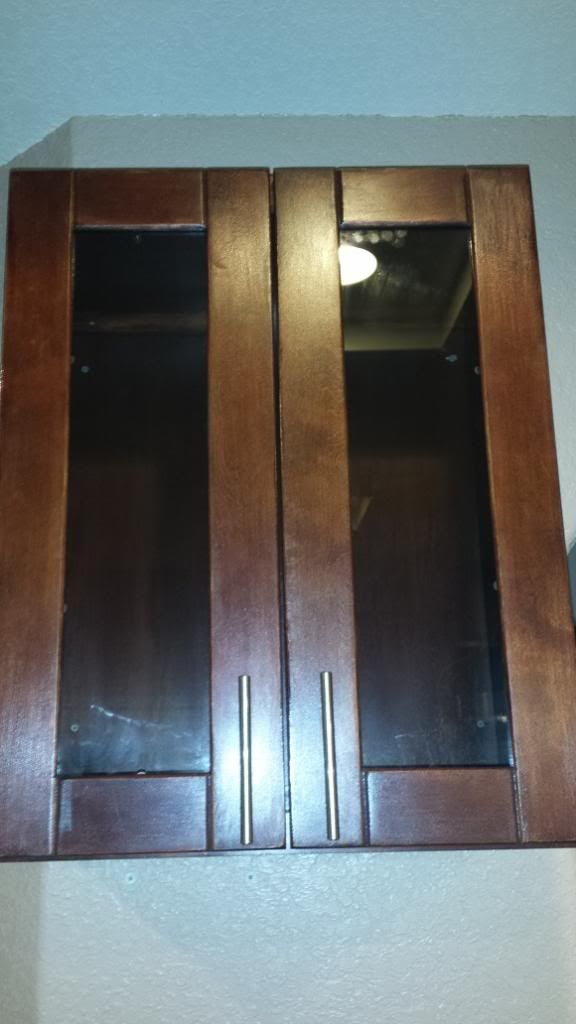
I had to have a buddy come over to hold the larger cabinet. It is looking a lot more complete with both of them up. 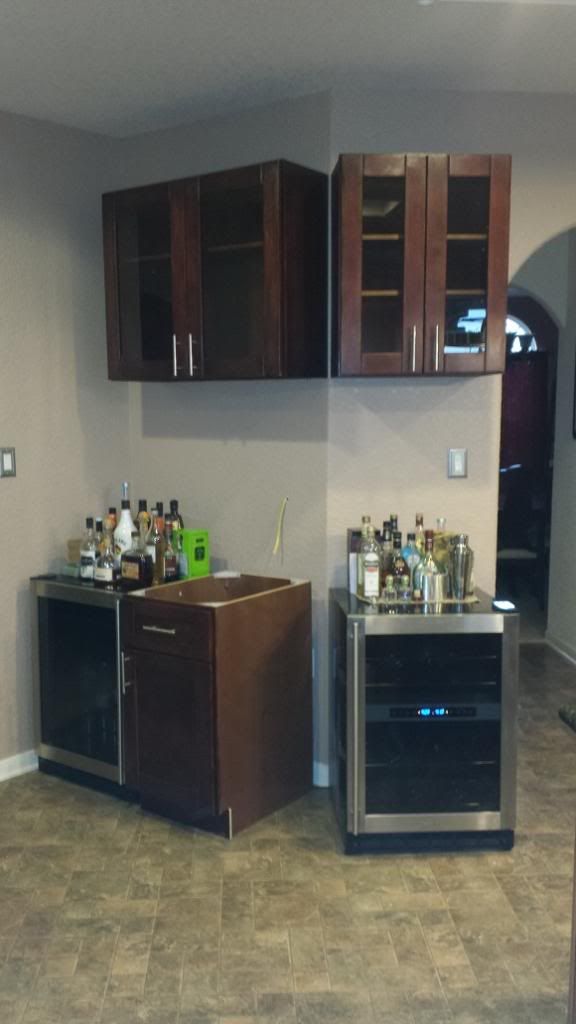
Since I decided to do some LED lighting I reviewed the other thread regarding it and wanted to make sure everything was hidden so I put an outlet in the larger cabinet to keep all of the LED wiring out of sight. 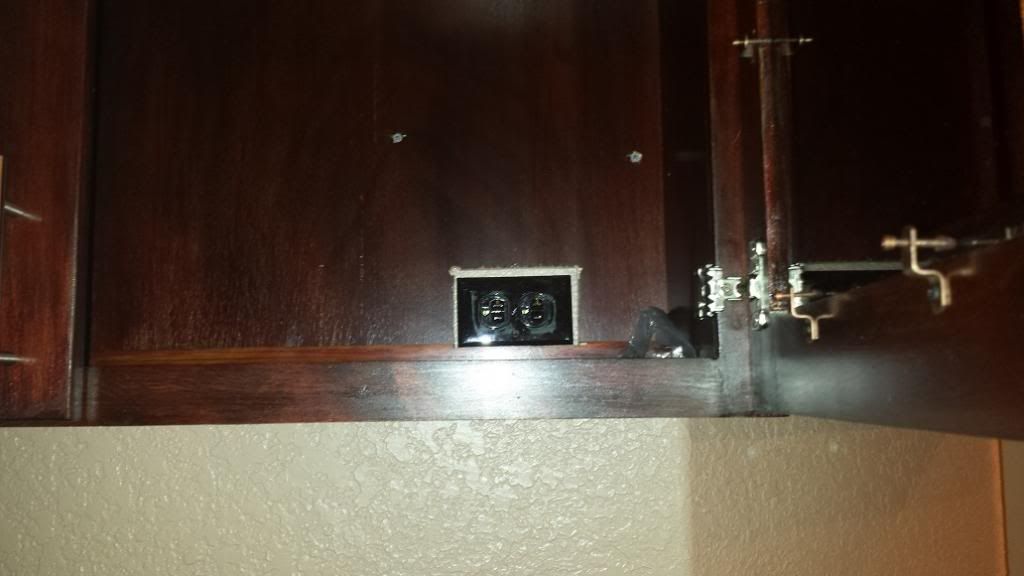
|
|
|
|
[#7]
The shelves which came with the cabinets didn't survive the sanding process... Imported veneers are way to thin so I had to cut some new ones. Since I needed a sheet of plywood to do some finish and trim work I had plenty left over for the shelves. The biggest pain in the ass was I can only find maple edge banding in 250 foot rolls locally so I substituted birch.
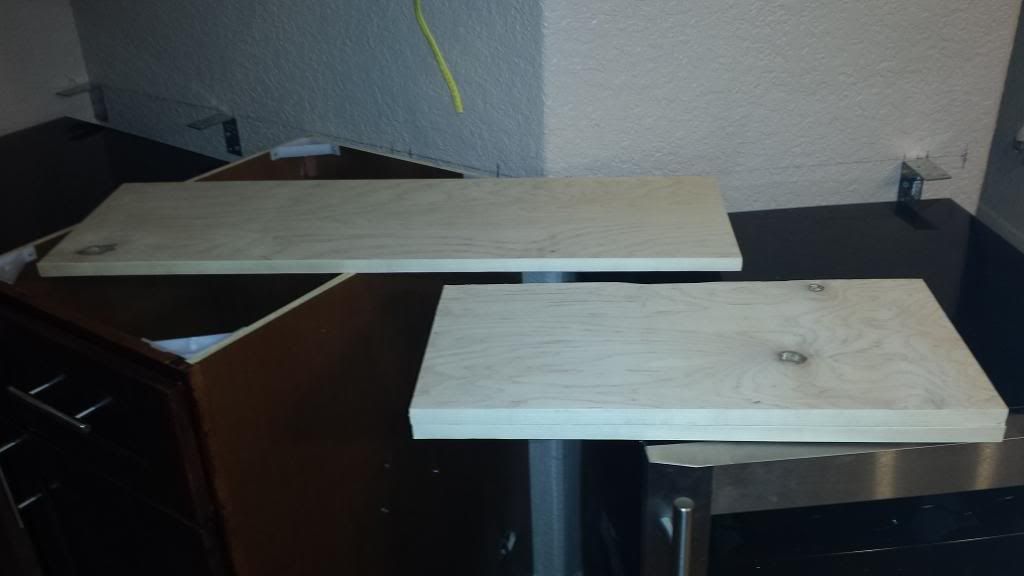
These are ready to be stained which I will end up doing in the morning. I am out of room on my table outside where I have a bunch of trim panels drying right now. They are a little thicker then the originals but that is ok since they will be holding glasses and I don't want the to bow in time. |
|
|
|
[#8]
Double Tap...
|
|
|
|
[#9]
The nail in the water line happened this morning. I don't do well sweating copper pipes so I elected to call a plumber to make sue it was done properly. I know my limitations and aren't going to tempt fate when it comes to water in the house. So he comes out and starts to monkey with the stabs the builder left in the wall for us. Suddenly he has water spraying all over the inside of the wall and tells my wife there is a leak. He reaches up and feels a nail which had been in the pipe for the last 6 years. When he was moving the pipes he broke it loose. So, a $175 bill turned into a $300 bill and included replacing a foot of PEX on both the hot and cold sides. There was a nail on the hot side as well but it hadn't penetrated the PEX yet, he decided better be safe than sorry and replace a section on that side as well since he didn't want to be the one who would have to tear everything apart to get to it. I think we got really lucky today from a couple different standpoints as the plumbing company we use always does great work and they caught something which would have been a bad problem in the future.
We only had a few inches to deal with for the water lines to come under the cabinet and he did a very clean job hooking everything up. 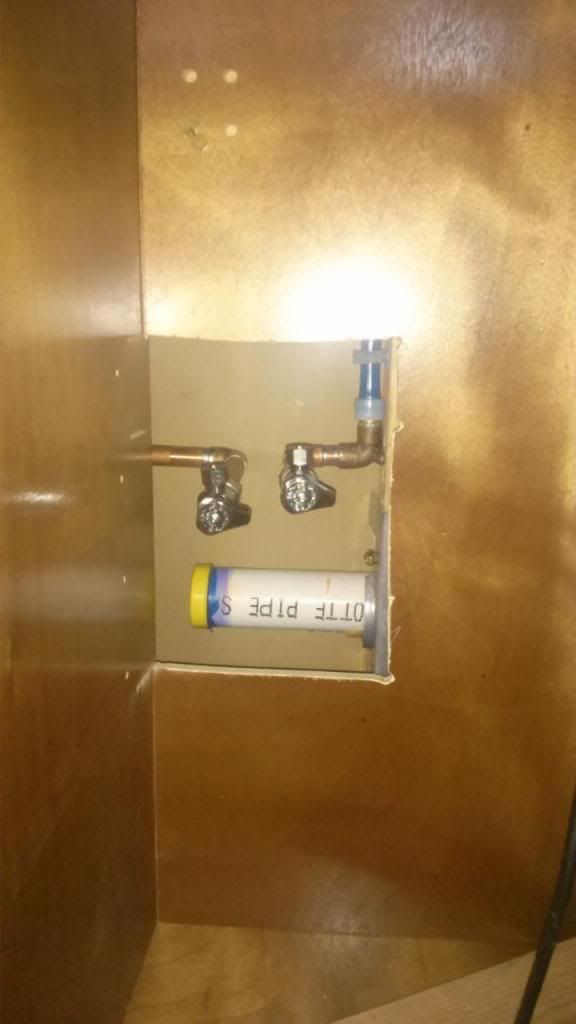
He left the damaged pipe and I didn't take a picture of it but there is a tiny pin hole in it from the nail. It came from the pantry on the other side of the wall where they installed the shelves and missed the stud when they were putting the nails in... Considering there was zero water damage in the wall and it had been like that for 6 years I won't complain about the bill from the plumber. |
|
|
|
[#10]
So tomorrow I should be getting to pick up a 12 foot white oak butcher block counter top. That will be fun. I also need to finish cutting my panels and build the last box for the floor in that odd angle of a corner. This one will be completely closed and only there for structural support for the counter top. Hopefully I will have time to finish running the electrical and put up the cement backer board so I don't have an open wall for any longer than necessary. I try to have everything closed back up at the end of every day.
We also bought half of the tile tonight, Lowes only had one box left of what the wife unit decided would look best. I didn't feel like driving to another Lowes to get the rest so I will wait until next week to get the other box. Hopefully there should be lots of pictures from the work tomorrow as I am mixing finish work with some construction. |
|
|
|
[#11]
That is a hell of a wall to build that on!
|
|
|
|
[#12]
I would cut a couple of "V"s and put some open shelves on that goofy corner the two cabinets are in between. Maybe for tall bottles or shot glasses or something. Just to tie it together. But other than that It looks good!! Very nice work.
|
|
|
|
[#13]
Quoted:
I would cut a couple of "V"s and put some open shelves on that goofy corner the two cabinets are in between. Maybe for tall bottles or shot glasses or something. Just to tie it together. But other than that It looks good!! Very nice work. I agree. Seems like a decent place to put your shakers and shot glasses. |
|
|
|
[#14]
The corner did get shelves, that was planned from the beginning. We have some decorations going on them. For the corner between the cabinet and the fridge I ended up building a cabinet with a couple of open shelves, this will be where we have some steins and shakers. I have the pics and need to load them up.
The larger cabinet is for excess glasses and liquor. We have a couple "extra" bottles of some things and we will leave them there to keep them out of the way. The one thing I haven't found what I like yet is some stemware holders to go under the cabinets. |
|
|
|
[#15]
Quoted:
That is a hell of a wall to build that on! When we were having the house built the builder knew we were going to do this and made sure everything would be good. With that being said because of the angle of this wall and it ties into the wall supporting the stairs it was built more significantly than had it been a simple freestanding wall. |
|
|
|
[#16]
Ok, its been a while since I posted updates but I have actually gotten a lot done. We appear to be int he home stretch now.
As I was putting the backer board up and running the additional power outlets I made an interesting discovery with the light switch. Had to fix this as well... 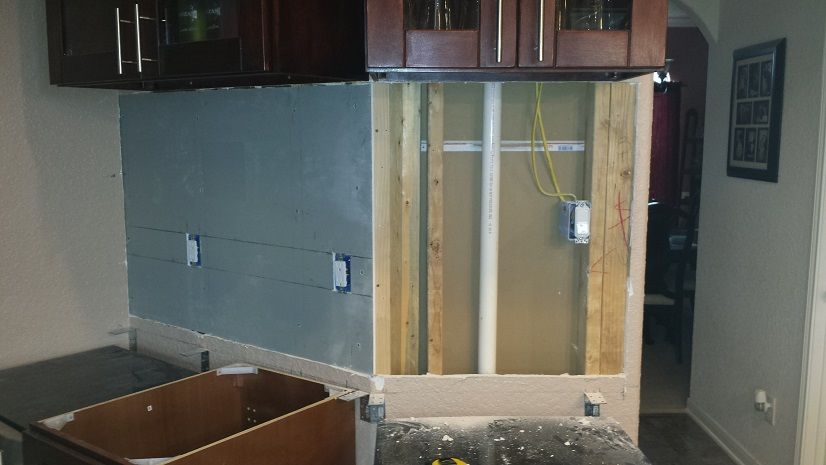
Attached the side to the wall and concrete. 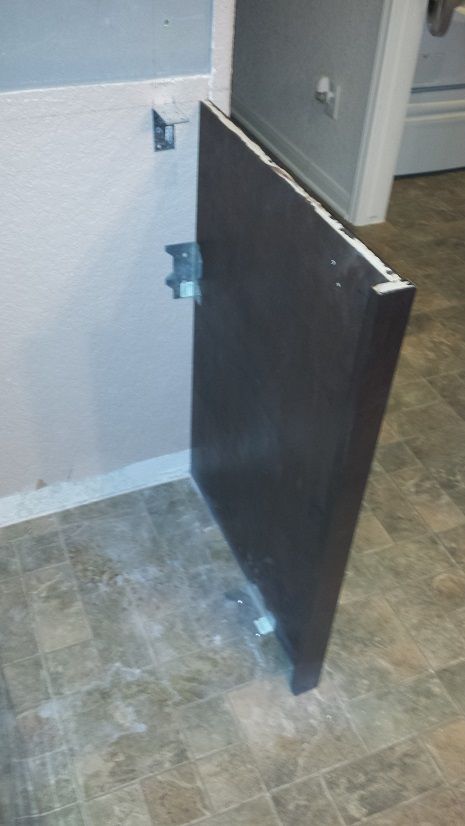
Built the corner cabinet, i left it open so we will probably store steins and shakers there. 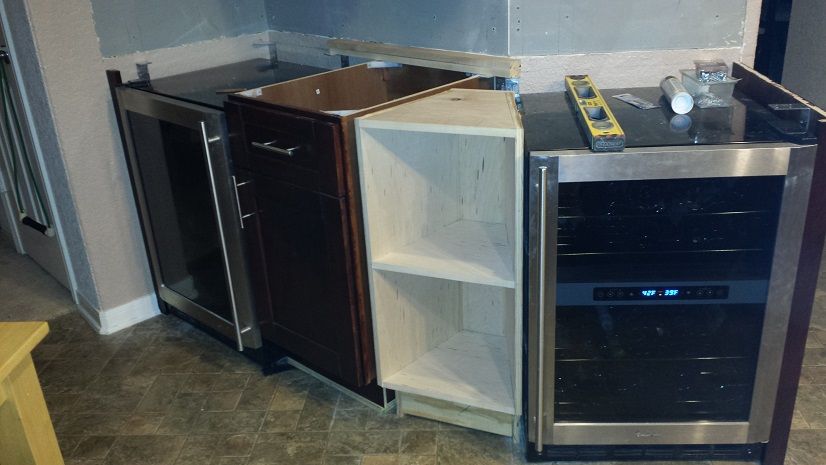
And the counter top finally came in. 12 feet of white oak goodness... 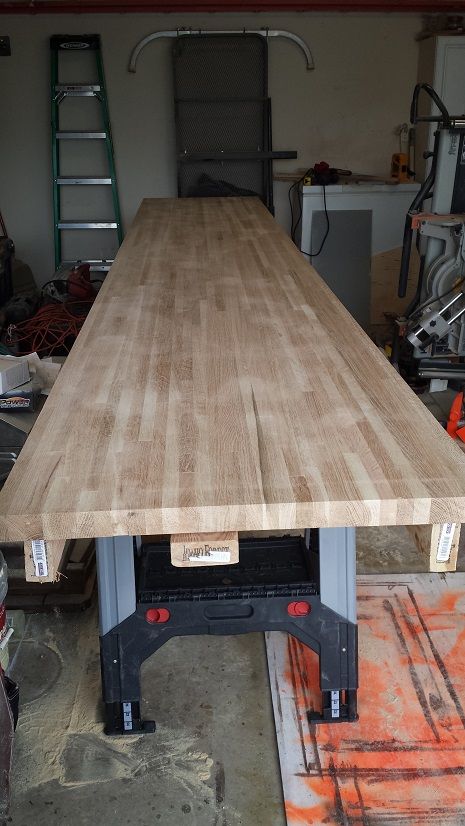
|
|
|
|
[#17]
Tag. Thanks for all the pictures.
|
|
|
|
[#18]
Ready to start on the counter top now.

The first 2 cuts were mentally easy for me. 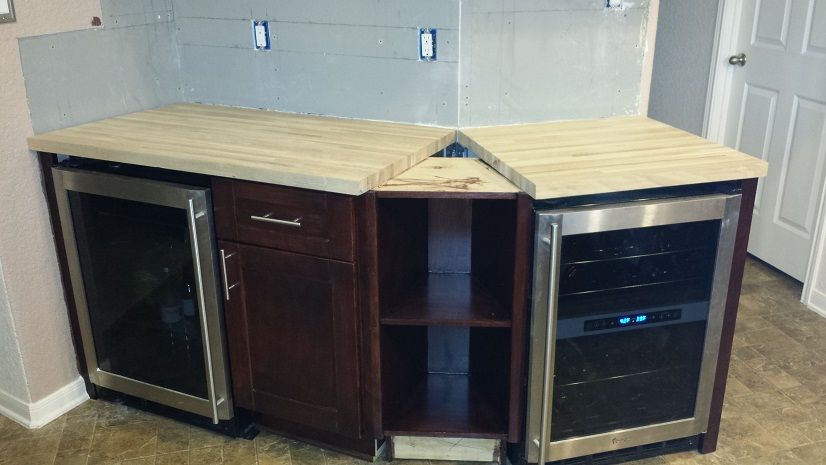
It took me a bit to build up the nerve to cut the wedge since it had to fit perfectly. 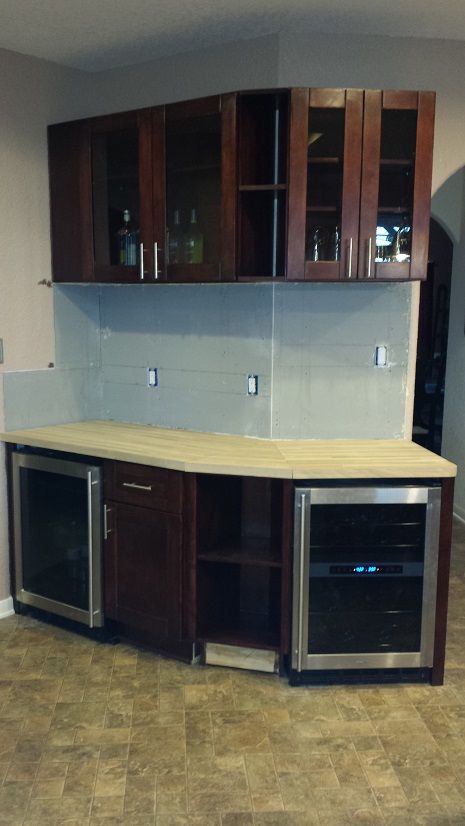
All put together with the sink cutout done. This was some hard wood, I broke a screw when I was putting it together so I had to fill in a bit of a gap because of it. Biscuits, glue and screws in pockets. 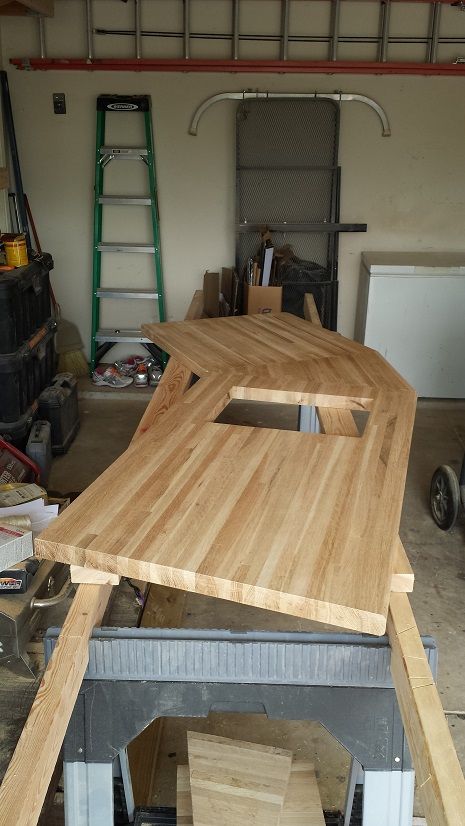
|
|
|
|
[#19]
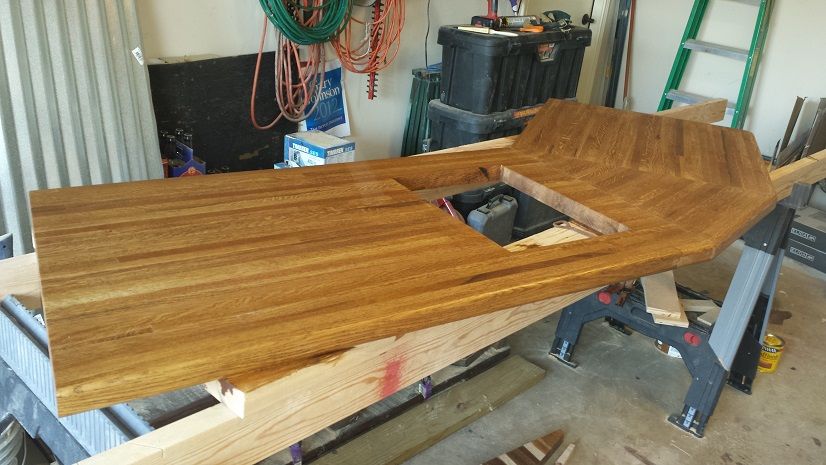
So it always takes my wife a while to make decisions. Usually she agonizes over too many choices, we went through 12 different options for stain for the counter top. She finally settled on a nice brown, I like it also!
Every time we do something the dog has a difficult time with the change and she has to inspect the work site. 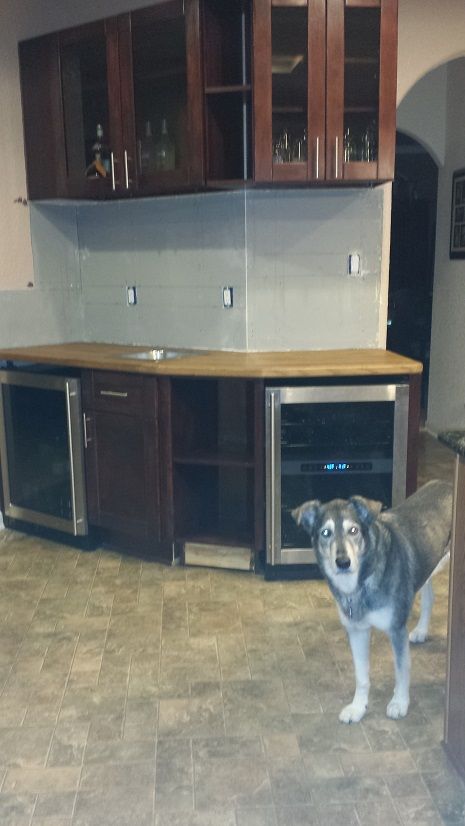
The backs plash is a 1"x1" mosaic glass tile. I don't think I will ever work with this again, it was a pain in the ass. I told the wife she has to grout it. 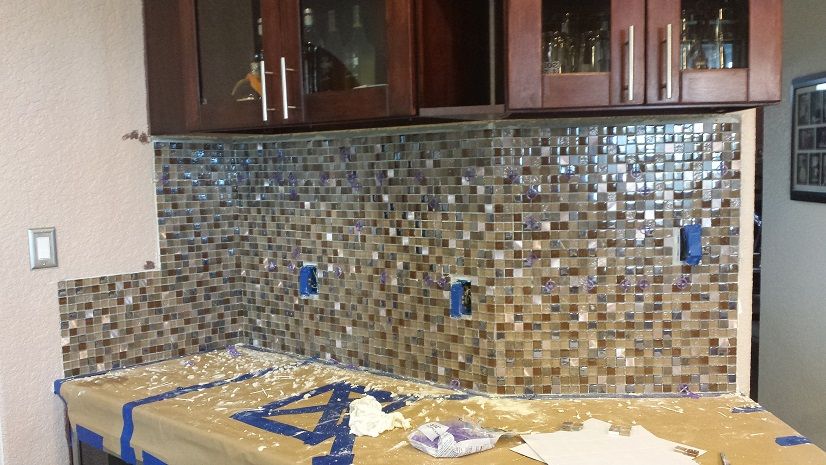
This is finally the home stretch. We need to grout the tile, install the stemware racks, finish putting in the LED lights, attach the plumbing to the sink and pour the epoxy on the counter top. Still quite a bit but at this point it is just a little more to go. The actual labor is pretty much over. 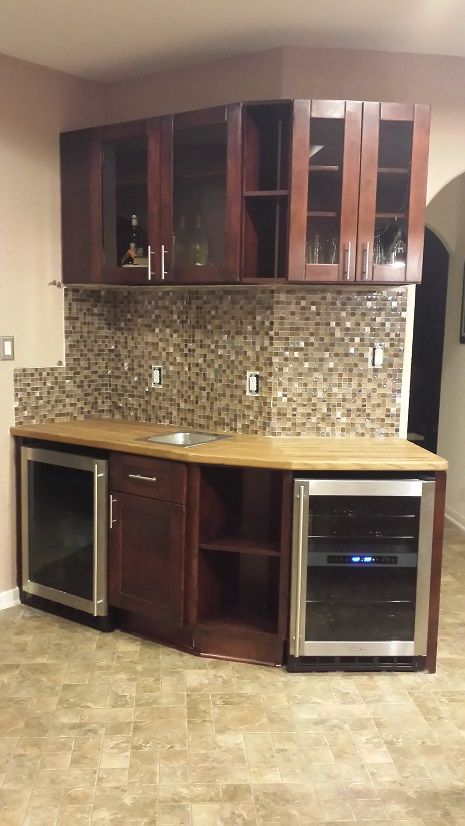
|
|
|
|
[#20]
Damn! Nice work
Jason |
|
|
|
[#21]
Quoted:
Damn! Nice work Jason Thank you. I am happy it is just about done, I put a bunch of the trim up this evening and cut the wood for the other stemware rack. Supposedly my wife has decided to pick the grout out tomorrow evening and grout on Thursday. We could potentially be done with it by this weekend. |
|
|
|
[#22]
Other things always seem to come up and my wife wants "minor" changes most of the way through the build. The stemware racks are built and in the garage with the stain and poly drying on them. Hopefully I will get them installed this week sometime. We poured the epoxy this evening....
Freshly poured epoxy. It is a food grade epoxy with low odor, it is mixed in equal parts and you have about 3 to 4 minutes of mixing time then about 20 minutes of working time. This is supposed to be completely clear versus the normal yellowing effect. It takes about 8 hours to dry to touch and about 2 to 3 days to completely cure. 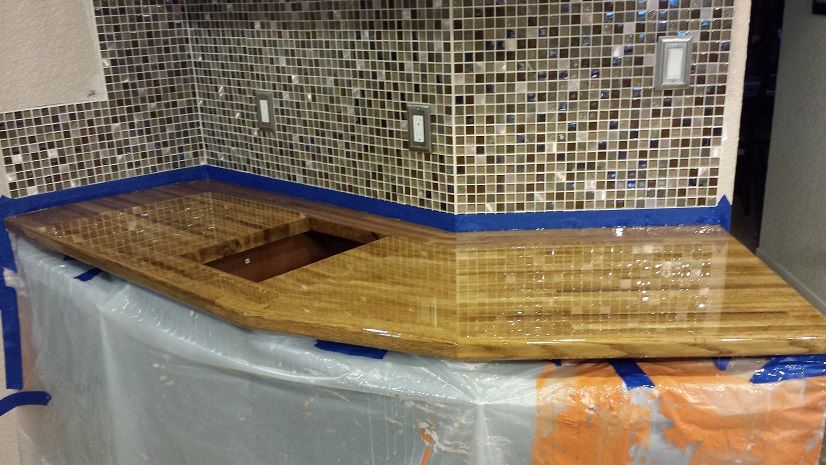
So after the epoxy has been poured you heat it up with a torch to draw the air bubbles out of it. I figured most folks would like to see some controlled fire during this process at one point. 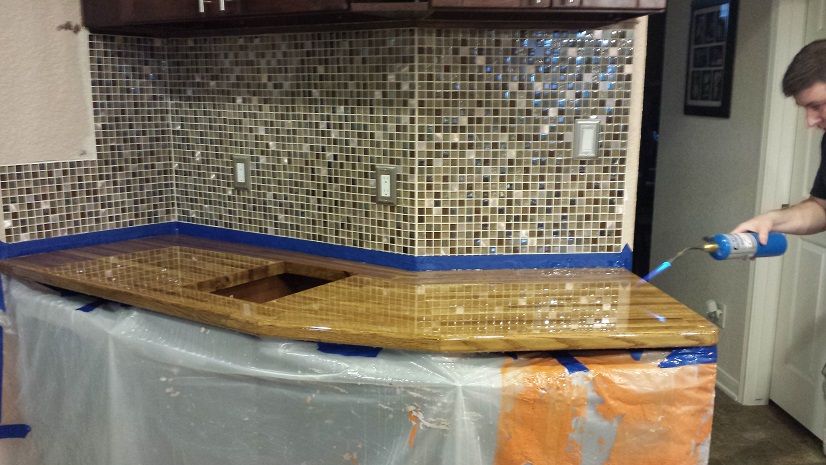
It should dry with nearly this quality of reflection in it. 
We have our annual shrimp boil in 2 weeks so it has to be completed by then so no matter what I have to push forward at this point. |
|
|
|
[#23]
Looks awesome...nice work!

|
|
|
|
[#24]
What are you going to do about the tape that you poured over against the backsplash?
|
|
|
|
[#25]
Quoted:
What are you going to do about the tape that you poured over against the backsplash? Looks great though. |
|
|
|
[#26]
Quoted:
What are you going to do about the tape that you poured over against the backsplash? Just peel it off in a couple more hours. If it sticks too badly anywhere I will just trim it with a razor, I am still going to caulk between the backsplash and the countertop. I also need to add a second layer of epoxy this week, there were a couple bubbles I couldn't get completely out so it will need a very light sanding there. |
|
|
|
[#27]
Quoted:
Just peel it off in a couple more hours. If it sticks too badly anywhere I will just trim it with a razor, I am still going to caulk between the backsplash and the countertop. I also need to add a second layer of epoxy this week, there were a couple bubbles I couldn't get completely out so it will need a very light sanding there. Quoted:
Quoted:
What are you going to do about the tape that you poured over against the backsplash? Just peel it off in a couple more hours. If it sticks too badly anywhere I will just trim it with a razor, I am still going to caulk between the backsplash and the countertop. I also need to add a second layer of epoxy this week, there were a couple bubbles I couldn't get completely out so it will need a very light sanding there. You'd be surprised how clear that blue tape will be through the epoxy and how impossible it is to remove. Ask me how I know. 
|
|
|
|
[#28]
Quoted:
You'd be surprised how clear that blue tape will be through the epoxy and how impossible it is to remove. Ask me how I know. That's why I plan on peeling it off before it gets all that much harder. |
|
|
|
[#29]
Quoted:
That's why I plan on peeling it off before it gets all that much harder. Quoted:
Quoted:
You'd be surprised how clear that blue tape will be through the epoxy and how impossible it is to remove. Ask me how I know. That's why I plan on peeling it off before it gets all that much harder. What did you use for the resin? Stuff I used dried very very fast. |
|
|
|
[#30]
Quoted:
What did you use for the resin? Stuff I used dried very very fast. Quoted:
Quoted:
Quoted:
You'd be surprised how clear that blue tape will be through the epoxy and how impossible it is to remove. Ask me how I know. That's why I plan on peeling it off before it gets all that much harder. What did you use for the resin? Stuff I used dried very very fast. Bar top epoxy. |
|
|
|
[#31]
Finally done... Here are a couple pics as the LED's cycle through their colors. If anyone wants any pics of something specific let me know, I will either see if I have one or take one of that particular item/step.
In blue... 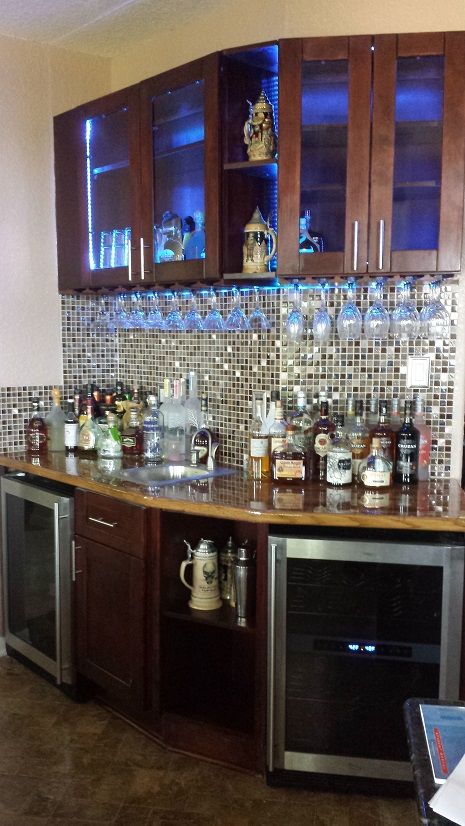
In green... 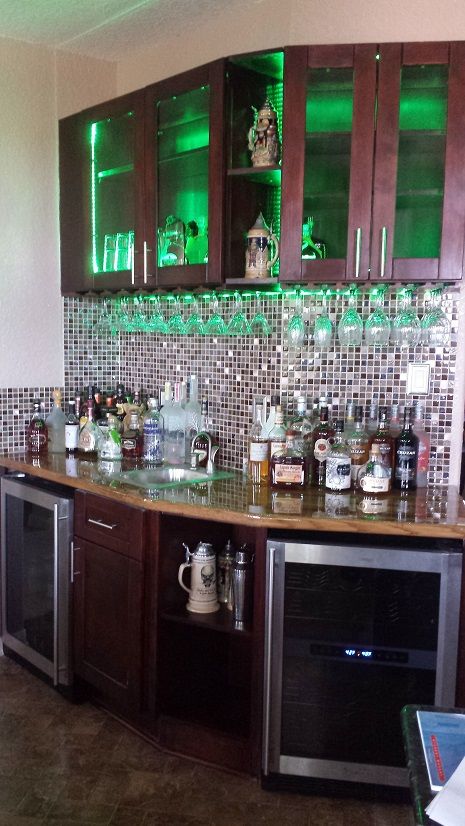
In purple... 
Before...
|
|
|
|
[#32]
Bravo. That looks bad ass. How $ do you have in the project?
|
|
|
|
[#33]
Quoted:
Bravo. That looks bad ass. How $ do you have in the project? Probably about $1,500 or so. We splurged on a couple things like the tile and the instant hot water tap. The fridges we already had but they were about $400 each when we bought them. If I add in my labor it would be well over $5K. |
|
|
|
[#34]
Quoted:
What are you going to do about the tape that you poured over against the backsplash? Yeah, you should have just poured up to the backsplash and skipped the tape entirely. The epoxy would have self leveled and sealed the bottom tile joint. That is my only nit pick though, everything else looks good. |
|
|
 Win a FREE Membership!
Sign up for the ARFCOM weekly newsletter and be entered to win a free ARFCOM membership. One new winner* is announced every week!
You will receive an email every Friday morning featuring the latest chatter from the hottest topics, breaking news surrounding legislation, as well as exclusive deals only available to ARFCOM email subscribers.

AR15.COM is the world's largest firearm community and is a gathering place for firearm enthusiasts of all types.
From hunters and military members, to competition shooters and general firearm enthusiasts, we welcome anyone who values and respects the way of the firearm.

Subscribe to our monthly Newsletter to receive firearm news, product discounts from your favorite Industry Partners, and more.
Copyright © 1996-2024 AR15.COM LLC. All Rights Reserved.
Any use of this content without express written consent is prohibited.
AR15.Com reserves the right to overwrite or replace any affiliate, commercial, or monetizable links, posted by users, with our own.


