|
[#1]
Oh yeah, almost forgot to mention, moved a couch for my brother earlier.
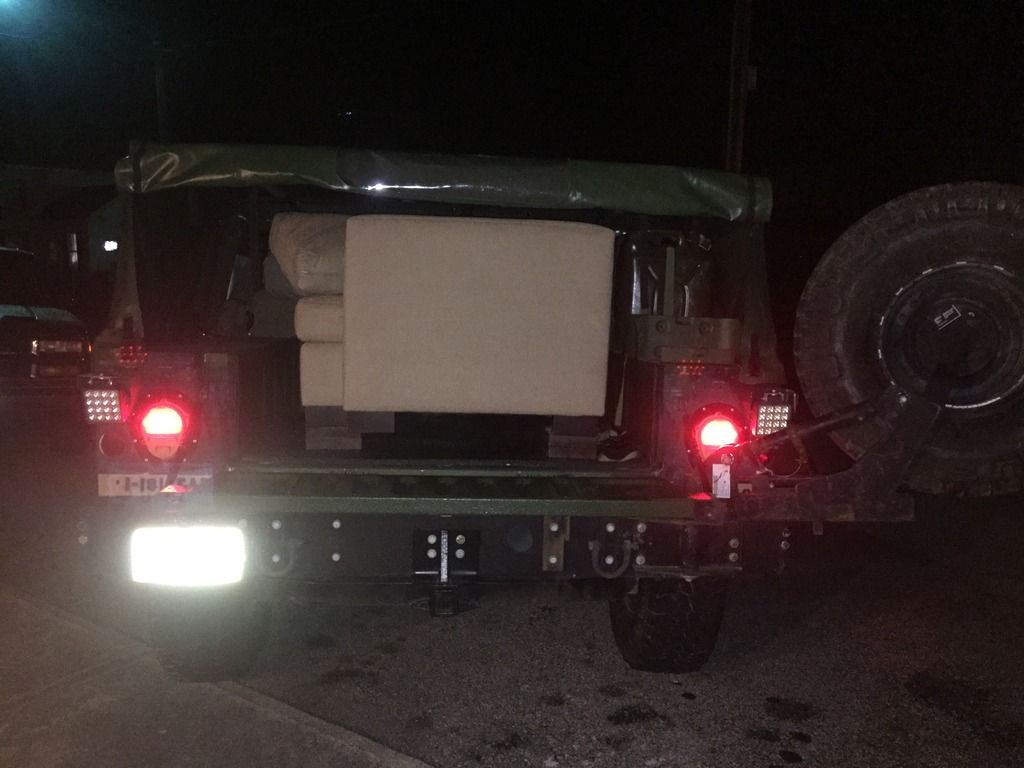
Fit pretty well! Of course I had to help move it in too. As for this weekend, going to get the fuel tank swap tackled this weekend since it is supposed to be so nice. Also decided I'm going to turn up the injection pump further. After talking with my new local HMMWV owning buddy who has more diesel engine experience than I do, he said so long as I've got the pyrometer to keep an eye on EGTs I could give it a much more generous adjustment. So, I'm going to bump it up to at least the full 1/4 turn mentioned for the turbo engines and see how she does. |
|
|
|
|
[#2]
Interesting episode of Xtreme Off Road this week. Ian builds up a Super Hydra 400 transmission, a heavier duty version of the TH400, using aftermarket and some 4L80E components.
Two-In-One Transmission Will be available online tomorrow. |
|
|
|
|
[Last Edit: jake-cutter]
[#3]
Originally Posted By Ryan_Ruck:
Yeah, if you could snap some pics of the brackets that would be great! Here's a pic of the brackets that came with the MRAP kit. You can tell how it would bolt to the windshield frame on the truck. I might be able to adapt/modify these depending on what your GoLight mounts look like. Ryan, Your pic below would be the passenger side mount. Below it is my passenger side mount. The lip goes towards the front to act as a wind/water break. You would need to drill the two holes for the mirror mount bolts to pass through. 
|
|
|
|
|
[#4]
Originally Posted By jake-cutter:
Ryan, Your pic below would be the passenger side mount. Below it is my passenger side mount. The lip goes towards the front to act as a wind/water break. You would need to drill the two holes for the mirror mount bolts to pass through. http://i217.photobucket.com/albums/cc40/ryaneruck/HMMWV/IMG_2902_zpskeezbxlq.jpg https://www.AR15.Com/media/mediaFiles/86875/IMG-20170219-143335-resized-20170219-023407537-149822.JPG Interesting... They are very close in design. I'm still up in the air if I want to go with side mounts or if I'm going to modify the brackets and do one light up front and one in the back. Right now I'm leaning more toward front/back. Seems like it might give more versatility since if they're side mounted, it's a little tougher to direct any light towards the rear area and I'd like light back there if I find myself working out of the back. I'd be interested to see how well you're able to cover the rear when you finish your install though! |
|
|
|
|
[#5]
Well, the new tank is in and with 10 gallons, no leaks and the truck runs fine. So, I guess I got everything hooked back up correctly.

The real test will be when I top off the tank. I don't want to do that right now though. There's one part I'm waiting on. While i was working on the truck I found these fuel tank shields so I bought one. Probably not a super heavy duty skid plate but should help offer a lot more protection for the tank than the exposed plastic. I'll fill the tank up after I get that on since the thought of wrestling with a full tank of fuel is not my idea of fun! Anyway, the whole project was pretty straightforward. No real tips or tricks. Drop the driveshaft, disconnect the fuel lines and sender connections, remove screw holding fuel lines and shield to the tank, disconnect the vent lines, disconnect the filler tube at the filler neck and take the neck out, then drop the tank. There's enough clearance down the center of the truck to just scoot the tank out from under it. A couple pics... Old tank out. 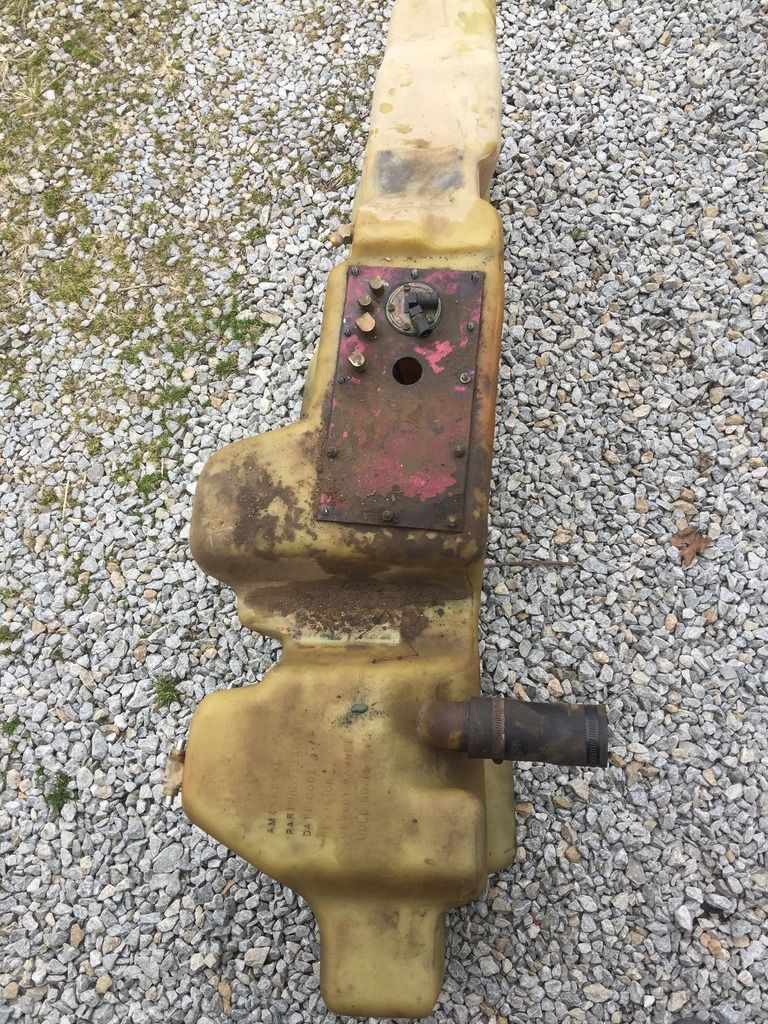
After taking the access cover off, that moment when you realize you spend $220 you didn't need to on a baffle kit you didn't need. 
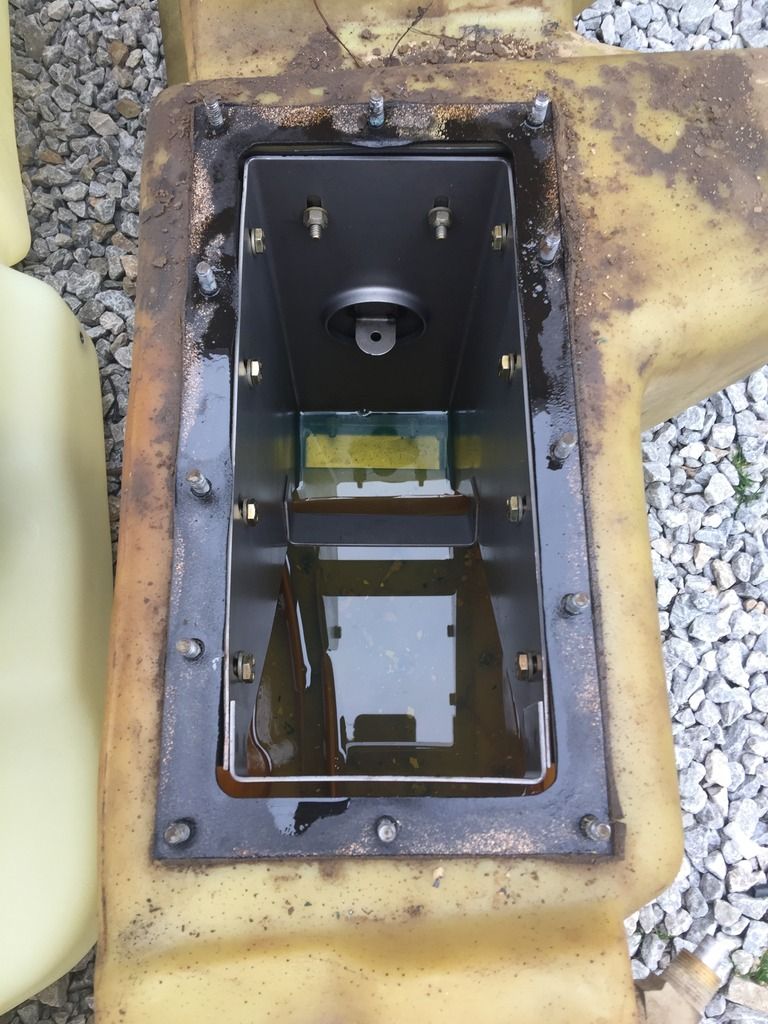
I really didn't think my truck was equipped with the baffle setup since I didn't think I could see anything when I looked and, especially with how erratic the fuel gauge was on acceleration and braking. I guess it is more intended to prevent fuel starvation than gauge accuracy. The part number on my new tank is the one that calls for the baffle setup and the new tank is the one that has the reinforcing Xs molded into it. The tank that was in my truck didn't have those Xs. I also know the tank that was in there was the factory original as it was dated '94 on it. So, either my truck came with the baffle setup from the factory or it was added at some point. I'm thinking it's more likely since my truck was an A1 it came with it. I do know the TM does specify a setup without it so maybe the A0 trucks don't have it. Then again, if your truck went through a recent reset, maybe it does. I guess I'm just going to see if Kascar will take a return and send them the untouched factory ones since I had to hack on the parts I got from them to get them to fit. I'd hope they would accept it since they should consider themselves lucky they'd be getting genuine parts back in place of their half assed repros. Would really like to get that $220 back. If not, I guess I'll be trying to sell them. Some more pics... Here's what I found in the bottom of my tank! 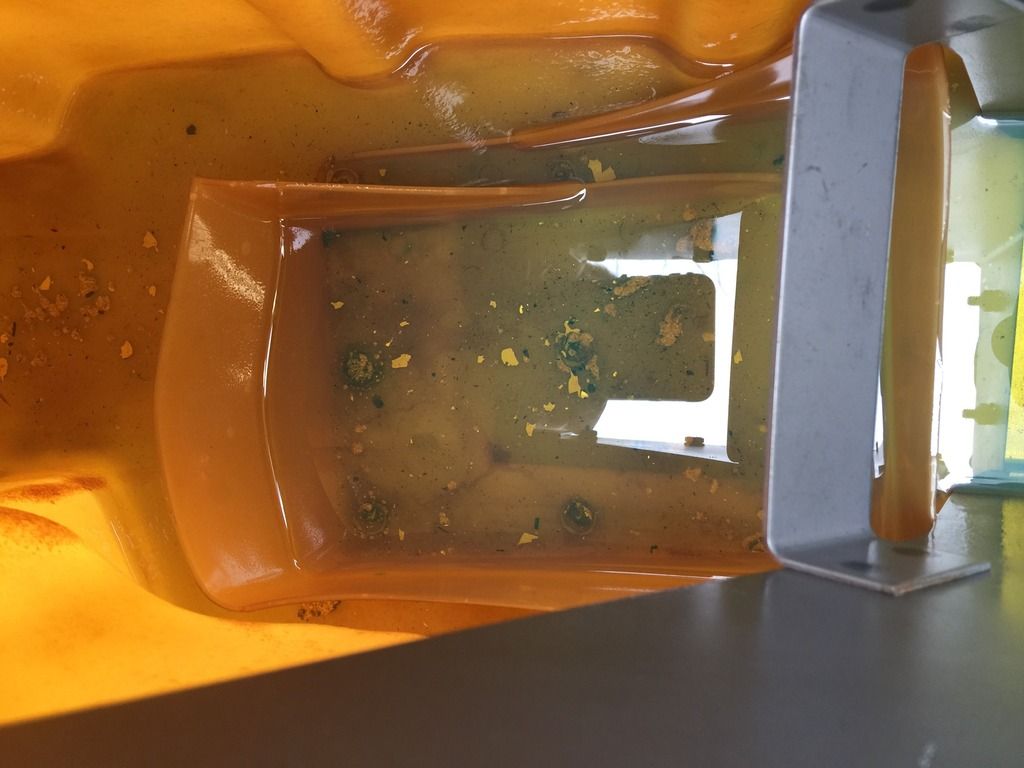
Side by side of the old and new tank. As you can see, there are some differences. 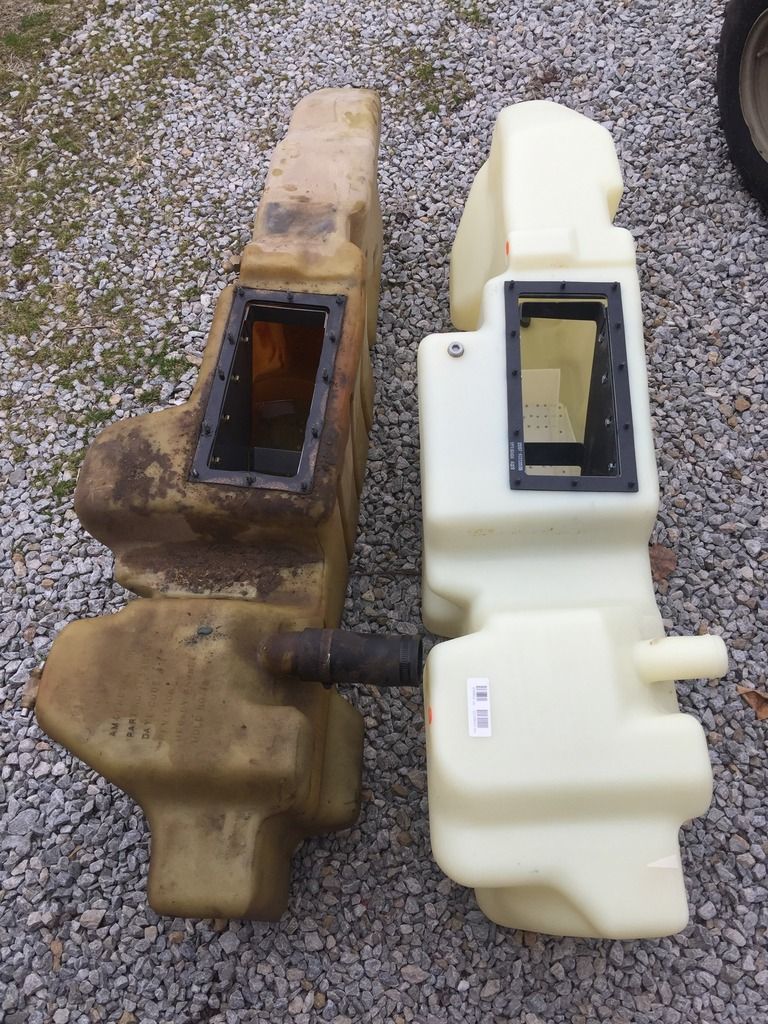
Here's the part number off my original tank. 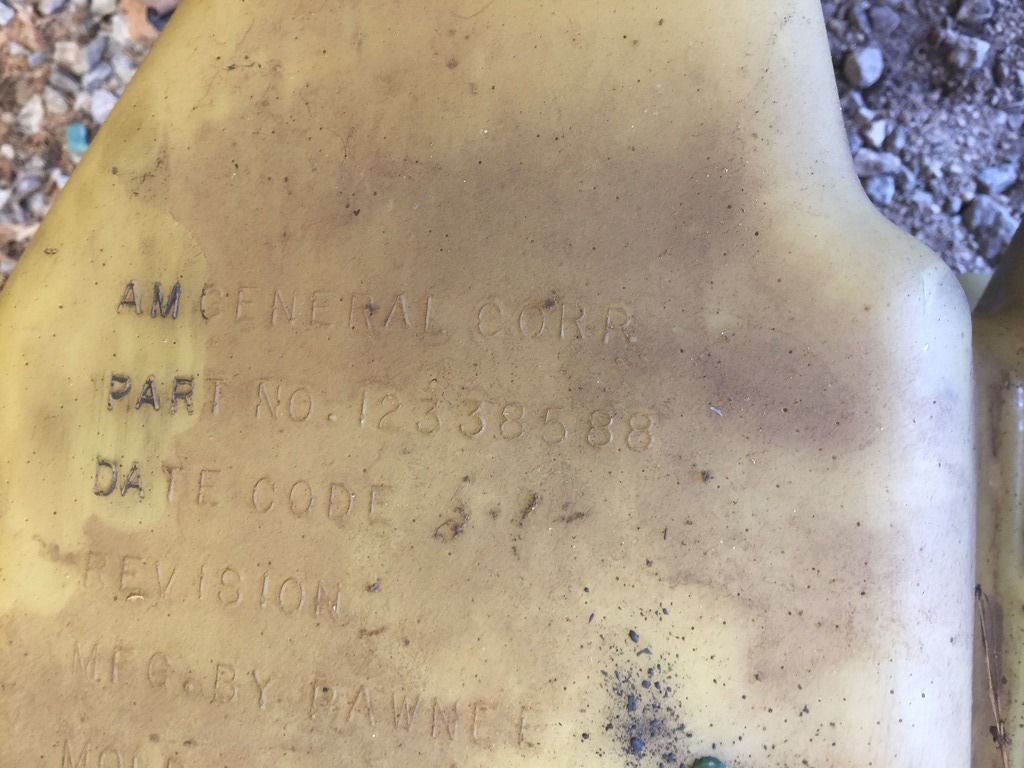
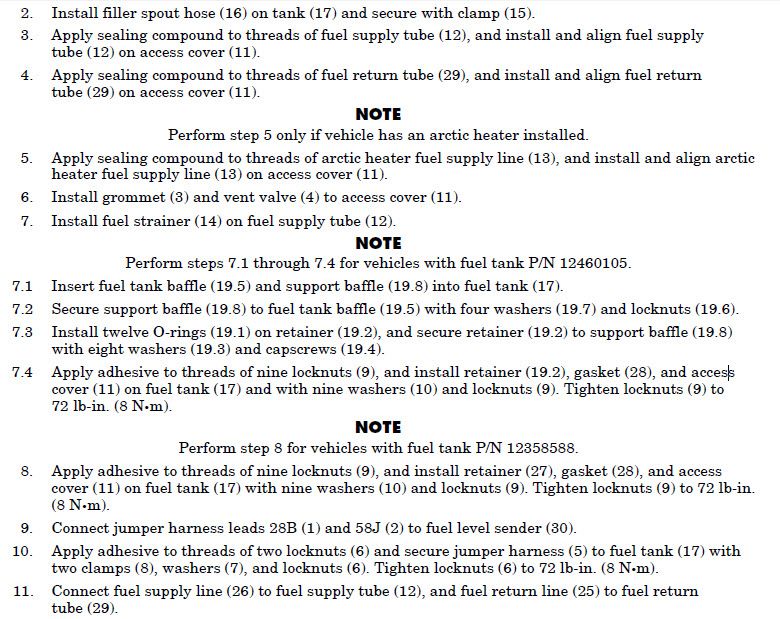
That part number doesn't come up in the 9-2320-280-20 TM but, Hummer Parts Guy does show a match for it. The closest in the TM is 12358588 (and it is referenced more than once) but, interestingly, no match on HPG. Has to be a typo in the TM. Here's the section of the TM for the fuel tank. It clearly doesn't reference the baffle kit for anything but the new tank, part 12460105, and hence my thinking I needed to buy it. 
Didn't get a chance to turn up the injector pump further. Will hopefully be able to get that tomorrow. |
|
|
|
|
[#6]
I was also concerned with not having enough light in the rear area. I initially bought a Blue Force Tracker mount to give me a flat spot to mount one of the search lights in the rear. But it required drilling more holes in the sponson than I wanted too. So I bought some Auxbeam LED lights that I am going to mount in the same spot. The lights actually fit inside a normal antenna mount too so I am planning on getting more of the lights in spot and flood pattern and going that route for the rear. I also have a 24" Ibis Tek light bar and wiring harness but need to change the end on the harness to work with the controller.
|
|
|
|
|
[#7]
Originally Posted By jake-cutter:
I was also concerned with not having enough light in the rear area. I initially bought a Blue Force Tracker mount to give me a flat spot to mount one of the search lights in the rear. But it required drilling more holes in the sponson than I wanted too. So I bought some Auxbeam LED lights that I am going to mount in the same spot. The lights actually fit inside a normal antenna mount too so I am planning on getting more of the lights in spot and flood pattern and going that route for the rear. I also have a 24" Ibis Tek light bar and wiring harness but need to change the end on the harness to work with the controller. I've got some lights that are nearly identical I installed on my zero turn mower. They're good lights! For rear lighting I'll have a 24" HID bar for the rear that's part of the MRAP kit and I've got the LED flood lights I installed on my antenna mounts (still need to wire those up but waiting until I've got my overhead rack with switch panel). That's probably enough light but I'll admit I find the idea of having an aimable light in the back appealing because once I've got my cargo rack, even though the searchlights would sit higher than the roof line with side mounts, the rack will block some of their field when it's on the truck. I guess it's a good thing it's not a problem I have to address right away. |
|
|
|
|
[#8]
Hopefully this won't find you all after the fact but GovPlanet has an auction today and if you scroll down to "PARTS" there are some very interesting items....I want the Marine Radio.
http://www.govplanet.com/jsp/equip/auctions.jsp?groupId=20771 |
|
|
|
|
[#9]
Originally Posted By fp1201:
Hopefully this won't find you all after the fact but GovPlanet has an auction today and if you scroll down to "PARTS" there are some very interesting items....I want the Marine Radio. http://www.govplanet.com/jsp/equip/auctions.jsp?groupId=20771 That's pretty cool and a great way to do it; self contained unit fits right into the radio tray mount points. I bet you can make a similar box easily enough and put whatever speakers and electronics you want in there cheaper than that will sell for. That would also allow you to customize and add cell phone holders or even a tablet mount built in as well as a storage area/glove box. |
|
|
|
|
[#10]
I really want an MEP-803A 10k genny and an M1101/M1102 trailer...
Maybe I'll win tonight's Powerball and buy a fleet! |
|
|
|
|
[#11]
Forgot to mention a little bit ago the Big Brown Truck dropped off my HMMWV tool kit I had mentioned the other day.
Came with all brand new, still in factory wrap tools. 53 lbs worth in total! Also, local friend of mine said the seller took an offer of $190+shipping. Definitely a great deal on some specialty tools! |
|
|
|
|
[Last Edit: Ryan_Ruck]
[#12]
Finally got the fuel turned up more. I'd say it's now got about a 1/3 - 1/2 turn and it's definitely rolling coal under heavy acceleration now!
I couldn't tell how much exactly since it was dark by the time I got done but, I'll test drive it tomorrow when it's light and see. I may have to dial it back a little. If you're going to be that adventurous with the fuel adjustment, you must have a pyrometer to keep a close eye on the EGTs since they will climb fast. She really gets up and goes now compared to stock! Now the cautionary part of my tale... Instead of trying to adjust the fuel screw through the side port like I did before, I figured I'd see what all was involved doing it from the top since that is also an option. Well, even though the screw will eventually be more easily accessible, there is a lot of work involved to get to the screw in the first place by removing the governor assembly. Once I saw how involved it was after I had the top off, I decided to forego it. But, not until I had already caused a problem. Removing the top of the pump involves taking out 3 hex head screws. The pump body is made of aluminum. The screws are made of steel. Very, VERY soft steel. Steel soft enough that the top half can be sheared off with nothing more than hand force, and I know I'm not that strong. All 3 sheared and I ended up having to grind flat and drill out the broken screws, which was not at all fun since you have to keep the shavings out of the pump. I ended up putting pieces of duct tape on the inside of the bowl sides facing outward to get the shavings to stick to it. Had to rethread the pump body but, I did put antiseize on the new screws.
So, if you need to take off the top of your pump (perhaps to replace a nonfunctional cold advance solenoid), know that there is a distinct possibility of those screws being seized up in the pump body. If you had the pump off the engine, you could theoretically get some penetrating oil into the screw holes from the bottom since they are open (likely contributing to the corrosion). Don't know if I'd want to use heat to try and free them considering the whole fuel thing. Not a fun experience... Stick with the side port for fuel adjustment. |
|
|
|
|
[#13]
The fuel tank skid plate came in today so I put it on when I got home.
As expected, it's not a real heavy duty piece of gear. Only weighs about 15 lbs but, it's definitely a lot better than just having the plastic tank exposed. 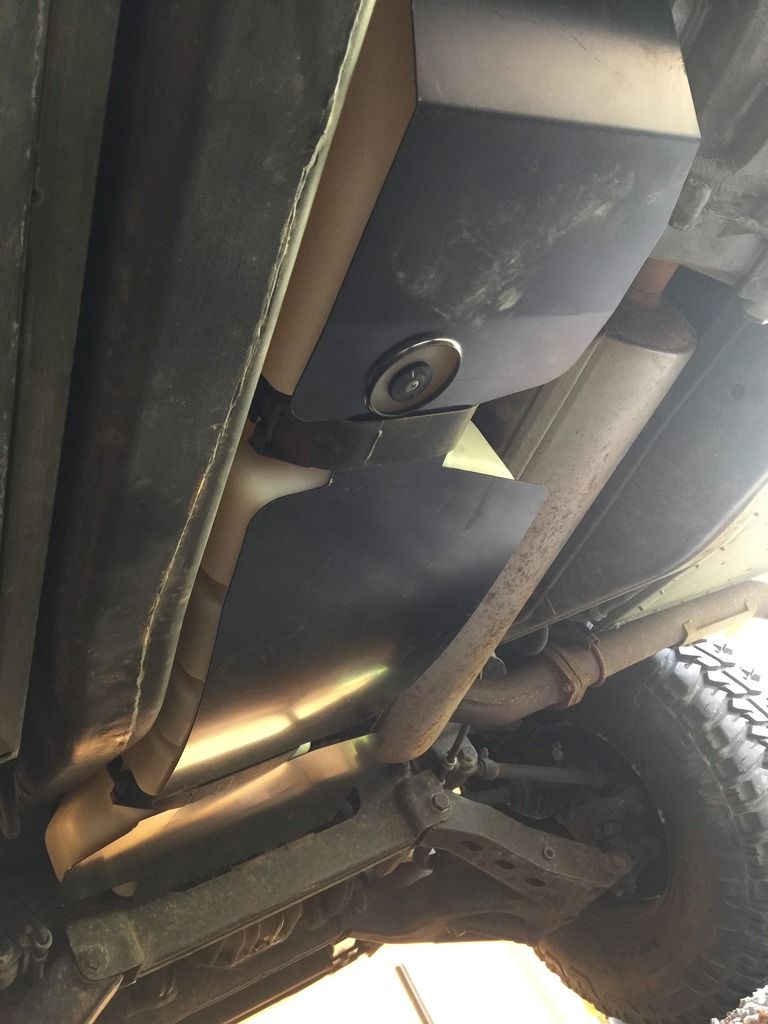
Also shields the rear U-joint... 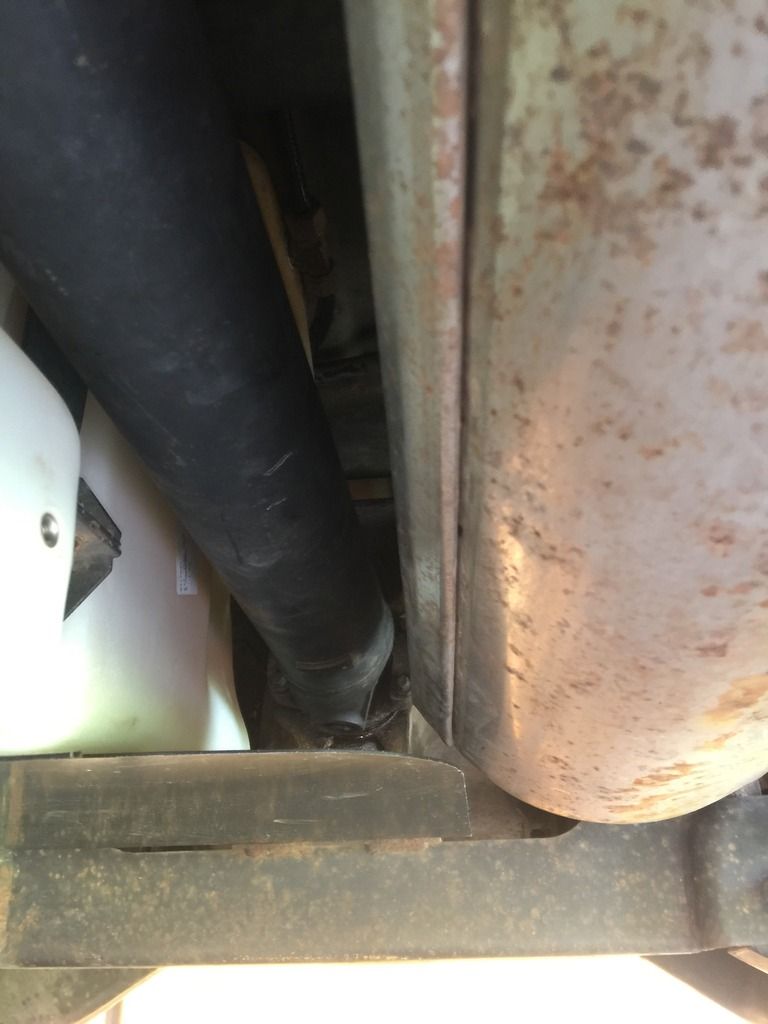
Super easy to put on. It's flexible enough you can undo one strap at a time without having to worry about supporting the tank. I really want to get the full underbody protection kit with the drivetrain cages as well as some rocker protection before doing any hardcore wheeling. After that I took the truck out to run a few errands. The smoke from turning up the fuel isn't bad at all compared to some diesels I've seen out there. It's also pretty easy to let off a little and it will quit smoking without noticeably losing power. Think I'm going to leave it adjusted as is. |
|
|
|
|
[Last Edit: Ryan_Ruck]
[#14]
@Lawman734 and other Georgia members, a heads up.
Just spotted this over on SS: http://www.steelsoldiers.com/showthread.php?165273-Bad-News-Georgia-HMMWV-Owners
|
|
|
|
|
[#15]
Originally Posted By Ryan_Ruck:
@Lawman734 and other Georgia members, a heads up. Just spotted this over on SS: http://www.steelsoldiers.com/showthread.php?165273-Bad-News-Georgia-HMMWV-Owners This is concerning. I would like to see more info to see if this is an isolated incident due to the individual making a mistake or a broader issue within that state. |
|
|
|
|
[#16]
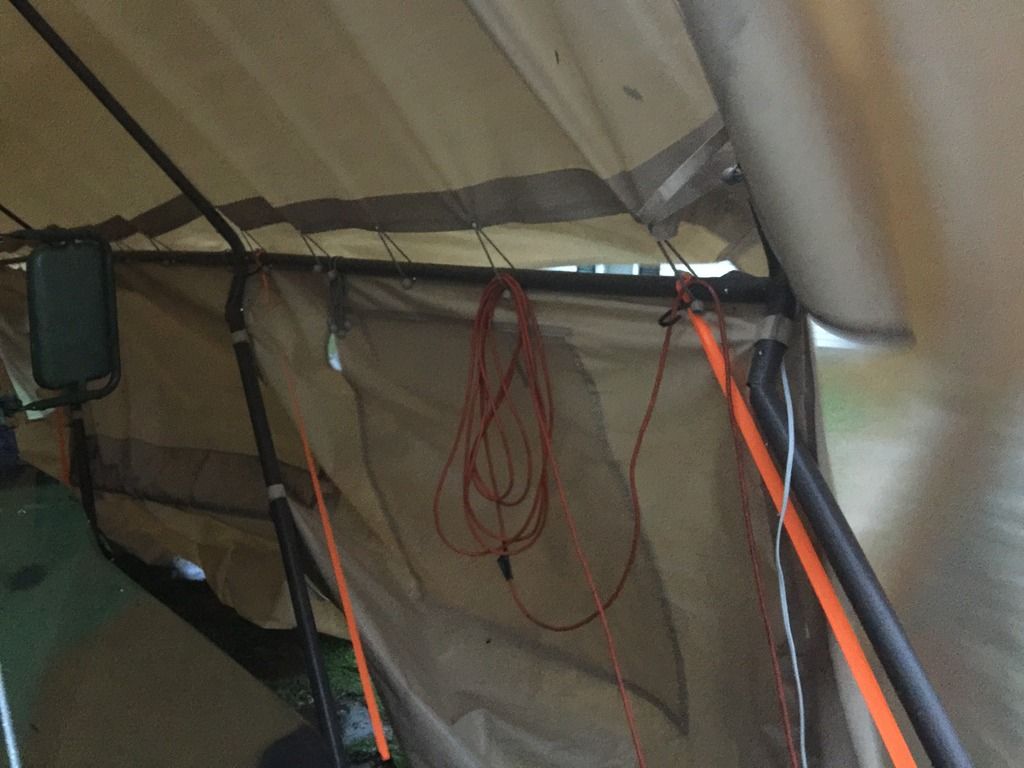
Didn't get any sleep last night. The weather radio was going off almost every 15 minutes with severe thunderstorm warnings, flash flood warnings, and even a couple tornado warnings.
One of the tornado warnings with a confirmed tornado on the ground was in Amelia, Ohio where my two younger brothers live. Both are okay thankfully. I haven't seen any storm damage in the area but based on the storm velocity readings I was watching as it moved through, I'd guess an EF1, possibly an EF2. Then around 7ish I was under a tornado warning that was going to cross the river from KY. Velocity readings didn't really show much rotation. It was likely a quick spinup because of the speed of the storm and the winds. I think I saw roughly 65-70MPH winds here at my house based on what I saw as it was blowing through. I did learn that the Costco auto shelter is NOT rated for 65-70 MPH winds no matter how many ground anchors you put on it. I took this at the height of the wind: :( 
Just after everything blew through: 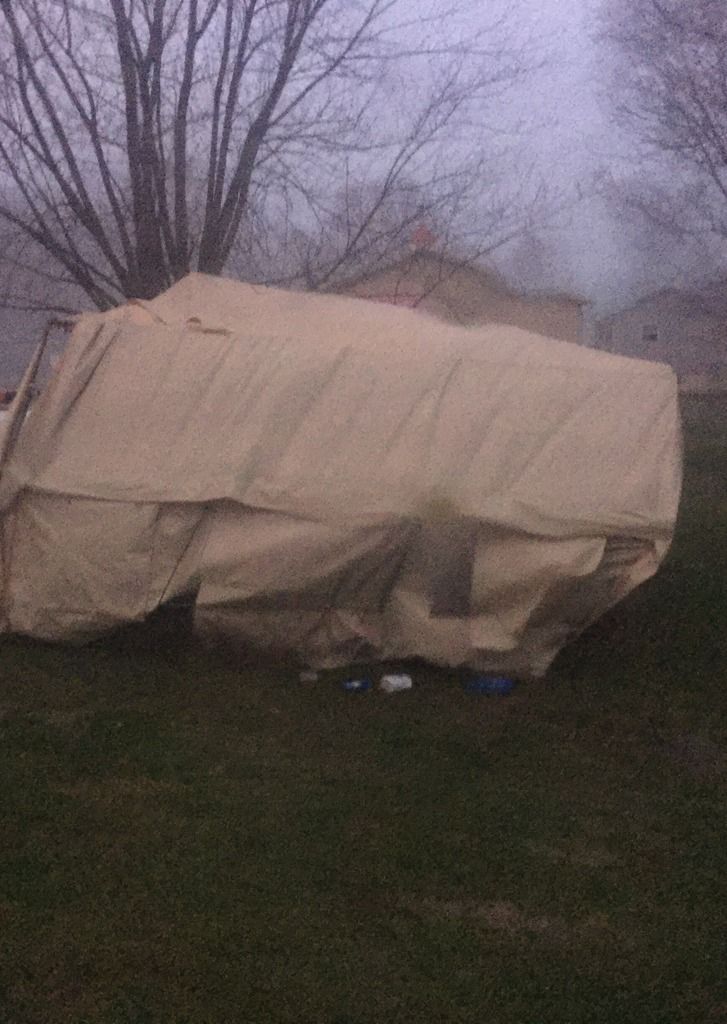
The only other casualty. And these were new mirrors since my passenger was broken when I got the truck. 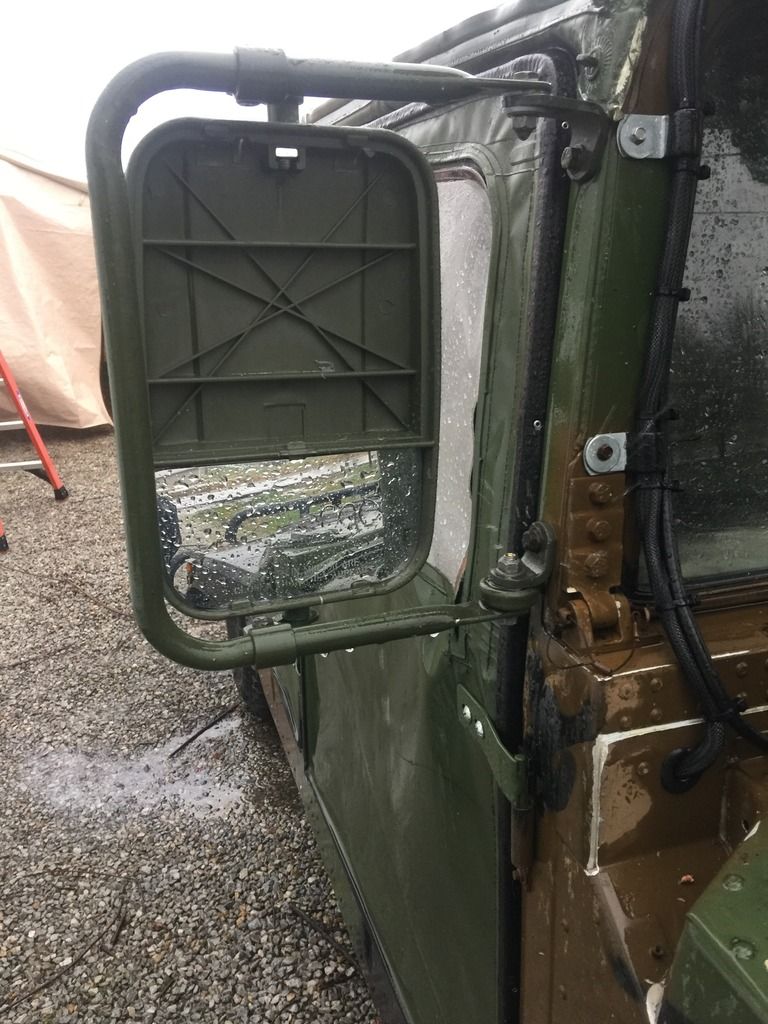
Really sucks just sitting there watching the stuff get destroyed, totally unable to do anything about it. I'm inside taking a break from cleanup trying to get dry since it is still raining. Still have power at least... So, anyone have any passenger mirror glass they can spare? |
|
|
|
|
[#17]
Originally Posted By Ryan_Ruck:
Didn't get any sleep last night. The weather radio was going off almost every 15 minutes with severe thunderstorm warnings, flash flood warnings, and even a couple tornado warnings. Well that sucks but it sounds like it could have been much worse! I'd say everything held up pretty well considering. We had severe thunderstorms here 2 days ago and I had to throw some rubber mats over the truck in case the hail got bad. They were calling for 1/2-dollar sized hail, but we only got 1/4" or so. |
|
|
|
|
[#18]
Originally Posted By EdwardAvila:
Well that sucks but it sounds like it could have been much worse! I'd say everything held up pretty well considering. We had severe thunderstorms here 2 days ago and I had to throw some rubber mats over the truck in case the hail got bad. They were calling for 1/2-dollar sized hail, but we only got 1/4" or so. Yeah, it really could have been. Especially with the twister that spun up near my brothers. I actually drove up there in the truck minutes after the storm blew through around 4am since I didn't hear anything from either of them. Just as I got near their areas, they both said they were okay so I turned around. The rain was insanely heavy on the drive back. |
|
|
|
|
[#19]
Glad you are safe. Besides being blown over, did the carport stay together with no tears?
|
|
|
|
|
[#20]
Originally Posted By jake-cutter:
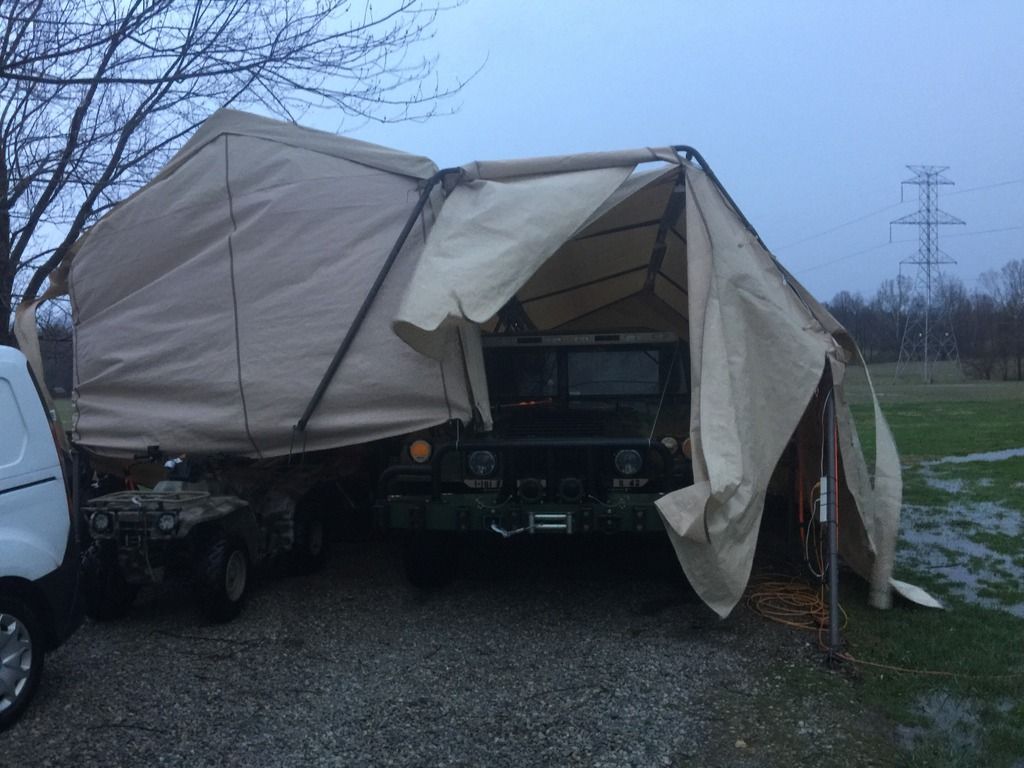
Glad you are safe. Besides being blown over, did the carport stay together with no tears? Got most everything cleaned up now (after I fell asleep in my chair for 2 hours after that update ).
Surprisingly the damage to the shelter wasn't nearly as bad as it looked and I'm pretty confident it can be rebuilt with some work. The damage was limited to the bent uprights like you can see in that one closeup pic of the inside. Of the 16 uprights, 4 were still good, and of the 12 damaged ones, I think I can cut the bent sections at the top off and bolt in new lengths of the smaller diameter pipe inside the larger pipe. The cover was in surprisingly good shape, probably because I went and reinforced everything with zip ties at the panel seams when I assembled it. Only damage I could find was one of the side door zippers ripped off it's stitching. I should be able to restitch that with my speedy stitch I used on my truck windows or, worst case, I've still got 2 unused side panels that would have normally gone on the inner sides when I put the two shelters together. Just means one less side door. Still have a few things to try and bring inside and find room for like my big 42" shop fan... |
|
|
|
|
[Last Edit: jake-cutter]
[#21]
While waiting on engine stuff and better weather, I did some more painting. The hood has 1 coat and needs 1 more. The drip/runmarks on the grill are from the military. I also mounted the light bar and the Go Lights. Next is to do the LED turn signals.
Ryan, did you do the LED turnsignals? Started on them tonight, but ran out of time. Looks like it will be easier with the hood raised. |
|
|
|
TN, USA
|
[Last Edit: JohnyRotten]
[#22]
Originally Posted By jake-cutter:
The drip/runmarks on the grill are from the military. I https://www.AR15.Com/media/mediaFiles/86875/IMG-20170306-193144-resized-20170306-073258136-160518.JPG I've seen $150k+ Alpha H1's with paint runs, I guess it adds character |
|
|
|
[#23]
Originally Posted By JohnyRotten:
I've seen $150k+ Alpha H1's with paint runs, I guess it adds character Not surprised. I sanded out some, but others had fiberglass mixed in so it was more than just the paint, possibly the mold for the hood. |
|
|
|
|
[#24]
Originally Posted By jake-cutter:
While waiting on engine stuff and better weather, I did some more painting. The hood has 1 coat and needs 1 more. The drip/runmarks on the grill are from the military. I also mounted the light bar and the Go Lights. Next is to do the LED turn signals. Ryan, did you do the LED turnsignals? Started on them tonight, but ran out of time. Looks like it will be easier with the hood raised. https://www.AR15.Com/media/mediaFiles/86875/IMG-20170306-193144-resized-20170306-073258136-160518.JPG I'm 100% LED inside and out. And, as you may or may not have found out by now, it is definitely easier to tackle them with the hood up. Kind of a pain to get to the mounting bolts through the access hatches. You still running the incan tail lights? Truck is looking top notch, paint runs and all! That hood could use some ECV hood brackets though... |
|
|
|
|
[#25]
The peripheral vision is not affected. I was concerned at first, but after installing and sitting in it, no change don't even see it. Now the light bar is noticeable and acts as a sun visor.
As for the LED taillights, I have them to install this weekend along with the turn signals and LED marker lights that I painted to match. Still haven't done the head lights. |
|
|
|
|
[#26]
Originally Posted By jake-cutter:
This is concerning. I would like to see more info to see if this is an isolated incident due to the individual making a mistake or a broader issue within that state. Originally Posted By jake-cutter:
Originally Posted By Ryan_Ruck:
@Lawman734 and other Georgia members, a heads up. Just spotted this over on SS: http://www.steelsoldiers.com/showthread.php?165273-Bad-News-Georgia-HMMWV-Owners This is concerning. I would like to see more info to see if this is an isolated incident due to the individual making a mistake or a broader issue within that state. Got one registered/ titled successfully and without even a bat of an eye to the ORUO stamping of the SF97 in Texas this week. Seems some states are friendlier about our prior steel solders than others are becoming (pun intended). Had a buddy last week ask his local vehicle registration office in Colorado how he could register his since his county requires diesel emissions testing with zero exemptions (some counties in CO require emissions tests, some don't), and he reported that she said the chief of the highway patrol came out stating that if it were up to him, all HMMWV's would be banned from public roads. Seems like a very politically motivated stance with zero grounding in the facts or actual issues (like someone earlier said, you can't tell me a Deuce and a half is more road-worthy than a HMMWV). I think he's going to become a resident of a different county of CO soon and/or the great state of Texas. |
|
|
|
|
[Last Edit: Ryan_Ruck]
[#27]
Originally Posted By TexJeepTJ:
Got one registered/ titled successfully and without even a bat of an eye to the ORUO stamping of the SF97 in Texas this week. Seems some states are friendlier about our prior steel solders than others are becoming (pun intended). Had a buddy last week ask his local vehicle registration office in Colorado how he could register his since his county requires diesel emissions testing with zero exemptions (some counties in CO require emissions tests, some don't), and he reported that she said the chief of the highway patrol came out stating that if it were up to him, all HMMWV's would be banned from public roads. Seems like a very politically motivated stance with zero grounding in the facts or actual issues (like someone earlier said, you can't tell me a Deuce and a half is more road-worthy than a HMMWV). I think he's going to become a resident of a different county of CO soon and/or the great state of Texas. If HMMWVs are allowed on public roads it will be the Wild West! There will be blood in the streets! Won't somebody please think of the children!?!? Gee, where have I heard that before... 
I'm suddenly feeling the urge to road trip out to Colorado and roll some coal in front of the Chief's office. And, I do have some friends in CO...  (Just kidding! ) Maybe the Chief can go hunt for some post-ban magazines. (Just kidding! ) Maybe the Chief can go hunt for some post-ban magazines. 
|
|
|
|
|
[#28]
A lot depends on who is processing the paperwork (rural vs urban) and how you act. In my county in Texas it was super easy, no issues in and out really fast. However, a buddy one county over they did not know how to process it. He just went to another office and it was also super easy.
|
|
|
|
|
[#29]
I got a letter from the state motor vehicle office yesterday. I was kinda nervous opening it but it was just a notice that I need to update the registration on my motorcycle. WHEW.....
|
|
|
|
|
[#30]
I finally picked up a deep fording exhaust a couple weeks ago before all the storm drama and with the really nice weather yesterday I was able to get it installed. It's definitely going to need some refinishing but it was $100 cheaper than most out there. Decided to install it and just paint it with the truck instead of separate.
It was too dark by the time I was finished last night so couldn't get any pics. I also wasn't 100% done since I needed a new exhaust hanger U-bolt to replace one that broke during removal. When I got home from work, I got the hanger reinstalled and snapped a couple pics. Getting the old exhaust tip off ended up taking up the bulk of the time. Big pain in the ass. Had to use an angle grinder and Dremel to cut the bolts and, a pry bar to pry it loose. The top bolt was the most difficult. Even after cutting half of it off, the head didn't want to come out of the muffler flange. Had to cut the head off and then was finally able to pound out the stub of the bolt rusted in the flange. There is a gasket that goes between the muffler and stack. Fortunately, I still had an exhaust gasket since they came as a pair when I ordered them for my exhaust crossover pipe replacement. Also picked up the correct reinforcement bracket compliments of 86humv on SS, though one could pretty easily fab up something suitable if you couldn't find one. The installation also requires what the install instructions call "isolators". The isolators are around $4 each (2x) plus shipping online. I found a suitable substitute at Lowes in their rubber grommet drawer in their hardware section. This is it but the picture doesn't match. It is thicker. Mounted everything up with new Grade 8 hardware and put anti-seize on everything. New U-bolt was just from a 3" exhaust clamp from O'Reilly. The finished product: 
Muffler flange and new hanger U-bolt: 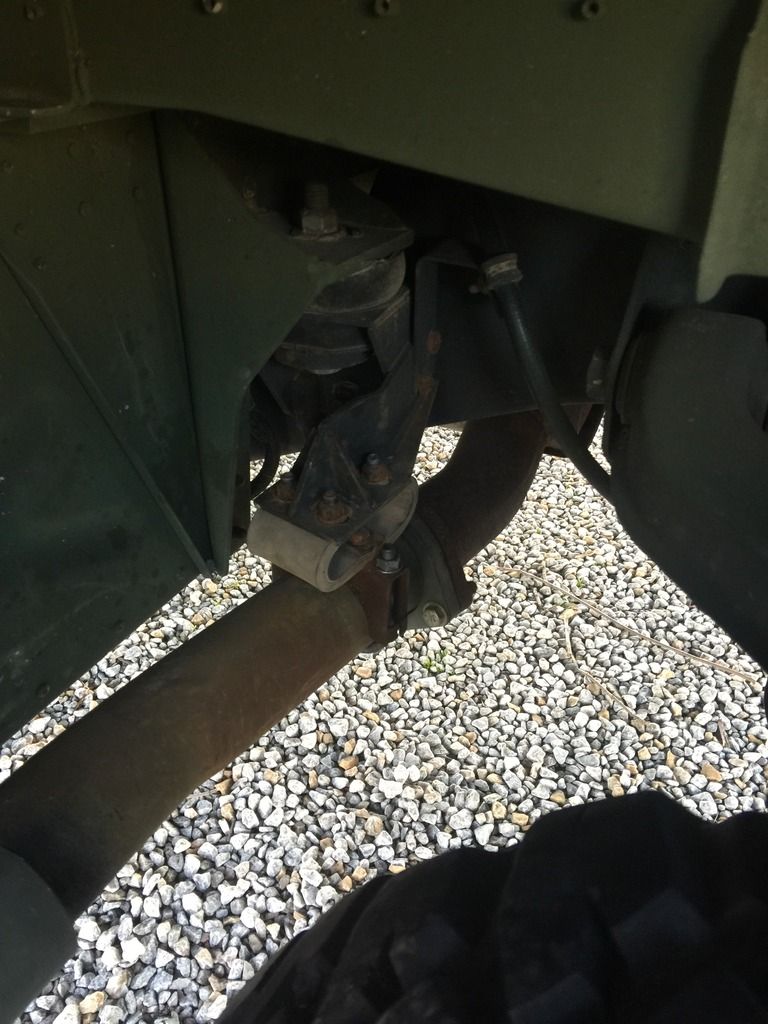
The stack bolted to the body: 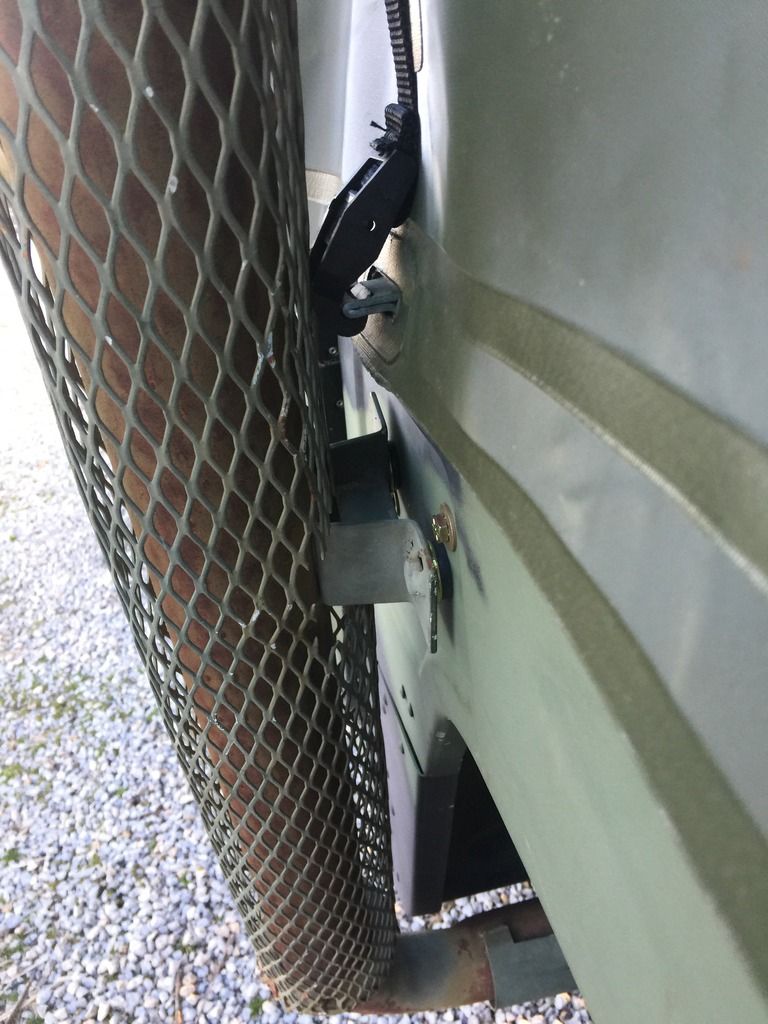
I put some washers between the stack bracket and the grommets and there's washers on the other side of the grommets as well. There's a small clearance problem I found. I don't know if it's a result of the fasteners on the new design cargo top but it barely fits into it's tab as you can see from the pic. There was actually an indent on the stack's shield so I assume it is normally a tight fit but it seemed especially tight on mine. Won't really be an issue after I get the Velcro installed post painting. A bit of a design flaw though... Going to gradually start piecing the rest of the deep fording setup together now! I've already got a sealing trans dipstick that I got a good deal on and, the air filter housing cap that replaces the rubber duckbill I'll be installing soon. |
|
|
|
|
[#31]
This just popped up in my YouTube feed. Published today.
RIP HMMWVs... 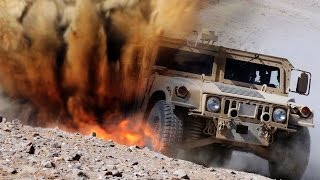 A-10 Warthog Obliterates Humvee Drone |
|
|
|
|
[#32]
Heads up for any potential buyers. All HMMWV sale coming up March 28.
|
|
|
|
|
[#33]
I looked for a parts truck, but none in my area. Wonder what the prices are going to be?
|
|
|
|
|
[#34]
Originally Posted By jake-cutter:
I looked for a parts truck, but none in my area. Wonder what the prices are going to be? Yeah, good question. Looks like lots of decent trucks. Plenty of missing doors though! A number of 4 man, runners for just over $4k! Those 2 makeshift shelter trucks in Texas look interesting too. |
|
|
|
|
[#35]
Originally Posted By Ryan_Ruck:
On a different note, if anyone is looking for some specialty tools like seal and bearing installers, I've found a rather extensive set specifically for HMMWVs from a seller on eBay. I really probably shouldn't have spent the money but, since I've only had to replace one of the 4 diff output seals, have a pinion seal that needs replaced, and will likely have more wear components like that in the future that need replaced, it seemed like a good idea for such an extensive set of tools that are otherwise a bit hard to find without having to make your own.
By the way, the seller will accept an offer of $200 so, as usual, feel free to try better! Just a follow up on the tools, I just ordered and he accepted $175. Really a good deal for down the road. Now I am outgrowing my tool box and will probably get another just for HMMWV tools and spare parts. |
|
|
|
|
[#36]
Originally Posted By jake-cutter:
Just a follow up on the tools, I just ordered and he accepted $175. Really a good deal for down the road. Now I am outgrowing my tool box and will probably get another just for HMMWV tools and spare parts. I'm guessing you saw all the posts on SS?
Great price on them! I have a feeling they'll make a lot of work down the road a lot easier. Like I said on SS, I think this set of tools is all of the basic specialty tools called for in the TM. The next kit up includes things like hydraulic pressure testers, timing lights, and other stuff you can find off the shelf if you really needed to. Here's the kit that's the next level up: HMMWV Direct Support Special Tools Set. As you can see, lots of stuff you would need even less commonly than the HMMWV Organizational Support Special Tools Set we've got. But, if I had the extra money laying around I probably would have gotten that instead just because. I can tell you from experience when I had to replace that diff output seal, it would have been a lot nicer to just be able to go grab the seal installer out of a box than 1) spend time thinking up a way to make one, 2) take the time to go to the store and buy the materials to make one, 3) then put the materials together and modify it. |
|
|
|
|
[Last Edit: Ryan_Ruck]
[#37]
Oh and one other thing... I hope the mods don't think this is out of turn since our vehicles are a bit niche and parts aren't likely to get much visibility in the EE alone but if it is, feel free to delete it.
I'm starting my spring cleaning so one last call to ARFCOMmers on the NIB 10k halfshafts and the nearly new heater core/blower I need to get rid of. I don't mind taking a slight loss on what I paid for them to sell them to someone on here but if no one is interested and I don't hear anything by Friday, I'm going to put them up on eBay for what I've got in them. Just hit me up via PM if you're interested. I've got pics and can fill you in on other details. |
|
|
|
|
[#38]
Originally Posted By jake-cutter:
Now I am outgrowing my tool box and will probably get another just for HMMWV tools and spare parts. It's easier to just get another HMMWV which will hold all the tools and carry all your spare parts. |
|
|
|
|
[#39]
Originally Posted By EdwardAvila:
It's easier to just get another HMMWV which will hold all the tools and carry all your spare parts. Originally Posted By EdwardAvila:
Originally Posted By jake-cutter:
Now I am outgrowing my tool box and will probably get another just for HMMWV tools and spare parts. It's easier to just get another HMMWV which will hold all the tools and carry all your spare parts. True story. I mean, there is a reason they make one specifically for that... 
|
|
|
|
|
[Last Edit: jake-cutter]
[#40]
Look at getting another one, but need to finish this one first. The mule you posted about on SS is very tempting, how much is he asking?
While waiting on parts and more time, I got some Blue Force Tracker mounts that go on the Sponsons in to see if I like them to mount LEDs on. Below is a couple of different mock ups. Kinda leaning towards option D. Option A is using the existing holes and then running the wire to the opposite hole. Option B is using the upper mount and giving a level platform. Wires are better hidden. Option C is using the lower mount that sits right at the sponson antenna mount and gives a level area. Option D is using the lower antenna mount and possibly mounting another in the hole at the bottom of the fender under the reflector. |
|
|
|
|
[#41]
Originally Posted By jake-cutter:
Look at getting another one, but need to finish this one first. The mule you posted about on SS is very tempting, how much is he asking? While waiting on parts and more time, I got some Blue Force Tracker mounts that go on the Sponsons in to see if I like them to mount LEDs on. Below is a couple of different mock ups. Kinda leaning towards option D. Option A is using the existing holes and then running the wire to the opposite hole. https://www.AR15.Com/media/mediaFiles/86875/IMG-20170314-200551-resized-20170314-082518520-165966.JPG Option B is using the upper mount and giving a level platform. Wires are better hidden. https://www.AR15.Com/media/mediaFiles/86875/IMG-20170314-200306-resized-20170314-082941735-165969.JPG Option C is using the lower mount that sits right at the sponson antenna mount and gives a level area. https://www.AR15.Com/media/mediaFiles/86875/IMG-20170314-200935-resized-20170314-082437357-165970.JPG Option D is using the lower antenna mount and possibly mounting another in the hole at the bottom of the fender under the reflector. https://www.AR15.Com/media/mediaFiles/86875/IMG-20170314-204632-resized-20170314-084702130-165981.JPG Sent you a PM on the Mule. Option D looks good. As does Option B with a caveat... If you go with Option B, go with some mini light bars instead of the cubes on the Blue Force mounts. I don't know how wide the Blue Force mounts are but, I'm guessing you could prob fit something like a ~9" LED bar on each. Personally, I think it would look better aesthetically since it would "fill out" the mount and would probably give you more light since I think you can get the 9" ones in combo beams. |
|
|
|
|
[#42]
A 9" or 10" led bar would fit or another go light. But the level mounts would require more holes to be drilled. I think I will stick with option D as no holes need to be drilled, I can always add the blue force mounts later. Hopefully I can finish painting this weekend and mount the antennas and rear leds.
|
|
|
|
TN, USA
|
[#43]
The GOOD stuff is coming out now
http://www.ironplanet.com/for-sale/Humvees-AM-General-M1045A2-Humvee-HMMWV-California/875839?h=5000%2Cct%7C35%2Cc%7C3468%2Cmd%7CM1045A2+Humvee%2Csm%7C0%2Cmode%7C8&rr=0.2&hitprm=&pnLink=yes |
|
|
|
[#44]
Originally Posted By JohnyRotten:
The GOOD stuff is coming out now http://www.ironplanet.com/for-sale/Humvees-AM-General-M1045A2-Humvee-HMMWV-California/875839?h=5000%2Cct%7C35%2Cc%7C3468%2Cmd%7CM1045A2+Humvee%2Csm%7C0%2Cmode%7C8&rr=0.2&hitprm=&pnLink=yes 
Can't wait to see how much that goes for... I'm guessing USMC truck from the markings on the top of the hood instead of front. Pics I've seen from my brother of their trucks had the markings there. Also has the undercoating. Has the deep fording kit but no snorkel or stack. Also, no mention of off road only. Really clean truck overall! |
|
|
|
|
[#45]
I wonder if that is a private individual's that they are selling. It has the armored doors so that leads me to believe its not direct form the military. One of the guys local sold his FMTV through gov planet. They came out and took pics and oil samples then listed it. Sold and made a small profit.
|
|
|
|
|
[Last Edit: Ryan_Ruck]
[#46]
Originally Posted By jake-cutter:
I wonder if that is a private individual's that they are selling. It has the armored doors so that leads me to believe its not direct form the military. One of the guys local sold his FMTV through gov planet. They came out and took pics and oil samples then listed it. Sold and made a small profit. When your local sold the FMTV did GovPlanet put their stickers all over it? Like you there's certain things that make me think it could be a private sale (note the tail pipe extension looks new since it's replaced the missing stack) but other things that make it look like a government sale (the overall dirty condition, the RFID asset tracker on the winch bumper, the loose parts sitting in it). Regardless, assuming the data plate is correct, a 2012 is a damn new truck! If this is the start of the sale of these, anyone know anyone in need of a moderately used kidney? I can cut back on my alcohol consumption for one of these. |
|
|
|
|
[#47]
When GP came out they stuck their stickers all over it and it wsa the same ones we see in the other auctions, right down to the government price. They even took pics facing away from his house and into the field. After the sale, the buy came and picked it up. They were surprised it was a private sale through Gov Planet as nothing was stated.
As for the armor doors, I have one rear one. It not aluminum but two pieces of high density steel. It makes it heavy, but adds a lot of rigidity to the otherwise flimsy X door and better sound proofing. From what I recall, they are still only rated to pistol rounds and fragments. Defiantly not going to stop a rifle round. If there was a close up you would see the two pieces of steel sandwiched together, if its only one piece then its the skins they sell on ebay. |
|
|
|
TN, USA
|
[#48]
Took this video yesterday on my way home from work....New Toys
https://youtu.be/E9M7nBByAlE |
|
|
|
[Last Edit: Ryan_Ruck]
[#49]
Originally Posted By JohnyRotten:
Took this video yesterday on my way home from work....New Toys https://youtu.be/E9M7nBByAlE Holy cow that's a lot of JLTVs! Good choice in music by the way. |
|
|
|
TN, USA
|
[#50]
Originally Posted By Ryan_Ruck:
Holy cow that's a lot of JLTVs! Good choice in music by the way.
|
|
|
 Win a FREE Membership!
Sign up for the ARFCOM weekly newsletter and be entered to win a free ARFCOM membership. One new winner* is announced every week!
You will receive an email every Friday morning featuring the latest chatter from the hottest topics, breaking news surrounding legislation, as well as exclusive deals only available to ARFCOM email subscribers.

AR15.COM is the world's largest firearm community and is a gathering place for firearm enthusiasts of all types.
From hunters and military members, to competition shooters and general firearm enthusiasts, we welcome anyone who values and respects the way of the firearm.

Subscribe to our monthly Newsletter to receive firearm news, product discounts from your favorite Industry Partners, and more.
Copyright © 1996-2024 AR15.COM LLC. All Rights Reserved.
Any use of this content without express written consent is prohibited.
AR15.Com reserves the right to overwrite or replace any affiliate, commercial, or monetizable links, posted by users, with our own.


