|
Posted: 2/1/2016 12:11:05 AM EDT
OK. Before I even get started I need to explain that I'm discussing one method of accomplishing this. There are plenty of others. I will be describing this assuming that you have a copy of lightroom (not really required) photoshop(you'll need this to follow my guide), a camera that allows you to manually focus it, and not much else really. A tripod helps, but is not required if you are fairly steady with the camera. You'll see why once we're into everything. There are tethering programs that allow you to automate the collection of images focused at specific points. I'll list a few of those at the end. There are also several programs specifically designed to perform focus stacking, I'll also list those.
First of all, what is focus stacking? The simplest way that I can explain it is you take a series of images focused at various points and combine them later into one image that has far greater depth of field than you would otherwise have been able to get. Macro work is a common use for this but it can come in handy in other places too. To get things started, you need to get your camera and subject set up. I recommend having your subject just outside the minimum focus distance of your particular lens. In other words, set the lens to minimum focus and use live view to adjust the camera or the subject (or both) until the closest part of the subject is in sharp focus. Now separate them just a little bit. You want to have some overlap in your images to make sure you get everything focused that you want to. Keep in mind that you'll want to leave some room for cropping! As for the images themselves, you will want to take a test fire of whatever exposure (mainly aperture) you're wanting to use and see how much you have in focus. Compare that to what you'd like to have in focus and that'll give you an idea of what needs to be done. More images are better. The more exposures you take (finer adjustments on focus) the better your final result will be. With a narrow enough aperture you can probably get by with 3-5 images, but I usually shoot a wider aperture and use more shots. To illustrate this technique I set up a yardstick leaning up against a backdrop at a pretty harsh angle. Here it is: 
As you can see the center numbers look pretty good but everything else looks like shit. So, we take a series of images from closest to farthest...like this (this isn't all of them, I skipped quite a few..just a representative example - there were 15 total for this exercise) 


Once you've got all of your images, go ahead and process them as you would a regular picture. I suggest finding one that is focused somewhere in the middle to base your settings on. If you shot it with everything manual, once you've done one image you can copy the same settings to all images and it'll work! Part 2 will contain the stacking! |
|
|
|
[#1]
Focus stacking part 2!
So you've got all your images. Here's the full set in lightroom: 
If you're using lightroom, this next part is easy. Select them all, right click one and edit in> Open as layers in photoshop 
It'll probably take photoshop a few minutes to load them all in but once it's done you'll see something like this: 
If you aren't using lightroom, you can click file > scripts > load into stack, browse to the folder your images are in and select them and load them that way. Now go to select > all layers 
That should light them all up for you. Next you'll want to go to edit > auto align layers (yes the cursor was in the wrong place, but you'll be using auto blend layers here as well) 
This box pops up, the default is fine (auto) 
Then it'll crank away, you may get a progress bar. Wait for a while. When it's done, you may notice that there are signs of manipulation on the images. That's OK. Next we click edit > auto blend layers. That brings up this: 
We of course want to stack images. Don't worry about that content aware fill stuff, but make sure the seamless tones and colors is ticked. This one takes a good long while. If you've got more than 20 or 30 images, it may even freeze your machine 
But once it's done, you'll see this: 
A more or less in focus image with some handy little masks created for you. If you look closely, you will probably find a few spots like these - stacking errors: 

There were images with those bits in focus but for no well explained reason, photoshop occasionally misses here and there. You can manually edit the masks yourself to fix it or be lazy like me and just crop that shit out by going to layers > merge visible: 
Then crop it to suit your final purpose and apply any further adjustments you feel necessary.  stacked by Zack, on Flickr stacked by Zack, on Flickr
Part 3 will contain other discussion on the subject! |
|
|
|
[#2]
Some final thoughts on focus stacking:
Photoshop itself is not the best when it comes to stacking images. I like Zerene stacker. I'm using the demo version right now (full version is freaking expensive!) but photoshop works well enough most of the time. There's a few other stackers out there like Helicon focus. That one's pretty good too but also expensive. Regarding tethering software, my current favorite is QDslrDashboard, an android app that also has a windows equivalent. It allows you to set a starting and ending focus point, select the number of steps, and hit a button and it does the captures for you. Pretty sweet. Other options include capture one, nikon's camera control pro, and lots of others - no doubt Canon has something! As for the focusing itself, I prefer to change focus via the lens and not by moving the camera back and forth. There are pros and cons to each method but I find that starting at minimum focus and working outward is a lot cleaner and requires less adjusting than using a focus rail to move the camera around. It's also more precise (when using the computer to help focus, that is!) That isn't to say you can't do this manually by turning the focus ring and clicking off shots. This can be done, but it's a tedious pain in the ass and chances are your hands can't adjust the focus in small increments like the software can. I advise using some type of tethering software (but since there are so many and they all work differently, that wasn't a part of this tutorial) Any questions, feel free to ask! Other macro shooters and focus stackers please chime in with your own input, advice, and methods! Here's a few focus stacks I've done, maybe they'll give you some ideas:  bee stack 2 small by Zack, on Flickr bee stack 2 small by Zack, on Flickr
 wasp small by Zack, on Flickr wasp small by Zack, on Flickr
 wasp2 small by Zack, on Flickr wasp2 small by Zack, on Flickr
 moth web by Zack, on Flickr moth web by Zack, on Flickr
 fungus web by Zack, on Flickr fungus web by Zack, on Flickr
 fly stack 2 crop by Zack, on Flickr fly stack 2 crop by Zack, on Flickr
 ladybug web by Zack, on Flickr ladybug web by Zack, on Flickr
|
|
|
|
[#3]
Very cool, I always wondered how that was done!
|
|
|
|
[#4]
Thanks!
|
|
|
|
[#5]
Outstanding, thank you very much for taking the time and effort to post this tutorial. I don't have lightroom but will be trying this with PS and PSE 14. Maybe one of them will work ok.
|
|
|
|
[#6]
Thanks for the write up, I've never done it in Photoshop... I'll have to try it out this weekend.
I've been using Helicon Focus with good results. |
|
|
|
[#7]
Quoted:
Thanks for the write up, I've never done it in Photoshop... I'll have to try it out this weekend. I've been using Helicon Focus with good results. I tried the demo versions of helicon focus and zerene stacker. In side by side comparisons, Zerene produced the better image. It's also cheaper. 
|
|
|
|
[#8]
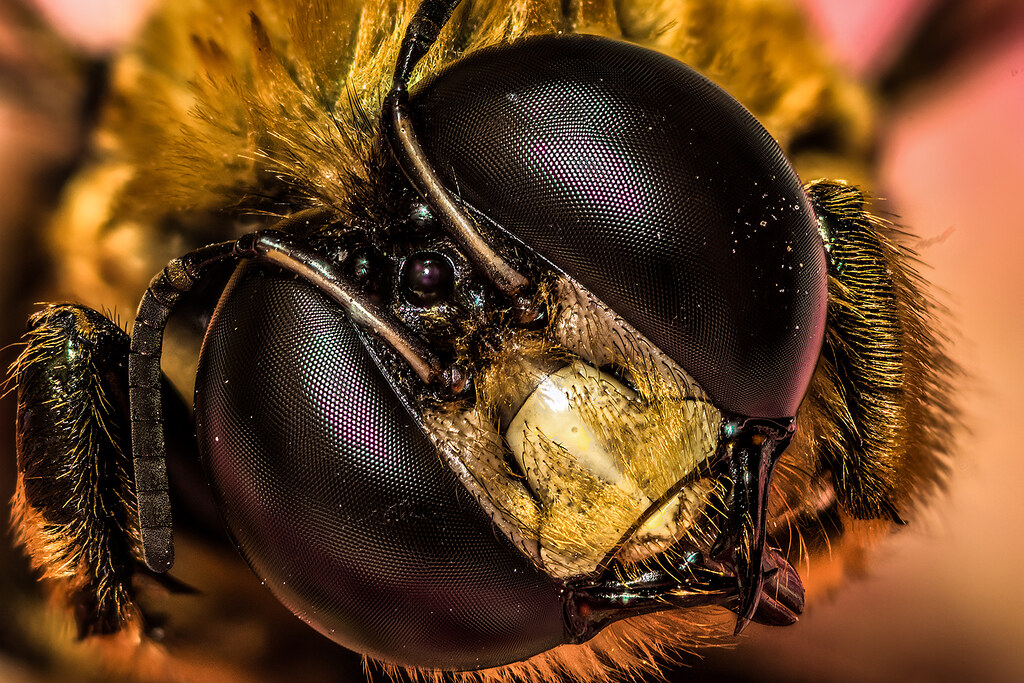
Here's an example of a zerene stack. I was testing some new shooting techniques to increase magnification and detail. Well...I think it worked.
This is the full size image, minus the crop to clear out the stacking related borders and such: 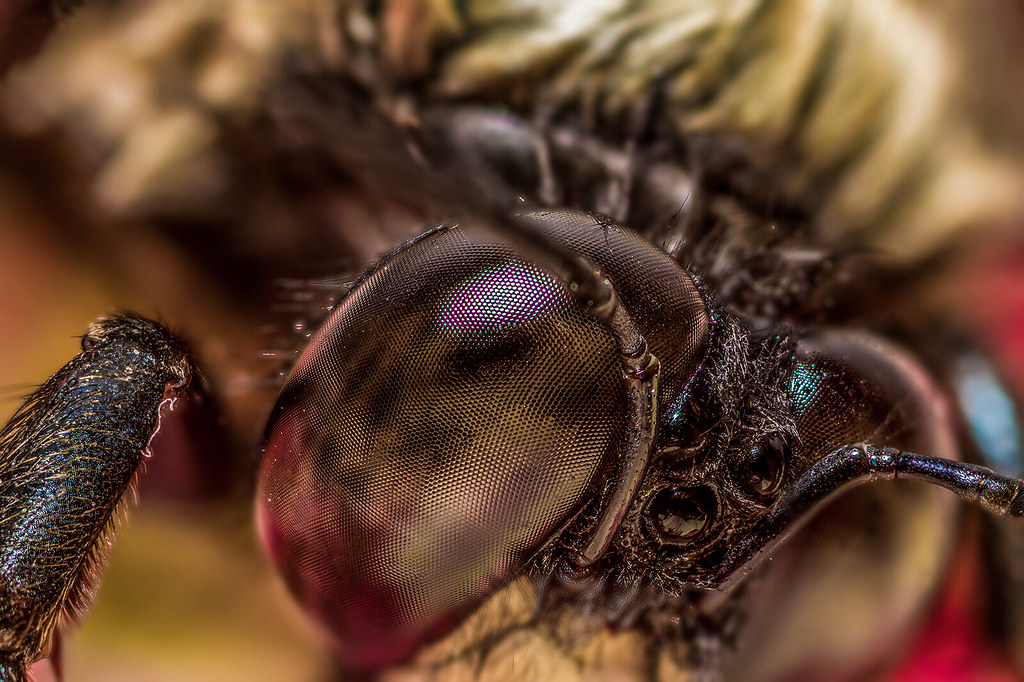 bee stack by Zack, on Flickr bee stack by Zack, on Flickr
Crop in some: 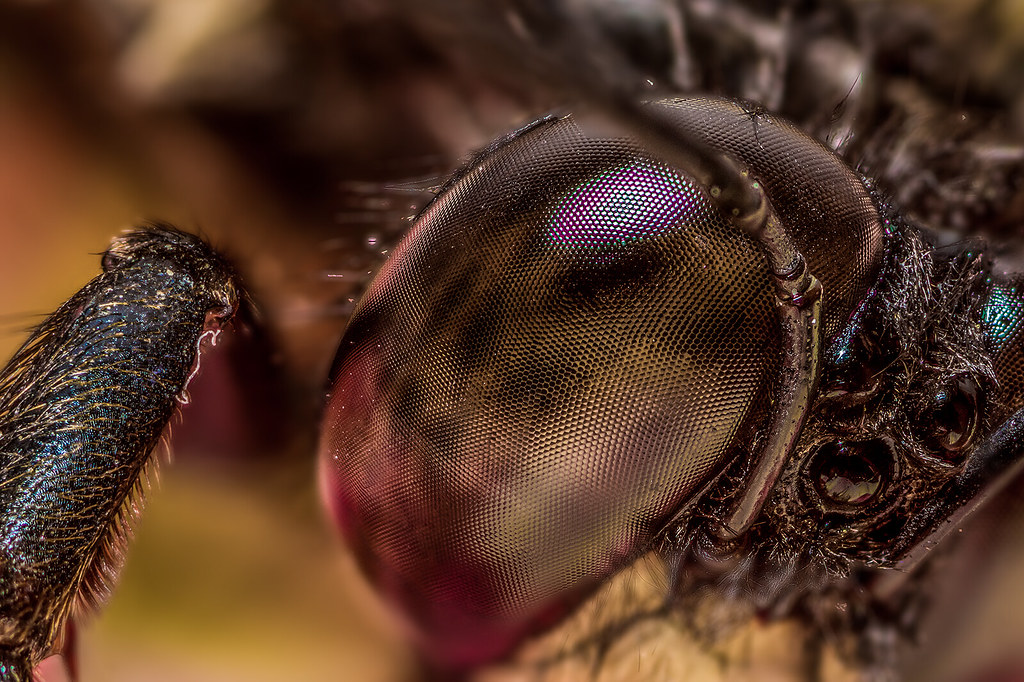 bee stack crop by Zack, on Flickr bee stack crop by Zack, on Flickr

|
|
|
|
[#9]
That's impressive. Mind sharing what appeture and how many pictures you used? I was playing around with it last weekend and did a stack with over 100 using the 'fine' focus adjustment, it didn't seem to turn out as good as using the coarse adjustment with around 15 pictures.
|
|
|
|
[#10]
Quoted:
That's impressive. Mind sharing what appeture and how many pictures you used? I was playing around with it last weekend and did a stack with over 100 using the 'fine' focus adjustment, it didn't seem to turn out as good as using the coarse adjustment with around 15 pictures. This was f/11 with 42 images shot. Not all of them made it into the stack. I use really really really fine steps but the way qDslrDashboard handles the focusing you set a start point and an end point then select the number of frames. The stepping depends on the distance between the start and end point and how many pictures you want to take. My steps vary depending on the aperture, subject matter, and how deep the stack needs to go. I also leave a few frames on either end to ensure that the part I want in focus ends up in focus. |
|
|
|
[#11]
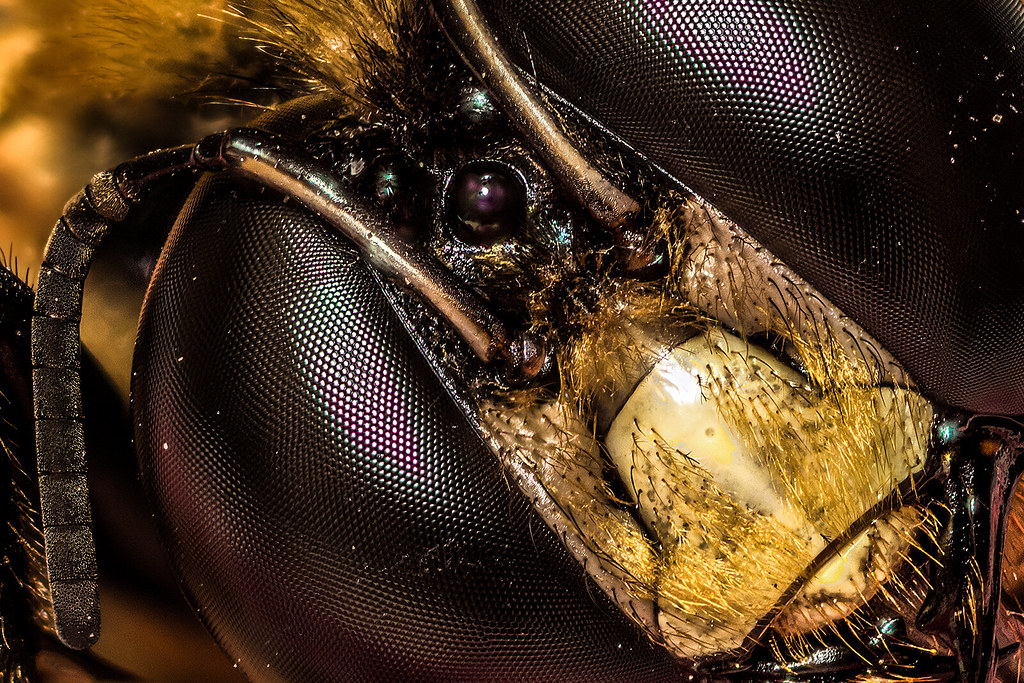
This is another stack of the same bee at f/11 with 42 images shot.
 bee stack close w by Zack, on Flickr bee stack close w by Zack, on Flickr
 bee stack close crop by Zack, on Flickr bee stack close crop by Zack, on Flickr
|
|
|
 Win a FREE Membership!
Sign up for the ARFCOM weekly newsletter and be entered to win a free ARFCOM membership. One new winner* is announced every week!
You will receive an email every Friday morning featuring the latest chatter from the hottest topics, breaking news surrounding legislation, as well as exclusive deals only available to ARFCOM email subscribers.

AR15.COM is the world's largest firearm community and is a gathering place for firearm enthusiasts of all types.
From hunters and military members, to competition shooters and general firearm enthusiasts, we welcome anyone who values and respects the way of the firearm.

Subscribe to our monthly Newsletter to receive firearm news, product discounts from your favorite Industry Partners, and more.
Copyright © 1996-2024 AR15.COM LLC. All Rights Reserved.
Any use of this content without express written consent is prohibited.
AR15.Com reserves the right to overwrite or replace any affiliate, commercial, or monetizable links, posted by users, with our own.


