|
Posted: 11/26/2015 1:03:17 PM EDT
Go about taking pics of your own gun collection, one gun at a time?
I have a good camera (Nikon D600), good flash units (Nikon & Nissin) & good lenses (too many to list) but that's about it. Do I get a folding card table & use a towel for a backdrop? 
Seriously, I need all the input I can get. Prime lens? Macro lens? No macro lens? Slow shutter? Fast shutter? Inside light? (Which I don't have the best of, FWIW.) Would there be different settings & backdrop for blued guns versus stainless? Two-tone guns? I'm pretty minimal for budget & would like to work with what I've got, if possible. I guess I can go to a fabric store & get a yard or three of some sort of fabric if that's what best. Can't be that expensive for fabric, can it? I pretty much know I'll use my tripod & external flash. Aside from that, I'm pretty clueless as to how to get the best with what I've got. 
These pics are for my personal use, FWIW. Maybe put a rifle or two on EE, maybe post a pic or three in a forum in arfcom now & then to show someone something. Nothing professional on my end, certainly. Thanks in advance! |
|
|
|
[#1]
For what you want to use them for, I'd shoot on white. We have giant seamless setups at the studio, but I just did a quick google search on DIY home seamless sets and came up with this.
http://www.analogsenses.com/2015/08/07/product-photography-on-the-cheap-creating-a-studio-like-environment-at-home Use the longest lens you have that get what you need in the frame. This will help minimize distortion. Keep your camera on a tripod. The larger the light source the better for seamless, especially guns which have large reflective surfaces. So a flash might not work as well as a large window. Or bounce the flash into a white wall. Just make sure you set your white balance accordingly. Gotta hit the road... but hope this little bit helps. Have a good thanksgiving. |
|
|
|
[#2]
Shoot in the bathtub. Free and can be done with what you have now. I thought there was a thread on it somewhere....
|
|
|
|
[#3]
Quoted:
Shoot in the bathtub. Free and can be done with what you have now. I thought there was a thread on it somewhere.... Tub is beige, not white. |
|
|
|
[#4]
Quoted:
Tub is beige, not white. Quoted:
Quoted:
Shoot in the bathtub. Free and can be done with what you have now. I thought there was a thread on it somewhere.... Tub is beige, not white. |
|
|
|
[#5]
The problem you have is that you don't know what you want the resulting photos to look like in the first place.
Once you can describe what you want, we can easily tell you how to get it. |
|
|
|
[#6]
Quoted:
The problem you have is that you don't know what you want the resulting photos to look like in the first place. Once you can describe what you want, we can easily tell you how to get it. Just some decent photos I can post on arfcom and/or use for sales listings or (heaven forbid) insurance purposes. In the past I just used a dark red beach towel as a backdrop but it sometimes washed out the blue of the gun. This is why I was asking about different lenses, settings, etc. I was using a 24x120mm f4 lens, camera set to "auto" on previous pics. This time I'll use a tripod, maybe a macro fixed prime lens & monkey with the shutter speed & ISO? The good news is, with digital I can immediately see the pic results & dial in a different setting if the results aren't good. But I still want input on suggestions............. |
|
|
|
[#7]
Quoted:
Just some decent photos I can post on arfcom and/or use for sales listings or (heaven forbid) insurance purposes. In the past I just used a dark red beach towel as a backdrop but it sometimes washed out the blue of the gun. The catch is that this problem has nothing to do with lens choice or exposure settings. The problem here was the red towel. You have the right idea about staying away from the "auto" exposure. What do you want the background to look like? (Neutral is good.) What direction do you want the shadows going in? Do you want one part of the gun closer to the camera than the rest? How much of the gun do you want to be in focus? |
|
|
|
[#8]
Quoted: Tub is beige, not white. Quoted: Quoted: Shoot in the bathtub. Free and can be done with what you have now. I thought there was a thread on it somewhere.... For a white-background pic: Home Depot or Lowes sells a 32"x48"x1/8" markerboard panel for about $10. Read through the thread beavo mentioned; same rules apply for any white background: How to take decent gun photo's in your bathtub. |
|
|
|
[#9]
I'll add a couple tips from my gun photography days....
- As was previously mentioned, a white background such as a good quality poster board from the craft store. - To prevent harsh shadows around your subject, and to give the shot a bit of depth, elevate the weapon off of the background. Support it from underneath with objects of your choosing, that are hidden from the view of the camera. If you Google "Product Photography" you'll find good tips that relate to gun photography. |
|
|
|
[#10]
Depends what you want to achieve. It easiest with an old white bedsheet or backdrop material . Easy to get infinite background look . The trick is if you have a spare flash you hit the backdrop and overexpose so you don't see wrinkles and shadows
Any cheap flash capable of slave firing works. You can buy bulbs for $20 at B&H http://www.bhphotovideo.com/c/product/878203-REG/Impact_sf_ae56_45W_AC_Master_Slave_Flash.html You may or may not like that look. See example below. Backdrop is dirty old sheet that is on the wall and droops down in a curve ( so you don't see corner ) . There has been no post done other than crop. It would be super easy to make the white a bit whiter Alternative is to take pic outside with background relatively far away and use hypersync with your speedlight to kill the ambient down . I will upload pics later for examples Don't think too much about lenses ....you don't really need macro since working distance is within most lenses min focus distance AS far as setting go, you may not realize it but when you are using the speed light , your Nikons max sync speed might is 1/60 . You can find it in the E1 . I leave mine on max setting since I often need to use SS over 1/200 If you want to press the easy button, then choose A mode and F11 you can't go wrong for product photography . For the most part, your gun parts and pics should all be in focus You can let the camera and TTL choose SS and flash output IF you want to shoot manual, just keep in mind that even in M in your Nikon, the ISO is still auto iso . You need to turn that off, because your cameras metering is going to ramp the crap out of the ISO Your F stop is more important than your SS because it will determine your DOF of your gun pic. The reason the SS is not as important is for this kind of photography, most of the light comes from the flash and therefore will freeze any of your motion ( the flash duration is very short ) I have a product photography setup and I never use a tripod I run M mode, F11 , ISO 200 and SS of anywhere from 80 to 250 . I have to run the higher SS to kill some of the light from my studio strobes ( they are turned almost all the way down ! ) With speedlight, even camera in M mode , the TTL will adjust for proper exposure The only time you run out of flash power typically is when you are trying to hypersync the flash (SS well over 1/1000 ) the poor flash has to hammer on hard 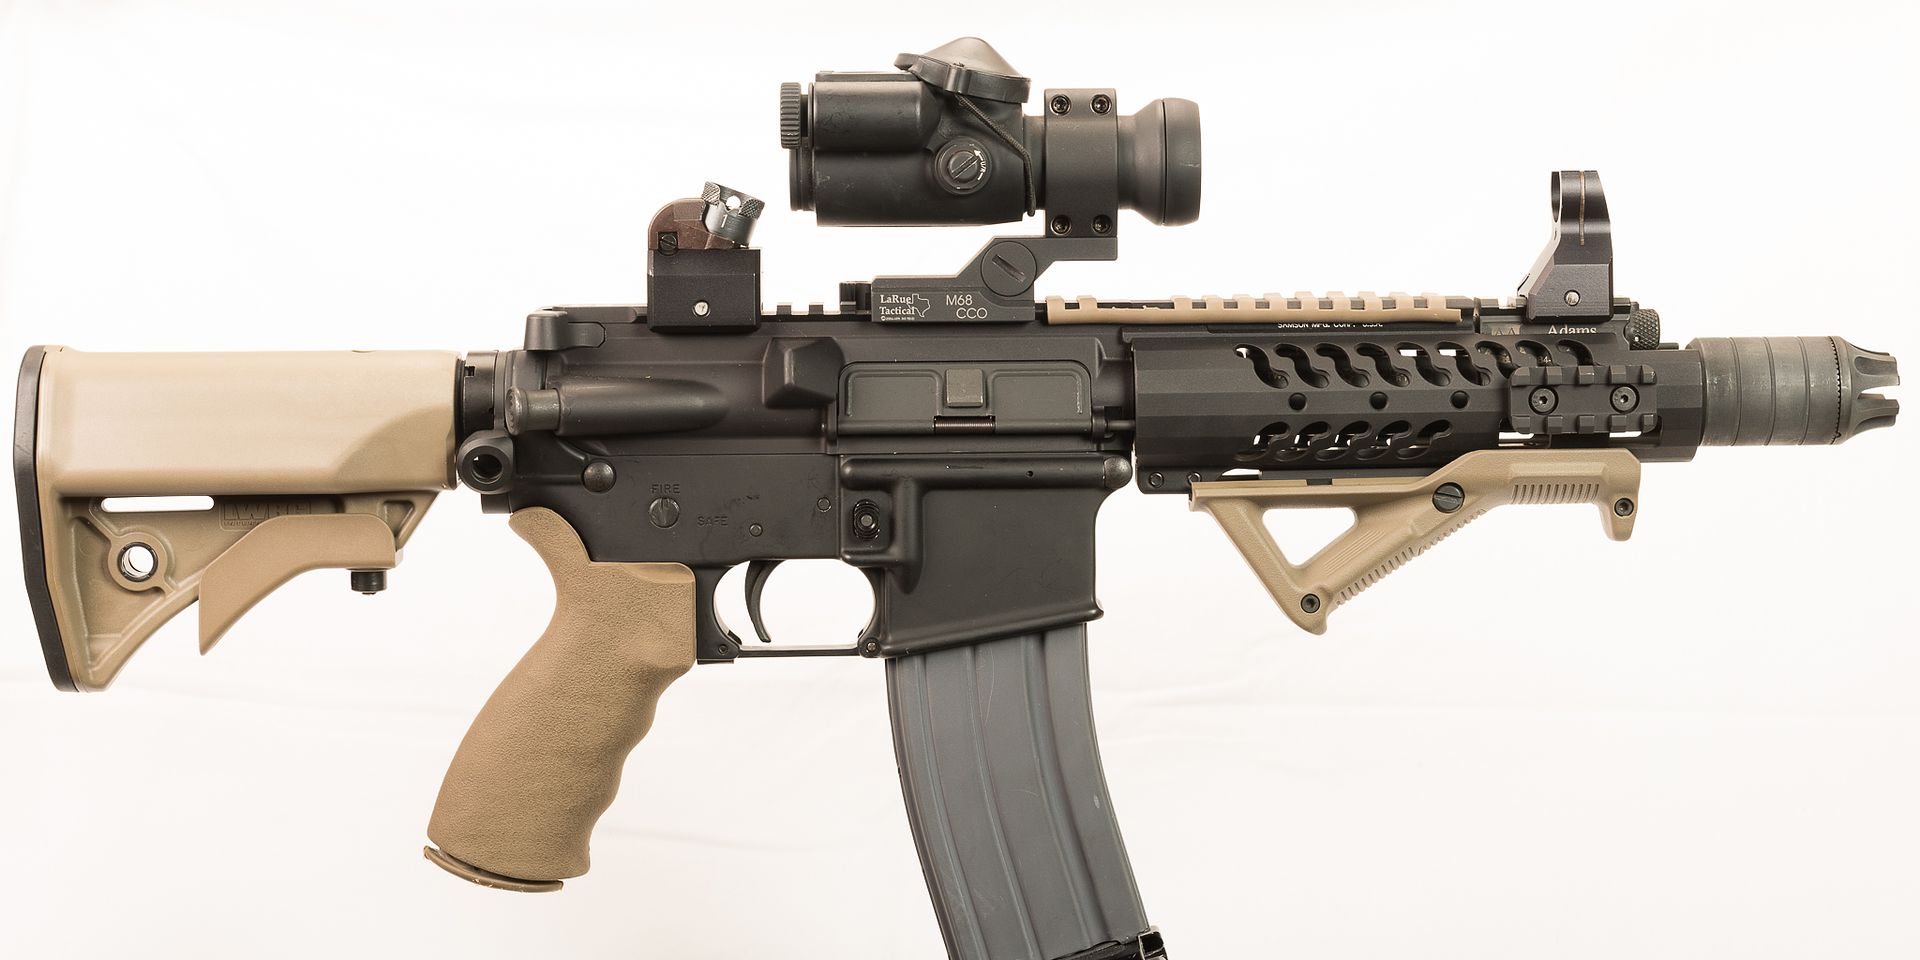
If you want to get fancy , a cheap slave with a gel can create accent lights Pic below is sitting on a frosted glass cutting board . Gel flash ( old nikon SB28 ) is underneath the board Not really my look but friend wanted it so 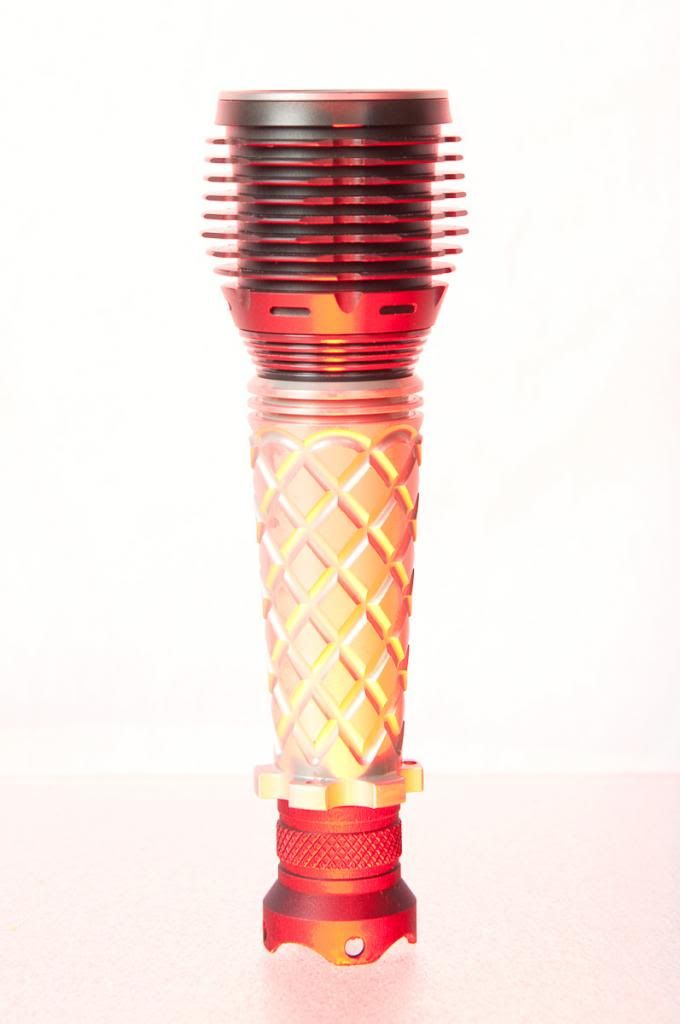
|
|
|
|
[#11]
|
|
|
|
[#12]
I am more than ok with my pics looking like this one. Just a simple, straight forward pic of the gun, showing the details without getting too bogged down in the minutiae, IMO. Some of the suggestions, gentlemen, are WAY over my head in terms of technical advice. PLEASE keep it simple, ok? |
|
|
|
[#13]
Like someone said earlier, it depends on what you want. I used a $34 plastic background on a hard floor for this:

The white background isn't too reflective but bounces enough light to wash itself out without over-exposing the photo. They get rolled up when you're done and aren't much bulkier than a collapsed tripod. For this shot, my tripod was fairly well extended, about 4' off the ground, and the center column was cranked over so the camera was shooting down. One speed light was on the camera illuminating the ceiling and two walls while another was shooting into an umbrella on the opposite side to balance out the light. To soften the shadows, you can throw something under your firearm to lift it up off the background. |
|
|
|
[#14]
Quoted:
OP, start with this. Spot Meter on the gun itself, and not the entire scene. Bounce your flash off the ceiling. Post a pic and let's go from there. If you're shooting on M, what's the point in metering at all? You're controlling all aspects of exposure: aperture, shutter, and ISO. Other than to see if you're under or over exposed, metering isn't doing anything. A better choice would be to pick an aperture/shutter/ISO you think might work and then bracket it. Remember, you're controlling depth of field with aperture. |
|
|
|
[#15]
Quoted: If you're shooting on M, what's the point in metering at all? You're controlling all aspects of exposure: aperture, shutter, and ISO. Other than to see if you're under or over exposed, metering isn't doing anything. A better choice would be to pick an aperture/shutter/ISO you think might work and then bracket it. Remember, you're controlling depth of field with aperture. Quoted: If you're shooting on M, what's the point in metering at all? You're controlling all aspects of exposure: aperture, shutter, and ISO. Other than to see if you're under or over exposed, metering isn't doing anything. A better choice would be to pick an aperture/shutter/ISO you think might work and then bracket it. Remember, you're controlling depth of field with aperture. True, I misspoke there. Just shot this and it's straight out of the camera with ZERO post-processing. Manual Mode f/11 ISO 200 Shutter speed 100 Single-point Auto-Focus (set at just above the guns trigger) ETTL metering on the flash, flash aimed at ceiling with no exposure compensation (Auto-mode essentially.) Background is 32"x48" white panel/marker board (available from the hardware store). Gun resting on the thread protector from a 10/22 barrel. Canon 7D, EF 50MM 1.2L, 580EXII light - attached to camera. Tripod & wired shutter release. Shot to RAW & JPEG - this is the JPEG version. Hosted at Photobucket - use something else. It could be tweaked and improved with post-processing but I don't know what the OP has available for that. Point is BobCole, if the basic look works for you, it was done with the above settings, that you could easily replicate, and I hope this helps you. eta: The muzzle area looks a bit fuzzy to me. It would probably have been better to back off just a bit, then crop the excess, to give a sharper pic. I presume you at least have software available for that. 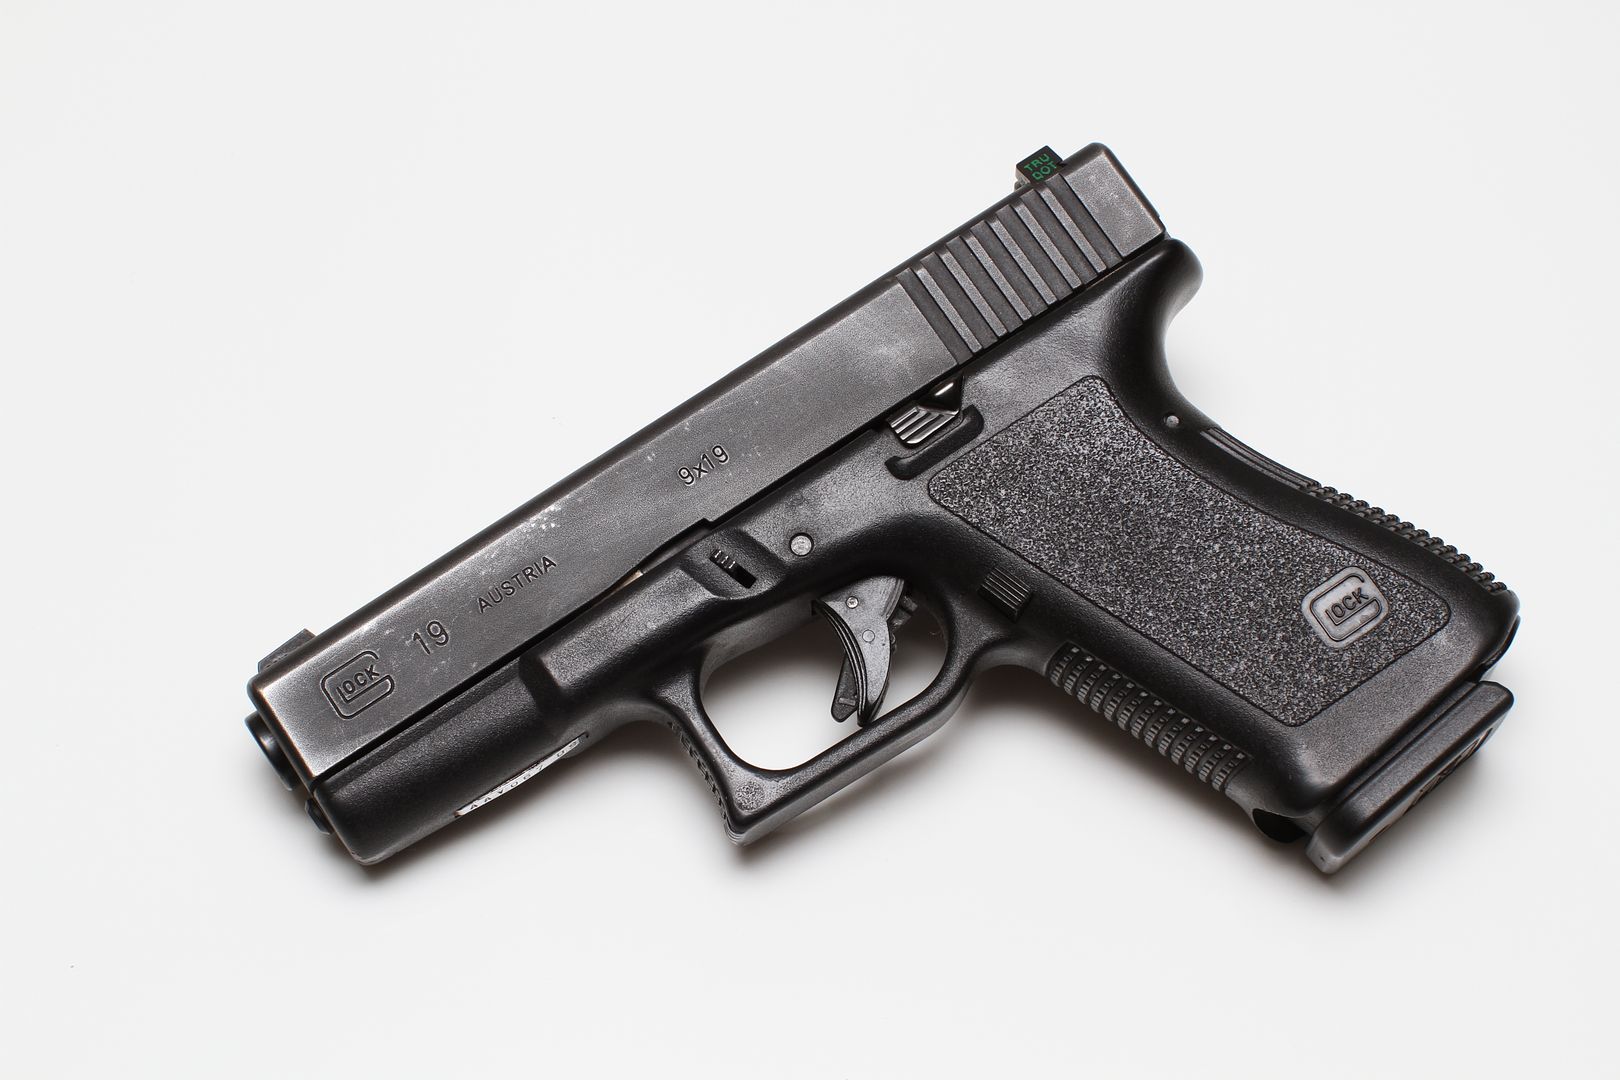 |
|
|
|
[#16]
Quoted:
Like someone said earlier, it depends on what you want. I used a $34 plastic background on a hard floor for this: http://s28.postimg.org/6ficuerzx/DSC_0229.jpg The white background isn't too reflective but bounces enough light to wash itself out without over-exposing the photo. They get rolled up when you're done and aren't much bulkier than a collapsed tripod. For this shot, my tripod was fairly well extended, about 4' off the ground, and the center column was cranked over so the camera was shooting down. One speed light was on the camera illuminating the ceiling and two walls while another was shooting into an umbrella on the opposite side to balance out the light. To soften the shadows, you can throw something under your firearm to lift it up off the background. Nice looking pic, IMO. Isn't that in B&W though? I'm wanting to shoot color for sure, perhaps dupe it in B&W. |
|
|
|
[#17]
Quoted:
Nice looking pic, IMO. Isn't that in B&W though? I'm wanting to shoot color for sure, perhaps dupe it in B&W. Quoted:
Quoted:
Like someone said earlier, it depends on what you want. I used a $34 plastic background on a hard floor for this: http://s28.postimg.org/6ficuerzx/DSC_0229.jpg The white background isn't too reflective but bounces enough light to wash itself out without over-exposing the photo. They get rolled up when you're done and aren't much bulkier than a collapsed tripod. For this shot, my tripod was fairly well extended, about 4' off the ground, and the center column was cranked over so the camera was shooting down. One speed light was on the camera illuminating the ceiling and two walls while another was shooting into an umbrella on the opposite side to balance out the light. To soften the shadows, you can throw something under your firearm to lift it up off the background. Nice looking pic, IMO. Isn't that in B&W though? I'm wanting to shoot color for sure, perhaps dupe it in B&W. Thanks! Its not shot black and white but my editing eliminated the vast majority of any remaining colors casts after white balancing. Color would work just fine, too!.. But all my Tupperware is black :) |
|
|
|
[#18]
Well, off to the camera supply store this week for some sort of white background material.
Thanks to all whom offered opinions, however diverse.............
|
|
|
|
[#19]
White foamboard, available for a couple bucks at Wal Mart, works well.
Here's one of my ghetto setups from years ago, with a D50. 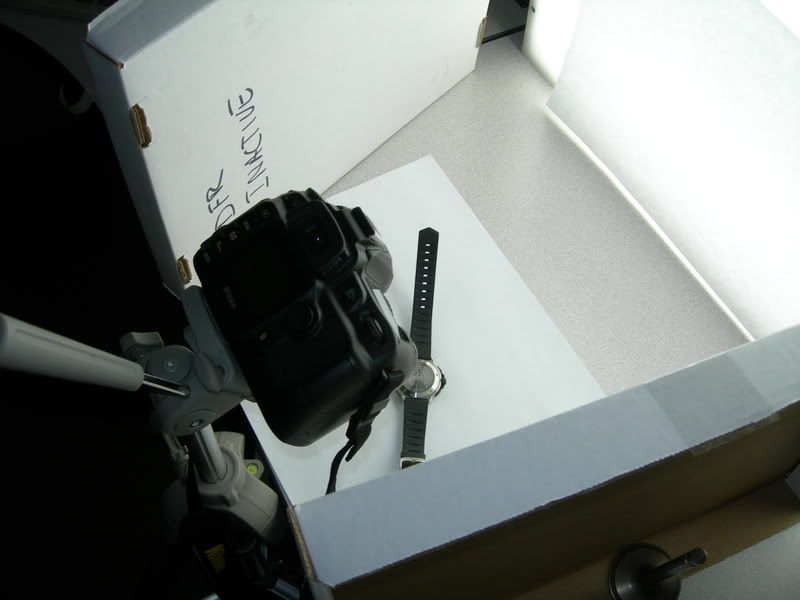
And the result 
|
|
|
|
[#20]
Quoted:
Go about taking pics of your own gun collection, one gun at a time? So, you only have one external strobe? If you're really good with a one-light setup, go knock yourself out. But, multiple lights, used properly, might be called for. If I were in your shoes and wanted to undertake such a project, I'd build a DIY photo tent/box for something like $20, and pick up a few hot lights. Adjust the power of each by moving it closer or farther from it's side of the tent. Do a custom white balance, get your lighting ratios adjusted correctly, and expose properly, and they might just be the best photos you've taken so far. If you want a cheap white background, that's easy, pick up some foam core from somewhere. Even a 4' x 8' sheet should be $15-$20 or so. And since you can get them in black, you can do that, too. Sign shops, art stores, and plastic suppliers will sell you sheets of thin polystyrene pretty reasonably as well. You probably won't have an exact spot on which to meter for final exposure, given a black object on a white background. Meter on the gun, you overexpose, meter on the background, you under expose. But a single test shot and a quick look at the histogram should show you exactly what's going on, and how much to adjust. |
|
|
|
[#21]
Quoted: Like someone said earlier, it depends on what you want. I used a $34 plastic background on a hard floor for this: http://s28.postimg.org/6ficuerzx/DSC_0229.jpg The white background isn't too reflective but bounces enough light to wash itself out without over-exposing the photo. They get rolled up when you're done and aren't much bulkier than a collapsed tripod. For this shot, my tripod was fairly well extended, about 4' off the ground, and the center column was cranked over so the camera was shooting down. One speed light was on the camera illuminating the ceiling and two walls while another was shooting into an umbrella on the opposite side to balance out the light. To soften the shadows, you can throw something under your firearm to lift it up off the background. |
|
|
|
[#22]
Quoted:
So, you only have one external strobe? If you're really good with a one-light setup, go knock yourself out. But, multiple lights, used properly, might be called for. If I were in your shoes and wanted to undertake such a project, I'd build a DIY photo tent/box for something like $20, and pick up a few hot lights. Adjust the power of each by moving it closer or farther from it's side of the tent. Do a custom white balance, get your lighting ratios adjusted correctly, and expose properly, and they might just be the best photos you've taken so far. If you want a cheap white background, that's easy, pick up some foam core from somewhere. Even a 4' x 8' sheet should be $15-$20 or so. And since you can get them in black, you can do that, too. Sign shops, art stores, and plastic suppliers will sell you sheets of thin polystyrene pretty reasonably as well. You probably won't have an exact spot on which to meter for final exposure, given a black object on a white background. Meter on the gun, you overexpose, meter on the background, you under expose. But a single test shot and a quick look at the histogram should show you exactly what's going on, and how much to adjust. Quoted:
Quoted:
Go about taking pics of your own gun collection, one gun at a time? So, you only have one external strobe? If you're really good with a one-light setup, go knock yourself out. But, multiple lights, used properly, might be called for. If I were in your shoes and wanted to undertake such a project, I'd build a DIY photo tent/box for something like $20, and pick up a few hot lights. Adjust the power of each by moving it closer or farther from it's side of the tent. Do a custom white balance, get your lighting ratios adjusted correctly, and expose properly, and they might just be the best photos you've taken so far. If you want a cheap white background, that's easy, pick up some foam core from somewhere. Even a 4' x 8' sheet should be $15-$20 or so. And since you can get them in black, you can do that, too. Sign shops, art stores, and plastic suppliers will sell you sheets of thin polystyrene pretty reasonably as well. You probably won't have an exact spot on which to meter for final exposure, given a black object on a white background. Meter on the gun, you overexpose, meter on the background, you under expose. But a single test shot and a quick look at the histogram should show you exactly what's going on, and how much to adjust. Most of what you suggest is beyond my current abilty. I'm trying to to learn as I go but it's a loooong process. |
|
|
|
[#23]
Quoted:
Well, off to the camera supply store this week for some sort of white background material. Thanks to all whom offered opinions, however diverse............. Skip the camera store and you can save money. Items for photography are often X times more than the same thing marketed for another purpose. You can get most of what you need at a hardware store. For those looking for a nice background for gun photography, I just picked up a couple of 4x8 plastic bathroom panels at Home Depot for $19.98. These are better than corrugated plastic or paper based materials as it's plastic, won't have any creases, wipes clean, and can easily be bent or curled up for seamless backdrop or storage. It's tougher and thicker than most other materials, big enough for most firearms shoots, and can be cut down for smaller sets. Surface is matte white, not glossy so you get a nice even tone. Can't beat the price. If you want reflections, get a piece of acrylic while you're there, and put it under the product. They also have black and white coroplast (corrugate plastic) for fill panels and flags and they even have the clear stuff which you can use to shoot light through. Get a few pieces of each and with the acrylic, roll of white duct tape, and background you can have a very capable set of tools for less than $50. |
|
|
|
[#24]
Quoted:
Skip the camera store and you can save money. Items for photography are often X times more than the same thing marketed for another purpose. You can get most of what you need at a hardware store. For those looking for a nice background for gun photography, I just picked up a couple of 4x8 plastic bathroom panels at Home Depot for $19.98. These are better than corrugated plastic or paper based materials as it's plastic, won't have any creases, wipes clean, and can easily be bent or curled up for seamless backdrop or storage. It's tougher and thicker than most other materials, big enough for most firearms shoots, and can be cut down for smaller sets. Surface is matte white, not glossy so you get a nice even tone. Can't beat the price. If you want reflections, get a piece of acrylic while you're there, and put it under the product. They also have black and white coroplast (corrugate plastic) for fill panels and flags and they even have the clear stuff which you can use to shoot light through. Get a few pieces of each and with the acrylic, roll of white duct tape, and background you can have a very capable set of tools for less than $50. Quoted:
Quoted:
Well, off to the camera supply store this week for some sort of white background material. Thanks to all whom offered opinions, however diverse............. Skip the camera store and you can save money. Items for photography are often X times more than the same thing marketed for another purpose. You can get most of what you need at a hardware store. For those looking for a nice background for gun photography, I just picked up a couple of 4x8 plastic bathroom panels at Home Depot for $19.98. These are better than corrugated plastic or paper based materials as it's plastic, won't have any creases, wipes clean, and can easily be bent or curled up for seamless backdrop or storage. It's tougher and thicker than most other materials, big enough for most firearms shoots, and can be cut down for smaller sets. Surface is matte white, not glossy so you get a nice even tone. Can't beat the price. If you want reflections, get a piece of acrylic while you're there, and put it under the product. They also have black and white coroplast (corrugate plastic) for fill panels and flags and they even have the clear stuff which you can use to shoot light through. Get a few pieces of each and with the acrylic, roll of white duct tape, and background you can have a very capable set of tools for less than $50. Thanks for the advice! I'm all about saving $$ when & where I can. |
|
|
|
[#25]
Quoted:
Most of what you suggest is beyond my current abilty. I'm trying to to learn as I go but it's a loooong process. Quoted:
Quoted:
Quoted:
Go about taking pics of your own gun collection, one gun at a time? So, you only have one external strobe? If you're really good with a one-light setup, go knock yourself out. But, multiple lights, used properly, might be called for. If I were in your shoes and wanted to undertake such a project, I'd build a DIY photo tent/box for something like $20, and pick up a few hot lights. Adjust the power of each by moving it closer or farther from it's side of the tent. Do a custom white balance, get your lighting ratios adjusted correctly, and expose properly, and they might just be the best photos you've taken so far. If you want a cheap white background, that's easy, pick up some foam core from somewhere. Even a 4' x 8' sheet should be $15-$20 or so. And since you can get them in black, you can do that, too. Sign shops, art stores, and plastic suppliers will sell you sheets of thin polystyrene pretty reasonably as well. You probably won't have an exact spot on which to meter for final exposure, given a black object on a white background. Meter on the gun, you overexpose, meter on the background, you under expose. But a single test shot and a quick look at the histogram should show you exactly what's going on, and how much to adjust. Most of what you suggest is beyond my current abilty. I'm trying to to learn as I go but it's a loooong process. Jumping in late, but I don't think that's beyond your current ability. You build a frame, and cover it in white paper, and set some work lights pointing at it. You can figure out how to set a custom white balance in about two minutes of googling, and getting the exposure down isn't hard. Five minutes (or less), and you should be rolling, and making some darn fine pictures. |
|
|
 Win a FREE Membership!
Sign up for the ARFCOM weekly newsletter and be entered to win a free ARFCOM membership. One new winner* is announced every week!
You will receive an email every Friday morning featuring the latest chatter from the hottest topics, breaking news surrounding legislation, as well as exclusive deals only available to ARFCOM email subscribers.

AR15.COM is the world's largest firearm community and is a gathering place for firearm enthusiasts of all types.
From hunters and military members, to competition shooters and general firearm enthusiasts, we welcome anyone who values and respects the way of the firearm.

Subscribe to our monthly Newsletter to receive firearm news, product discounts from your favorite Industry Partners, and more.
Copyright © 1996-2024 AR15.COM LLC. All Rights Reserved.
Any use of this content without express written consent is prohibited.
AR15.Com reserves the right to overwrite or replace any affiliate, commercial, or monetizable links, posted by users, with our own.


