|
[#1]
There is a great deal of good info on photographing firearms in this thread.
I haven't seen this reference yet, and thought I would add it to the discussion. Excellent instructions of photographing firearms on the 1911 forum: One-light Photography |
|
|
|
[#2]
Here's a redo with the garage door open for some natural light.
I think my camera just sucks 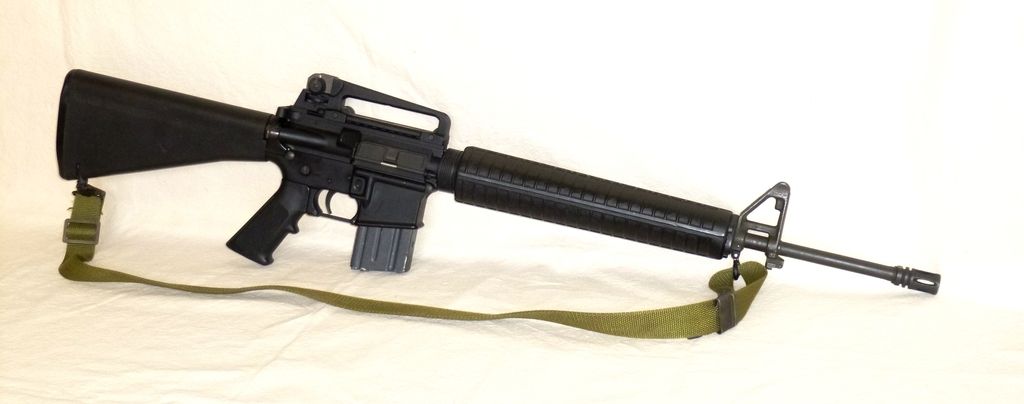 |
|
|
|
[#3]
Quoted:
I did this in my garage tonight with a drop cloth, an overhead fluorescent light, a desklamp, cream colored drop cloth, and a point and shoot camera. Edited in microsoft office 2010. It's pretty bad It is not as bad as it could be. The two big things you have working against you are (1) multiple types of light and (2) editing in MS Office. |
|
|
|
[#4]
Quoted:
Here's a redo with the garage door open for some natural light. I think my camera just sucks It's most likely not the camera. 
You just need to plan out the shoot better: What do you want the background to be? What do you want its color to be? How much of the subject do you want to be in focus? What direction do you want the shadows to be doing in? Do you want the shadows to be seen at all? What type of light do you have available? Are you mixing light types (bad)? When you get to the camera part, what options do you have to shoot in the most manual exposure mode? If the light levels are low, do you have a tripod? |
|
|
|
[#5]
Quoted:
Here's a redo with the garage door open for some natural light. I think my camera just sucks http://i1011.photobucket.com/albums/af236/onehalfmvsquared/hobby/M16A1%20bbl%20with%20M4%20carry%20handle_zpsterjbz6w.jpg By the powers of Photoshop: 
Keep in mind, I had a poor quality jpg to start out with. If I had a raw image, I could have done even more to save it. The highlights along the rifle's length are gone for good. Same with the detail in the darkest shadows of the rifle. I tweaked and fiddled as best as I could though. |
|
|
|
[#6]
That looks good. I guess I should pony up for photoshop! Can the program be purchased used at all?
Update: A different camera, taken outside, edited a bit with Office10 and then some more with Photobucket's editor 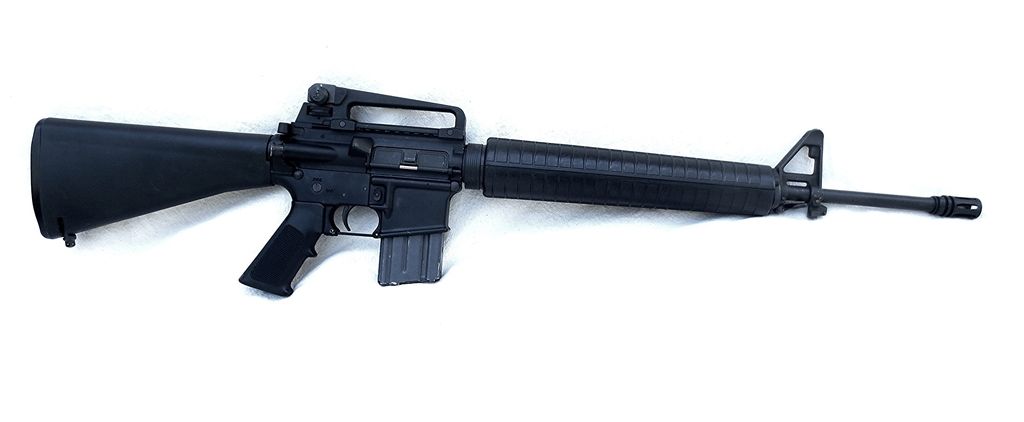 |
|
|
|
[#7]
Quoted:
That looks good. I guess I should pony up for photoshop! Can the program be purchased used at all? Update: A different camera, taken outside, edited a bit with Office10 and then some more with Photobucket's editor http://i1011.photobucket.com/albums/af236/onehalfmvsquared/hobby/IMG_1472_zps11ifszyv.jpg You can buy PS and Lightroom CC for $10 a month. They have gone to (pretty much) all digital downloads at this point, but it does automatically update as soon as they push a change/upgrade. PS can be an absolute time and money saver as you don't have to pull your hair out trying to finish the image in the camera. For a pure white background, light the subject not the background. I personally prefer some subtle shadow as it grounds the image and prevents the "floating in space" look. 
|
|
|
|
[#8]
OK, I'll play guinea-pig with this one shot yesterday. Comments and critique welcome. Whatcha' think? Yea or nay on the trigger-guard flare? Can you look at it and figure out the lighting setup? If anyone is interested, I'll detail that. How would you make it better? 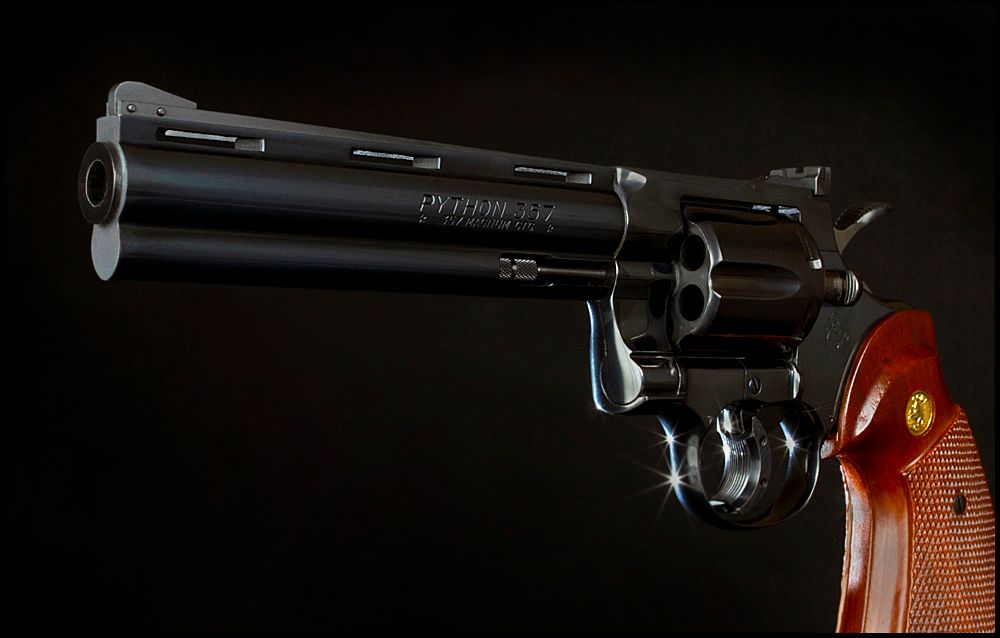 |
|
|
|
[#9]
Quoted:
OK, I'll play guinea-pig with this one shot yesterday. Comments and critique welcome. Whatcha' think? Yea or nay on the trigger-guard flare? Can you look at it and figure out the lighting setup? If anyone is interested, I'll detail that. How would you make it better? http://img.photobucket.com/albums/v503/parshooter/Python6-3_zpsfpw2js6s.jpg Awesome! Would love to know the deets... |
|
|
|
[#10]
3-light shot. The idea was to highlight the vented rib of the barrel. Original thought was to include a full view of the gun on black reflective tile, but I abandoned that and just cropped it a bit. Gun is propped up with a bent coat hanger (cloned out in post - Photoshop), sitting on a small stand, 5 feet in front of black paper. Tape wrapped around the bottom of the hanger, sticky side out, to keep it from slipping on the tile. The butt isn't perfectly flat, which caused the gun to want to tilt over, so I put a bit of spackling compound in a plastic bag, pressed the butt into it and let that dry. Once it dried some, I cut out the shape of the butt and placed it under it, which prevents the gun from tipping over. I started with (trying to) get the exposure of the muzzle correct first - it needed light on it since it would show in the pic. I would take a shot with just that flash on, check it, adjust, and re-shoot. Stand mounted, with the umbrella just above and about a foot away from the muzzle. Turned that off, then adjusted the bare flash sitting on the floor. At first it was pointed at the lens and caused bad lens flare. Moved it closer so that the paper was between the lens and the flash, but the flash could still light the gun. (See pic below.) Main light came from the 580EXII, shot through a white umbrella. Colt Royal Blue can be tough to photograph, since it's so reflective. I ended up holding the flash/umbrella in my hand and tripping the shutter with a cable release. Glance at the shot, move the main flash and try again. Most shots washed out sections of the barrel. In the one above, IIRC, the main flash was 2 or 3 feet directly over the gun. Took 50 shots, then went with the one with the least wash-out. Canon 7D, 24mm 1.4L, 430EX flash (x2), 580-EXII flash, ST-E2 transmitter. ISO 100, f/11, 1/200, manual, RAW, spot-metered on the barrel, ETTL. 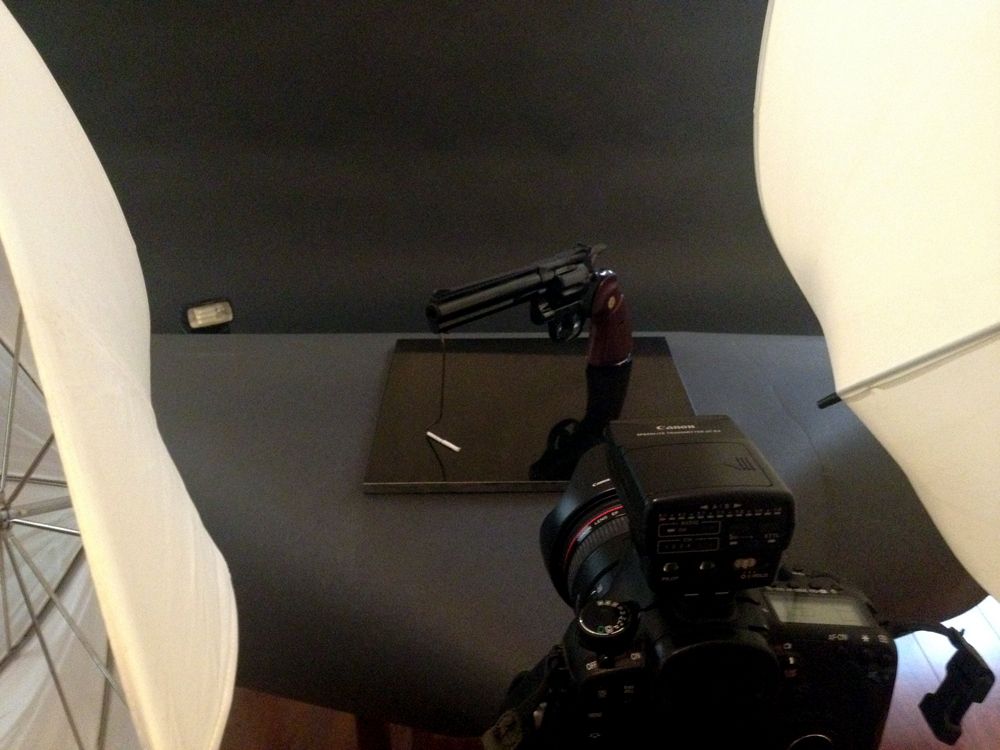 |
|
|
|
[#11]
Not a gun pic, but this shot

was shot with this setup 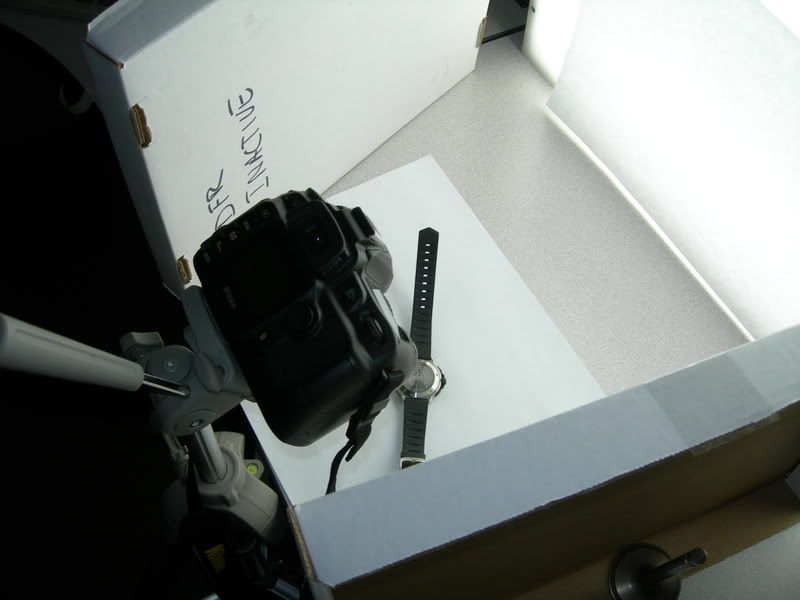
Fluorescent light table and a couple of banker box tops for reflection. This gun pic was shot with a similar setup 
as was this one 
|
|
|
|
[#12]
So I bought a Speedlite and a light stand, probably going to get a second Speedlite this week.
Question: Speedlite(s) through a diffusion tent: any tricks, things to watch out for? Most diffusion tent setups I see online have continuous lighting on them, not strobes... |
|
|
|
[#13]
Quoted:
So I bought a Speedlite and a light stand, probably going to get a second Speedlite this week. Question: Speedlite(s) through a diffusion tent: any tricks, things to watch out for? Most diffusion tent setups I see online have continuous lighting on them, not strobes... The advantage of the constant lights is that it makes things much easier for visualizing the lighting since you can see the shadows and highlights. |
|
|
|
[#14]
Quoted:
The advantage of the constant lights is that it makes things much easier for visualizing the lighting since you can see the shadows and highlights. Quoted:
Quoted:
So I bought a Speedlite and a light stand, probably going to get a second Speedlite this week. Question: Speedlite(s) through a diffusion tent: any tricks, things to watch out for? Most diffusion tent setups I see online have continuous lighting on them, not strobes... The advantage of the constant lights is that it makes things much easier for visualizing the lighting since you can see the shadows and highlights. No argument there. But will I able to make strobes work for this? |
|
|
|
[#15]
Quoted:
No argument there. But will I able to make strobes work for this? Quoted:
Quoted:
Quoted:
So I bought a Speedlite and a light stand, probably going to get a second Speedlite this week. Question: Speedlite(s) through a diffusion tent: any tricks, things to watch out for? Most diffusion tent setups I see online have continuous lighting on them, not strobes... The advantage of the constant lights is that it makes things much easier for visualizing the lighting since you can see the shadows and highlights. No argument there. But will I able to make strobes work for this? Strobes work pretty much the same as far as the end result is concerned. |
|
|
 Win a FREE Membership!
Sign up for the ARFCOM weekly newsletter and be entered to win a free ARFCOM membership. One new winner* is announced every week!
You will receive an email every Friday morning featuring the latest chatter from the hottest topics, breaking news surrounding legislation, as well as exclusive deals only available to ARFCOM email subscribers.

AR15.COM is the world's largest firearm community and is a gathering place for firearm enthusiasts of all types.
From hunters and military members, to competition shooters and general firearm enthusiasts, we welcome anyone who values and respects the way of the firearm.

Subscribe to our monthly Newsletter to receive firearm news, product discounts from your favorite Industry Partners, and more.
Copyright © 1996-2024 AR15.COM LLC. All Rights Reserved.
Any use of this content without express written consent is prohibited.
AR15.Com reserves the right to overwrite or replace any affiliate, commercial, or monetizable links, posted by users, with our own.


