|
Posted: 1/13/2014 4:16:13 AM EDT
The same question comes up every now and then how to install radio/antenna in a vehicle. With all the options available, of course every install would be different in most ways but the reality, not all too different.
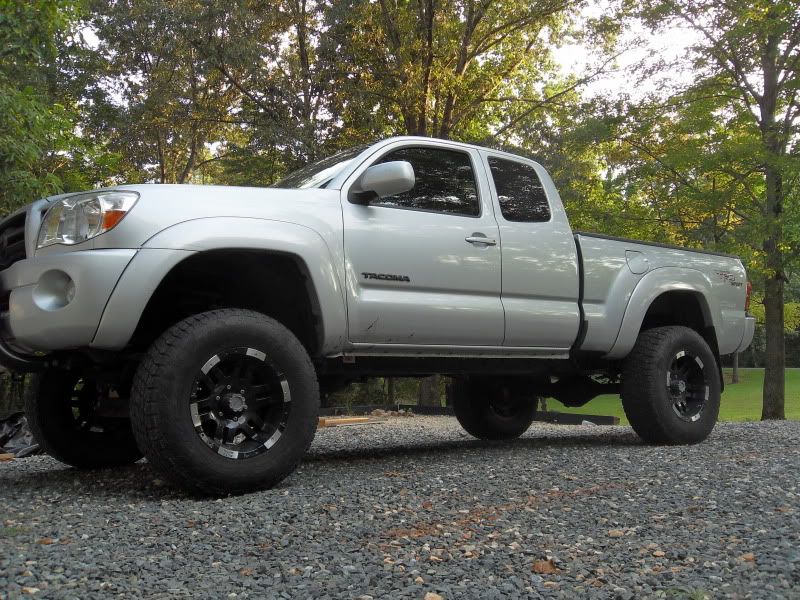
I will post what it was like to install a FT-857D mobile radio with a NMO 2M/70cm antenna on the roof in a brand new Toyota Tacoma double cab truck. I've done dozens of radio installs for personal vehicles and a couple of dozen for work related, although I'm not an install tech. My blank canvas:  And I'm putting this in it:  The only thing not showing is the antenna and NMO mount. For that I'll describe. It's a (I can't remember the brand - Comet or Diamond) 3/8 inch shaft with RG-174. In this install it wouldn't make enough difference going to a thicker cable. RG58 or RG8X would still have been small enough to get it through where I needed it. First thing to do is survey the heck out of your vehicle. That and I took my sweet time. I could have done this whole install in six hours but I took 2 days, mostly surveying and checking panels and access points. In this install I've found that Tacomas are very radio friendly trucks. My goal is to drill as few holes as possible and holes are drilled for antennas, mount radio, mount control head, mike mount, speaker, power access through firewall, and sometimes antenna cable. I figure out what are "sacrificial" parts if I wanted to restore those drilled parts or how easy it would be just to plug it. Since it's a new truck, I know how some are "chicken" to drill a NMO hole on the roof. I did contamplate a fender mount but I've drilled roofs before and either I've just plugged or capped the old antenna when I sold or traded in the vehicle in the past. It was never an issue. On every radio install I break it down to a 3 part job. 1. First thing I figure out is where the radio will go. In this case, as typical in new radios I have a detachable head. This can make it simple or complicate things. You will have to figure out where to mount it w/o interfering with air bags, and that I can read it safely as I go down the road. I live in AZ so sun exposure is a concern. But remember, even though manuals bring it to your attention, mobile radios are designed to be installed in a vehicle. And vehicles are exposed to heat and cold. Just as this Tacoma's navigation-touch screen entertainment center is as exposed to heat and cold, that Yaesu will hack it. So if I constantly leave it out in the heat, maybe in 3 to 5 years it'll fade it. I haven't had one radio crap out die to leaving it in the vehicle in the heat. They are designed for that purpose and made out of the same materials are vehicle electronics. Worse case scenario, I just cover my radio with a towel if parked in the sun. Now for a detachable radio control, this one part makes it a two part project. 2. Antenna install. This is always the typical question. For performance the best place to mount it is smack dab in the middle of the roof. A steel roof. And it's the hardest place to do so. Concern issues are OMG, a hole in the roof?, garage clearances, roof racks, fiberglass or no real roof (Jeeps), ect. Of course other options are fender mount, door or trunk lip, truck bed, tow hitch, covert antenna (Am/FM) ect. In my case, even if i lift the Taco, garage clearances won't be an issue. And since this will have second antenna (HF) I wanted my VHF/UHF out of the way. That and it's the shorty dual bander and it always does great on the roof. 3. Power to radio. This can be a pain in the ass project or simple as pie. The Taco makes this almost a snap. The usual challenge when battery typically mounted in the engine compartment, is getting that cable through the firewall. This is where the Taco has two firewall cab access holes with easy to remove plugs. That and the plugs themselves are easily modifiable to use as a grommet. Some vehicles have batteries mounted in the trunk. These are also a snap if the radio body is mounted in the trunk. The PITA ones are sedans with battery up front and those where it has their own "special" compartment some where generally f'ed up location. Many hams, like I do, go directly to battery. I wire up just the positive to battery and the negative gets grounded near the radio and no, I don't fuse the negative. I've never seen where running an extra fuse on the negative has ever helped "save" a radio. That and not one vehicle electronic component or device ever had a negative fused. All Motorola radios I've installed had the one very long fused positive power cable, and the short non-fused ground cable. Your one cable to power is sufficient. Since I won't need to punch a hole in the firewall, I will say to those who do, be sure to dress up the hole on both sides. I use a chanfer tool used for reloading. And I always use a grommet or worse case scenario, wrap duct tape on the cable and fit to size. That and have a fuse right near the battery terminal. I have seen where a power cable welded itself to the firewall and the battery caught fire and melted to the point it finally failed due to a shitty firewall hole. Almost torched the 1 year old vehicle. Good thing he had an extinguisher. And it was done by a professional install shop! Continued..... |
|
|
|
[#1]
I first started with radio mount location. Trucks are easy as they have the "default" behind the seat location. We will see later as heat may be an issue at a later time because these compartments are sealed. I may have to cut vent holes if it's and issue, worse case a small fan. 99% of the time it won't be an issue. Other truck or car options are under the seat. That would involve removing the seat and I'm not comfortable with dirt/dust exposure and moving seats. Forget it if you have power seats.
 Fitted radio to panel. I made sure the radio mounted will have enough room to move cables around AND THAT YOU CAN CLOSE THE SEAT!!!! Didn't happen here, but I have had the experience. This is what it looks like with the bracket and power/antenna/acc cables hole.  If removing a panel is not an option then by all means drill, but before you drill CHECK WHAT IS BEHIND THE DRILL HOLE!! I can't say that enough. Vehicles have a ton of electrical wires and now issues with SRS air bags. The last thing you need to be surprised with is that you punched a hole through a pressurized bottle. You'll know it when you hit that one. |
|
|
|
[#2]
How's RF noise in your truck? Mine is a 2010 model and puts out S9+10 pulsing noise. I've tried everything except rewiring fuel injectors with shielded wire. The noise is definitely caused by fuel injectors circuit. I currently use an IC-7000. Noise blanker kind if kills the noise but it kills the receiver front end with it. I hear terrible splatters from signals as far as 20 KC away with the NB on.
|
|
|
|
[#3]
Can you do an Access Cab next since I don't have that compartment that you put the radio in?

|
|
|
|
[#4]
Quoted: Can you do an Access Cab next since I don't have that compartment that you put the radio in? http://i49.photobucket.com/albums/f261/killmoles/IMG_4011-1024_zps86dd08b9.jpg http://forums.radioreference.com/amateur-radio-equipment/201926-radio-installation-question.html I forgot about access cabs. I'd do it for $300 and a round trip expenses paid trip to IA. If it were me still I'd tack it to the back wall if not in the storage compartment box if large enough if you need that space. You still can cram it under the seat cuz I know there is enough room and another option is mount it to the back of the console box. This thread shouldn't be vehicle specific, but they always are. It's a way to show any basic DIY can do it IF they haven't seen it done. Maybe motivate some to get that license, or upgrade and join the club. Are you running a lift? If you are which ones? I see shock reservoirs. More pics to come. |
|
|
|
[#5]
Quoted:
Can you do an Access Cab next since I don't have that compartment that you put the radio in? <a href="http://s49.photobucket.com/user/killmoles/media/IMG_4011-1024_zps86dd08b9.jpg.html" target="_blank">http://i49.photobucket.com/albums/f261/killmoles/IMG_4011-1024_zps86dd08b9.jpg</a> My truck is like yours, except it's a 4 cyl and a base model (80 mile commute daily). I put my IC7000 under driver's seat. There is plenty of space there. |
|
|
|
[#6]
I'm on TacomaWorld as it seems many from Arfcom are. Running an Icon "Stage 3T", basically their Stage 3 but with their tubular UCA's. I've read a few radio install threads but haven't decided what I'll do. Won't do HF and probably just 2 meters, and also CB since a local club requires CB to use their private trails.
|
|
|
|
[#7]
tag for radio mounting on my next truck

|
|
|
|
[#8]
Nice install. I mounted my two radios to plexiglass that was mounted to the rear wall of the cab.
|
|
|
|
[#9]
Awww, ya'll have some cute little trucks.
OP, I'm interested in your HF antenna selection and mount. I got a 857d last week, more for my car than my truck, but I do have a Tarheel 2 laying in the basement and thought about mounting it on the Taco. Good write up and thanks for taking the time for the pictures. Hopefully we will see the rest, including the finished pics of the faceplate mounted on the dash. |
|
|
|
[#10]
I too have a Taco and would like to put a ic-706. If the RF noise is going to be as described, I'd rather not even bother.
|
|
|
|
[#11]
I used an IC-7000 for a bit w/o any problems. I have a '04 double cab.
|
|
|
|
[#12]
Quoted:
How's RF noise in your truck? Mine is a 2010 model and puts out S9+10 pulsing noise. I've tried everything except rewiring fuel injectors with shielded wire. The noise is definitely caused by fuel injectors circuit. I currently use an IC-7000. Noise blanker kind if kills the noise but it kills the receiver front end with it. I hear terrible splatters from signals as far as 20 KC away with the NB on. the noise in my 2002 is from the COP system. i put a ton of ferrites on the spark plug wires, at both ends, and added some at several other places, and knocked the heck out of the COP noise. ar-jedi 


|
|
|
|
[#13]
All right, continuing on....
In these pics I'm showing the single positive power lead from the battery. What you can't see is the 20A blade fuse tucked behind the battery and the 6 gauge (from Motorola) power cable is encased in that flex tube to give it a clean look and a bit of protection. I had to use about a 3 1/2 foot section because the factory cable fell short. I just crimp the crap out of the butt connector. And speaking of splicing, yes I use crimp butt connectors. And I use a quality crimp tool in addition I remove the connectors from their plastic casing and recover the connectors with 2 layers of shrink tubes. The plastic casing never allow for a solid crimp. Why crimp? Because soldering in f'ed up placed suck. I'm wiring up a radio in a truck, not the space shuttle. Not to do a half ass job, but trying to be efficient.  Here it is going through the firewall access. I'm positive Toyota put these in here just for the sole reason for additional electronic peripherals. Very pleased with this! No sharp unpainted edges from drilling. A little trick I had to do here; when I pulled the plug the firewall carpeting covered the hole. I shone a flashlight at the hole, located the light from the inside and punched it through using the end of a file from the inside. Once punched through I left it in place and worked to cable inside from the engine compartment side. It was too tight of a spot to get at it with a razor.  Routing the cable under the thresh hold cover. Easy to do.  Here you see the end result before reinstalling that panel. Check out how I grounded the radio. Toyota was even nice enough to leave a 8mm threaded hole for a ground. I just removed a bit of paint and used a star washer.  After all set and done. Still had to do the antenna and speaker extension at this stage.  |
|
|
|
[#14]
Quoted: Nice install. I mounted my two radios to plexiglass that was mounted to the rear wall of the cab. Quoted: Nice install. I mounted my two radios to plexiglass that was mounted to the rear wall of the cab. Quoted: I'm on TacomaWorld as it seems many from Arfcom are. Running an Icon "Stage 3T", basically their Stage 3 but with their tubular UCA's. I've read a few radio install threads but haven't decided what I'll do. Won't do HF and probably just 2 meters, and also CB since a local club requires CB to use their private trails. Quoted: OP, I'm interested in your HF antenna selection and mount. I got a 857d last week, more for my car than my truck, but I do have a Tarheel 2 laying in the basement and thought about mounting it on the Taco. Good write up and thanks for taking the time for the pictures. Hopefully we will see the rest, including the finished pics of the faceplate mounted on the dash. I will catch up on my install thread, but I already am using MFJ "hamsticks" until I get a a screwdriver such as that Little Tarheel II like you have laying in the basement. It'll be my 1st screwdriver. i was also eyeing the HiQ Scorpion as a potential. I will be using a REP design antenna mount or something I will "copy" to mount it to the cargo tracks in the bed. In the meantime I will use the hamsticks as I fugure out bonding issues and anything that will affect the antenna. So far, I'm not getting any noise issue as i experienced from my Jeep LJ where I had S8-S9 RF noise from COP ignition. And nowhere to put a ferrite. |
|
|
|
[#15]
Quoted: How's RF noise in your truck? Mine is a 2010 model and puts out S9+10 pulsing noise. I've tried everything except rewiring fuel injectors with shielded wire. The noise is definitely caused by fuel injectors circuit. I currently use an IC-7000. Noise blanker kind if kills the noise but it kills the receiver front end with it. I hear terrible splatters from signals as far as 20 KC away with the NB on. |
|
|
|
[#16]
Continuing on...
Microphone mounting; Of course I already routed the mike cable bundled with the control head and speaker extension cable. I routed the mike cable via the accessory tray under the dash. Here to remove the tray, grab a set of balls and pull. BTW, I did my research on Google and Youtube where it covered several posts of disassembling a 2nd gen Tacoma dash. Everytime I pull plastic panels inevitably I break off a clip or plug. nope were broken at this tray.  There is a cavity behind the tray where I cut a notch in the "unseen" plastic with a round file.  I also notched the bottom of the tray. This tray is also a sacrificial part where it's reasonable cheap to replace, but where I'm notching this it will not be noticed in the event I remove the radio.  This is the end result. Instead of a mic clip, I just put the mic in the tray and it stays out of sight except for the cable.  |
|
|
|
[#17]
Mounting the control head;
My philosophy of mounting a mobile radio : Don't mount the dang thing in a place you can't keep your eyes on the road. I've tried them down low, up high on the head liner, and I've come to the conclusion that remote head radios should be mounted up on or near the dash. Period. I mentioned in my OP the concern of sun damage and other issues. And that is these radios, as in all auto electronics, are designed to take car heat. At least for a number of year. I've seen tons of radios and other mobile electronic equipment and I've yet to see one crap out due to direct sunlight. Common sense tells me sunlight will eventually damage it, and 3 things come to mind, A) I parkit in the garage and B) I can always cover the control head. C) I can still remove it. But safety is an issue. Ask yourselves what is a greater concern, slight sun damage to the radio or sacrificial vehicle plastic, or getting in to an accident? Theft is another concern. Still applies, what is the greater threat? A stolen control head, because they'd never have enough time to figure out the rest of the components in a timely manner. Again, I did a lot of research before I started to pull panels and components and there is a shit ton of info on how to take the dash apart so I will skip explaining how to pull the stereo. Here I'm threading from where I intended the radio control to be mounted and back I'm showing how I routed my cable with delicate tabs. I used a Motorola power cable and taped over the control cable. It was easier to bring a cable down from the opening attach and pull up and through than it would have been trying to bring a cable up to the access opening.  Control cable secured>  Here I used a mounting bracket from an old TM-741A I had from, '95. It kida sticks out more than I would like but what the heck.  For the pre-reinstall configuration:  To the final product: Look down to where I have my mic.  |
|
|
|
[#18]
Quoted:
Did you post pics of that install? If so, I think I saw it and I thought it was a very clean install. I would have looked into using plexiglass as a mount if it wasn't for that back seat storage panel. Quoted:
Quoted:
Nice install. I mounted my two radios to plexiglass that was mounted to the rear wall of the cab. Yeah, I've posted it a few times. You have a sweet storage panel. The new Tacos have some nice features I'd like. |
|
|
|
[#19]
Good looking Install

You might want to toss a hat or glass cleaning cloth over the top of the display to keep it cool. The FT-857's LCD's have been known to develop "zebra stripes" after the display unit gets too hot in the sun. http://sv8ym.blogspot.com/2010/10/does-your-ft-857-display-look-like.html I ran an 857 mobile for years, and if I had to park in the sun, I'd toss something over it to keep it in the shade. People always asked, "why didn't you center it up with the car stereo" I went for ergonomics, instead of looks, I wanted to be able to reach the VFO easier. 
You can work some real DX with that setup
I worked T32C on 10m and 12m with that rig and a TARHEEL Now I run a TS-480HX and TMV71A |
|
|
|
[#20]
Quoted: Good looking Install You might want to toss a hat or glass cleaning cloth over the top of the display to keep it cool. The FT-857's LCD's have been known to develop "zebra stripes" after the display unit gets too hot in the sun. http://sv8ym.blogspot.com/2010/10/does-your-ft-857-display-look-like.html I ran an 857 mobile for years, and if I had to park in the sun, I'd toss something over it to keep it in the shade. People always asked, "why didn't you center it up with the car stereo" I went for ergonomics, instead of looks, I wanted to be able to reach the VFO easier. http://img.photobucket.com/albums/v488/derek45/RADIO/857_zpsd439ec57.jpg You can work some real DX with that setup I worked T32C on 10m and 12m with that rig and a TARHEEL Now I run a TS-480HX and TMV71A And roger that on covering the radio. Right now the weather is not hot so no problems. And I park it in the garage. Besides I do carry a towel to cover the radio when out and about but I'm thinking a ball cap would be less attention in addition to a sun screen. If I had a facory radio w/o nav I would have definitely done a single DIN stereo swap and taken advantage of that slot. In fact, I was seriously considering that TS-480HX, but compactability and weighing in VHF/UHF capable beat out a radio with more power, BACKLIT BUTTONS (Get with it Yaesu!) , less menus, and a better performing radio. Who knows I'm still thinking of replacing my Ft897D at the house with the TS-480, or just get one. That and we shall see if I toss in that Motorola XTL5000 VHF I may just go that direction. |
|
|
|
[#21]
The FT-857 is a very capable rig.
I found it difficult for my +40 year old eyes to work with while mobile. but I always got unsolicited reports of good strong audio. the TS-480Hx takes up more real estate on the dash, but I really like it 

Bonding / grounding can make a big difference in some trucks. years ago, I ran a IC-706MkIIg in a Ford Ranger 4x4 V6 NOTHING on that truck was bonded to ground, I tied everything to ground via the frame rails and it helped a lot grounding the tail-pipe and truck bed really helped with the noise. My new truck is a Nissan Frontier 4x4, and I'm amazed how RF quiet it is. |
|
|
|
[#22]
Awright folks. Internet at home took a dump for a few days but now back on line. I'll go over the antenna install.
My antenna of choice for VHF/UHF is a Diamond NR72BNMO for around town and I bring along a NR770HNMO. My NMO mount has the 3/8" shaft with RG-174 and it's going on the roof. I've covered this before with other postings. Some claim that they can mount a NMO on the roof w/o dropping the headliner. I haven't mounted an antenna on all roofs but I've done my share, and all of them I had to drop the headliner. And what I mean by drop, I don't mean all the way, but had to remove enough panels and clips half way around to get one side or corner down. The worse has been Chevrolet Malibu-hole already there-swapping "shark fin" XM antenna for Sti-co Euro covert. For those antennas you have to get this 5/8 inch nut like fastener underneath. No way around it. The easiest was a 90 Ford Bronco and 99 Suburban. And I've heard how the NMO with 3/4 hole is so easy to install from the top, as long as you don't drop it. Still the issue is fishing the cable to the sides. And I've tried, and maybe it's not for me. If you have the expertise, please share. Experiences will vary but I will stay with 3/8" holes for now. Another issue is the 3/4" hole itself and using a hole saw. I absolutely hate hole saws. I love 3/8" NMO. Always a nicer hole, and nicer fit. I did a '07 Dodge truck with a 3/4" hole and that center part of the antenna was weak and lacked support. After a few years that area around the antenna creased a little bit. But a 3/8" hole definitely requires a bottom up install. Almost. A trick I use is drill the hole at 1/2". Fish a 14 to 18 gauge wire from top to bottom. Strip about 1 1/2" on insulation and wrap the copper strands around the 3/8" threaded shaft and bring it up through the hole. There is more than enough real estate around the hole it will still have a secure mount and some room for adjustment when needed. Here are issues with roof installs with new cars with SRS that has made things tougher now:  This roof install, not the hardest except to remove all those panels. The issue here is to ensure whatever cable you are routing goes OVER all SRS components and in between the components and the bottom of the sheet metal roof. The key is to take your time.  Here I used a piece a metal plate directly under my target site. And yes, I've poked one headliner with the drill bit part of a hole saw. So never again.  Next section: The Drill! |
|
|
|
[#23]
Again, not everyone will do it the same, but this is what works for me. I did witnessed a roof install mounted about 1" off center. That person insisted on using a tape measure. And I saw as he measured it several times. I have no idea where it went wrong, but that was enough for me never to do it as such.
I center my antennas as to whatever I can line them up with. But I won't rely with using the rear view mirror mount on the windshield. In my trucks case I went down to the emblem and used the shark fin on the back. I tape a string taunt at both ends:   Then a large 6 point socket to mock up locate where the antenna will go. I center the string right at the points. Of course the string will shift but easily adjusted. I also step away from the truck to "eyeball" all adjustments.  Once comfortable with the location I mark it with a sharpie:  Once marked, I remove the socket and check that is centered. If I see the mark (or not evenly on both sides of the string) I redo the mark. Here you cannot see my mark. And I've never redone one so far.  Drill it, and I left the string where you can re-check it although it's too late to fix it :). At least we know.  Here it is assembled, looking good. (FYI I drilled it at 3/8 and not 1/2. Didn't have to. Had enough roof to access through the dome light. But that 3/8" hole leaves a solid mount, BTW it looks off but it's not. It's the camera angle.  And there she is:  |
|
|
|
[#24]
Quoted:
Again, not everyone will do it the same, but this is what works for me. I did witnessed a roof install mounted about 1" off center. That person insisted on using a tape measure. And I saw as he measured it several times. I have no idea where it went wrong, but that was enough for me never to do it as such. I center my antennas as to whatever I can line them up with. But I won't rely with using the rear view mirror mount on the windshield. In my trucks case I went down to the emblem and used the shark fin on the back. I tape a string taunt at both ends: http://imagizer.imageshack.us/v2/800x600q90/17/j8ey.jpg http://imagizer.imageshack.us/v2/800x600q90/42/b0zz.jpg Then a large 6 point socket to mock up locate where the antenna will go. I center the string right at the points. Of course the string will shift but easily adjusted. I also step away from the truck to "eyeball" all adjustments. http://imagizer.imageshack.us/v2/800x600q90/13/ldd9.jpg Once comfortable with the location I mark it with a sharpie: http://imagizer.imageshack.us/v2/800x600q90/593/m2im.jpg Once marked, I remove the socket and check that is centered. If I see the mark (or not evenly on both sides of the string) I redo the mark. Here you cannot see my mark. And I've never redone one so far. http://imagizer.imageshack.us/v2/800x600q90/30/w0kg.jpg Drill it, and I left the string where you can re-check it although it's too late to fix it :). At least we know. http://imagizer.imageshack.us/v2/800x600q90/842/mcte.jpg Here it is assembled, looking good. (FYI I drilled it at 3/8 and not 1/2. Didn't have to. Had enough roof to access through the dome light. But that 3/8" hole leaves a solid mount, BTW it looks off but it's not. It's the camera angle. http://imagizer.imageshack.us/v2/800x600q90/826/hoo0.jpg And there she is: http://imagizer.imageshack.us/v2/800x600q90/853/6xje.jpg Beautiful work  and I love your centering method. and I love your centering method.
I bought a 3/8" NMO for my car also, already have a little shark fin on the trunk and so I'm going to try to fish it through there and follow that cable all the way into the passenger compartment. Routing is key for me because it's a hardtop convertible. The least amount of muss and fuss (plus, I can cover it back up when I sell it) |
|
|
|
[#25]
Excellent work
Also... I've doing NMO roof mounts for years Never once have I been questioned about it at trade-in time I just cover it with a cheap hamfest NMO cap |
|
|
|
[#26]
Nice work on the installs.
I'm new to ham radios but have 25 years in automotive electronics installations. For the guys having noise issues, I would try making the ground for the radios as short as possible and see if that makes a difference. Clean the paint off the body panel and use a large screw and a serrated washer. I do not understand the train of thought behind the "ham" method of running the ground to the battery in a vehicle, but it seems to be common pratice. I have trouble shot "noise" hundreds of times with audio systems and returning the ground back to the battery never fixed the issue. But as always, YMMV. |
|
|
|
[#27]
Thank you for your detailed install writeup with all your pictures. I have a 2006 access cab Tacoma that I want to install my Icom IC 7000 in and do some mobile work in. Right now I am looking at the Tarhill screwdriver antenna for my antenna. I will post my install on this forum after I get things started. Thank you.
|
|
|
|
[#28]
Hmmm... maybe this wouldn't be so bad after all.
Excellent job! |
|
|
|
[#29]
This post has been incredibly helpful. I'm looking to do two NMO mounts (I think) in the spring, one for CB and one for HAM. Still waiting on the FCC for my call sign.
|
|
|
|
[#30]
Good looking install. I have a taco as well but didn't go the the extent you did OP. I have a radio under each seat with a dual band remote head mounted in the space under the us connector in your photo. The second radio is a public service band vhf with the remote head shoved under the seat and pulled out when needed. I am very concerned with theft so I don't have any thing obvious except the antennas.
|
|
|
|
[#31]
Well I'm now just getting around to posting my near final work, the HF antenna. Nothing fancy here. A plain old SO239 to 3/8 stud adapter on the bent half of a mirror mount and a MFJ Hamstick. I used two factory bolt holes and drilled two holes in the bracket.  This is how I carry my 10 through 40 hamsticks, in my custom made antenna caddy made from PVC tubing, And you also see my NVIS 40 and 80 meter wires. One end has a terminal loop fitting to fit the 3/8 stud and I drape the wire away from the truck over some nearby brush, trees, or saguaro cactus.  It's worked like a charm! Notice my surroundings here. I purposely pick surrounding canyons to try it out. Even did it at a place call Fish Creek, which is a boxed canyon surrounded by 1000 foot straight up canyob walls. I got a station in ABQ from east of Phoenix, some 260 miles away. In this picture I'm chatting with my daughter some 40 miles away on 25 watts. I also have a NVIS wire 6 ft off the ground at home. So it was NVIS to NVIS. 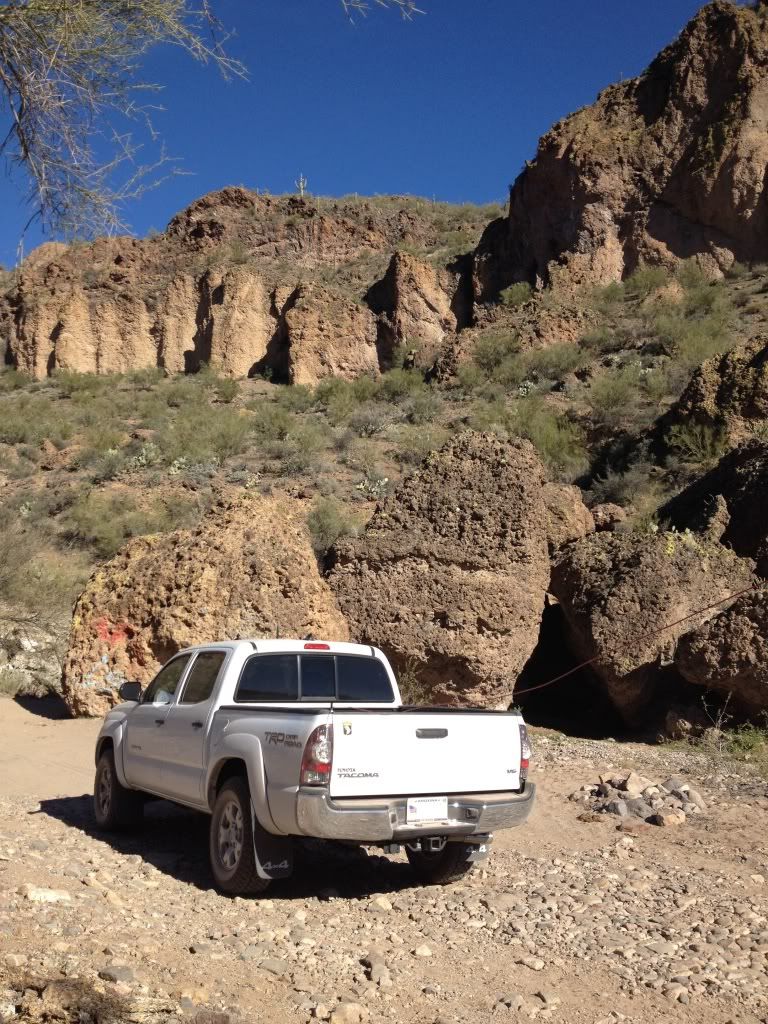 No cell signal, no hitting any repeaters here. Nothing but HF 40 meter NVIS getting out in 20 watts SSB?  I'll be getting a screwdriver here in the near future. Either a LT2 of ATAS-120A. Might take a gander at Hi-Q antennas or maybe later on Steal Telcom 9310. |
|
|
 Win a FREE Membership!
Sign up for the ARFCOM weekly newsletter and be entered to win a free ARFCOM membership. One new winner* is announced every week!
You will receive an email every Friday morning featuring the latest chatter from the hottest topics, breaking news surrounding legislation, as well as exclusive deals only available to ARFCOM email subscribers.

AR15.COM is the world's largest firearm community and is a gathering place for firearm enthusiasts of all types.
From hunters and military members, to competition shooters and general firearm enthusiasts, we welcome anyone who values and respects the way of the firearm.

Subscribe to our monthly Newsletter to receive firearm news, product discounts from your favorite Industry Partners, and more.
Copyright © 1996-2024 AR15.COM LLC. All Rights Reserved.
Any use of this content without express written consent is prohibited.
AR15.Com reserves the right to overwrite or replace any affiliate, commercial, or monetizable links, posted by users, with our own.


