|
Posted: 3/13/2017 3:11:04 PM EDT
The wife has been wanting a dump trailer for a while, so we finally brought one home :).
We had decided on a 7K dual axle, partially because the weighted plates on the F-150 already accommodate the 7K car hauler. We looked at a few of the locally available choices (BigTex, Hawke and PJ) and settled with the PJ 5x10 7K dual axle. Dollars on the three makers we looked at were fairly close (< $600 range), and the PJ had, IMHO, the best combination of features and construction of those we considered. The form factor should work well for how we are going to use it. The relatively low sides are easy to reach over and let even the 1025R dump fully with forks attached to the bucket when used here at the house site. The 5' width is easier for "reach over" and more handy in tight quarters. The system includes a 120v charger you can power with an extension cord via a covered plug port on the side of the equipment box. I plan to add one or two small solar panels to keep the battery topped off. The hydraulic dump mechanism is powered up & down. Both of us are getting tired of having to handle stuff multiple times, so having the option to dump contents is going to be a real treat! 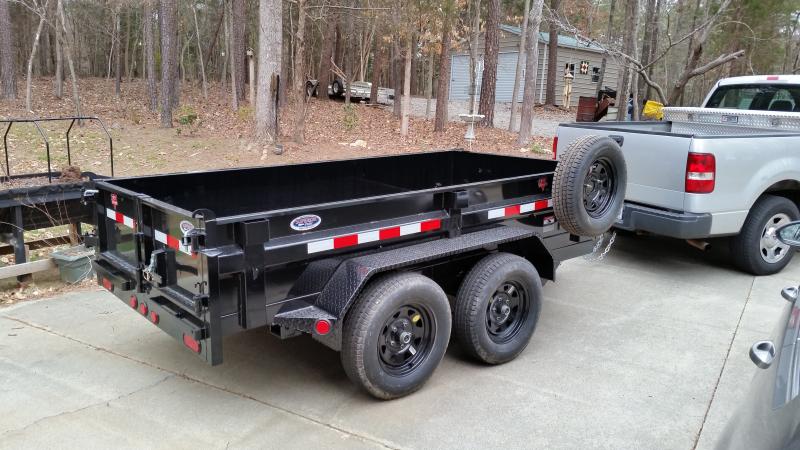
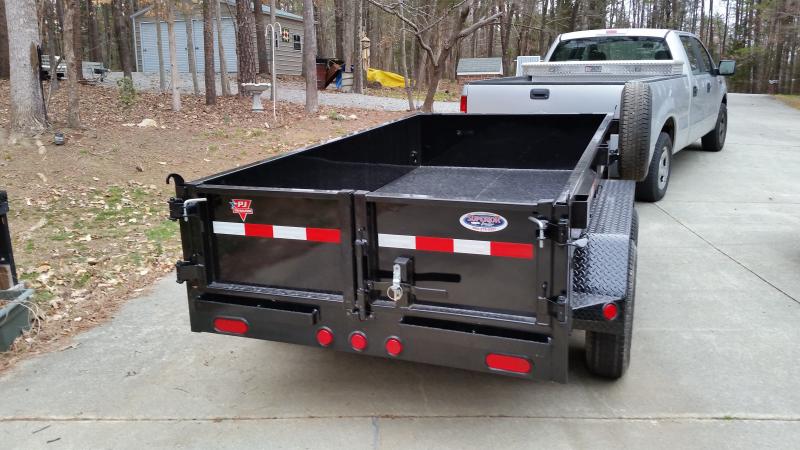

A crank rollup cover is on order, I should be able to get it on in about a week. A big portion of the intended use is for removal of "woods trash" as we continue to clean up our mostly wooded 4.5 acre home site. It will also be good for mulch, gravel, etc. both around the house & the "acreage" down the road (20 acres inherited from the wife's family). Nick |
|
|
|
[#1]
"the wife"
Suuuuuuuuuuuuuuuuuuuuuuuuuuuuuuuuuuuuuuuuuuure Seriously, sounds great! We would love one as well after borrowing one a few years ago. |
|
|
|
[#2]
Well, you certainly know how to wow the ladies...
|
|
|
|
[#3]
I was expecting something else.

|
|
|
|
[#4]
Dump trailers are like safes. They are never big enough. I've got a 16' maxxey tripple axle and it is the handiest damn thing I've ever bought. And still too damn small

Congrats. |
|
|
|
[#5]
I have an old crappy 68 ford dump truck that was abused by the county. It decided to retire. But I nominate your wife for arfcom saint of the week.
|
|
|
|
[#6]
I need one of those in a bad way!
|
|
|
|
[#7]
Very nice! Only thing I might do different is plumb in some hoses so it could be hooked up to the rear remotes on a tractor as well as using the 12V pump.
|
|
|
|
[#8]
I have a BigTex 5' x 10' tandem axle...I would recommend an additional battery if your gonna haul heavy and many loads a day. I hauled all the gravel in on my new property and could get about 7 3 ton loads out of one battery...two batteries I was able to run all day and recharge at night.


|
|
|
|
[#9]
Quoted:
I have a BigTex 5' x 10' tandem axle...I would recommend an additional battery if your gonna haul heavy and many loads a day. I hauled all the gravel in on my new property and could get about 7 3 ton loads out of one battery...two batteries I was able to run all day and recharge at night. do you have your trailer hookup wired to charge the battery while your truck is running? |
|
|
|
[#10]
Quoted:
do you have your trailer hookup wired to charge the battery while your truck is running? Yeah but my gravel yard is close...30 min round trip so it doesnt keep up with the weight that kills the battery. |
|
|
|
[#11]
I used to have an Appalachian 3 axle gooseneck dump trailer. The trailer was super handy, however I think Appalachian makes a cheap trailer. I've since bought an old army truck and put a dump bed on it.
I also have a PJ flatbed.. PJ makes good stuff! I think you'll be very happy with your dump. |
|
|
|
[#12]
We probably won't be doing more than 3 or 4 heavy dumps (i.e. gravel) on any given day, the bulk of use will be wood, brush and some mulch. The box has an outlet for connecting an extension cord to charge when not on the truck & I have parts on order to add a 10 watt solar panel to help maintain the battery while sitting for a long time.
Nick |
|
|
|
[#13]
Quoted:
The wife has been wanting a dump trailer for a while, so we finally brought one home :). We had decided on a 7K dual axle, partially because the weighted plates on the F-150 already accommodate the 7K car hauler. We looked at a few of the locally available choices (BigTex, Hawke and PJ) and settled with the PJ 5x10 7K dual axle. Dollars on the three makers we looked at were fairly close (< $600 range), and the PJ had, IMHO, the best combination of features and construction of those we considered. The form factor should work well for how we are going to use it. The relatively low sides are easy to reach over and let even the 1025R dump fully with forks attached to the bucket when used here at the house site. The 5' width is easier for "reach over" and more handy in tight quarters. The system includes a 120v charger you can power with an extension cord via a covered plug port on the side of the equipment box. I plan to add one or two small solar panels to keep the battery topped off. The hydraulic dump mechanism is powered up & down. Both of us are getting tired of having to handle stuff multiple times, so having the option to dump contents is going to be a real treat! http://www.skhowell.com/images/dump-t-1.jpg http://www.skhowell.com/images/dump-t-2.jpg http://www.skhowell.com/images/dump-t-3.jpg A crank rollup cover is on order, I should be able to get it on in about a week. A big portion of the intended use is for removal of "woods trash" as we continue to clean up our mostly wooded 4.5 acre home site. It will also be good for mulch, gravel, etc. both around the house & the "acreage" down the road (20 acres inherited from the wife's family). Nick SOOOO Jelly. |
|
|
|
[#14]
wrong thread
|
|
|
|
[#15]
Quoted:
do you have your trailer hookup wired to charge the battery while your truck is running? This is the way to go with electric over hydraulic dump trailers |
|
|
|
[#16]
Tagging! I have looked at a few, but not very serious yet. It would be super handy to have.
Very nice op! |
|
|
|
[#17]
Quoted:
This is the way to go with electric over hydraulic dump trailers Anymore almost all trailers of they have a battery have it hooked up to charge from the truck all 7 way plug ins have it |
|
|
|
[#18]
Quoted:
Anymore almost all trailers of they have a battery have it hooked up to charge from the truck all 7 way plug ins have it I was gonna ask that. Would a dump trailer require a different kind of plug to operate? And are there in-cab controls? Or do you get out to make it dump? |
|
|
|
[#19]
Quoted:
I was gonna ask that. Would a dump trailer require a different kind of plug to operate? And are there in-cab controls? Or do you get out to make it dump? ETA: As far as connector, it should be the standard "RV" 7 wire round plug |
|
|
|
[#20]
Quoted:
The one I borrowed had a jog box (the controls) on a cable that was stored in the front "tool box" with the electric/hydro system. No in-cab controls, although that could be wired, but you would need a second electrical connector. ETA: As far as connector, it should be the standard "RV" 7 wire round plug Bingo most of the time they have a wired controller in the job box or just a hydraulic hand lever now with the advancements in stuff I'm sure you could rig a easy wireless system |
|
|
|
[#21]
PJ and Big Tex are owned by the same corporation. Both good trailers. PJ is made in Mexico. Label is around the fender mount area. I haven't heard of the third one you mentioned.
I wouldn't think woods trash would be that heavy. My PJ car hauler has stake pockets for such loads. Dirt and gravel are another story. |
|
|
|
[#22]
The big deal is just having to handle stuff during an unload. A lot of what will be transported is stuff that will be loaded by FEL or backhoe w/thumb (like stumps & 4' sections of cut logs) & unloaded in an area without equipment. We are getting a bit long in the tooth to hump the big stuff more than we have to...
Nick |
|
|
|
[#23]
Can I ask what you paid?
Local guy has what I think is that exact trailer on Craigslist in mint condition. I have been looking at it hard but haven't committed yet. |
|
|
|
[#24]
I have a 14' Load Trail dump trailer, it comes in very handy.
Downside is that I get roped into all kinds of projects from folks wanting to borrow it, but that can be fun, too. |
|
|
|
[#25]
Quoted:
Can I ask what you paid? Local guy has what I think is that exact trailer on Craigslist in mint condition. I have been looking at it hard but haven't committed yet. Got the parts I had ordered in, so I installed the 10 watt solar charging system on the trailer. Panel got placed on the lid. 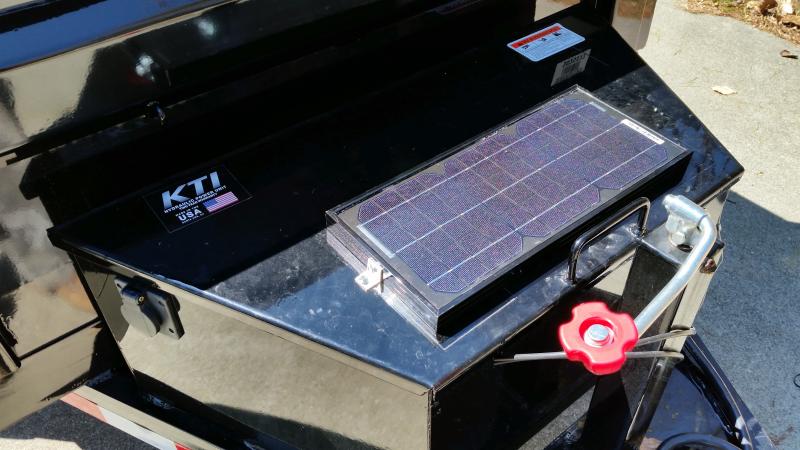
Leads were routed through holes under the panel. 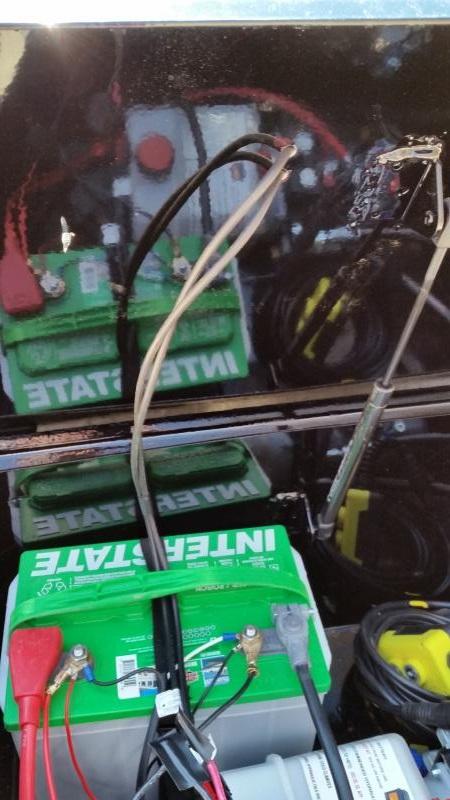
The panel connects to the controller via Anderson Power Pole connectors so it can be disconnected if the controller is going to get disconnected from the battery. 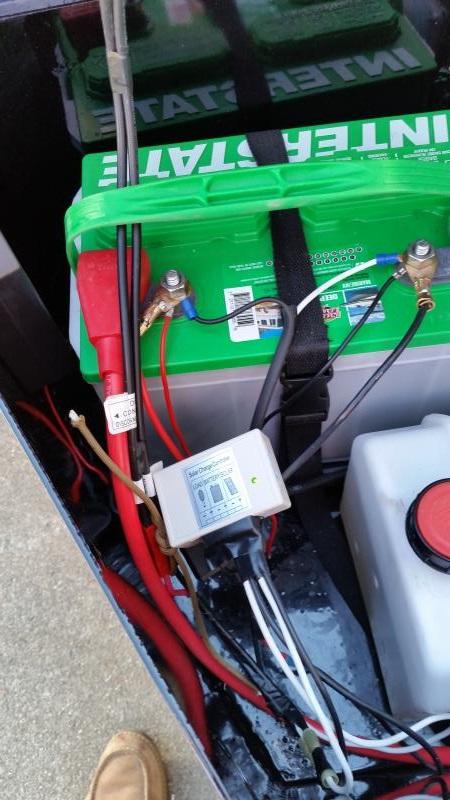
The little green light says things are running :). Nick |
|
|
|
[#26]
holes are already drilled but knowing myself
guaranteed I would do something dumb or even the tiniest bit of debris would fall out of tractor bucket and find that solar panel wouldn't have permanently mounted it so I could store it when in use cheap enough though that I guess it doesn't really matter |
|
|
|
[#27]
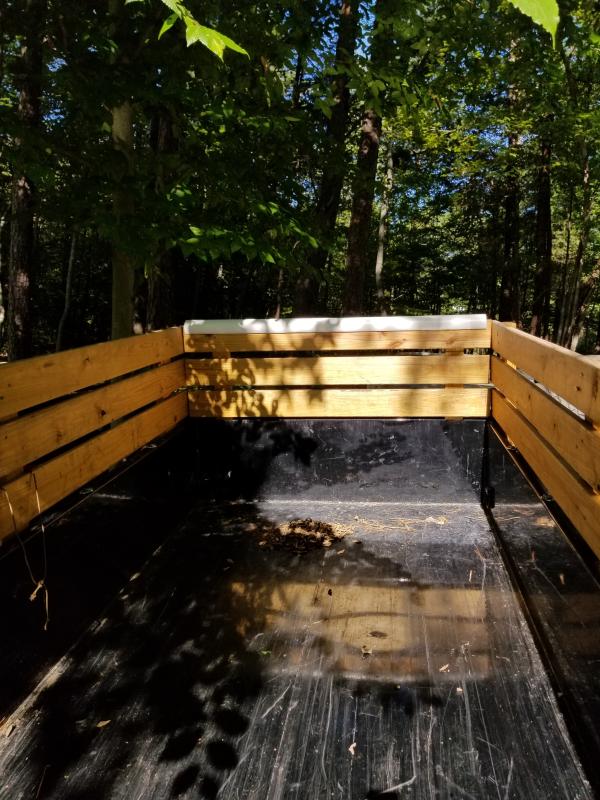
Got the sides up. We have one last chore in WV before transferring the old house property over & that is removing a brush pile that accumulated over the last few years after moving away. The sides should help make for fewer trips to the mulching yard. They will come off if moving gravel, etc.
Not doing anything across the front til I see how the roll up tarp looks mounted. 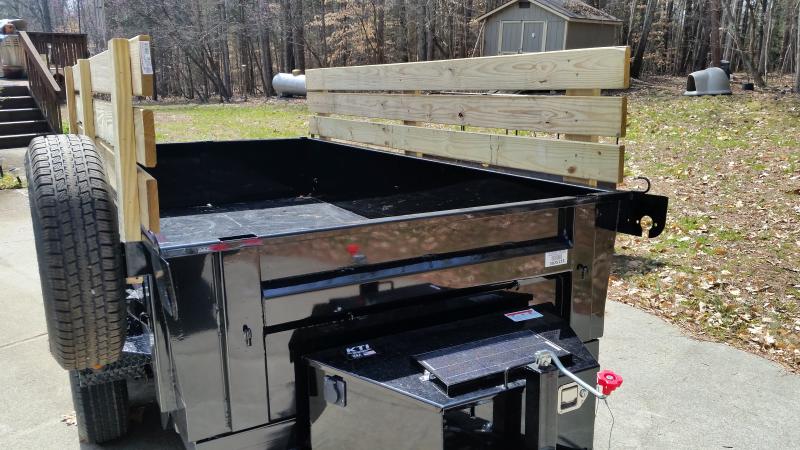
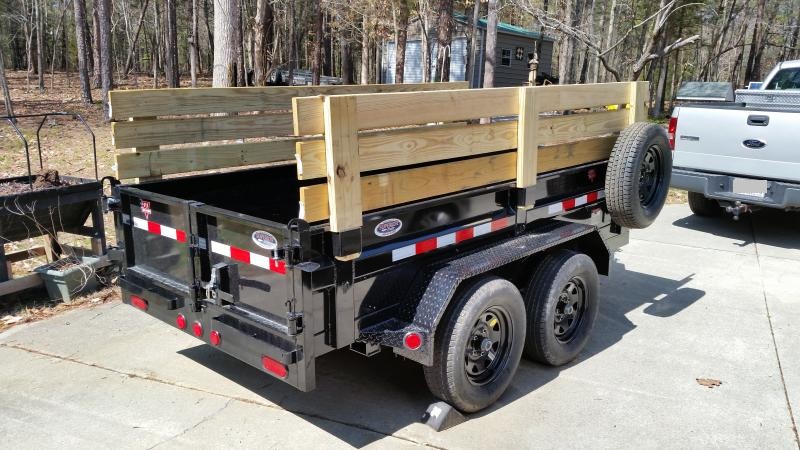
Nick |
|
|
|
[#28]
We finished our last chore in WV and the trailer did real well. The tarp wasn't in yet, so I put a section across the front to match the sides. The trip is 250 miles, one way, and the trailer pulled very nicely. Steep grades made the 2000+ lb. weight evident, but on the flats it had much less resistance than the 6x12 box trailer we had used while moving furniture, etc. The lugs stayed tight and the brakes worked well. On a sand coated intersection (recent snow treatment), I noticed there was one wheel that grabs a little early, but I had already figured on doing a brake adjustment/synchronization after the 500 mile round trip.
It took three trips to the local transfer station/mulch yard, with the trailer loaded to the top of the new sides to finish off the pile (16 cu yards total?) weighing a total of about 1800 lb. Unloading was much easier than loading! Probably 5 minutes total, including backing in & closing up. Nick |
|
|
|
[#29]
Quoted:
Got the sides up. We have one last chore in WV before transferring the old house property over & that is removing a brush pile that accumulated over the last few years after moving away. The sides should help make for fewer trips to the mulching yard. They will come off if moving gravel, etc. Not doing anything across the front til I see how the roll up tarp looks mounted. http://www.skhowell.com/images/dump-t-side-1.jpg http://www.skhowell.com/images/dump-t-side-2.jpg Nick i was just scrolling down to recommend putting sides on it. |
|
|
|
[#30]
Quoted:
"the wife" Suuuuuuuuuuuuuuuuuuuuuuuuuuuuuuuuuuuuuuuuuuure 
|
|
|
|
[#31]
Quoted:
Anymore almost all trailers of they have a battery have it hooked up to charge from the truck all 7 way plug ins have it I have a 12' dump trailer and it is my favorite toy....I mean tool I have. A nice cheap upgrade is a wireless remote. ebay cheap wireless remote Not as needed if most of your loads are hauled off site but for moving stuff around on the property its nice to leave the back doors open and drive back and forth and never have to leave the cab of the truck. Grove |
|
|
|
[#32]
Yeah, I checked our F-150 & the trailer battery is getting charged from the truck system as long as the engine is running (I added a push button digital readout for battery line voltage). We've made a number of additional dump runs associated with cleaning up dead wood from the woods around the house (the wife is cleaning up & "wild scaping" w/ Rhododendron & Azalea) and the trailer really makes the process easier.
Nick |
|
|
|
[#33]
I'll resurrect this thread for an update. The dealer never did come through with a tarp kit, so after a month+ of waiting I went looking for alternative sources. The tarp kits for the PJ are actually a third party (Buyers) product that PJ standardized on for their trailers, with a 60" x 14' kit for the 10' PJ D5 series trailers. The kits go for about $290 + shipping & include all the hardware needed for installation. The PJ factory parts shop was my first try, but after waiting for two weeks for them to re-stock I canceled to go another source.
Fayette Trailers out of PA turned out to have plenty in stock, so I ordered from them & have a 60" x 14' roller tarp kit that should be here Monday. I'll post pics of the install when available. Nick |
|
|
|
[#34]
Got the tarp kit in Monday, but the box was damaged & a few parts missing. I let the supplier know & they sent replacements I got today (Wednesday).
This is Monday's delivery - the kit consists of bearings, a roller bar assembly, crank with sprocket & latch, tarp, anti-sail bar, tie-down, pull cord and mounting hardware. 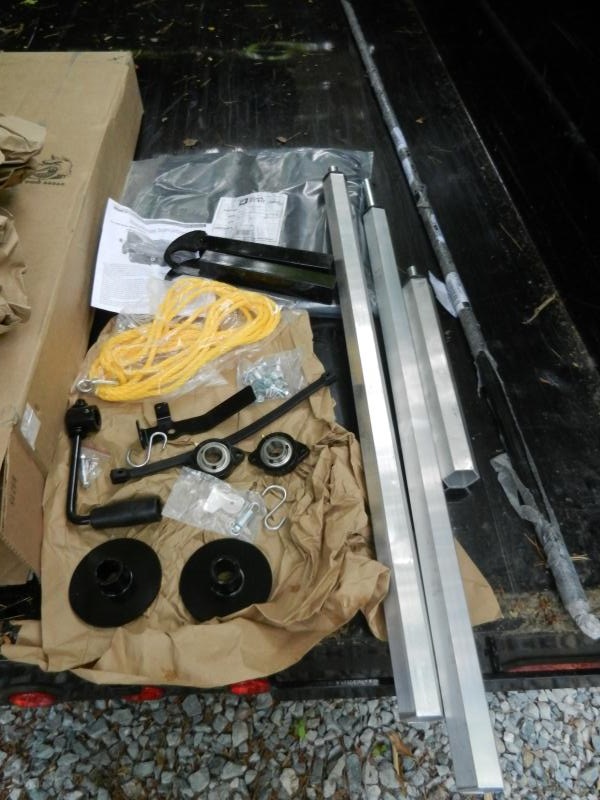
The missing items were a sprocket, one of two rubber tie-downs, and the inner roller bar shaft (they were supposed to send one driver side outer, one passenger side outer & one inner that nests inside the outer bars - they sent one driver & 2 different sized passenger side but no inner). Installation is simplified on a PJ Dump as they include the tarp roller bearing mount on all production. 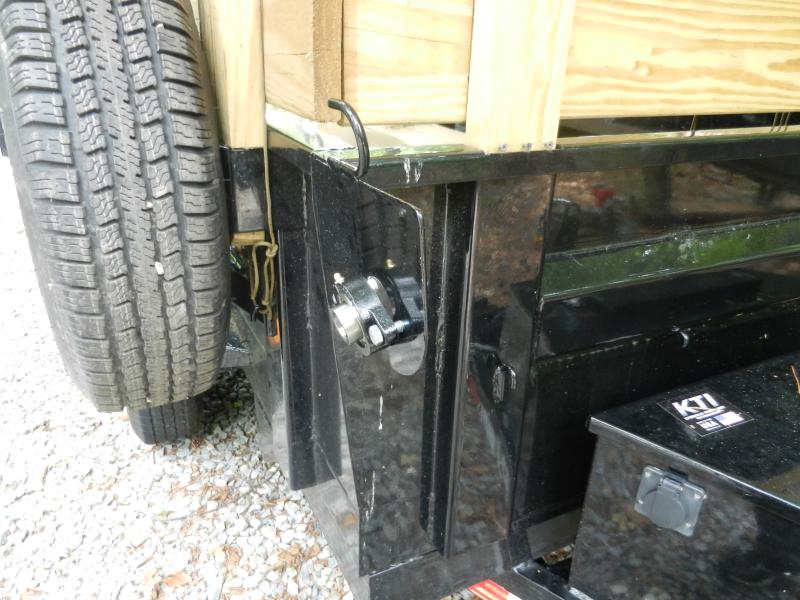
After trimming the passenger side roller piece to fit, the two outer roller pieces are joined by the nesting inner piece then secured with self tapping screws 
The driver side bearing/sprocket/handle assembly gets installed along with the spring loaded latch. Set screws secure bearings & sprocket to the roller shaft. 
(unlatched) 
(latched) ... and finally the handle is on 
The roller gets threaded through the tarp end pocket 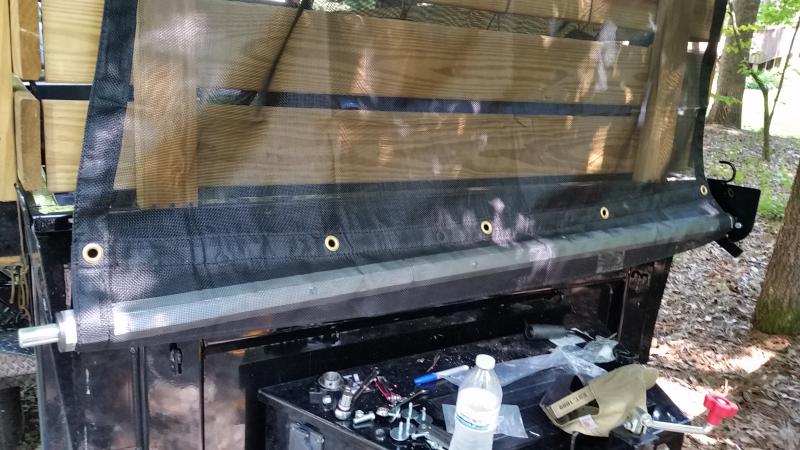
and the passenger side bearing installed. Note the angle between shaft & bearing housing. They are "self-adjusting" bearings that can shift the angle of the race in the mount. 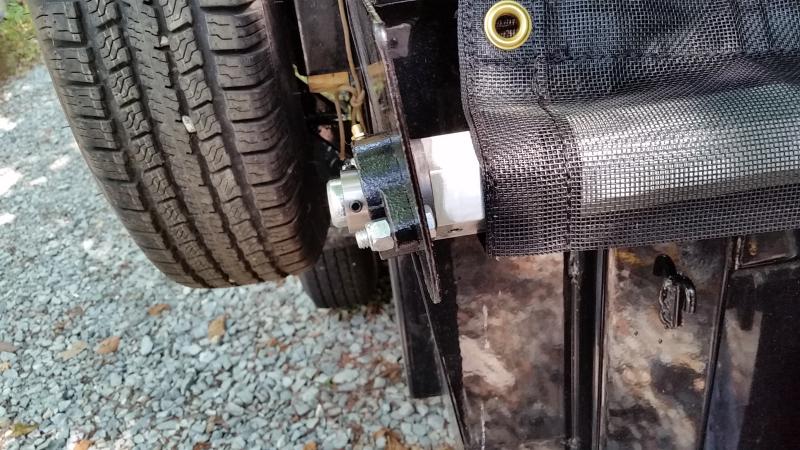
Then more self tapping screws w/fender washers to bind the tarp to the roller. 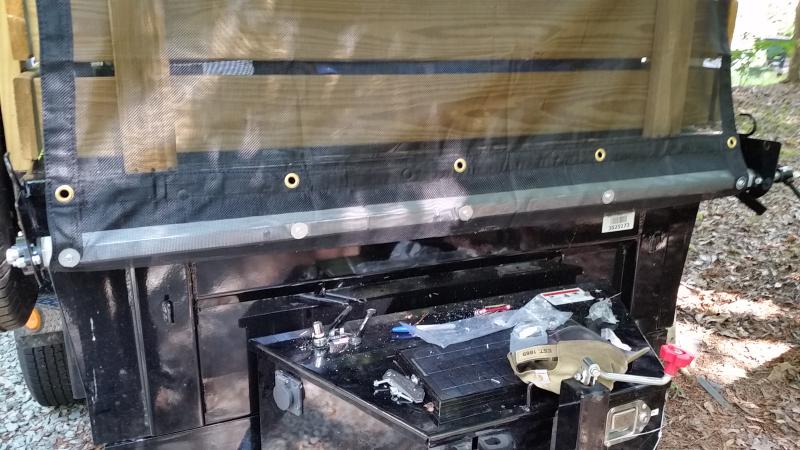
After getting trimmed to length, the anti-sail bar gets threaded through the smaller pocket at the far end of the tarp & caps secured with set screws. 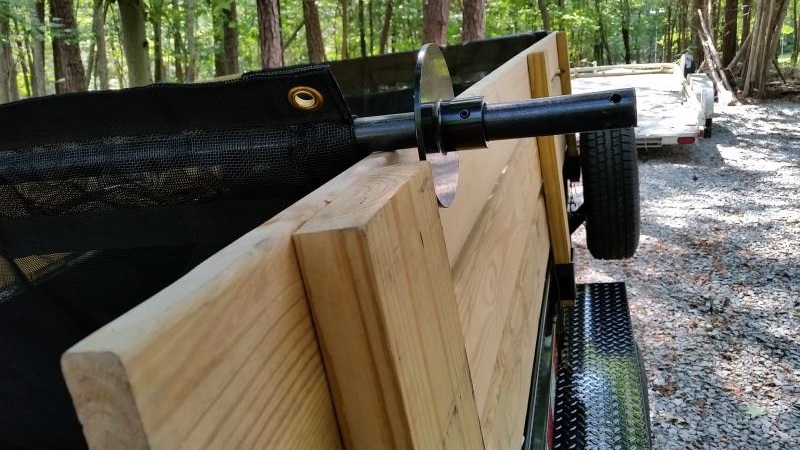
Last step was to wind up the tarp & secure the anti-sail bar in the front storage position. 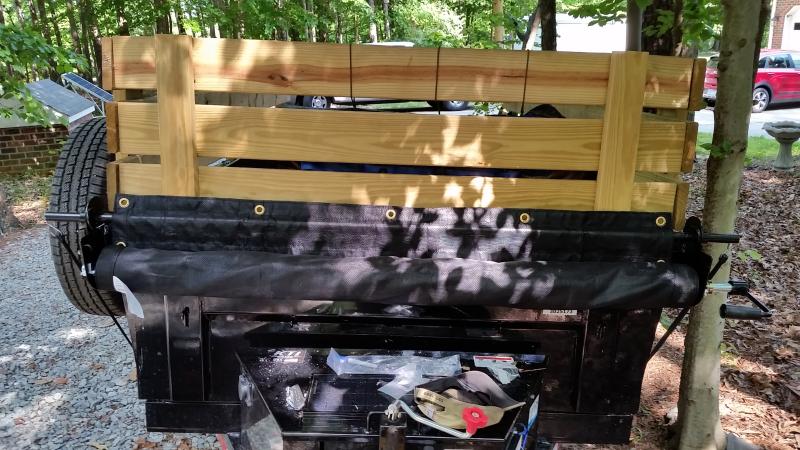
All said, a pretty simple install with a few hand tools & a lot easier to use than a loose tarp. Nick |
|
|
|
[#35]
Quoted:
Got the tarp kit in Monday, but the box was damaged & a few parts missing. I let the supplier know & they sent replacements I got today (Wednesday). This is Monday's delivery - the kit consists of bearings, a roller bar assembly, crank with sprocket & latch, tarp, anti-sail bar, tie-down, pull cord and mounting hardware. http://www.skhowell.com/images/trailer-tarp-05.jpg The missing items were a sprocket, one of two rubber tie-downs, and the inner roller bar shaft (they were supposed to send one driver side outer, one passenger side outer & one inner that nests inside the outer bars - they sent one driver & 2 different sized passenger side but no inner). Installation is simplified on a PJ Dump as they include the tarp roller bearing mount on all production. http://www.skhowell.com/images/trailer-tarp-06.jpg After trimming the passenger side roller piece to fit, the two outer roller pieces are joined by the nesting inner piece then secured with self tapping screws http://www.skhowell.com/images/trailer-tarp-10.jpg The driver side bearing/sprocket/handle assembly gets installed along with the spring loaded latch. Set screws secure bearings & sprocket to the roller shaft. http://www.skhowell.com/images/trailer-tarp-11.jpg (unlatched) http://www.skhowell.com/images/trailer-tarp-12.jpg (latched) ... and finally the handle is on http://www.skhowell.com/images/trailer-tarp-16.jpg The roller gets threaded through the tarp end pocket http://www.skhowell.com/images/trailer-tarp-13.jpg and the passenger side bearing installed. Note the angle between shaft & bearing housing. They are "self-adjusting" bearings that can shift the angle of the race in the mount. http://www.skhowell.com/images/trailer-tarp-14.jpg Then more self tapping screws w/fender washers to bind the tarp to the roller. http://www.skhowell.com/images/trailer-tarp-15.jpg After getting trimmed to length, the anti-sail bar gets threaded through the smaller pocket at the far end of the tarp & caps secured with set screws. http://www.skhowell.com/images/trailer-tarp-17.jpg Last step was to wind up the tarp & secure the anti-sail bar in the front storage position. http://www.skhowell.com/images/trailer-tarp-18.jpg All said, a pretty simple install with a few hand tools & a lot easier to use than a loose tarp. Nick If you end up doing your brake adjustment (or have not already done it) I'd love to see what you do. |
|
|
|
[#36]
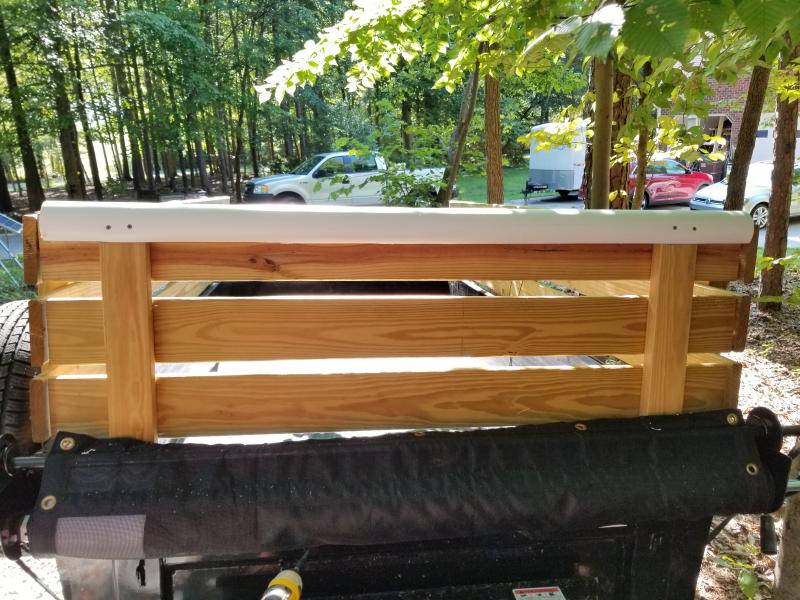
Just an update , the other day we were taking some tree trimmings (piled to the top of the side extensions) to the stump dump & used the roll up tarp to keep small stuff from flying off. As I snugged it into place, I noticed the vertical uprights on the front wall extension were putting stress on the tarp mesh. I had some foam sheets from the solar panel packing materials, so I cut a couple of squares to protect the mesh at those areas.
That was fine for that trip, but I wanted to do something more permanent. I ended up using a 60" length of 3" PVC pipe, cutting a 2 1/2" slot & fitting that over the top edge to serve as a mesh friendly surface when moving or snugging up the tarp. 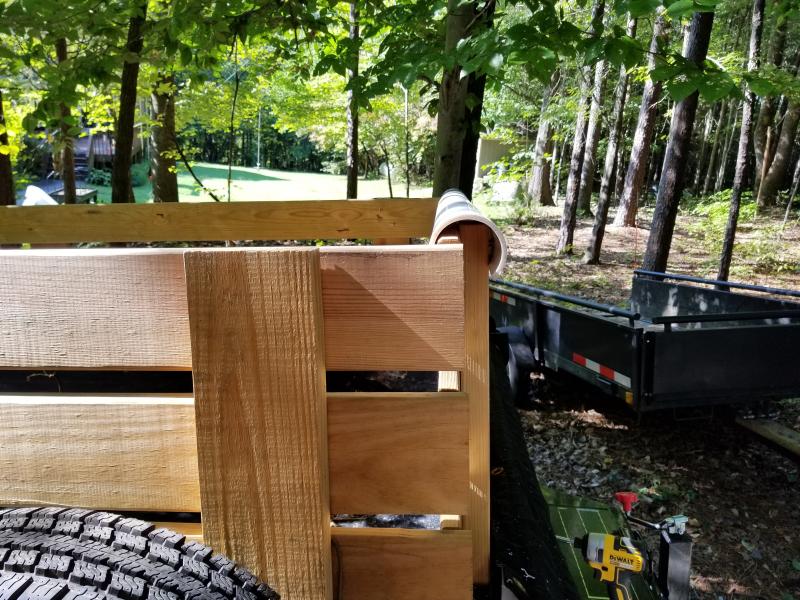
Regarding the brake adjustments, it's done using an adjustment tool (or large flat head screwdriver) to reach through an opening on the back of the wheel hub to nudge a star shaped adjuster to expand or contract the brake shoe placement relative to the drum. Generally the easiest thing is to jack up one side at a time, then back off the adjusters on both until the wheels spin free & then tighten each til both end up with the same slight degree of drag on a manual spin. You then repeat for the opposite side, aiming for the same degree of drag. Afterwards, if one side still hits first, back off one click at a time on the offending wheel till it doesn't. Nick |
|
|
|
[#37]
Regarding your brake adjustment I always like to pull brakeaway and lock brakes up and give it a few forward or reverse tugs then install brakeaway and re adjust to make sure the shoes are centered
|
|
|
 Win a FREE Membership!
Sign up for the ARFCOM weekly newsletter and be entered to win a free ARFCOM membership. One new winner* is announced every week!
You will receive an email every Friday morning featuring the latest chatter from the hottest topics, breaking news surrounding legislation, as well as exclusive deals only available to ARFCOM email subscribers.

AR15.COM is the world's largest firearm community and is a gathering place for firearm enthusiasts of all types.
From hunters and military members, to competition shooters and general firearm enthusiasts, we welcome anyone who values and respects the way of the firearm.

Subscribe to our monthly Newsletter to receive firearm news, product discounts from your favorite Industry Partners, and more.
Copyright © 1996-2024 AR15.COM LLC. All Rights Reserved.
Any use of this content without express written consent is prohibited.
AR15.Com reserves the right to overwrite or replace any affiliate, commercial, or monetizable links, posted by users, with our own.


