Warning


Close

Confirm Action

Are you sure you wish to do this?

Confirm Cancel
BCM
User Panel

Posted: 1/28/2017 10:53:14 PM EDT
I've posted this in GD but it's always better technical discussion in the tech forums.  Any suggestions or help would be appreciated.

Here's where I am-

I think I've got the trusses all figured out now.  I'm going to use aluminum, but I also bumped up the back of it to be a few feet higher than the back wall so that I can actually do what I've been dreaming about since I moved to 6200' elevation in Utah- Grow avocado and Kiwi.  To do that I will want the back wall taller than 8 or 9 feet because both the avocado and kiwi will have to be on the back wall so they don't shade the rest of the greenhouse.  All the blue panels will be metal roofing with 3" foam board insulation against them and sealed off.  That will be between the trusses, I haven't figured out how or if I'm going to insulate where the truss members will be, it will transfer a lot of cold through in the winter with a foot or more of snow up there, but I still don't think it will be worth trying to insulate under the truss members.

The bigger truss members will be 2x4x1/4" Aluminum, lacing in the truss will be 1.5x1.5 square (also aluminum)

Here's a few pics- Dimensions will be 24' deep, 52' long and about 16' to the peak.  It's being placed about 4' down into the ground so overall height won't be as bad as it looks.

Attachment Attached File

Attachment Attached File


You can see in this image that I'm way over my member capacity on the vertical piece in the front, but I really think it's a modeling error more than structural.  But it also might need some gussets on the sides of that connection.  I need to play with it and see.  I did just notice that the small concrete wall in front is modeled as a pinned connection instead of fixed, so I'll have to fix that and see what's next.

Attachment Attached File


I also went out the excavation and used my new total-station to survey my property boundary and make sure I'm off the property line as much as I planned to be and it's just about perfect.  I heard my neighbor out playing with his quad-copter so I called him and asked him to do some flyovers while we were out there, pics or video should be available whenever he gets off his lazy ass and gets them to me.

Here's what the excavation looked like before our last snow storm, since then we've had nearly 2' of snow but today was really warm, so combined with the settlement we are down to 14" or so.  I'll be getting back to digging pretty soon.


Since I know one of the first questions I'll be asked is about cost I'll have to say...  I don't know.  I'm an engineer in a small community and I do a lot of trade work for contractors and suppliers, so I expect about 1/2 of the concrete costs, all of the truss costs and about half of the glazing costs will be covered through trade work.  Total value of it is likely about $15K I think.  So far I'm about $1,600 into excavation, but that includes a lot of landscaping before the actual greenhouse excavation got started.
Link Posted: 1/29/2017 1:48:19 AM EDT
[#1]
So I'm a little confused.  Is the angled side (left) the back of the greenhouse?  

I don't have any experience with aluminum or steel trusses, my experience is with wood, so take that into account with my observations.  I do like that your first and last webs are tension webs.  Will your compression webs and bottom chords need much lateral bracing?  

Your angled, extended top chord with the short bend seems very long.  Is it really more of a balloon framed wall structurally?  It seems like flex might cause metal fatigue at the bottom chord panel point or the small bend.  

If both bearing points were pinned, that will cause some weird reactions.  I've found that it doesn't much matter which is pinned or fixed, as long as there's one of each.  

Finally, I envy you man.  A big greenhouse like that could feed your family.  Being sunk 4 feet will give you a lot of thermal mass to help regulate your temperatures.  Have you looked at aquaponics?  Big tanks of water would add more thermal mass and mix up your green harvest with fish.

lukus
Link Posted: 1/29/2017 2:08:29 AM EDT
[#2]
You had me at avocado.

I'm here until the guacamole is served.

Would love to economically grow my own supply here.
Link Posted: 1/29/2017 2:28:08 AM EDT
[#3]
The walls with the blue are the top and back (north), the steep wall is glazed (south) and the short vertical wall is going great to either be removable panels or openable windows with screens.  Probably windows covered in polycarbonate glazing, screen behind them and a hinge at the bottom.  Similar panels at the top will create a chimney effect to bring in cool air.

Bracing will be unistrut that I'll also use to run water lines and hang whatever.  I don't know how much of it I'll need, it's a very light roof so I don't expect much trouble with it.

I'll be building the all-concrete fodder shed on the back and it needs as much airflow at 70F as it can get.  I'll be  running air lines from the outside, coiling them underground for 100+ feet then stubbing them up into the greenhouse.  Then again in the greenhouse pulling warm air into the fodder shed.  I've also seen designs where they pull the air off the top of the inside and use fans to blow it into pipes distributed underground to warm the earth/. Not sure if I'll do that or not.

I have seen some aquaponics stuff but I really don't want to mess with it.  Far more expensive and difficult, I want to be growing this year.  My greenhouse is modeled after one a friend has that is much smaller and cheaper, but still really performs well.  I'm not too worried about staying warm, more worried about keeping cool in the summer actually.  The steep glazing will help and I'll probably use a semi-opaque polycarbonate also.
Link Posted: 1/29/2017 3:13:30 AM EDT
[#4]
I have about 60 of these super thermal insulated panels to make a greenhouse one day.
Link Posted: 1/29/2017 9:21:29 AM EDT
[#5]
what about snow load?
Link Posted: 1/29/2017 10:36:17 AM EDT
[#6]
Discussion ForumsJump to Quoted PostQuote History
Quoted:
what about snow load?
View Quote


I'm at 6200' in Utah and the roof snow load (flat roof) is 60psf.  The code has a clause called the slippery roof reduction that allows you to reduce the snow load on a roof with slippery roofing materials and no obstacles that would impair the snow from sliding off.  For the front face that means it's reduced to about nothing.  

For the flatter back roof I am assuming that I'll never actually see 60psf because it's not as well insulated as a house and actually will get the roof pretty warm even in the winter, so I only used a 30psf snow load.  I half expect the county to see this thing in a few weeks and red-tag me for not pulling a permit, so about then I'll find out if my assumptions will fly with them.  It's a small County and I do about 80% of the local building engineering here, so I'm sure they'll see it my way.  Those truss members are only utilized at about 80% at the most, so my snow capacity is actually higher anyway.

Wind loads I didn't reduce at all.  115mph is about 35psf, times 4ft spacing on the trusses.
Link Posted: 1/30/2017 10:16:02 PM EDT
[#7]
Discussion ForumsJump to Quoted PostQuote History
Quoted:I half expect the county to see this thing in a few weeks and red-tag me for not pulling a permit, so about then I'll find out if my assumptions will fly with them.
View Quote
So why do you not need to pull a building permit, our County requires one for anything over $1,000, but how they come up with the $1K is not defined, DIY, or expensive contractor...  We do get a well house with no permit required, so I'm building one big well house!

Rancher
Link Posted: 1/30/2017 10:43:56 PM EDT
[#8]
Should get this in the Homestead/Farm/Garden forum (subforum of Outdoors)
Link Posted: 1/30/2017 10:45:52 PM EDT
[#9]
Tag to track.  Looks awesome!
Link Posted: 1/31/2017 5:12:15 PM EDT
[#10]
Discussion ForumsJump to Quoted PostQuote History
Quoted:
So why do you not need to pull a building permit, our County requires one for anything over $1,000, but how they come up with the $1K is not defined, DIY, or expensive contractor...  We do get a well house with no permit required, so I'm building one big well house!

Rancher
View Quote


I'm part anarchist  I figure it's my property, why should I pay a fee to improve my property so they can assign higher value and charge me more taxes?  We had a 30% property tax increase this year against 100% opposition in the county.  Huge meeting, county told they better figure out how to cut costs, etc.  Passed the tax increase anyway.  

I'll draw it up and stamp it myself if I have to, but not until I have to.  

Made some progress today, I met with two steel fabricators that I work with in a 3-way arrangement of sales, engineering and fabrication.  Both fabricators agreed that I'd break out about even using aluminum for all my truss material, both of them can fabricate it for me and one of them owes me a bunch of money, so it looks like I'm going with aluminum trusses.

Also brought my new toy home today, I'll still hire out the big hoe for the bulk of the work but I purchased this mini a few weeks ago in partnership with some friends that own a construction company, I'll use it to start on some of my water and air lines.  I'll have a pretty large network of underground air ducts to bring in fresh air, then pull the warm air off the peak of the greenhouse and blow it underground inside to help keep the dirt warmer.

Link Posted: 1/31/2017 5:44:14 PM EDT
[#11]
Link Posted: 1/31/2017 5:53:59 PM EDT
[#12]
Discussion ForumsJump to Quoted PostQuote History
Quoted:
Sweet.  I can't comment much on your design because I don't know your area well enough.  I do have funny greenhouse story for you.  

My nephew had just finished adding a sun room to his house and had a good amount of heavy gauge transparent plastic left so he asked me what he cold do with it.  An avid gardener, I told him to buy PVC pipe and make himself a small green house.  We don't get much snow here in TN.  He did and loved it then one day after a big storm, he came outside and it was gone.

He calls me asking what's up.  I asked him, "You did anchor it down right?"

He found what was left of it, two doors down.

Tj
View Quote
Kids 
Link Posted: 2/1/2017 1:01:46 PM EDT
[#13]
Some overhead pics from my friend's quad-copter.  I think I need one of these...

Attachment Attached File


Attachment Attached File


Attachment Attached File


The odd distortion is actually plastic I put down on the south side of the excavation when it started snowing.  The north side should melt off in the sun pretty easy, but the south side will be in the shade more so I just covered it.  Hopefully will be able to finish the excavation this week and pour footings next week.
Link Posted: 2/4/2017 12:53:39 AM EDT
[#14]
Link Posted: 2/10/2017 3:22:37 PM EDT
[#15]
Got the footings placed today, foundation walls next week, then I'll backfill, place sand in the attached cold storage, good soil in the greenhouse, concrete slab in the fodder room, then a concrete lid on the back rooms, then build some trusses.


I had a thread a while back in GD discussing a lousy concrete contractor that built his footing drops all wrong, so here's an example of doing them right-


Also got the prices for my aluminum for the trusses today-  Yikes.

It appears the overall cost for my 24x52 greenhouse will be right about $1,900.  That's a few hundred dollars more than I was planning to spend, but I'm getting a great deal on the material, deal on shipping and it will be the easiest to work with as far as screwing it together, so I think I'm going to do it.  I'm ordering it directly from an extruder in Texas and combining shipping with a local fabrication shop that is already getting a delivery in a couple of weeks.
Link Posted: 2/21/2017 12:51:02 AM EDT
[#16]
Finally ready to pour walls sometime tomorrow afternoon, if the weather holds.  Since we started this I've had several snow storms and now the rain is starting, so it's somewhat slow going.  Should continue to go slow, I've order all the material for the trusses and now I wait for shipment in about two weeks.


You can see some pink and in some place black pipes in the walls, these will be air venting between my fodder/sprouting room and the main greenhouse.  I've got venting high and low in the fodder room as well as inside and outside, so I should be able to keep a good stream of warm air into the fodder room (requires 70degrees 24/7/365 for best operation).  In the past the problem with good fodder production has been keeping it up to temp in the winter and still providing adequate fresh air.

I also have a large pipe formed in that will act as a chute for fresh barley to be dumped into the room from a tank/bin above.
Link Posted: 2/23/2017 4:40:50 PM EDT
[#17]
I was looking for other things but found these:

Gray Tinted Glass - Crate of 32 Pieces


Insulated glass, tinted.  Might help if you think your solar gain is a bit much.  And it's been on that site for a while, so they might work a deal if you take a bunch of it.
Link Posted: 2/25/2017 2:19:58 PM EDT
[#18]
Interesting find, but I already designed my trusses around the light weight polycarbonate, I'll just have to use a shaded polycarb.  


Fodder-

This isn't the most common method of producing animal feed, so I might as well give a little background on it here.

Here's a few pics of a large production facility nearby.  He's producing right about 4,000lbs of sprouted barley each day and feeding about 700 mustangs.  That's not enough fodder, but I don't know how much bailed hay he's also feeding, last I heard he wanted to double his fodder production in order to stop buying hay.

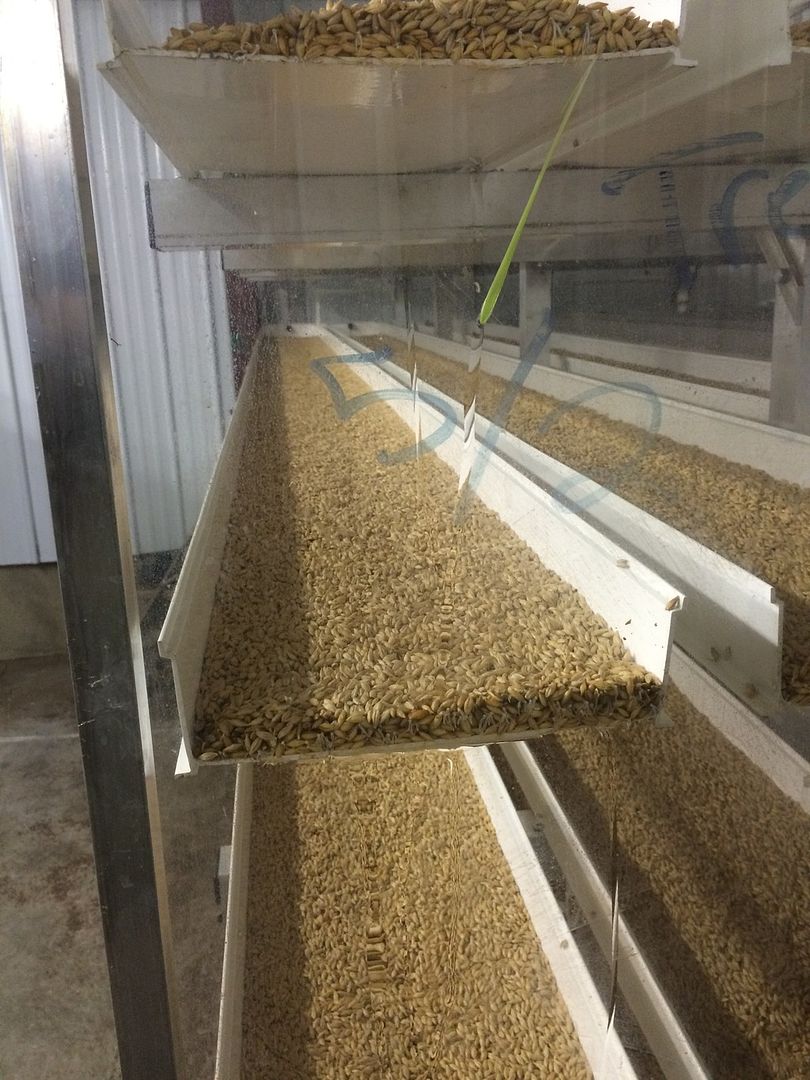
Hard to tell in this pic because the plastic is clean, but the end of the try is butted up against a clear plastic 'wall' that keeps the barley seed from washing off.

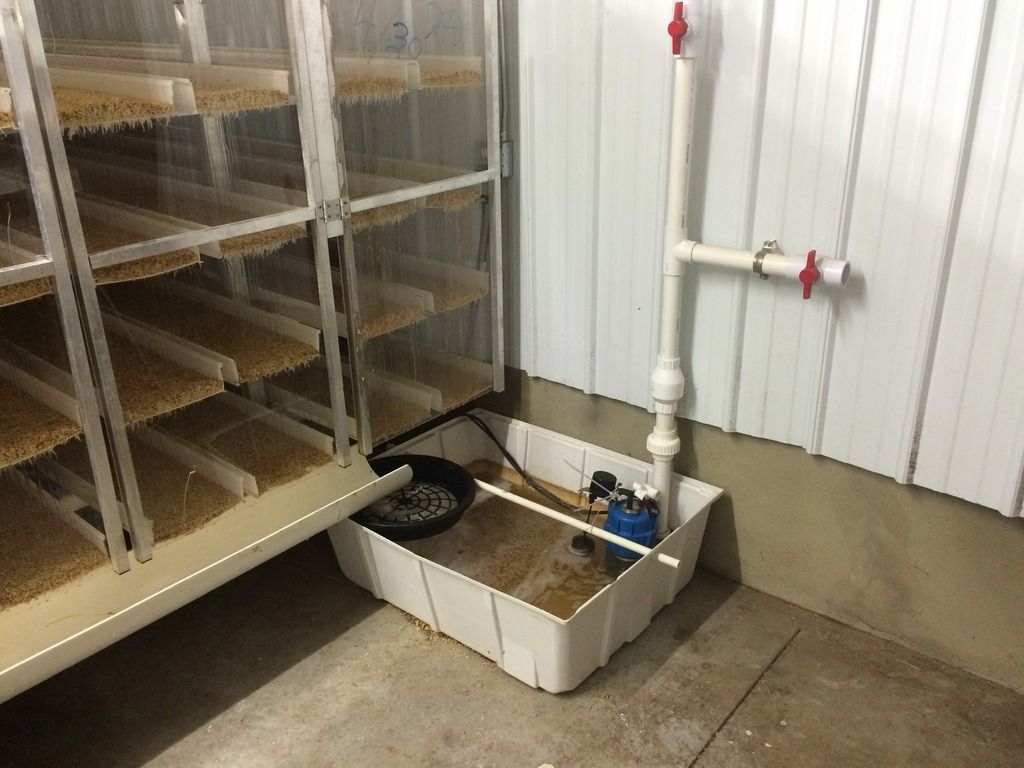
This is his recirculation pump for his water.  I don't know why he recirculates it, in my experience unless you are really trying to conserve water it's not worth it.  The water gets really funky really fast and spreads mold and fungi issues.  If you keep it filtered, slightly chlorinated and only recirculate 75% each watering it isn't too bad, but that's a lot of effort and equipment for water that's usually pretty cheap here.


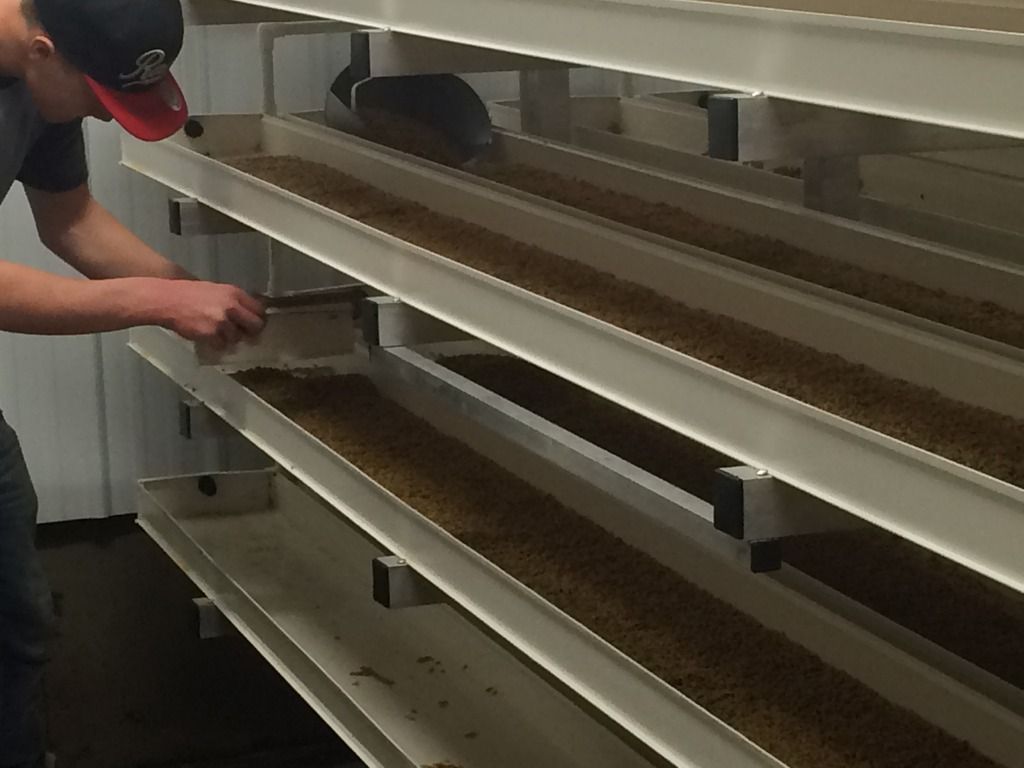
Flunkie loading the tray-

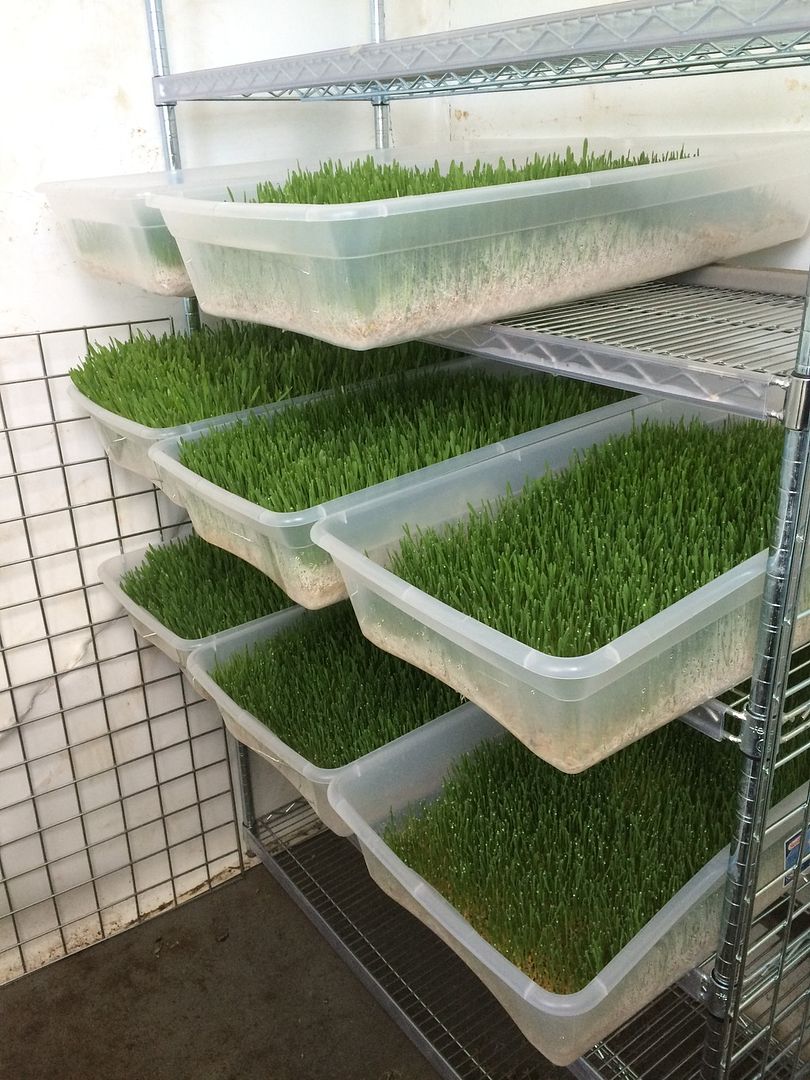
This is the best shot I've got of his finished product.  And imo it's not nearly as good as it could be.  You can see all the unsprouted seed on the bottom of the mat, showing that his germination rate stinks.  Also, he should have a really tight and thick root mat that allows you to pick it up and it's hard to tear.  His root mat is almost non-existant, I think it's because he either waters too often or doesn't have enough angle on the trays to get the water back off.  Also, you can get almost high in the room due to the high oxygen content, so he really needs a better air transfer system than he's using.
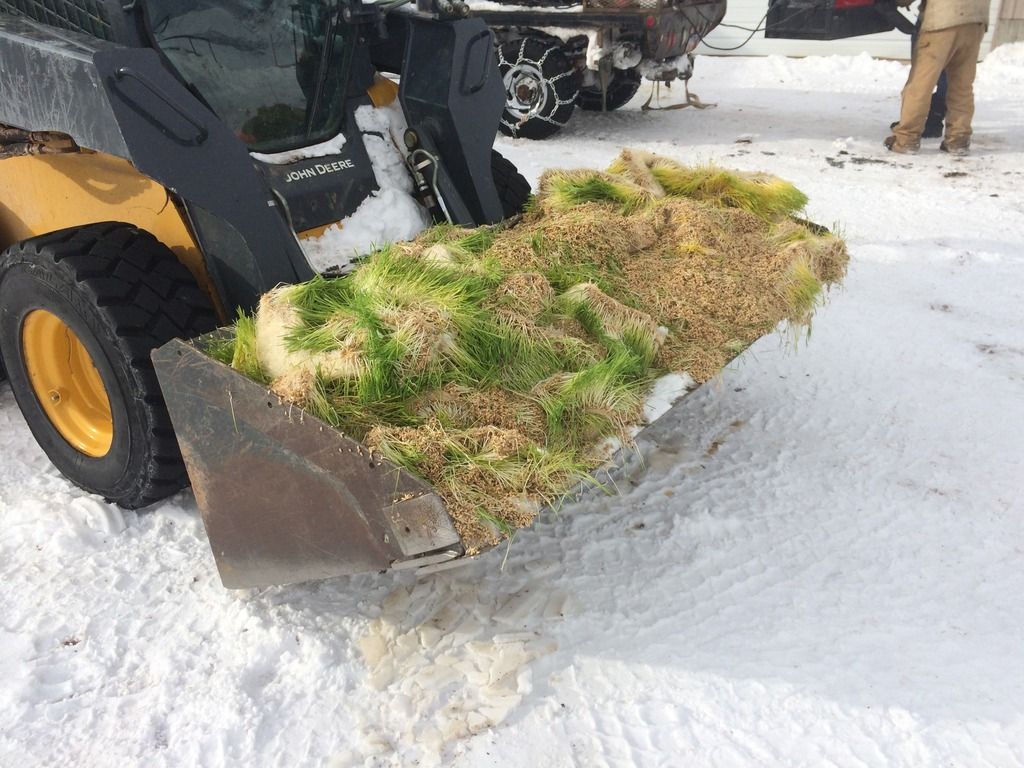
.
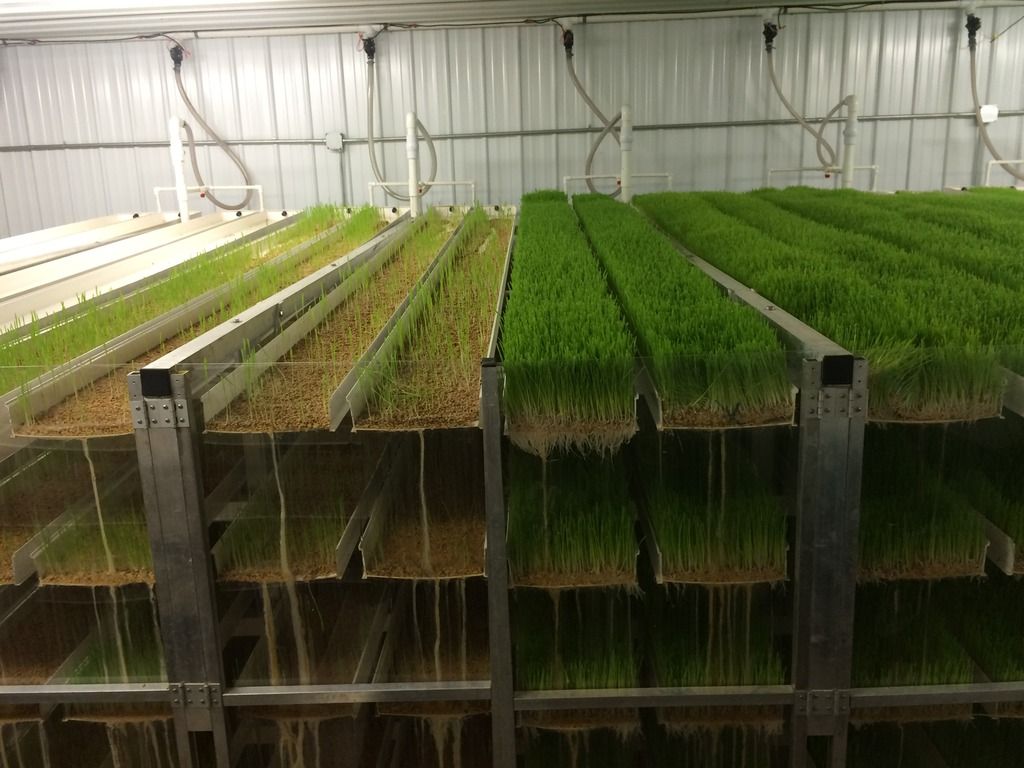
Another shot of the trays.  He should have a 1-2" thick white layer of roots at the base of these if it was running better.  You can see the poor sprouting rate in the trays to the left, they'll fill in but it takes a few days longer and his overall weight per pound of seed is a lot lower than it could be.

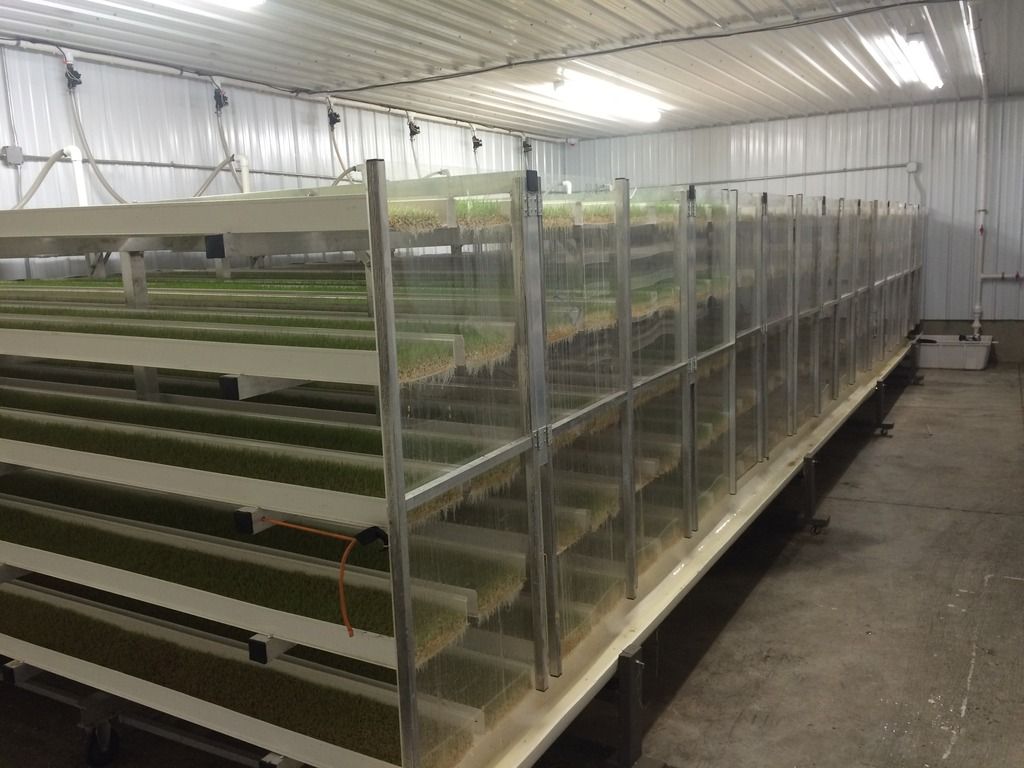
Another shot of one of the three banks of trays.

Here's a few shots of some stuff I have sprouted-
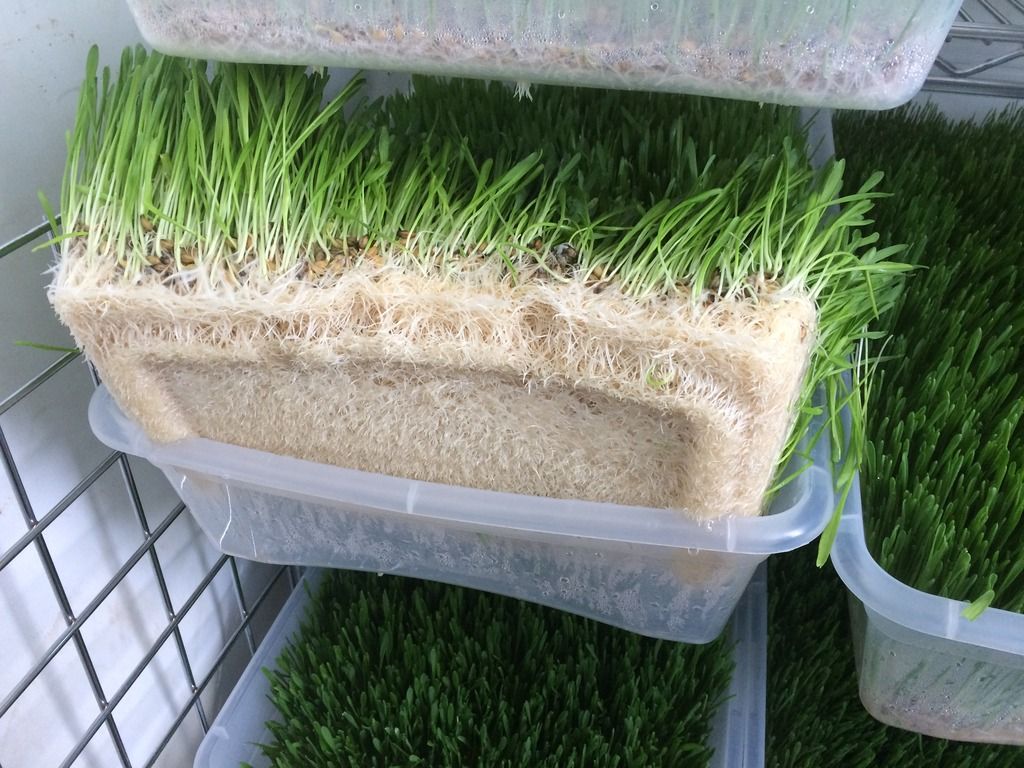


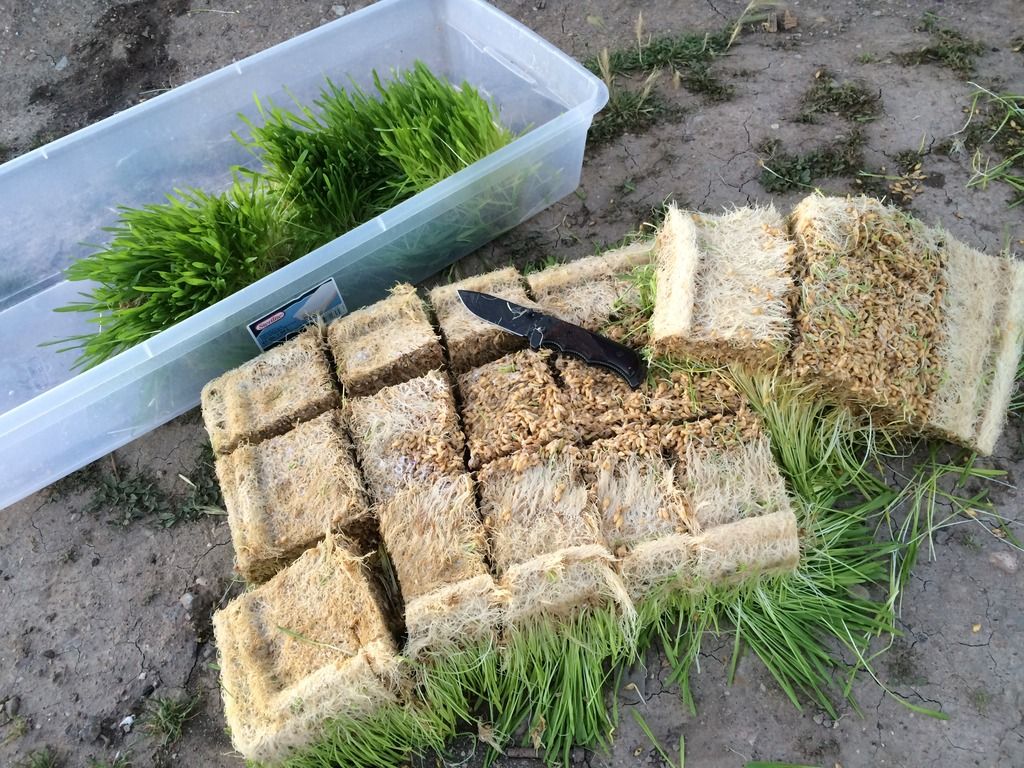
This shows the effect of having poor quality trays that let the water settle into the center and stunting the growth of the seeds.  We also cut it into chunks because cows are retarded and didn't do well on the full biscuit.  If we cut it into bite-sized pieces they did very well.  Horses are smart enough to tear pieces off and they do well without cutting it.

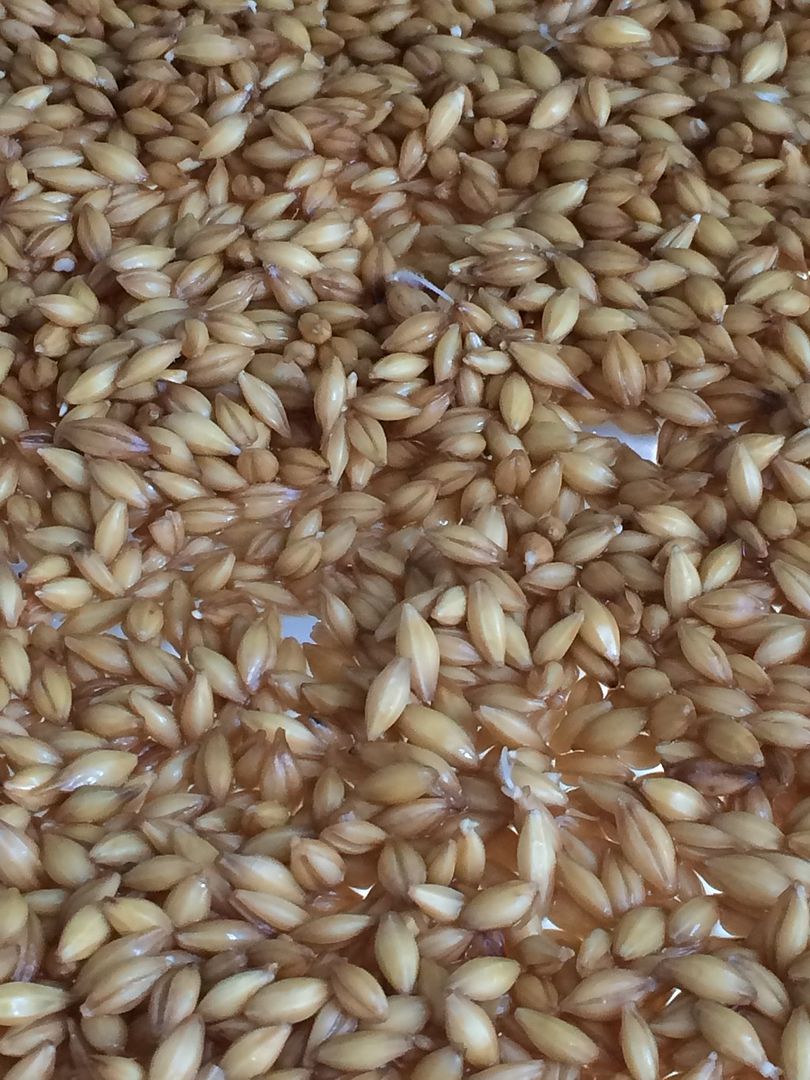
Day 1 (after a 24hr pre-soak in water with just a touch of chlorine (tap water works best))

Day 2
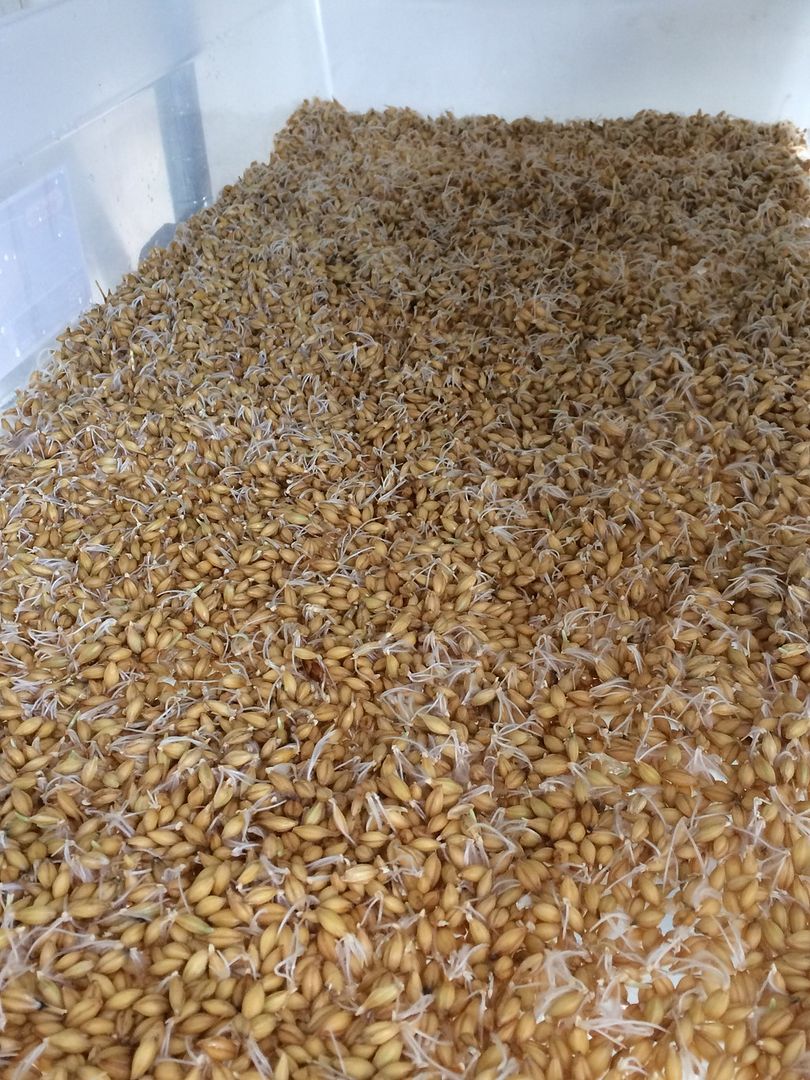

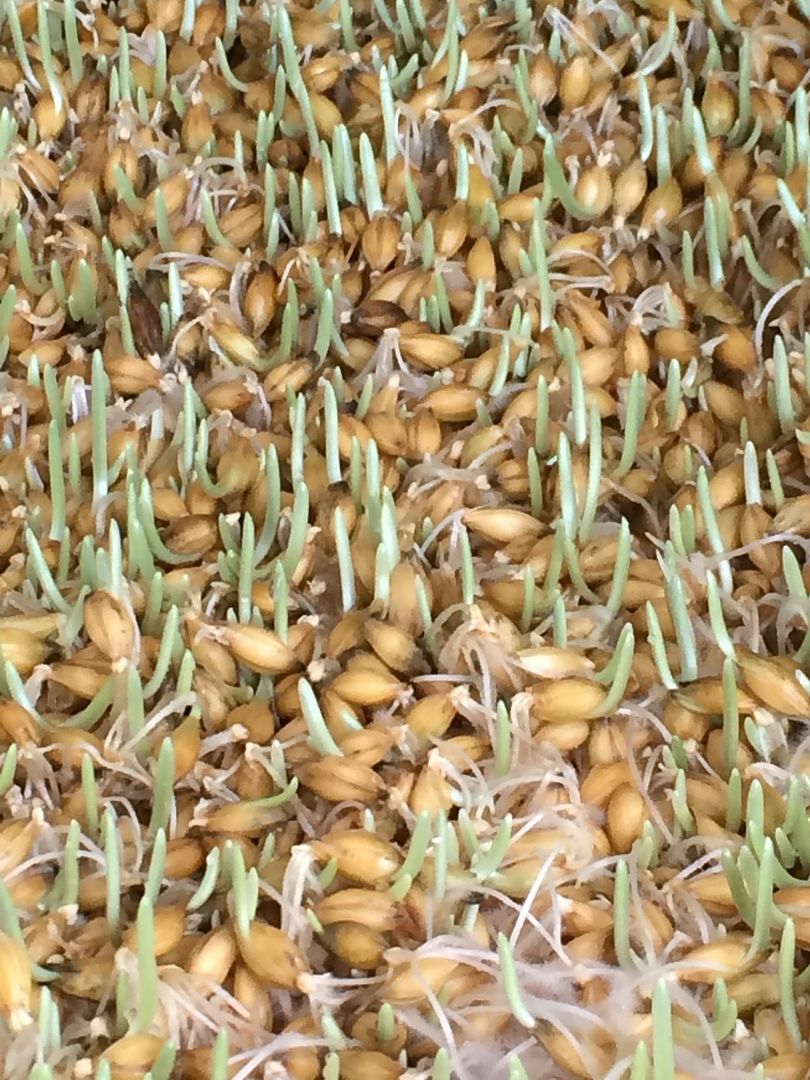
Day 3

Some of the cotton mold issues we've had.  Not sure why they start or why they quit, it seems random, but I do know that when the environment is perfect, water is kept up to proper temps and air is fresh, I seldom have any issue.
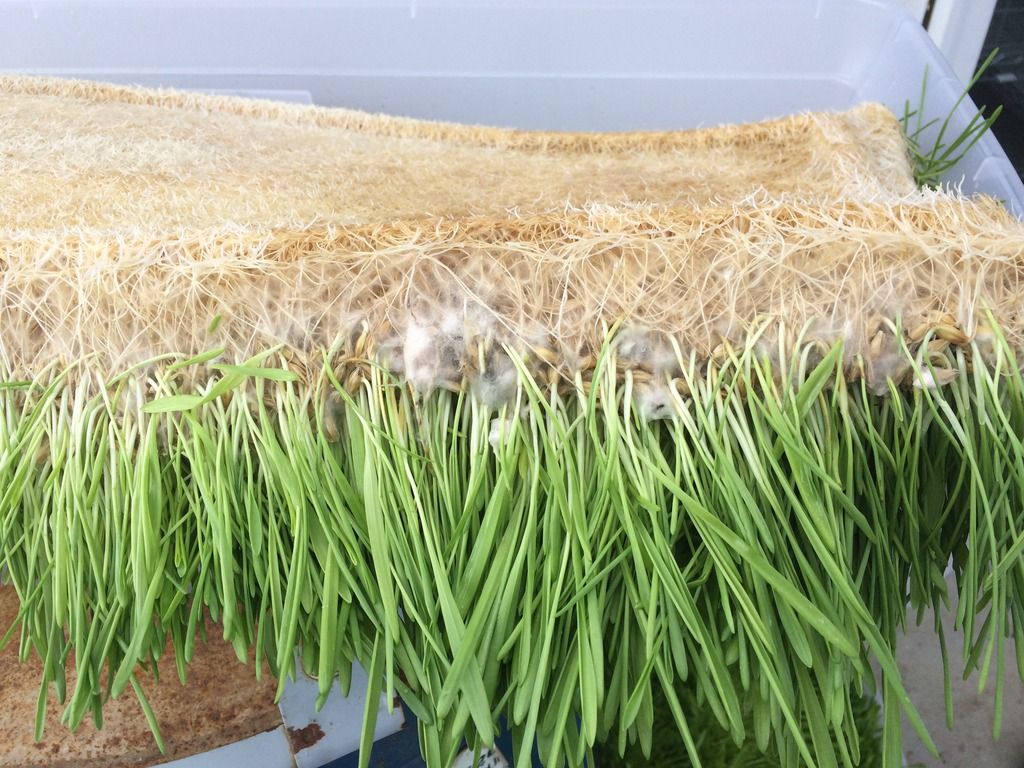

This is a batch of barley I got that has a lot of rye in it.  I like it, the rye sprouts very fast and the cows love it.  Straight barley shown for comparison.
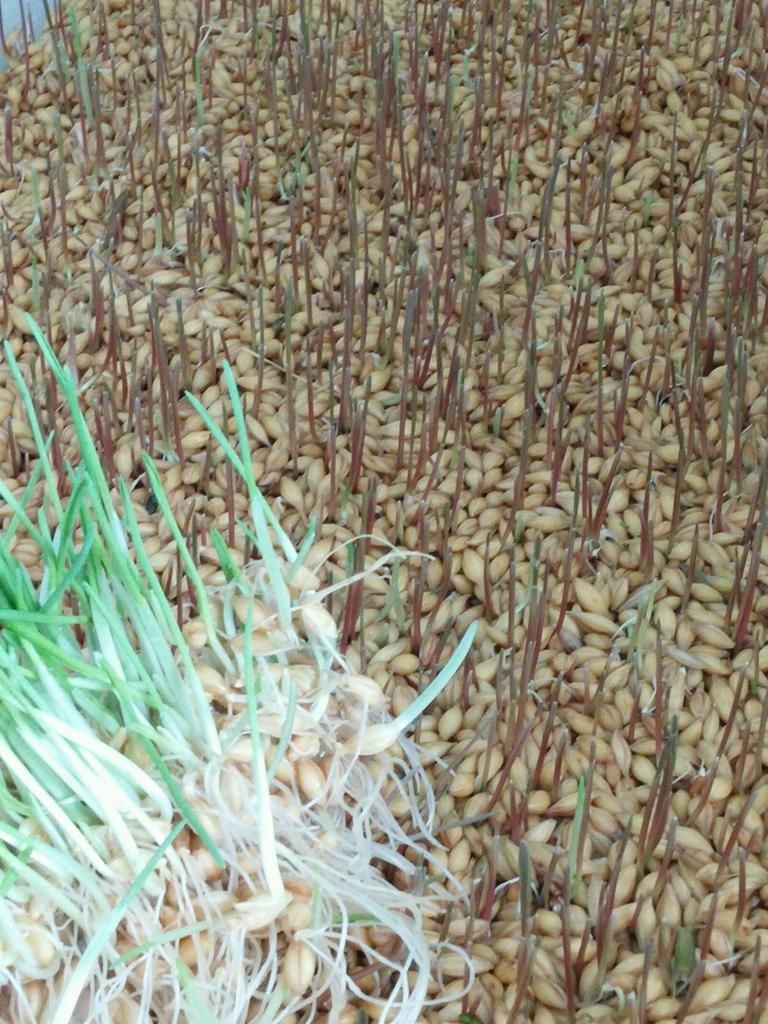


Details-

I buy the barley for about $0.08/lb and if everything is perfect (never) you can theoretically get about 12-14lbs of fodder for each pound of dry seed.  We can get up to 10 at times, but average more like 7-8lbs/lb.  
Large animals eat more fodder than dry hay, per pound, because it's wet.  Comparisons to dry hay are a little weird but I'll sum up by saying that when I fed my 1300lb steer nothing but 30lbs of fodder through the heart of the winter, he gained weight.  That means I can put weight on a steer, in the winter, for less cost per month than feeding a small dog.  That's pretty cheap.
Link Posted: 3/2/2017 10:37:05 AM EDT
[#19]
In response to the fodder, we just started sprouting this year.  We used local (missouri) grown barley.  We initially had some white mold issues, but at the advise to some folks in the dexter cattle group we put a circulating fan and a dehumidifier in our grown room.  I havent' noticed any since doing that....
Link Posted: 3/10/2017 3:38:27 PM EDT
[#20]
For some reason your greenhouse reminds me of this guy.
Link Posted: 3/11/2017 3:19:06 PM EDT
[#21]
I like this.  Thanks for posting this info.
Link Posted: 3/14/2017 7:25:31 PM EDT
[#22]
Discussion ForumsJump to Quoted PostQuote History
Quoted:
In response to the fodder, we just started sprouting this year.  We used local (missouri) grown barley.  We initially had some white mold issues, but at the advise to some folks in the dexter cattle group we put a circulating fan and a dehumidifier in our grown room.  I havent' noticed any since doing that....
View Quote


Lots of air really seems to be the key to this stuff.  If it's not growing well- give it more air.  Mold?  Air.  Weak and flimsy looking?  Air.  Rotting seeds on the bottom?  Too much water, but might as well give it more air too, lol.

I've got a ton more pics in the GD thread on this same greenhouse build.  GD gets pretty stupid (aka funny) at times so I also did it here in the tech forum,but I haven't been keeping this updated.

Please venture on over and take a look.  Conversation would be nice here too just because of the improved rate of intelligent posts.

GD Greenhouse thread
Link Posted: 3/15/2017 11:58:14 AM EDT
[#23]
Discussion ForumsJump to Quoted PostQuote History
Quoted:


Lots of air really seems to be the key to this stuff.  If it's not growing well- give it more air.  Mold?  Air.  Weak and flimsy looking?  Air.  Rotting seeds on the bottom?  Too much water, but might as well give it more air too, lol.

I've got a ton more pics in the GD thread on this same greenhouse build.  GD gets pretty stupid (aka funny) at times so I also did it here in the tech forum,but I haven't been keeping this updated.

Please venture on over and take a look.  Conversation would be nice here too just because of the improved rate of intelligent posts.

GD Greenhouse thread
View Quote

Mold needs moist conditions - not over wet, and not dry.  The advice for more air is to reduce the humidity in the room, which then lets the moisture evaporate faster and not sit on the sprouts.  No surface moisture, no mold.
Close Join Our Mail List to Stay Up To Date! Win a FREE Membership!

Sign up for the ARFCOM weekly newsletter and be entered to win a free ARFCOM membership. One new winner* is announced every week!

You will receive an email every Friday morning featuring the latest chatter from the hottest topics, breaking news surrounding legislation, as well as exclusive deals only available to ARFCOM email subscribers.


By signing up you agree to our User Agreement. *Must have a registered ARFCOM account to win.
Top Top